
Struggling with sending large video files via Outlook because of the 20MB size limit? You’re not alone in this digital jungle! As your friendly monkey guide, I’m here to show you how to compress those bulky videos into nimble little files that Outlook can handle with ease. Think of it as teaching a gorilla to do a ballet – a bit of a challenge, but oh-so rewarding!
Table of contents
- Method 1: Compress Video For Outlook Using ezyZip Media Converter
- Method 2: Compress Videos for Outlook with Online Tool
- Method 3: Compress Videos for Outlook on a Mac with iMovie
- Method 4: Using VLC Media Player for Video Compression on Windows
- Method 5: Using Handbrake
Video guide showing how to compress videos for outlook using an online service. This guide shows 25mb but same steps apply for 20mb limit.
How to Compress Video For Outlook Using ezyZip Media Converter
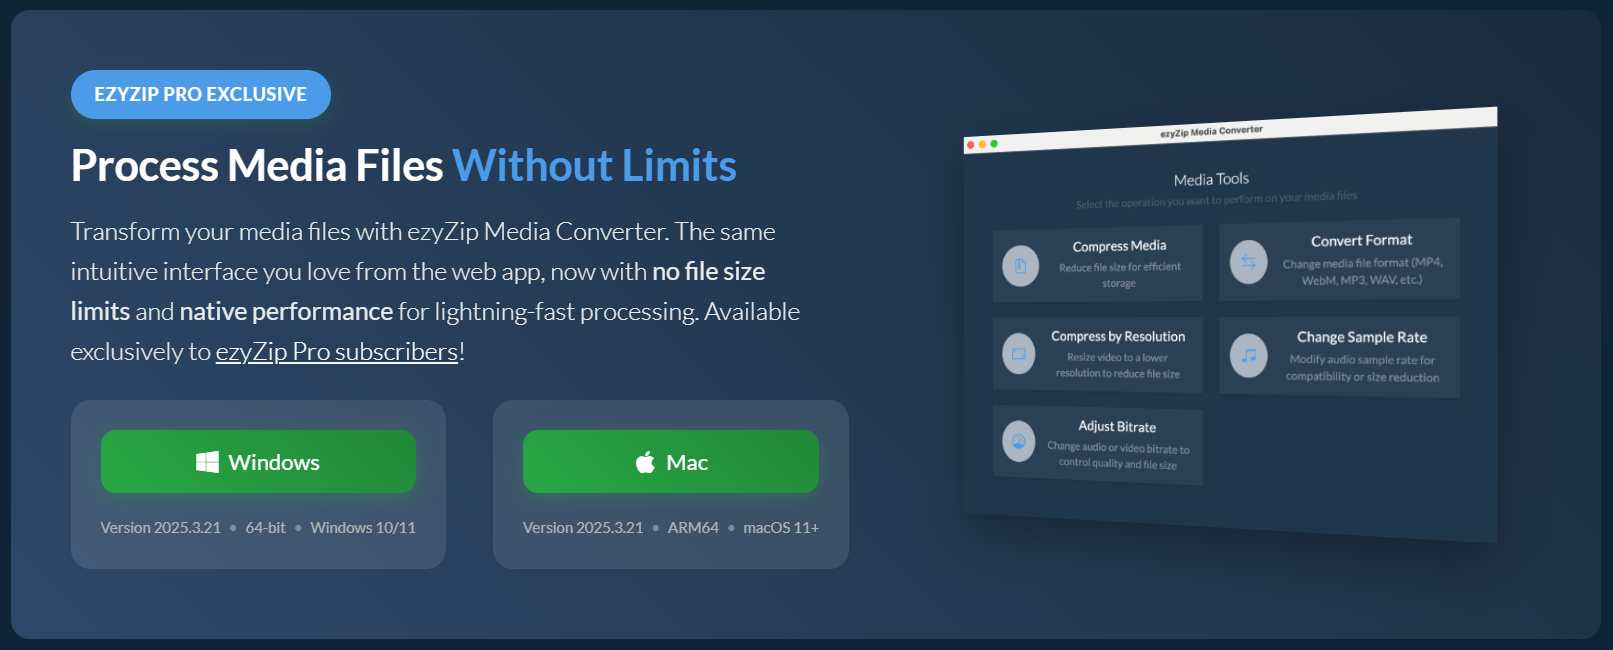
Need to reduce your video file size so it fits within Outlook’s email attachment limit? ezyZip Media Converter makes compression effortless—no quality loss, no frustration, just smooth file handling! 🚀🎬
- Download & install ezyZip Media Converter – because sending oversized files shouldn’t feel like cramming a giraffe into a compact car! 🦒🚗
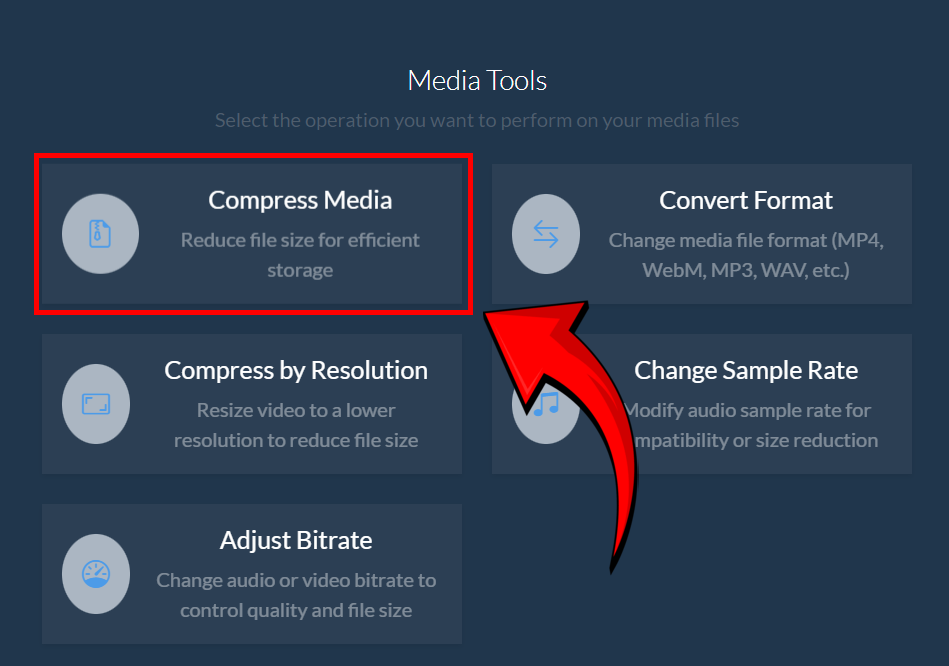
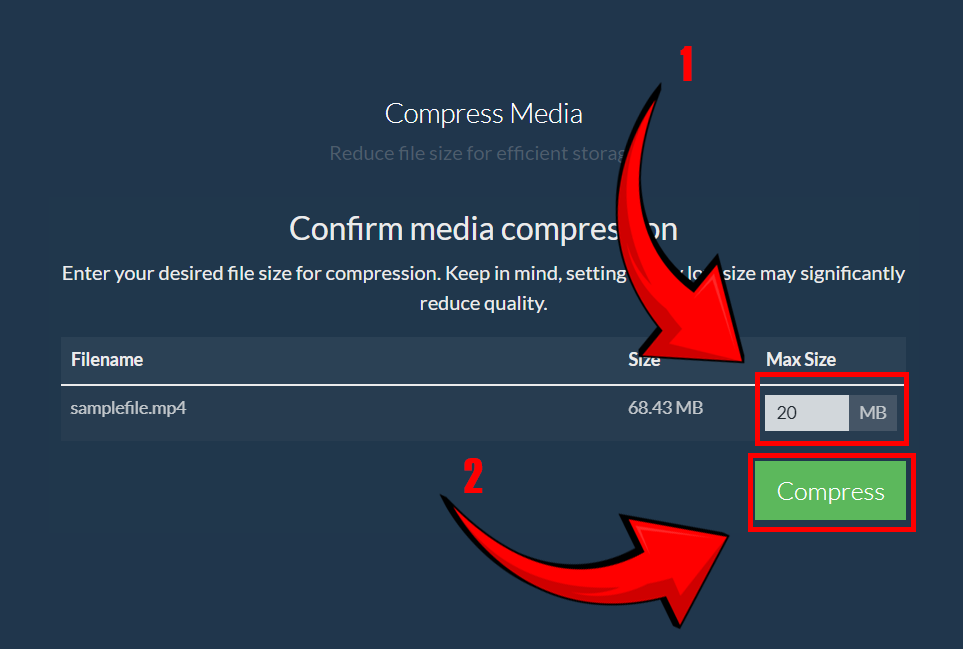
- Launch ezyZip & click “Compress Media” – time to shrink your file for easy email sharing! 📩
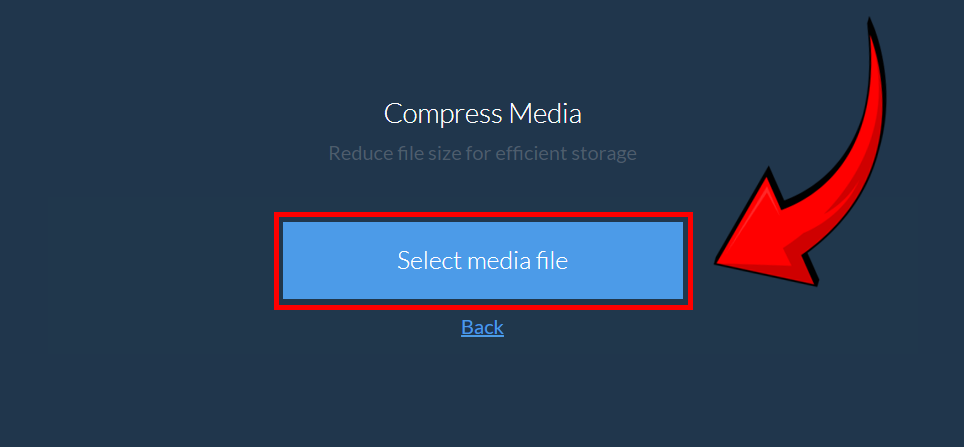
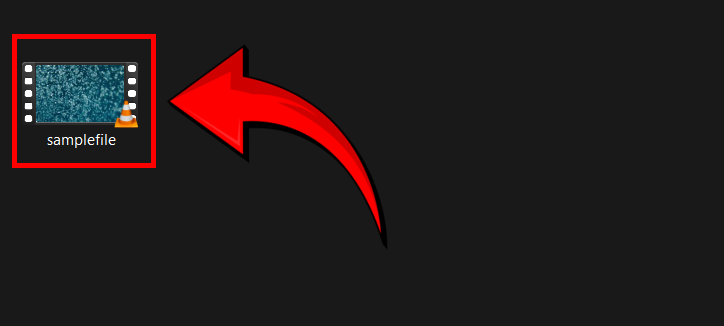
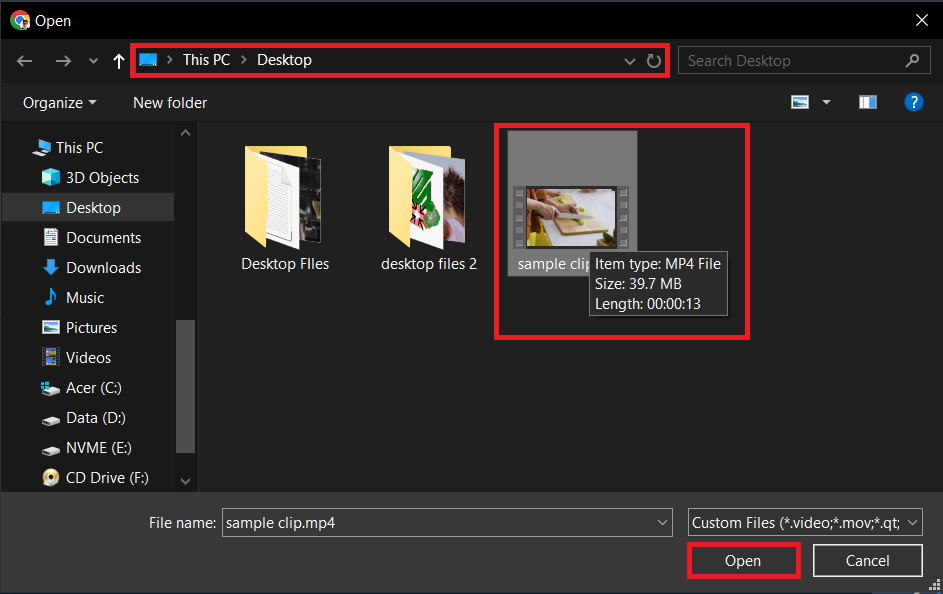
- Click “Select Media File” –– pick the video you need to compress. 🎞️
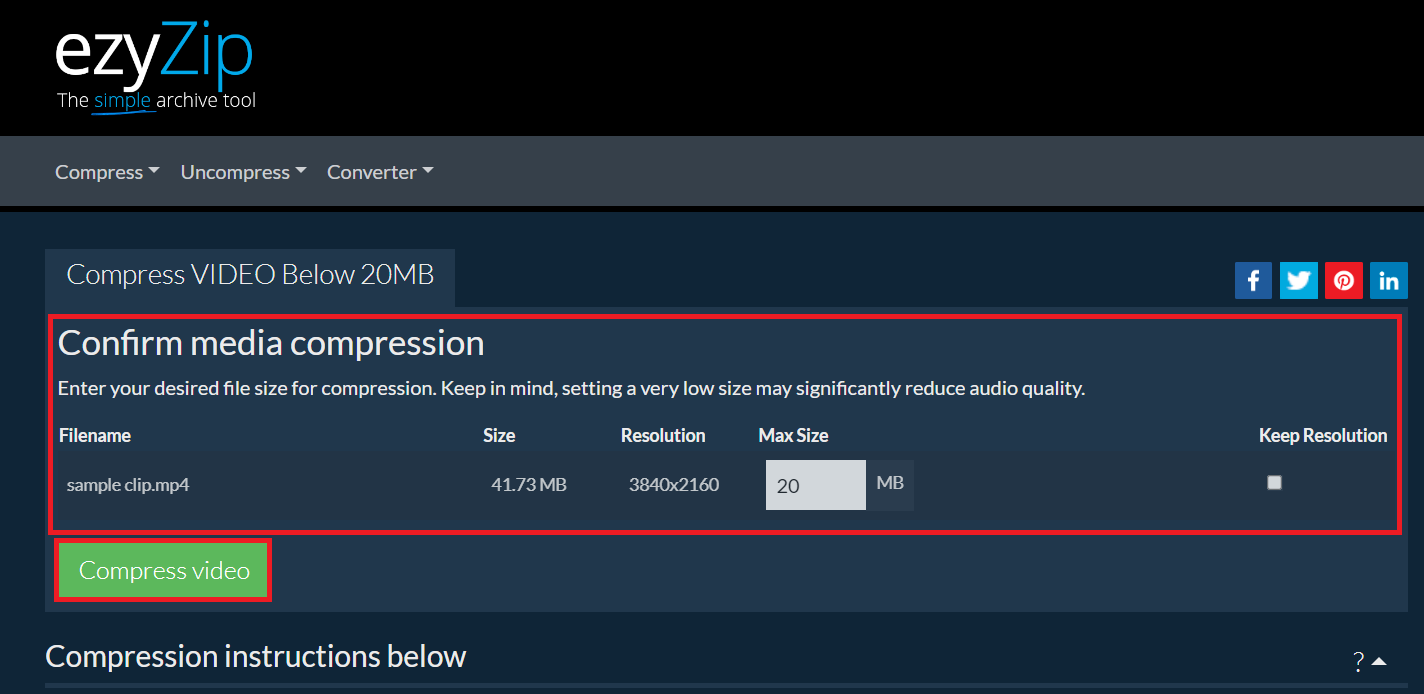
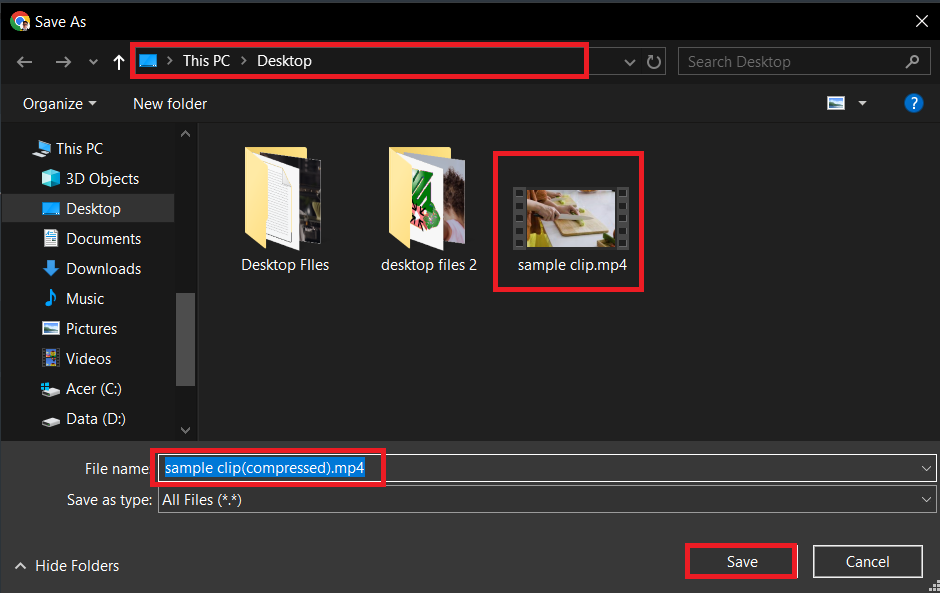
- Set your desired maximum file size, then click “Compress” – adjust compression settings to ensure it fits Outlook’s attachment limits. 🛠️
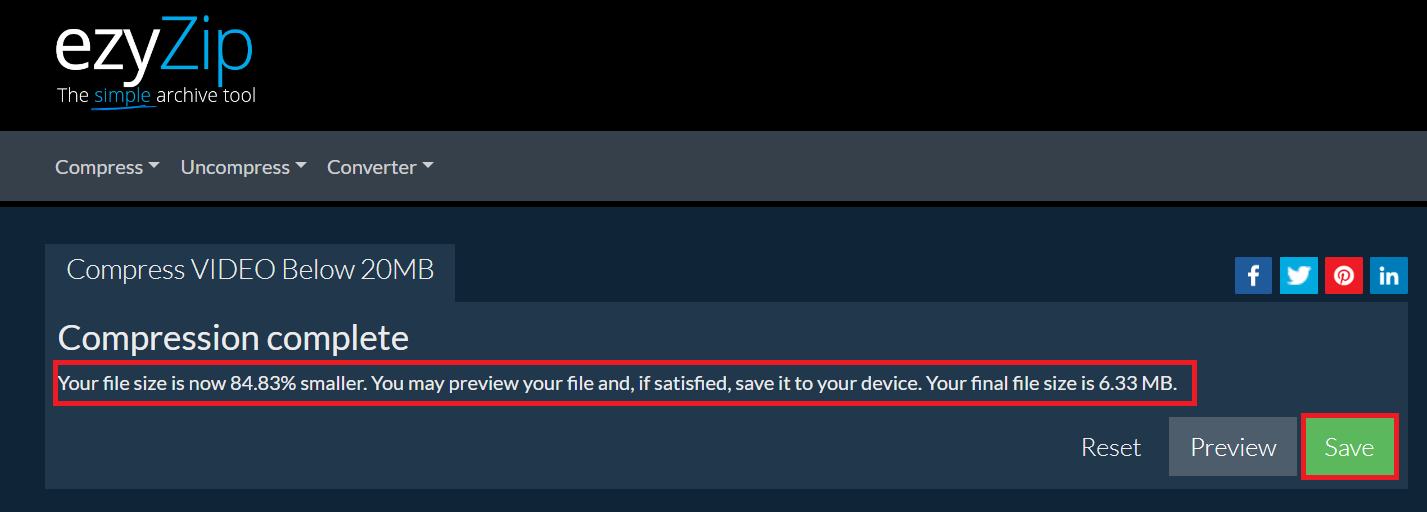
- Save your newly compressed file – attach it to your Outlook email and send it without a hitch! 📧
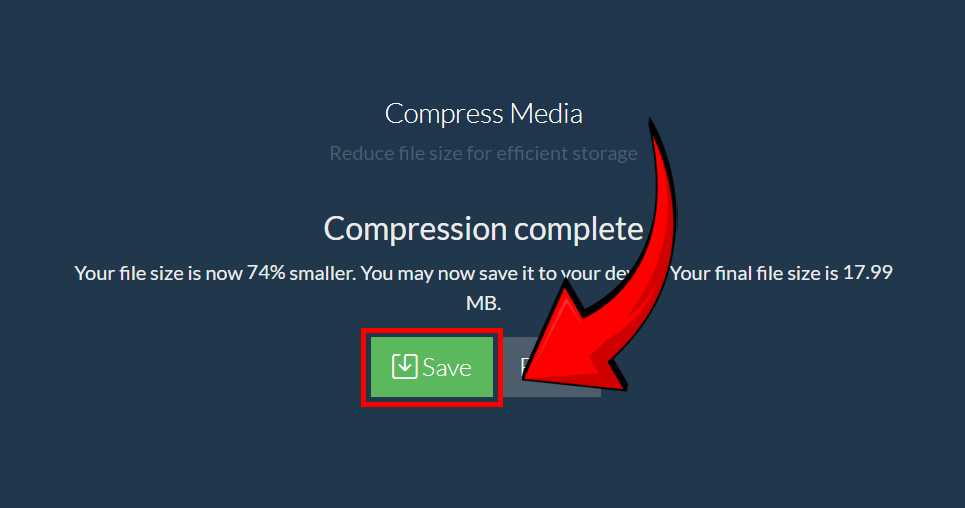
And just like that, your video is Outlook-ready—small in size, big in quality, and ready to send! 🚀🎥
How to Compress Videos for Outlook with Online Tool
Navigate the online jungle effortlessly with ezyZip, your go-to tool for shrinking those elephant-sized video files.
- Navigate to ezyZip: Leap over to ezyZip’s Video Compression Tool – your digital vine for this adventure.
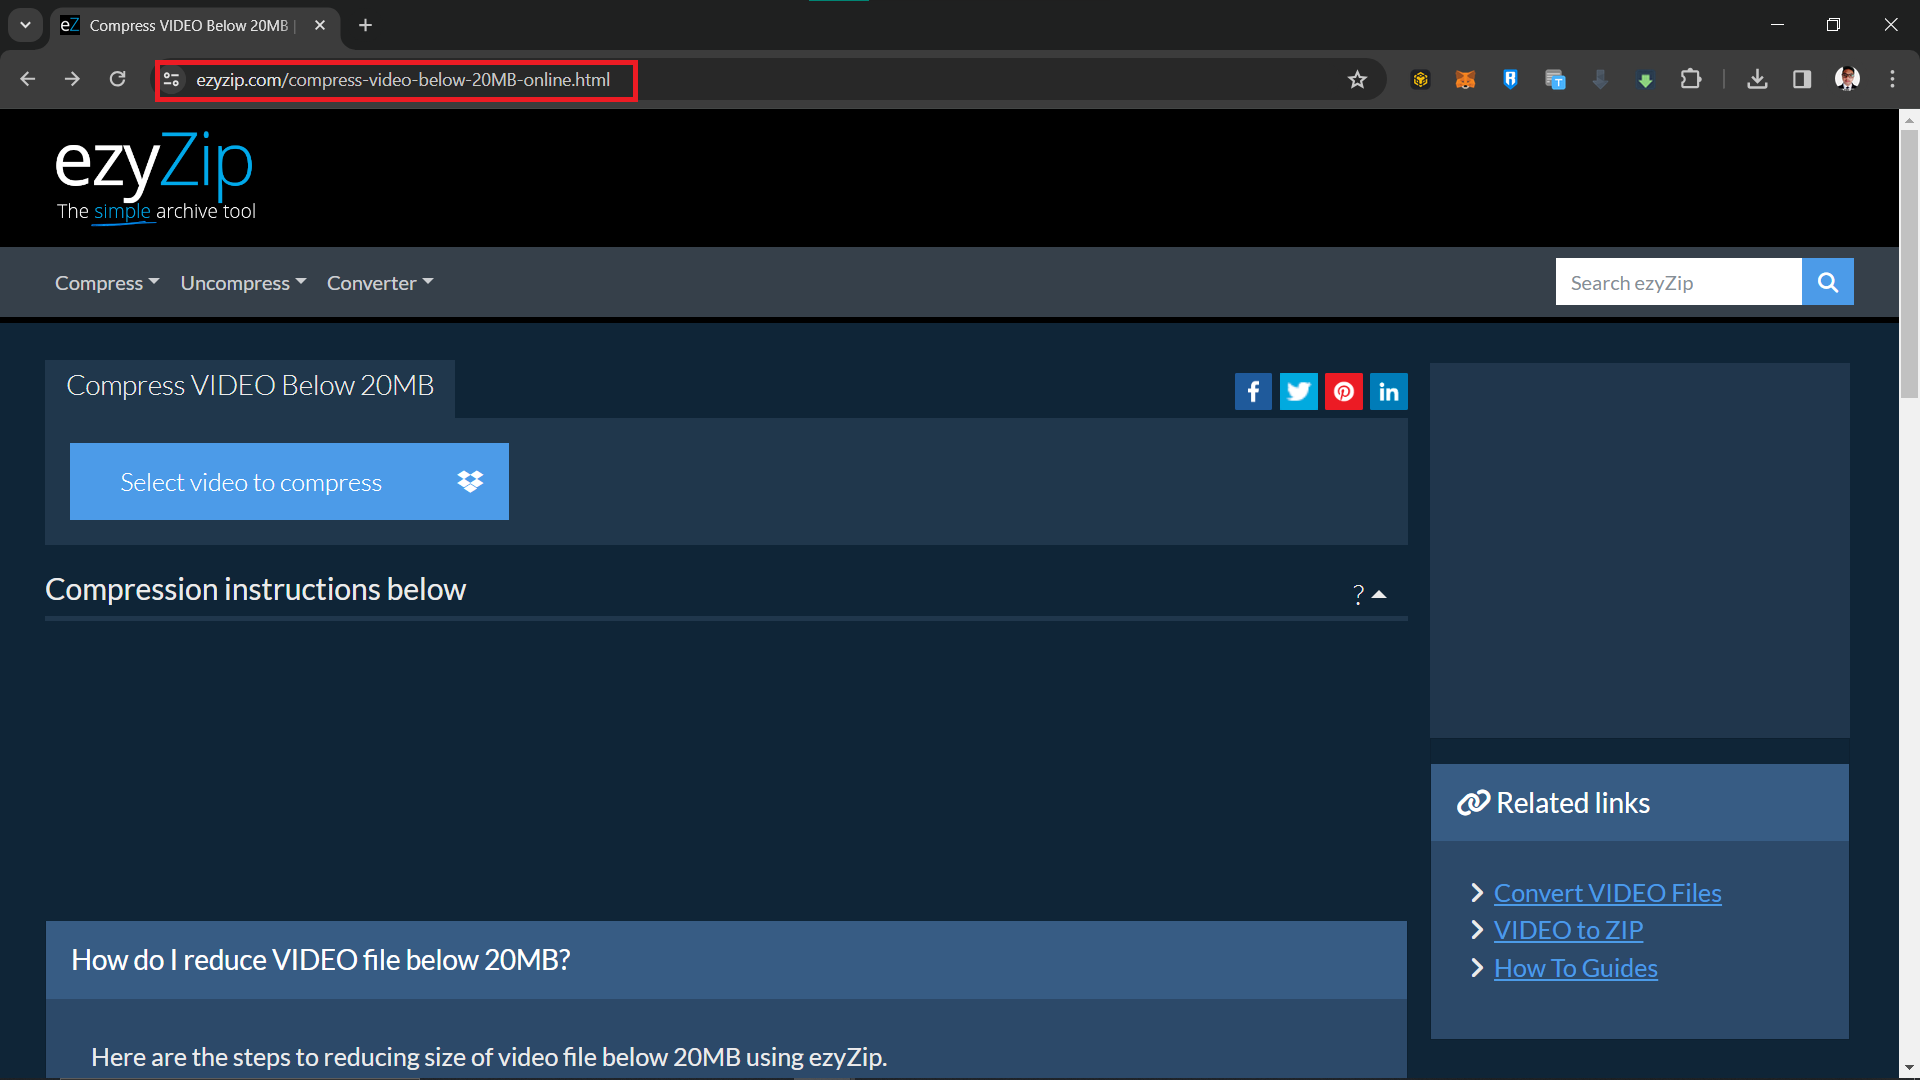
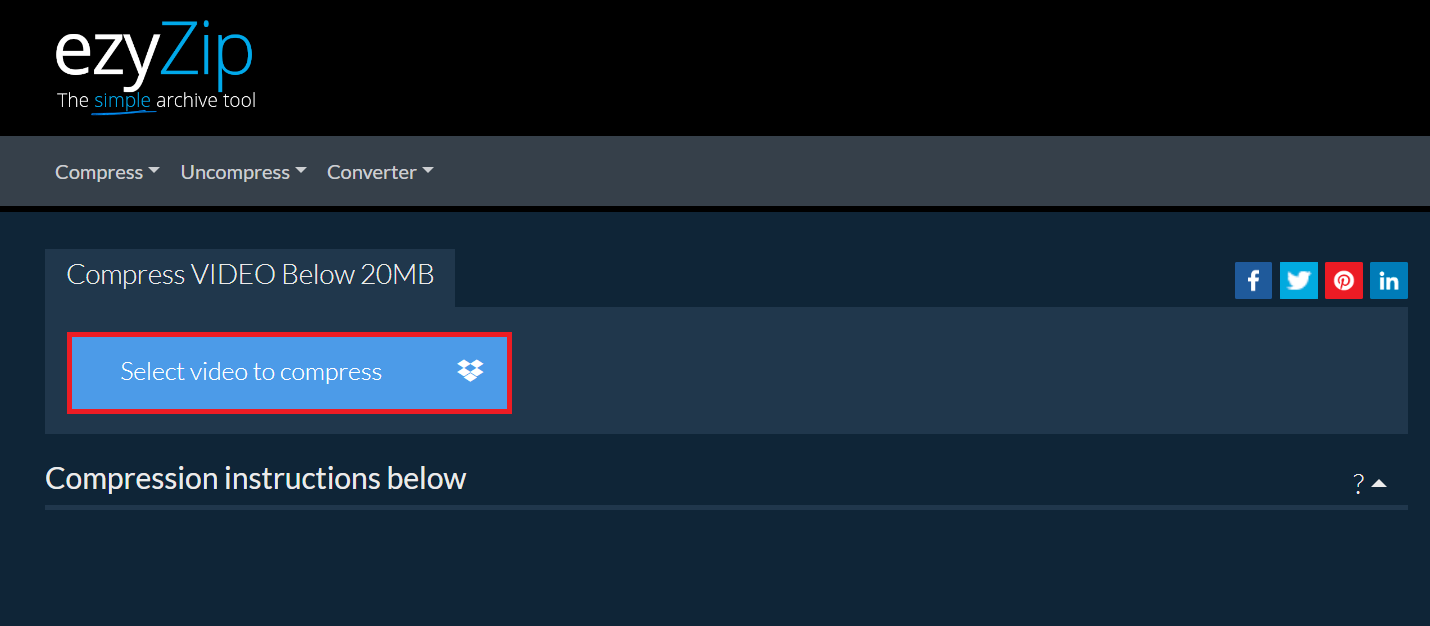
- Upload Your Video: Click on ‘Select video to compress’ and upload your video. As simple as a monkey picking the best banana!
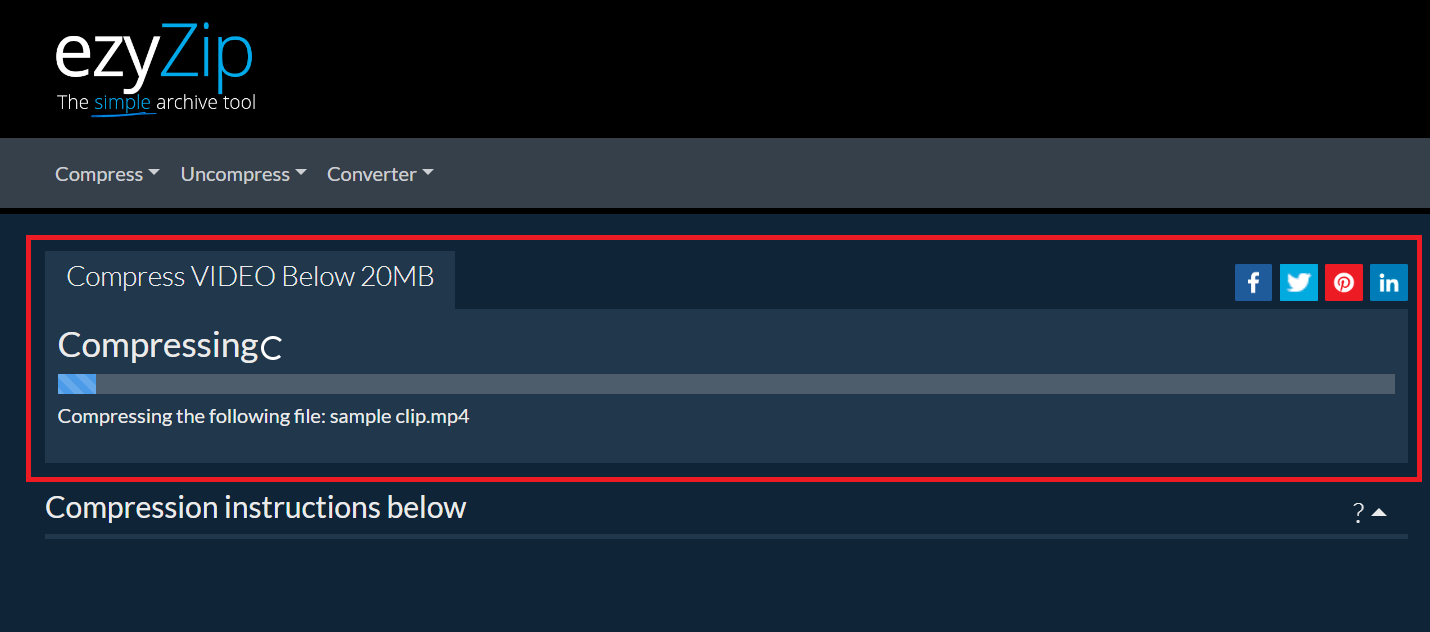
- Compress Your Video: Tweak any settings to your liking, then hit ‘Compress Video’. Watch in awe as ezyZip compresses your video faster than a monkey on a mission.
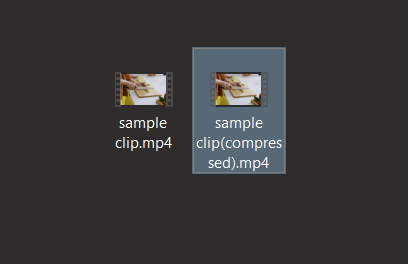
- Download the Video: Once the compression is done, download your newly lightweight video, all set for Outlook!
How to Compress Videos for Outlook on a Mac using iMovie
Mac users, let iMovie be your jungle gym for mastering video compression for Outlook.
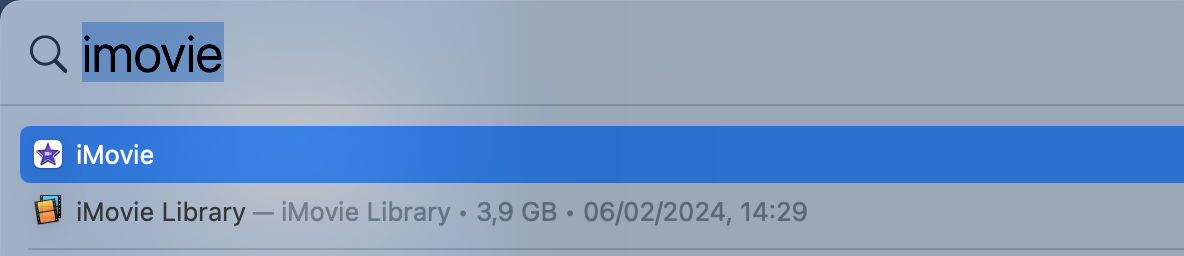
- Start iMovie: Open iMovie on your Mac – it’s as intuitive for Mac users as swinging is for monkeys.
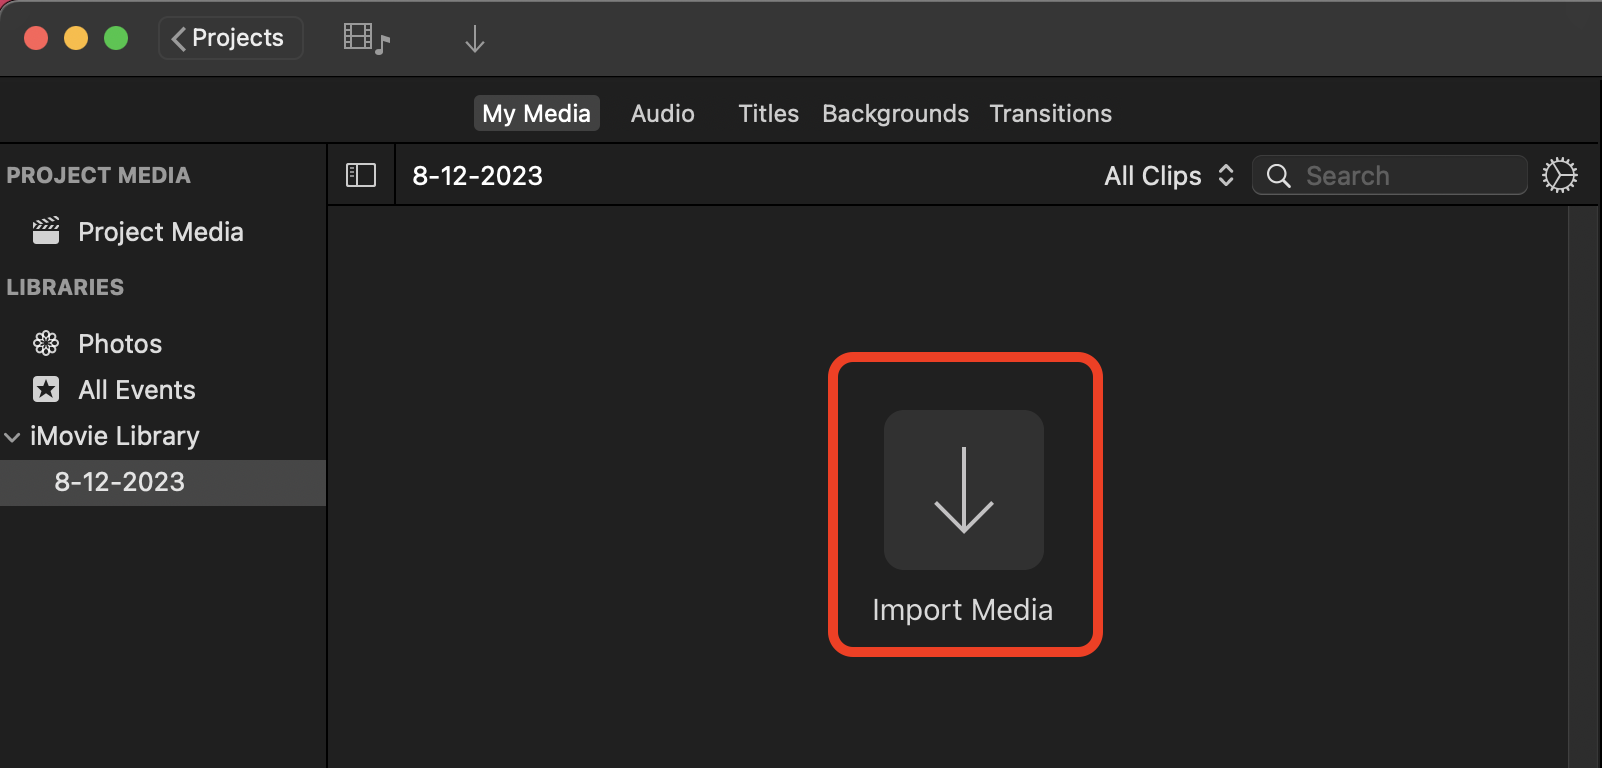
- Import Your Video: Click ‘Import Media’ and load up your video. It’s gathering time, just like for a banana feast.
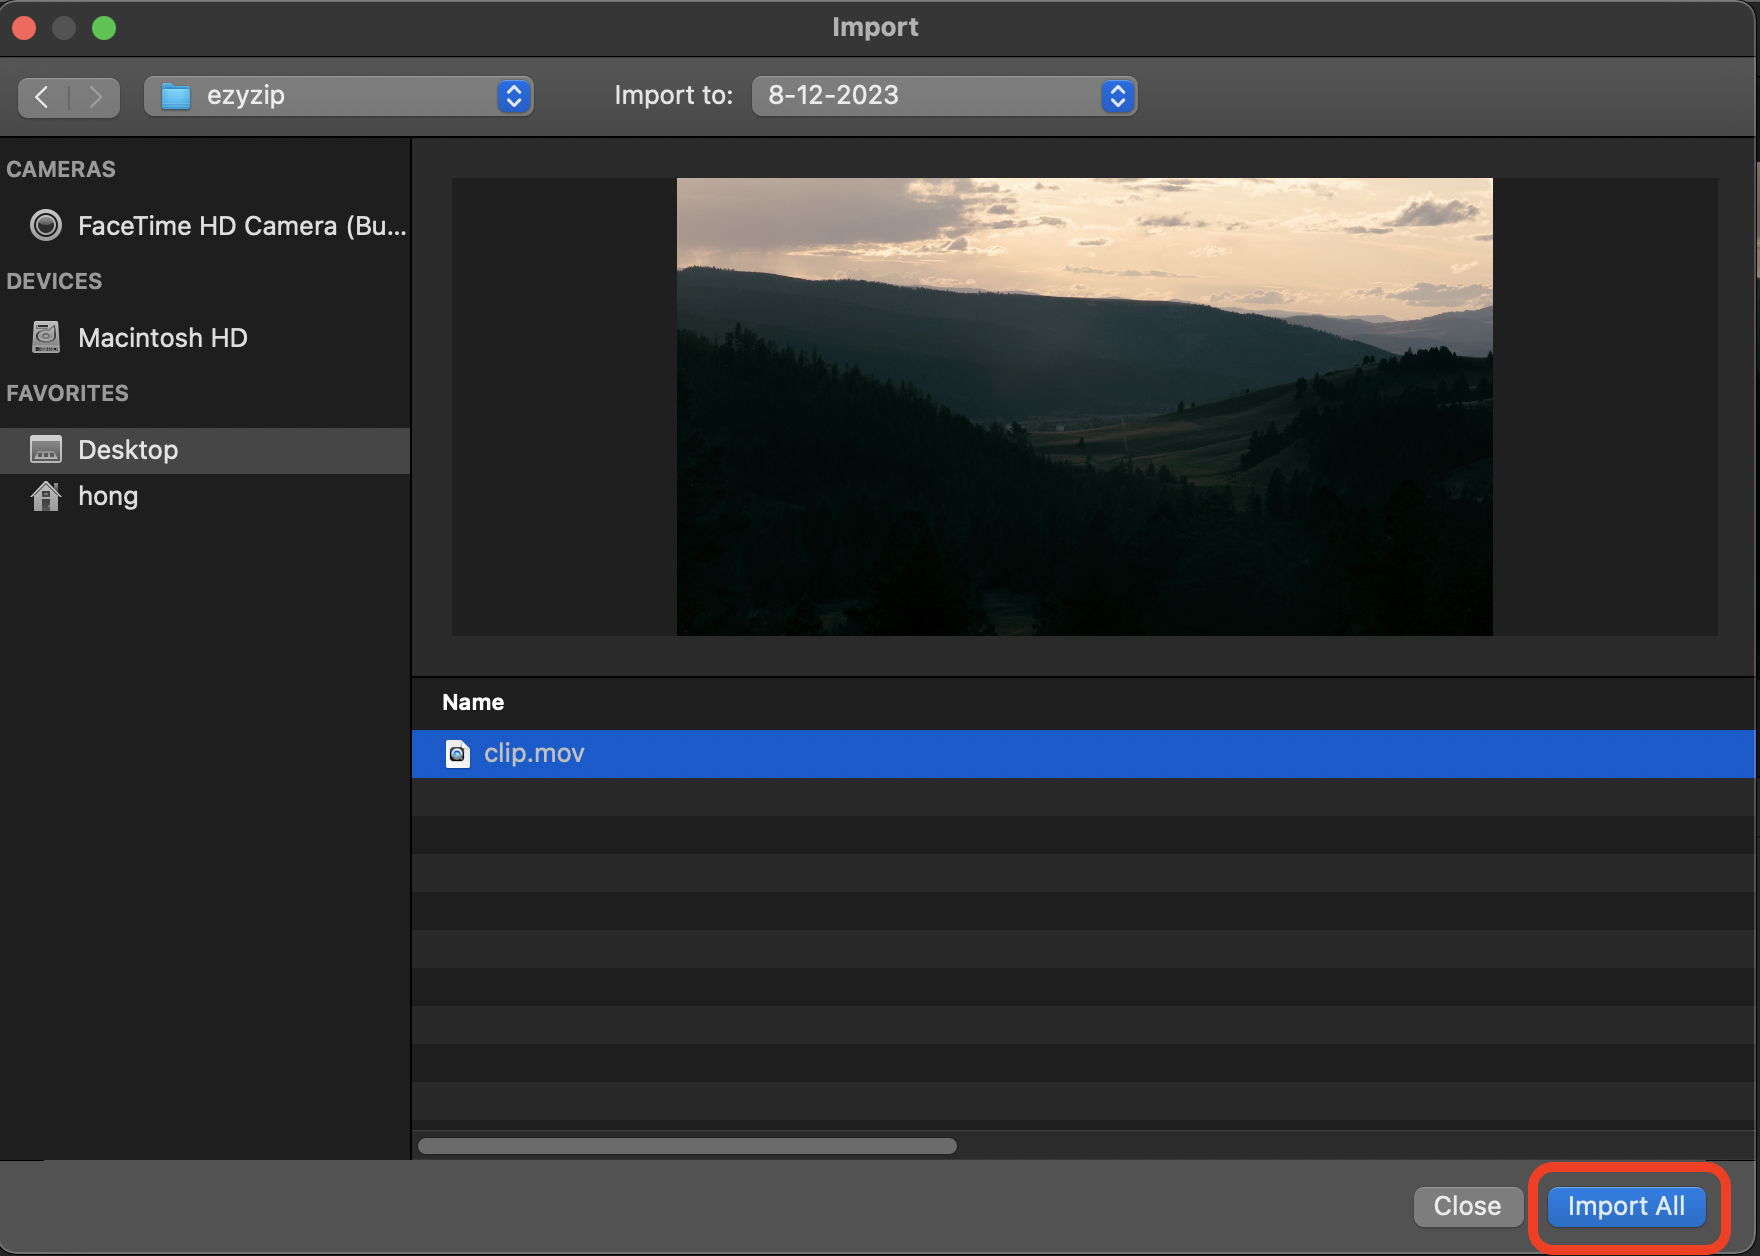
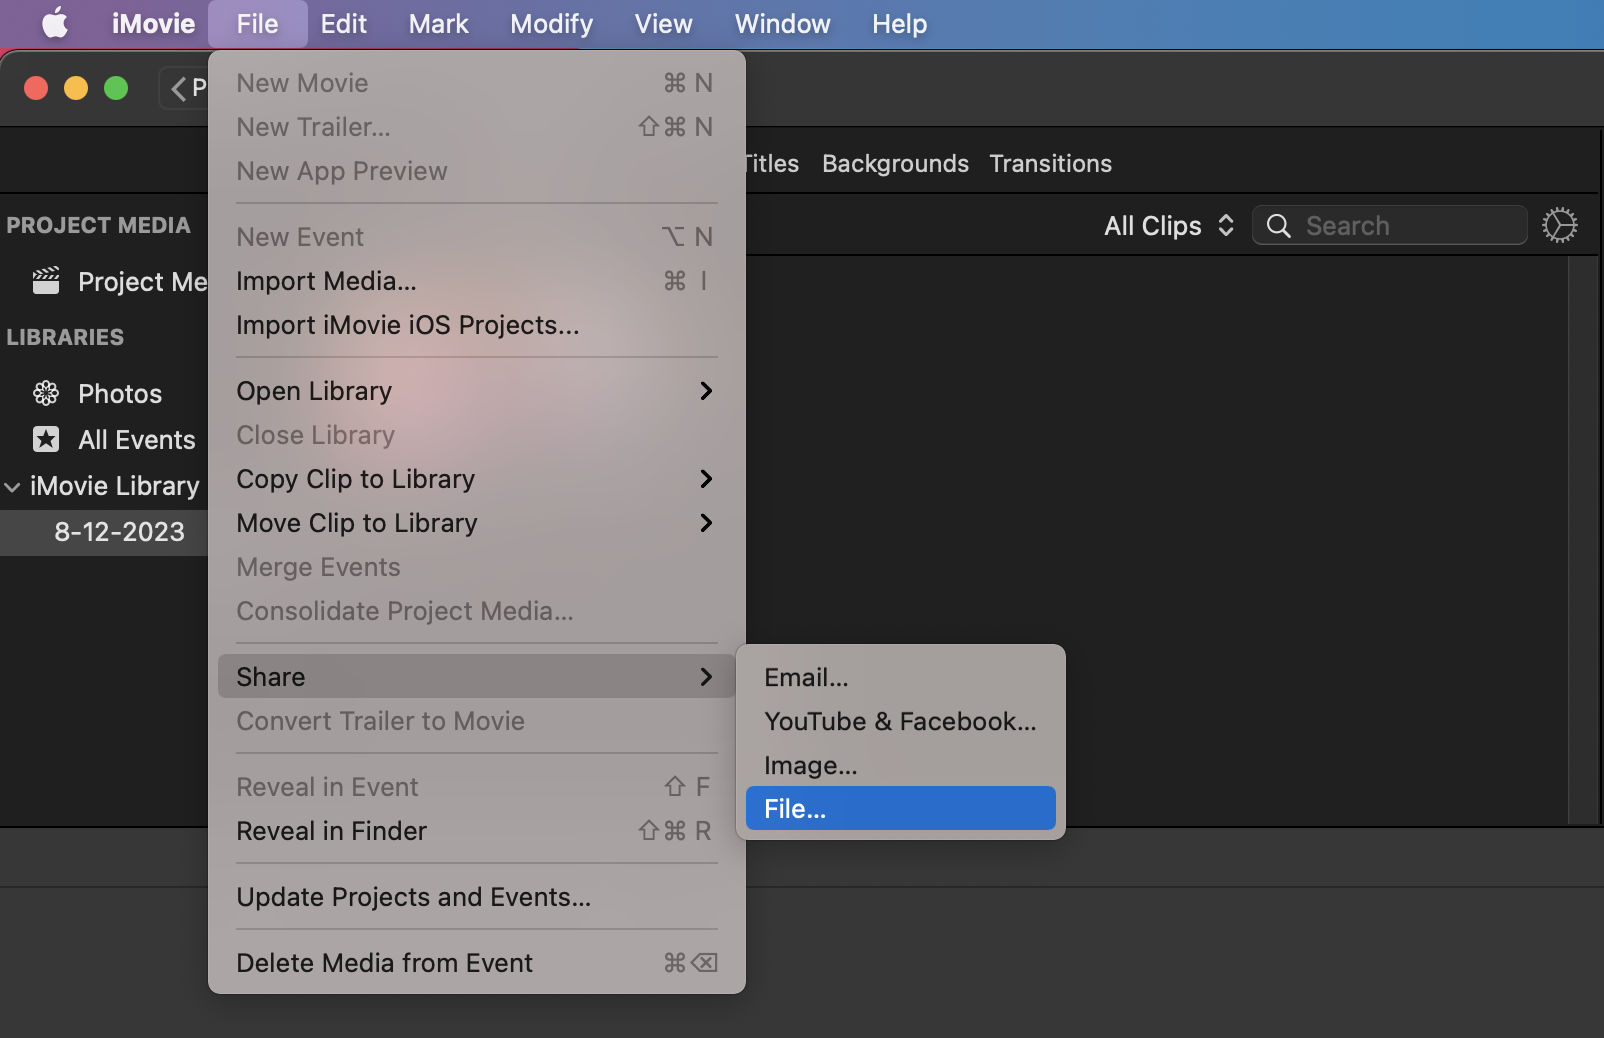
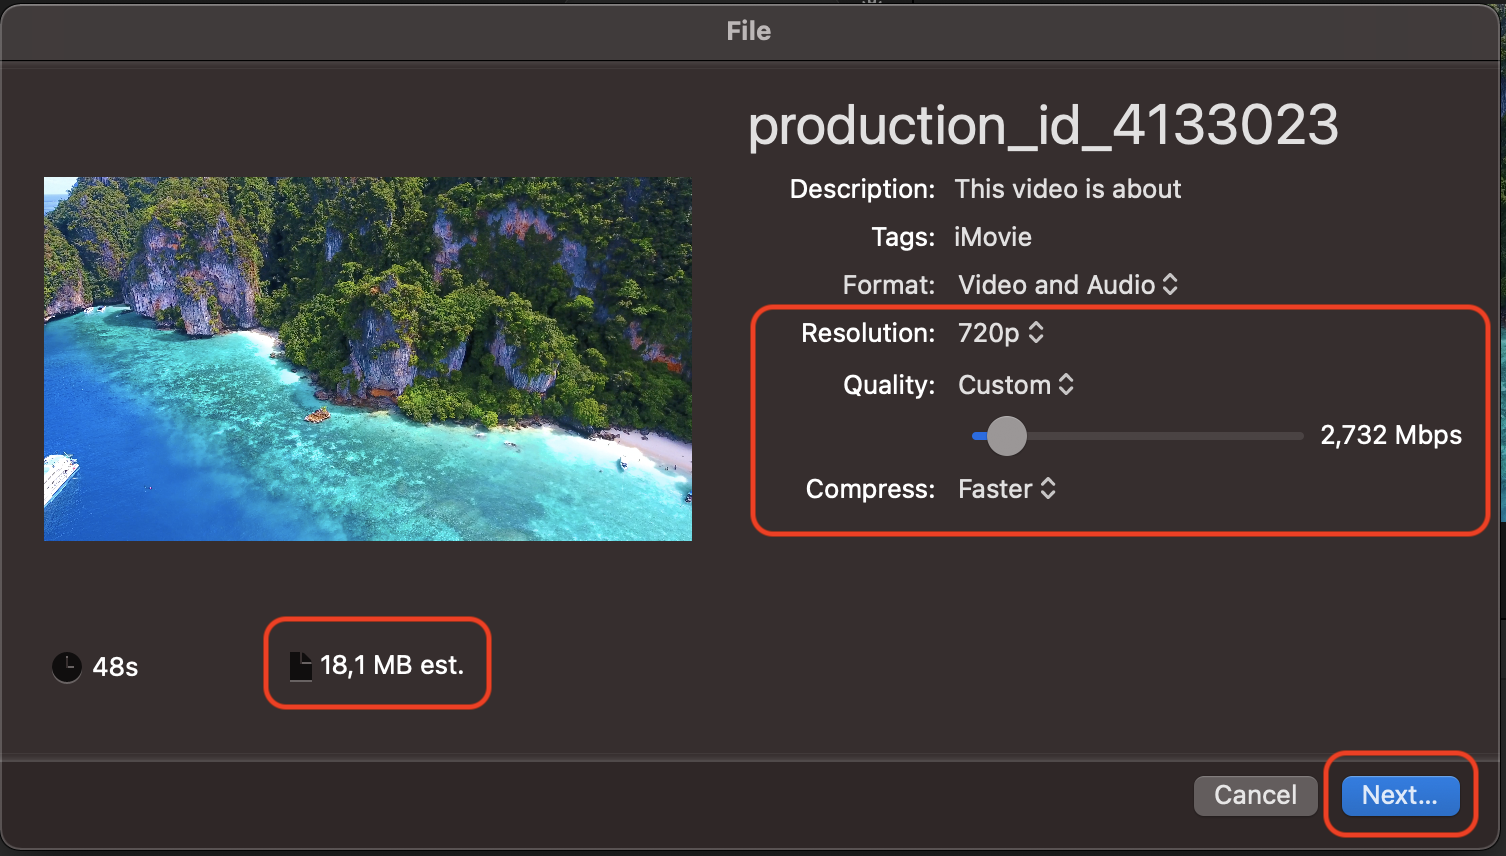
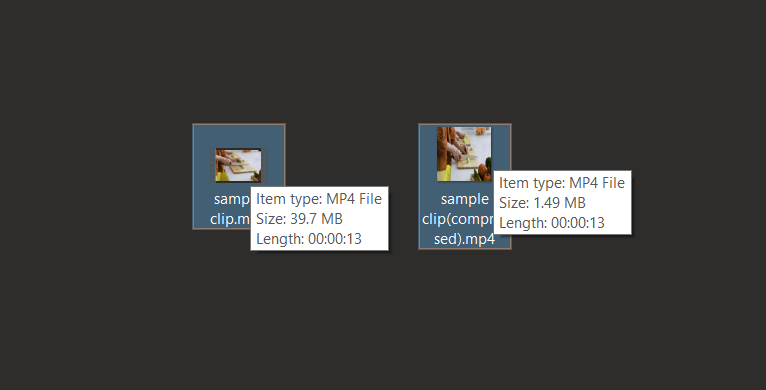
- Export the Compressed Video: After any desired editing, go to ‘File’, then ‘Share’, and pick ‘File’ for export. Here’s where you slim down the resolution and quality. Make sure it’s under 20MB for Outlook!
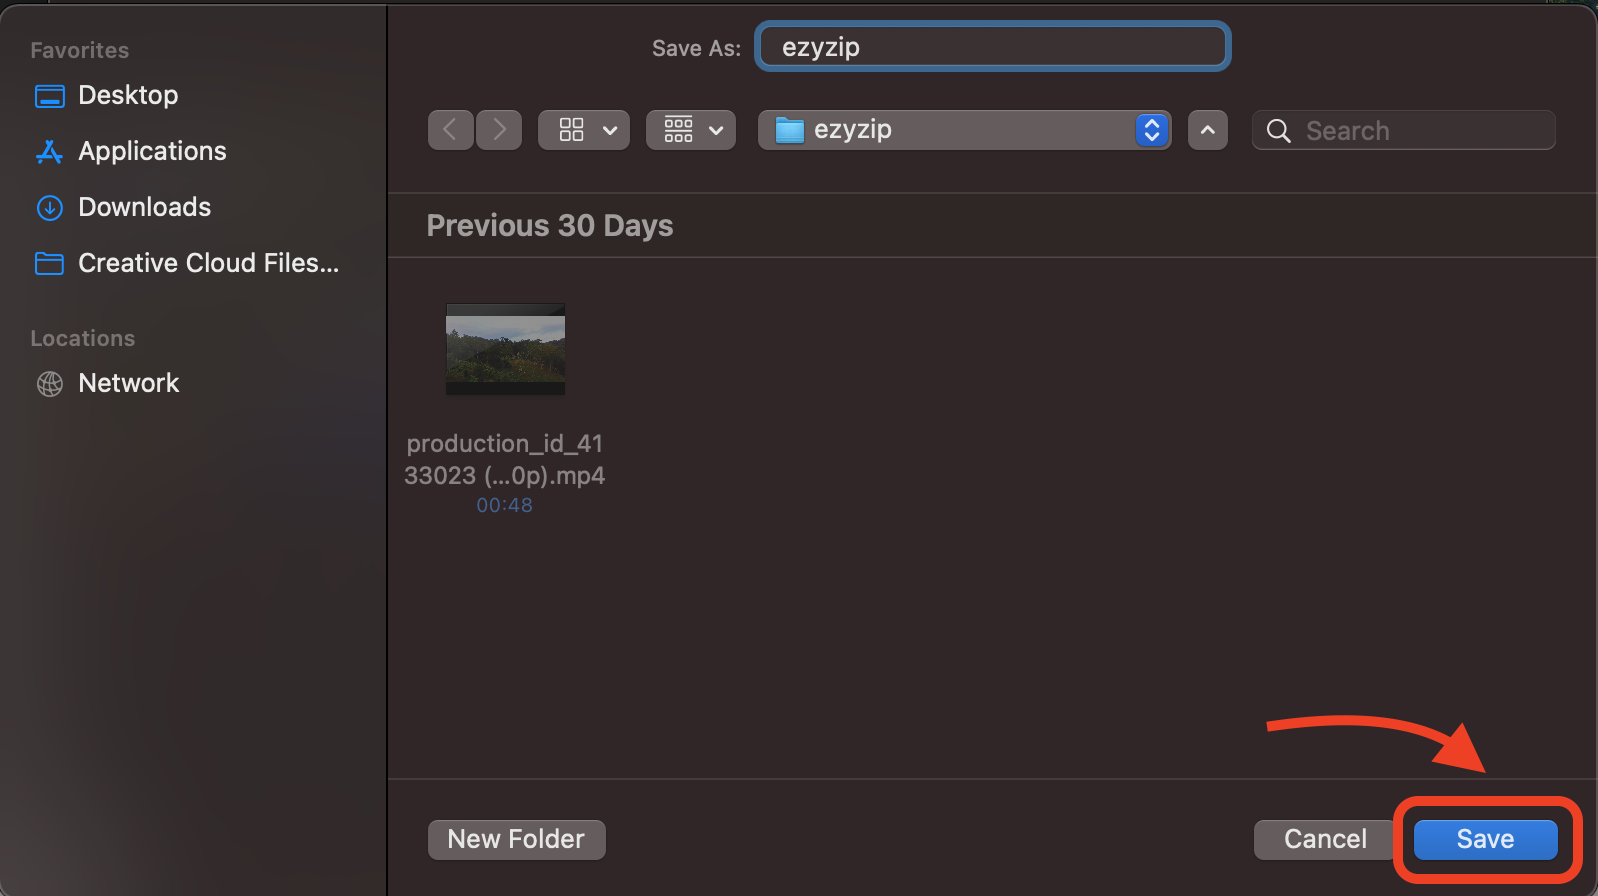
- Save Your Video: Store your compressed video, now perfect for attaching and sending via Outlook.
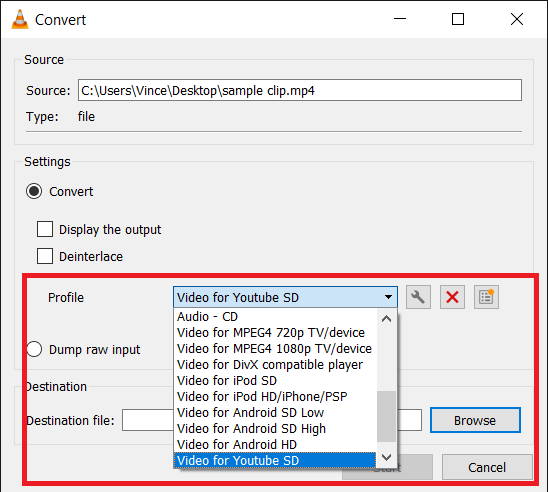
How to Compress Videos for Outlook using VLC Media Player on Windows
For Windows users, let VLC Media Player be your trusty tool in the wild world of video compression.
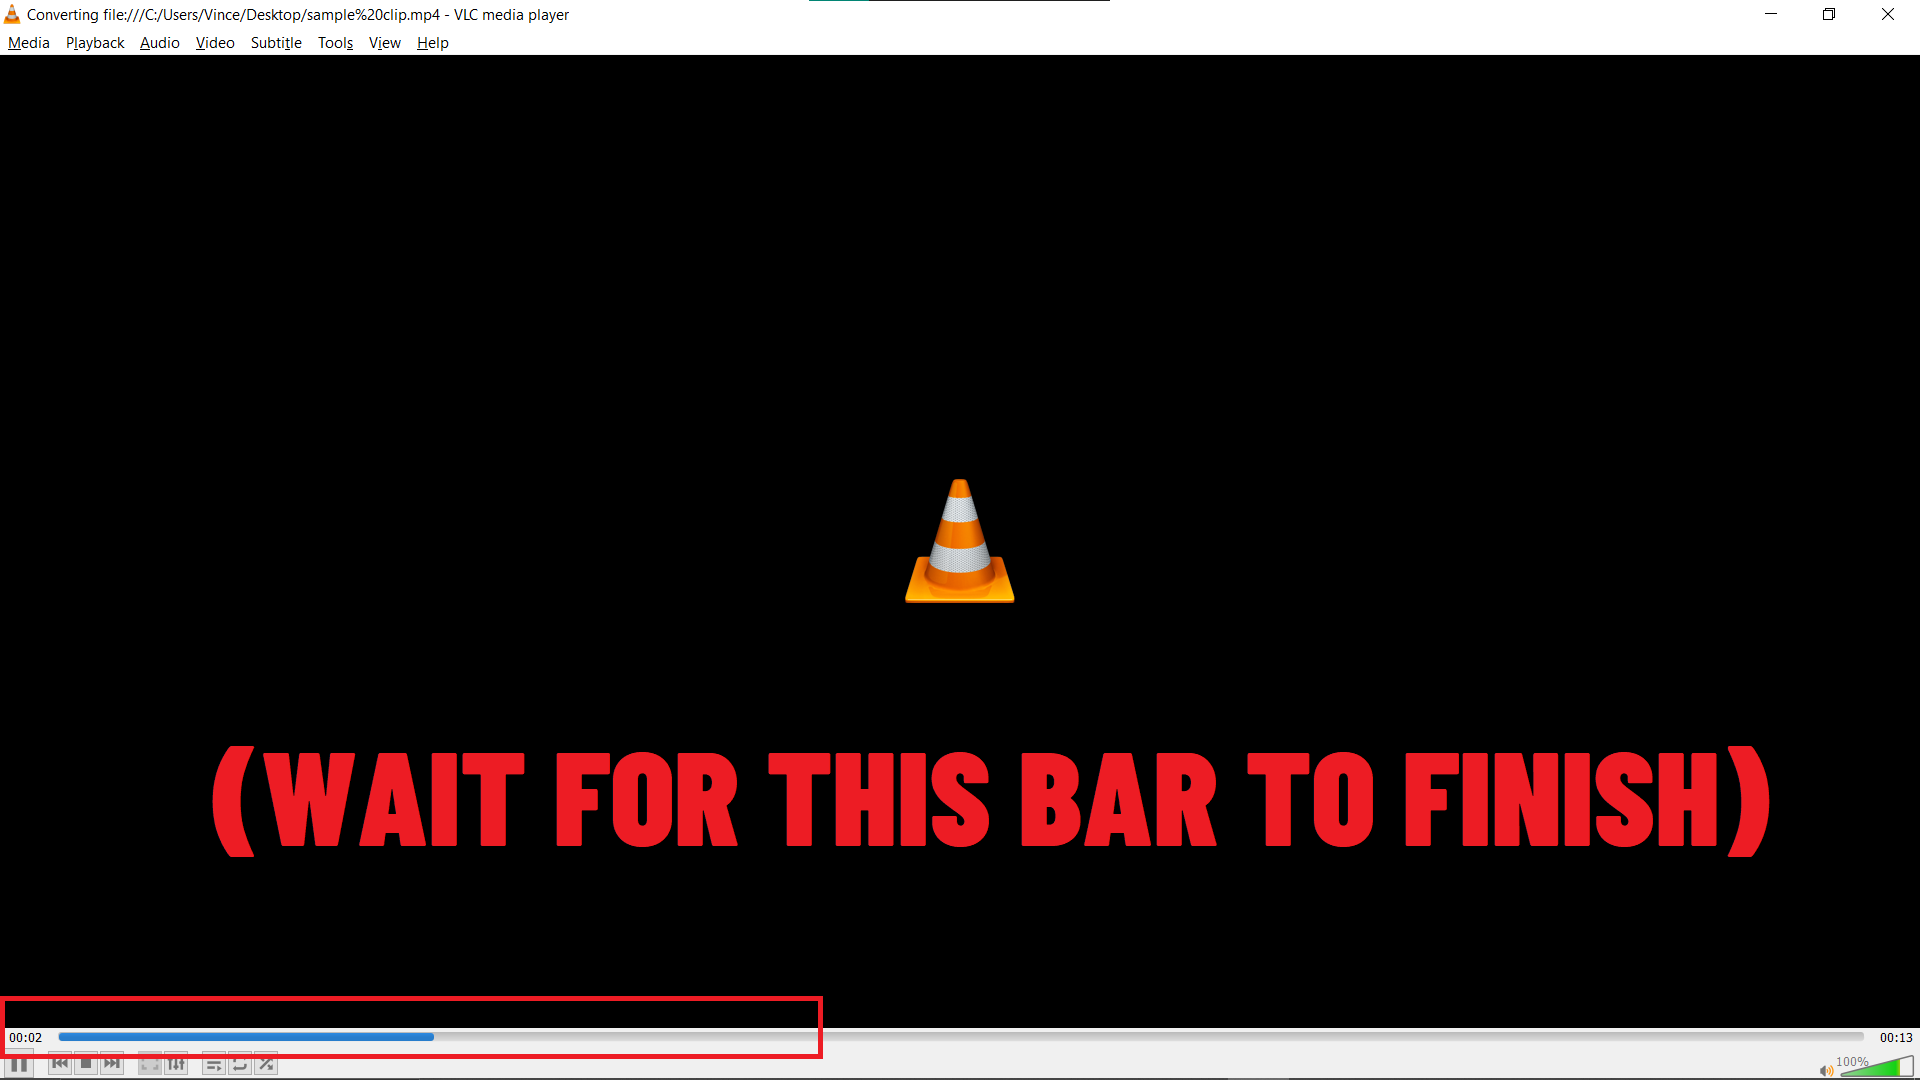
- Open VLC: Get VLC Media Player up and running on your Windows machine. It’s a versatile tool, just like a monkey’s handy tail.
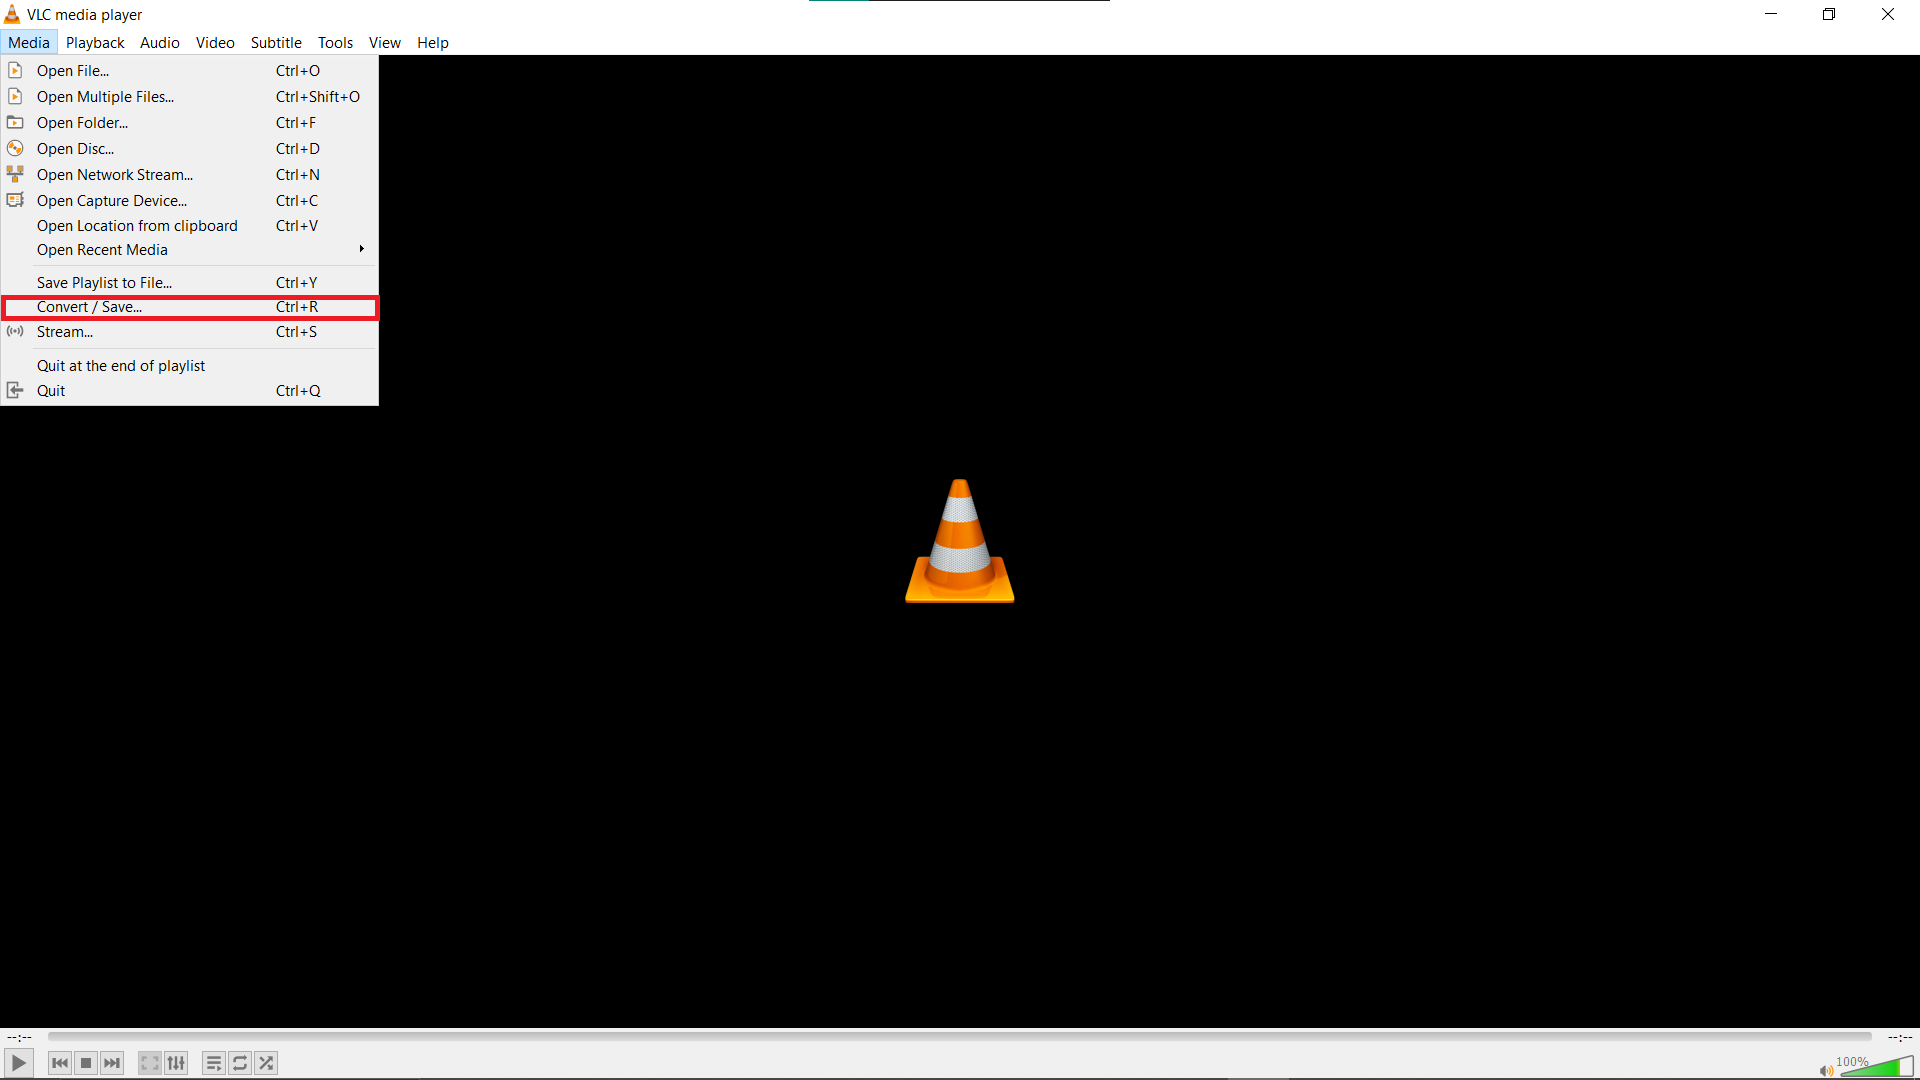
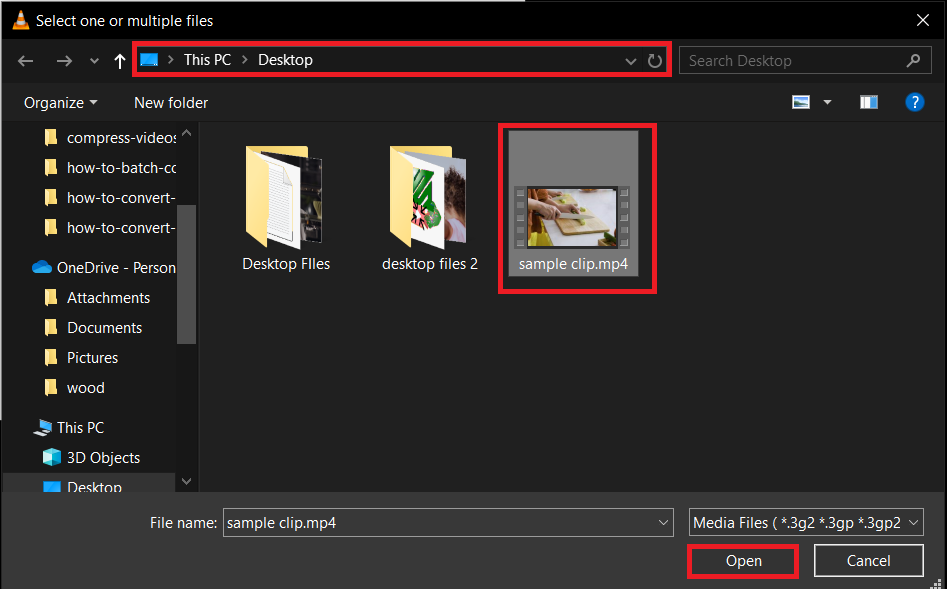
- Convert Your Video: Head to ‘Media’, then ‘Convert / Save’. Add your video and click ‘Convert / Save’ once more.

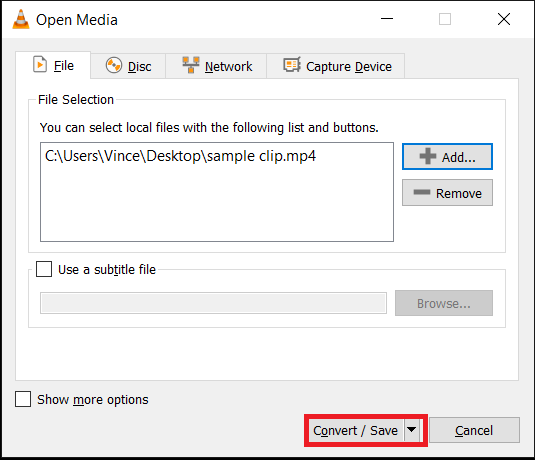
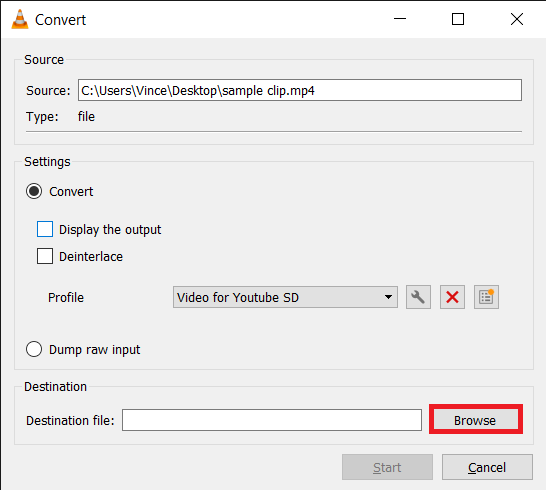
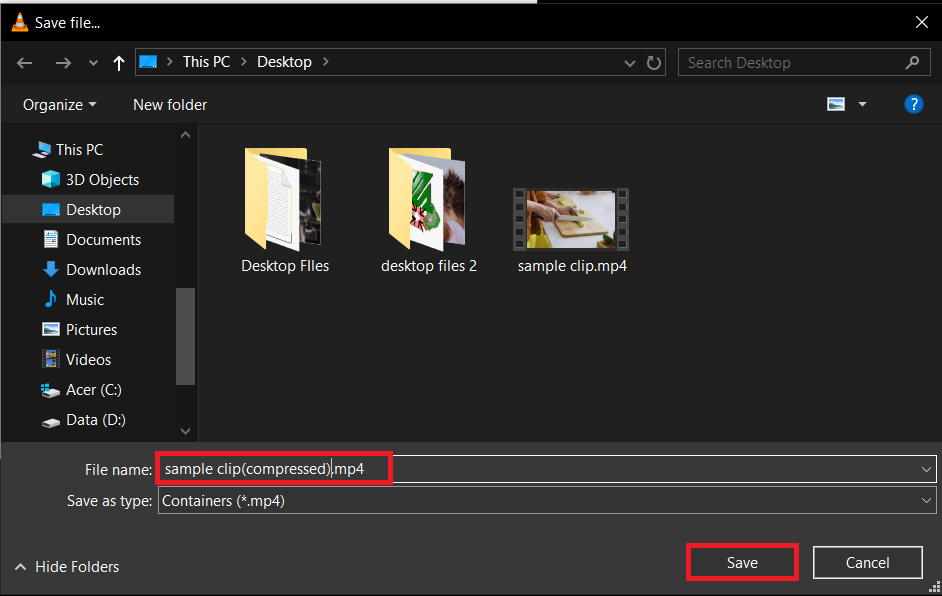
- Adjust Compression Settings: In ‘Profile’, select a format that reduces file size. Also, choose the path where you want the converted file to be saved by clicking on the “browse” button. It’s all about choosing the right path in the jungle.
- Begin Compression: Hit ‘Start’ to compress your video. VLC will now diligently work to make your video as manageable as a small bunch of bananas.
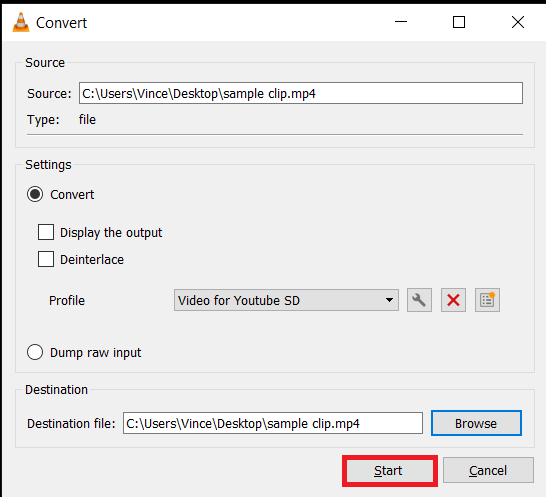
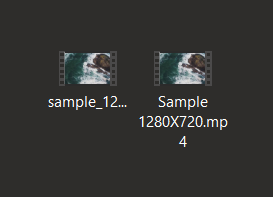
- Find Your Video: Once VLC finishes, locate your compressed video in the chosen save location. It’s now primed for a hassle-free trip through Outlook!
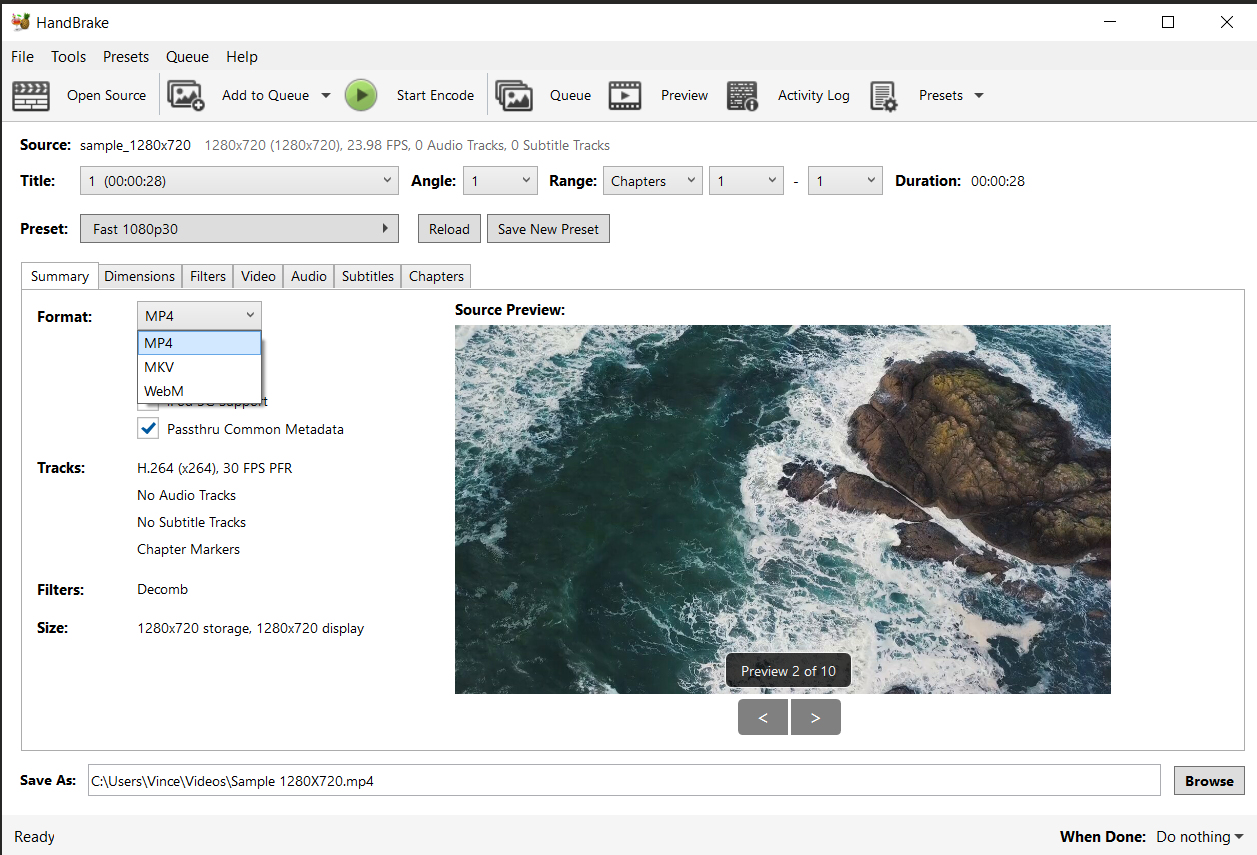
How To Compress Videos for Outlook using Handbrake
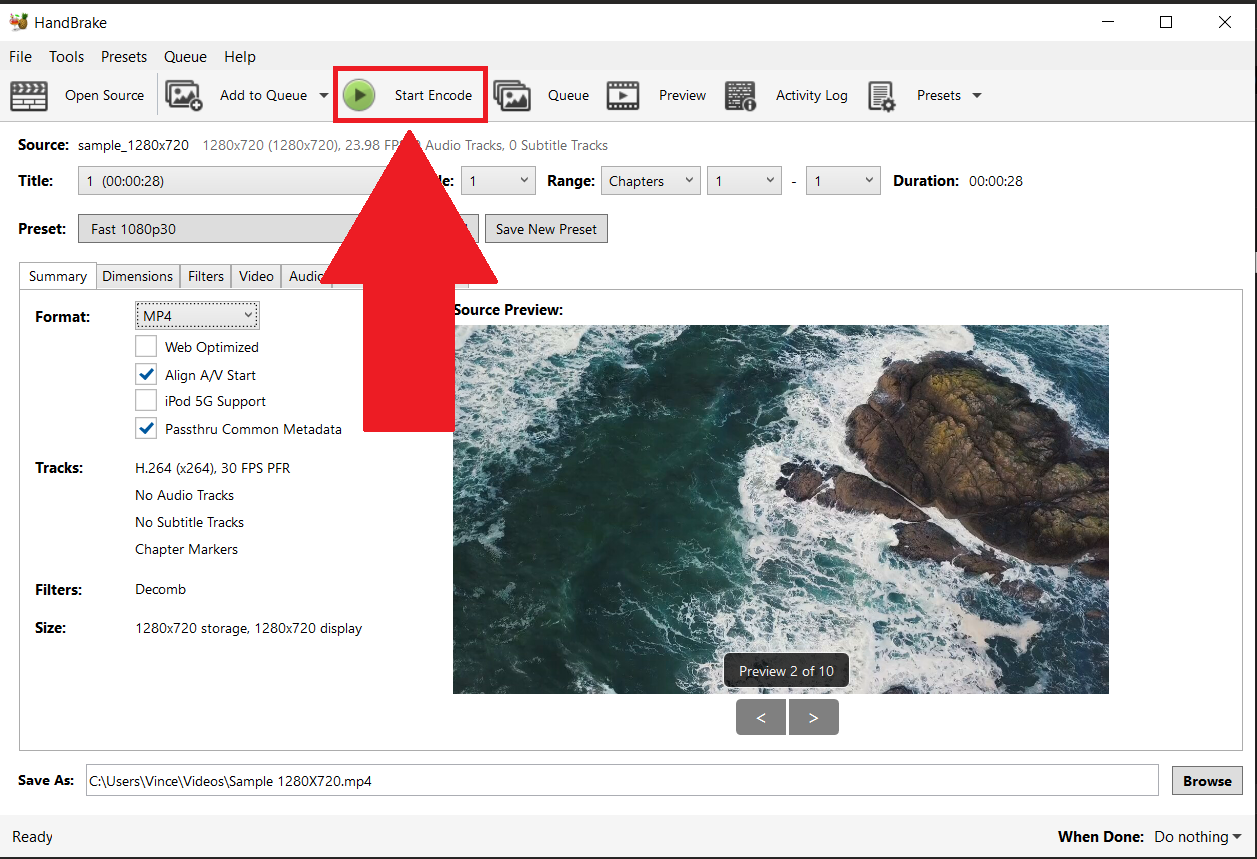
Reducing size of videos for Outlook using Handbrake is as easy as peeling a banana. Here’s how to do it in 5 simple steps:
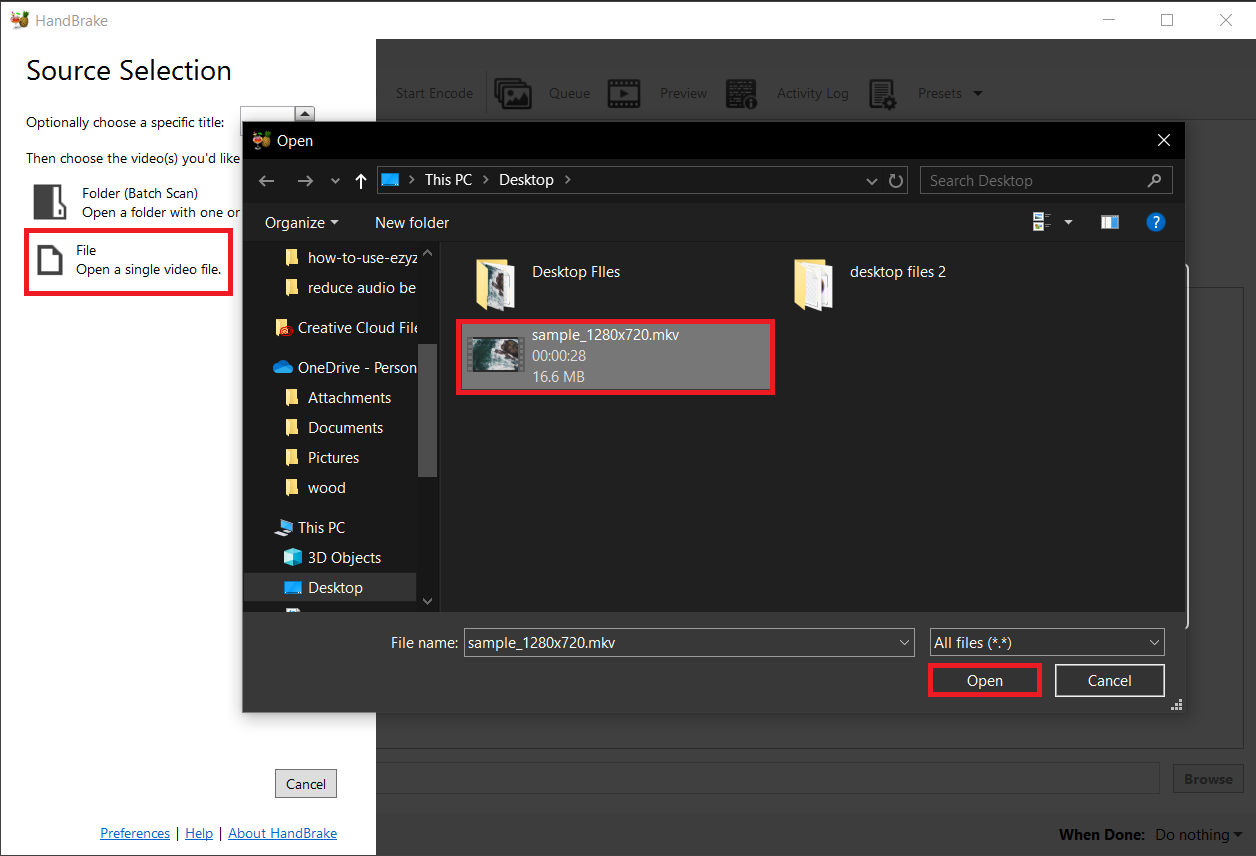
- Open Your Video: Start by selecting ‘Open Source’ to choose the video file you want to compress. This initiates the compression process.

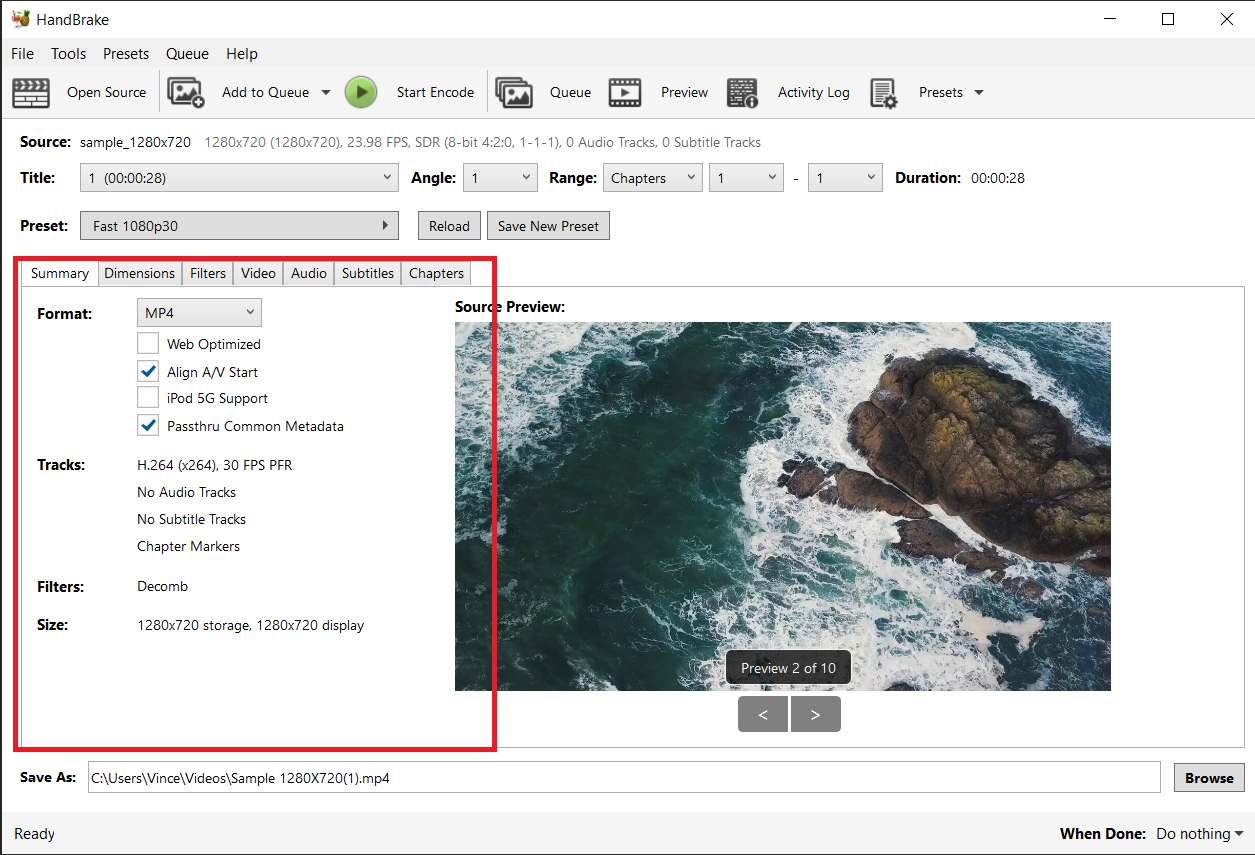
- Choose a Preset: With a range of presets available, select one that aligns with your needs, whether for web use, mobile compatibility, or general purposes.
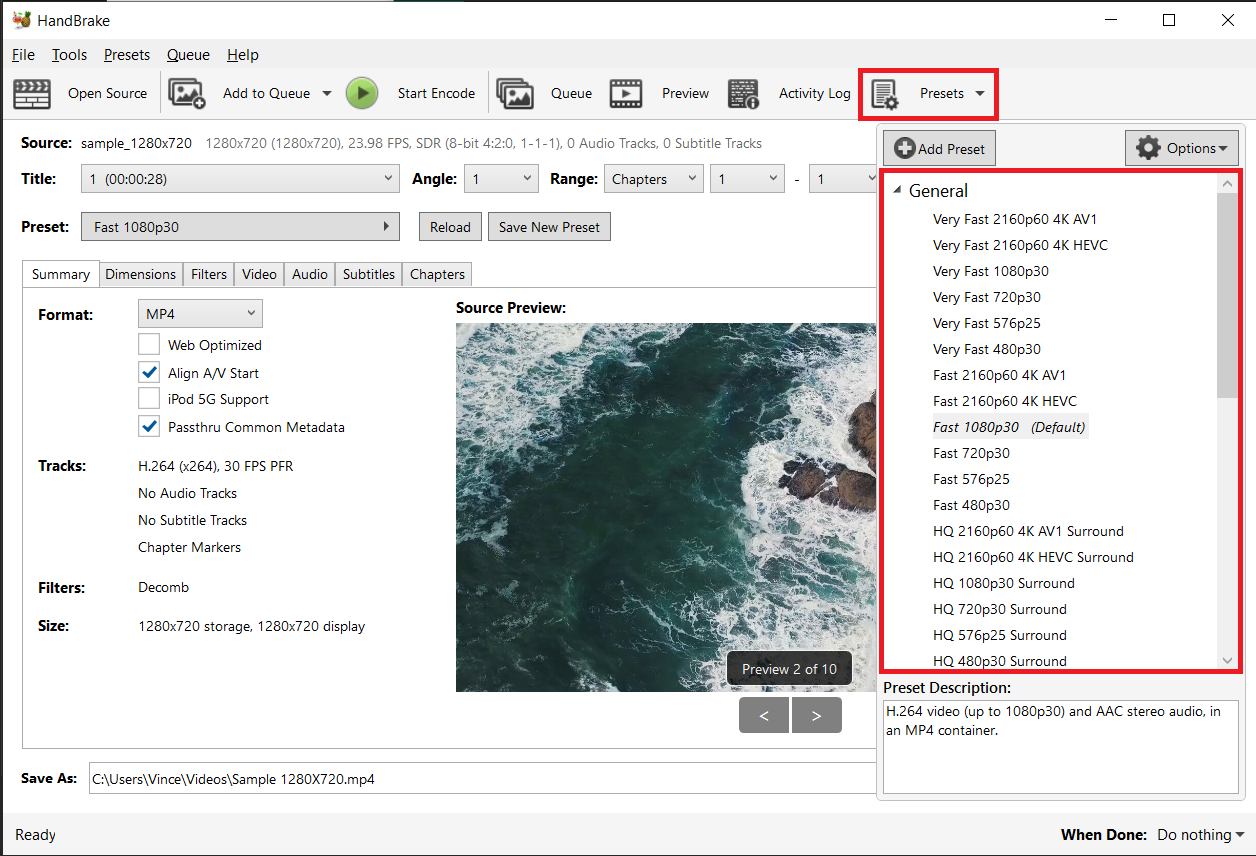
- Set Your Output Format: Decide on your preferred output format by selecting from the ‘Format’ dropdown menu. Options include MP4, MKV, and others to suit various needs. I’d pick MP4 – it’s as versatile as a monkey in the jungle!
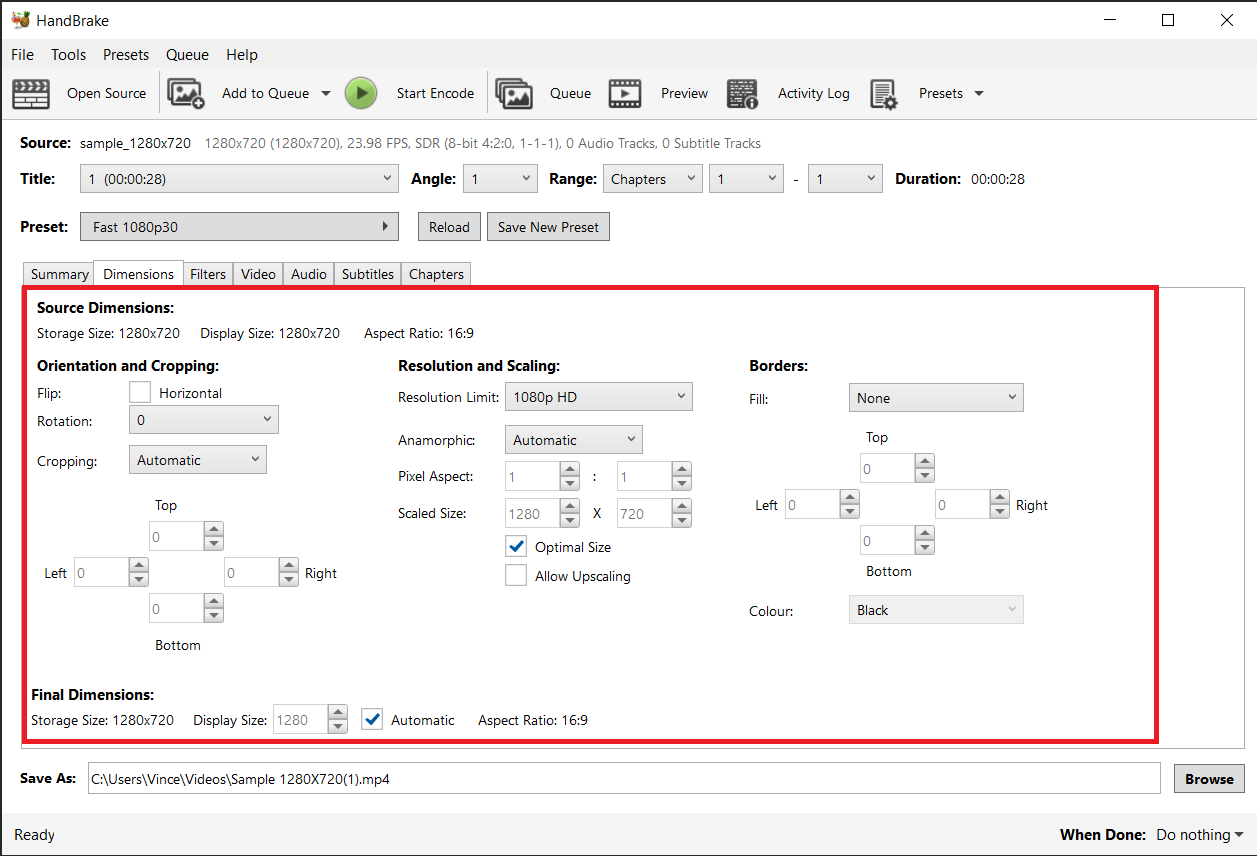
- Tweak the Settings: Explore the settings to fine-tune your video. Adjust with caution to ensure the changes meet your expectations without any surprises.
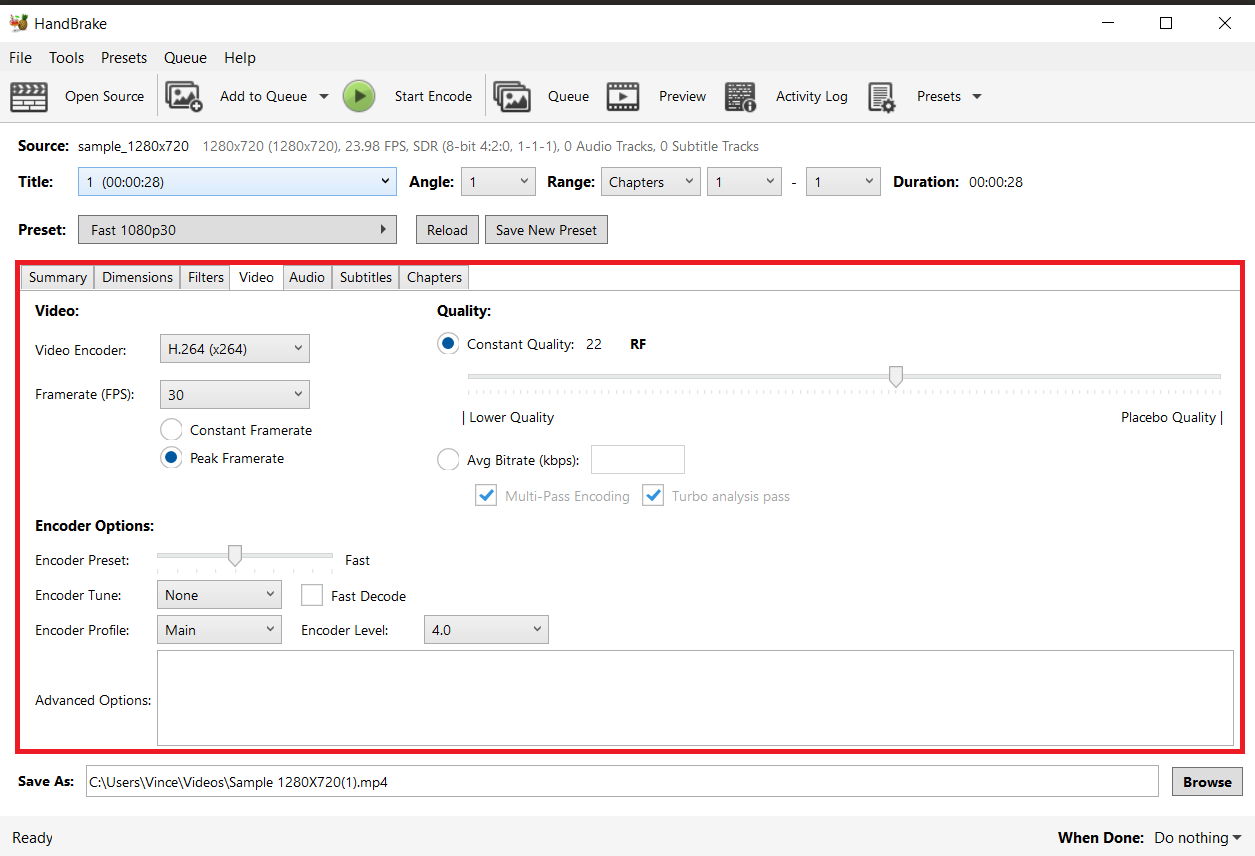
- Start the Conversion: Press the ‘Start Encode’ button to begin the conversion. Handbrake efficiently compresses your video, making it Outlook-ready in moments.
With these user-friendly methods, compressing videos for Outlook becomes as easy as a monkey swinging from tree to tree. Say goodbye to oversized video hassles and hello to smooth, effortless emailing!