
Ever had to swing through the digital jungle with a WEBP file heavier than a gorilla after a banana buffet? Let’s get those WEBP files compressed so you can swing through your digital tasks with ease! Don’t worry, we’ve got your tail covered with a few simple methods that will make compressing WEBP files as easy as peeling a banana.
Table of contents
Video guide showing how to reduce size of images (webp, jpeg etc...) using a web browser.
How To Compress WEBP Files Using EZGIF
EZGIF is an online tool that’s as easy as swinging from vine to vine and works on any operating system with a web browser!
-
Jump Online: Go to the EZGIF website, just like a monkey leaps between tree branches.
-
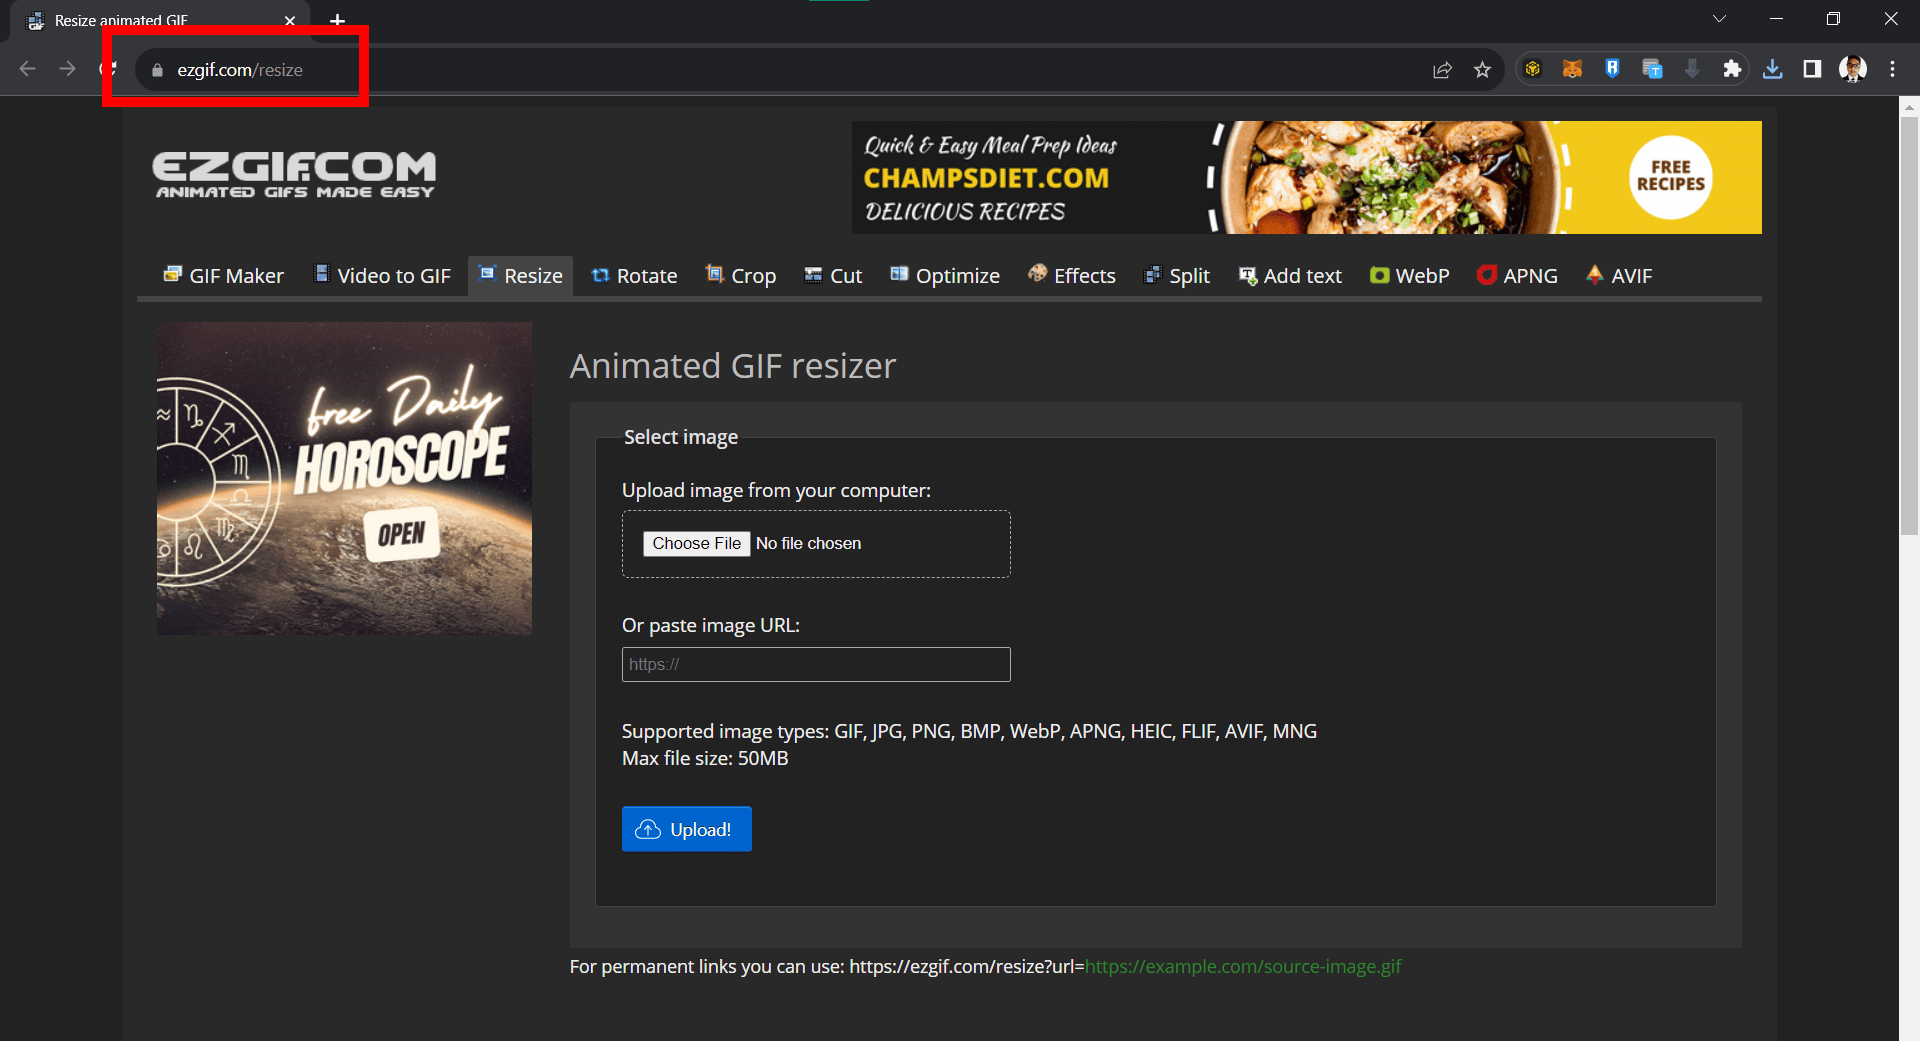
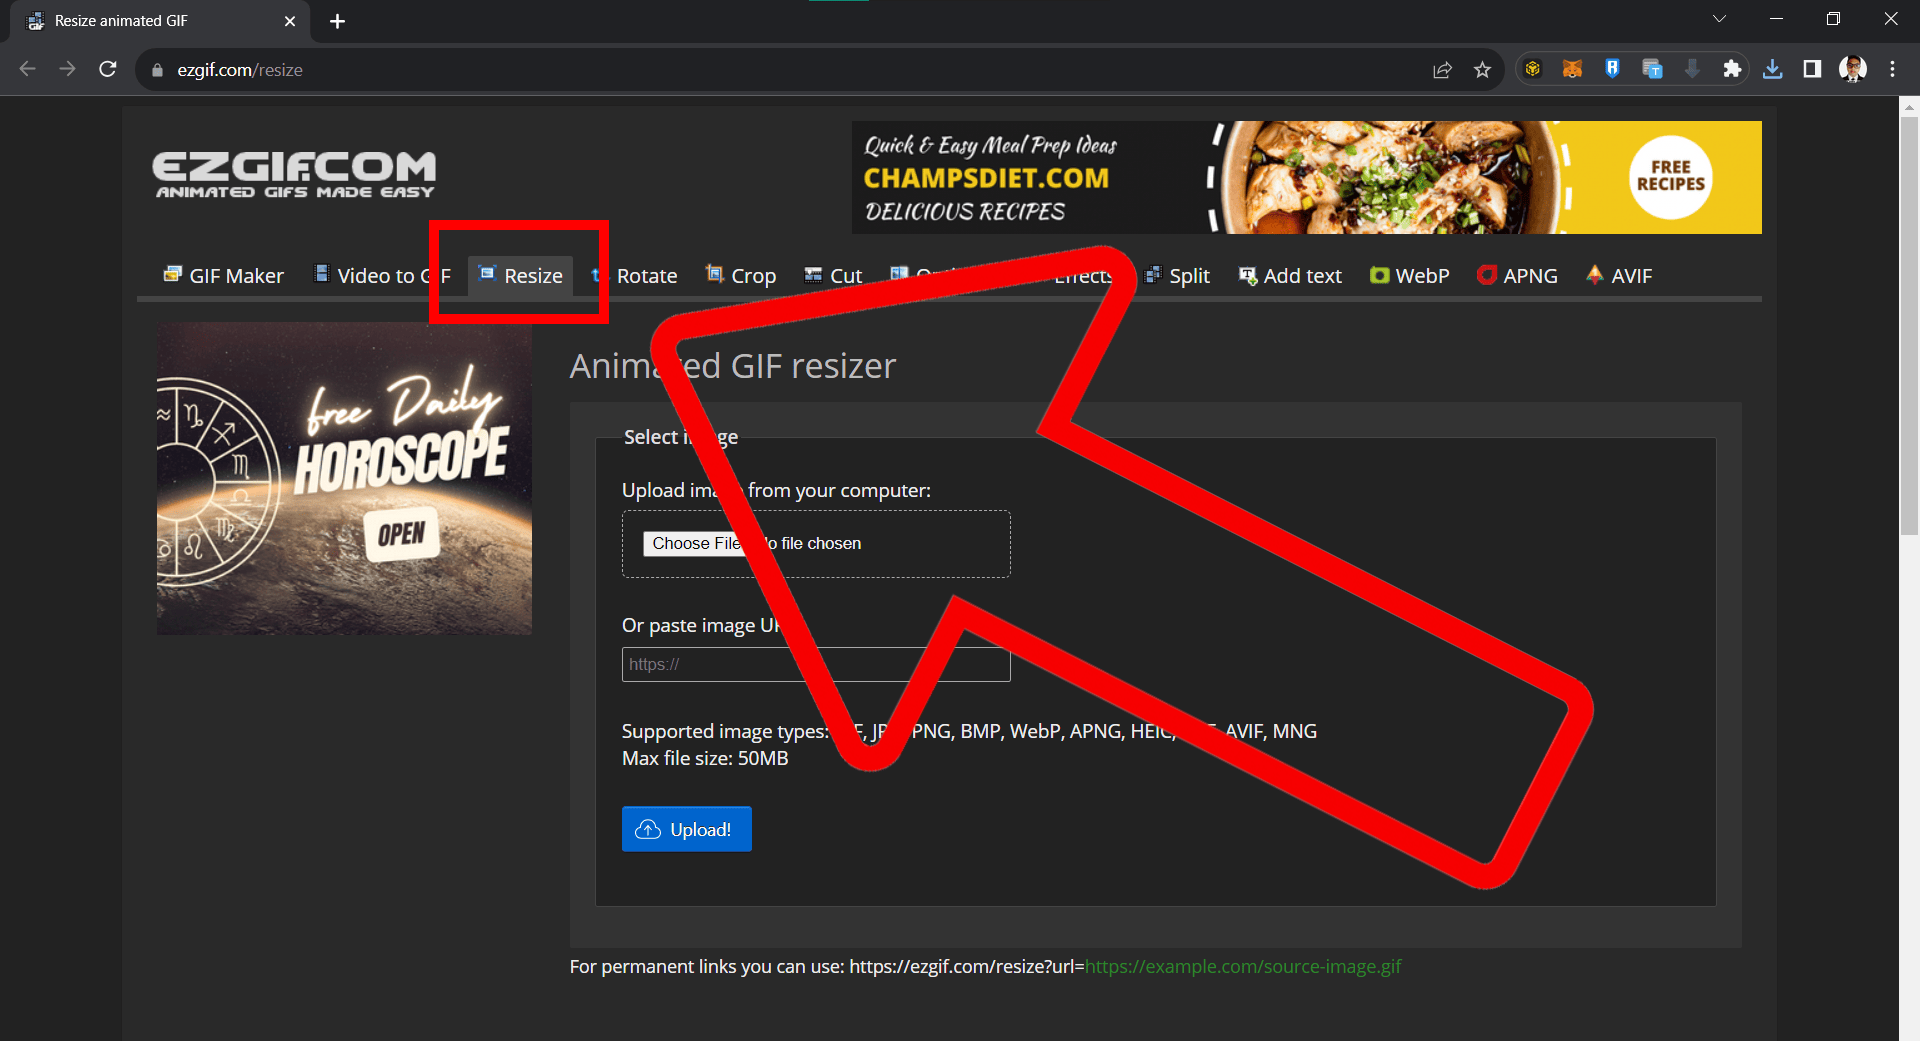
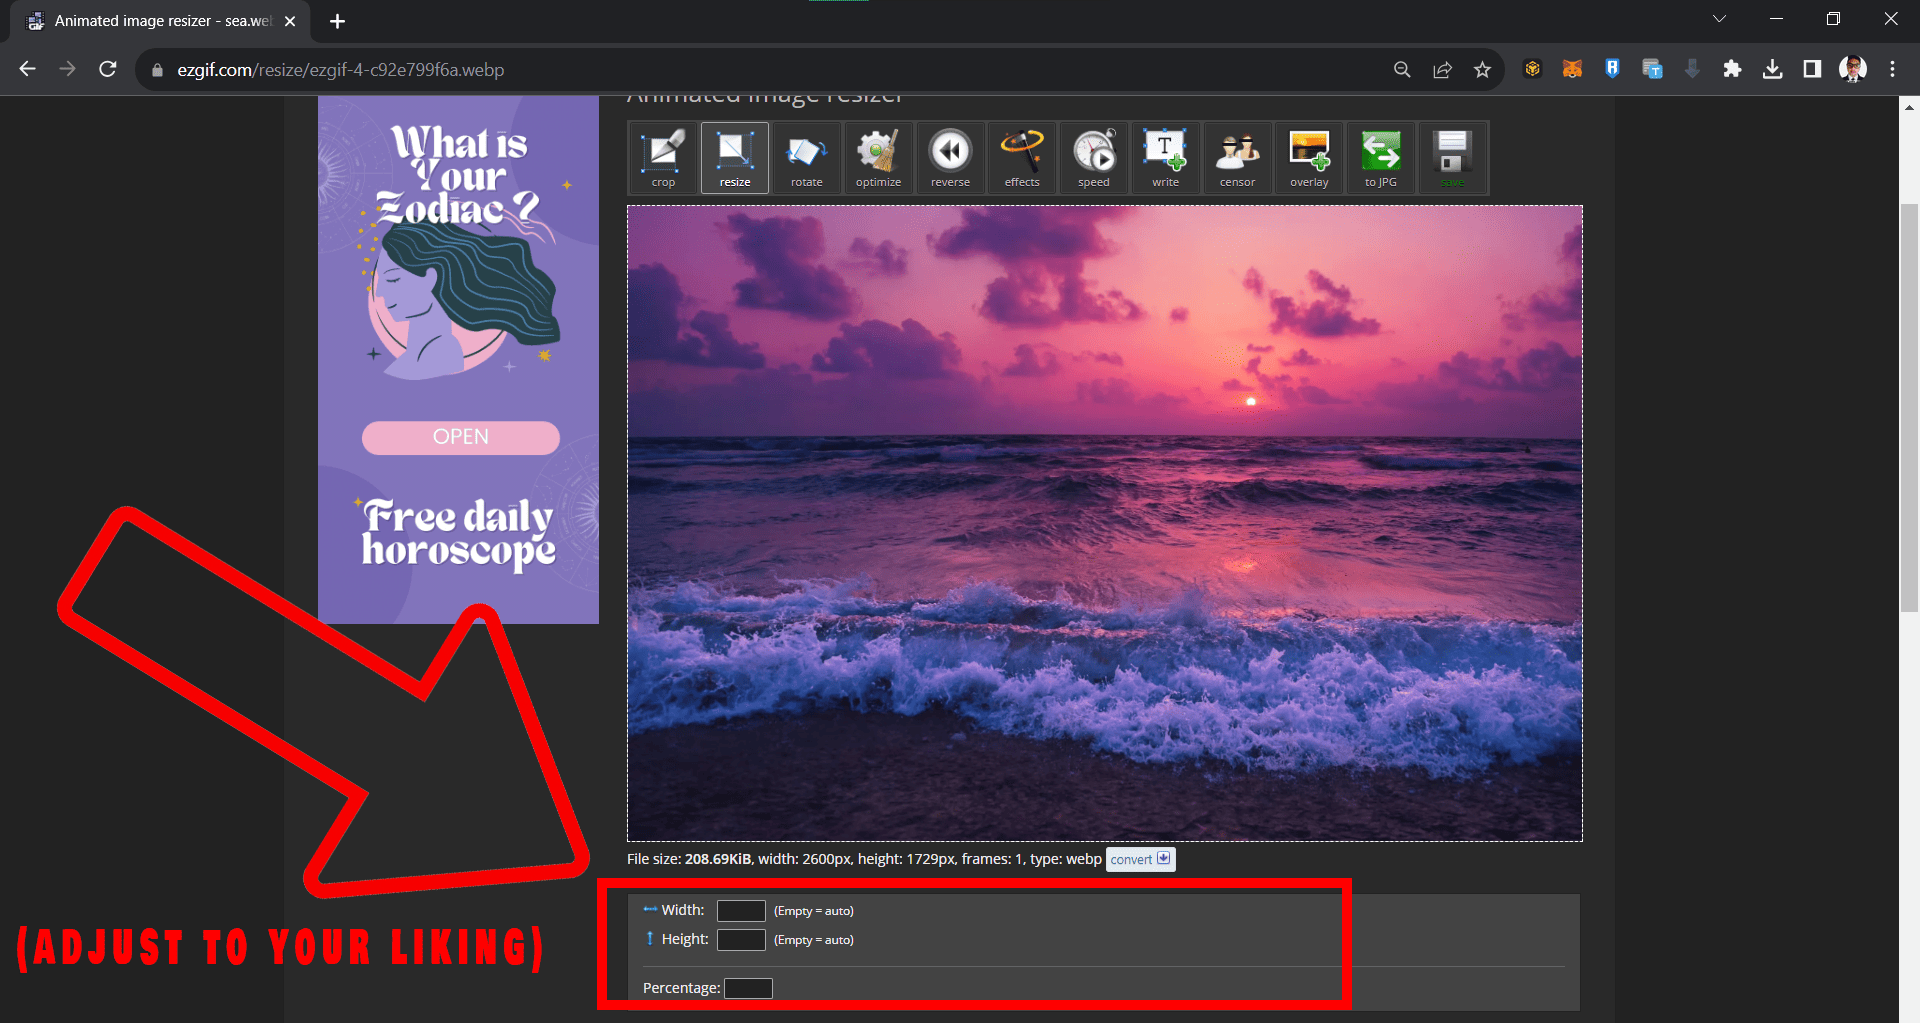
Choose the Tool: If you’re not already on the Resize page, click on the Resize option on the top menu.
-
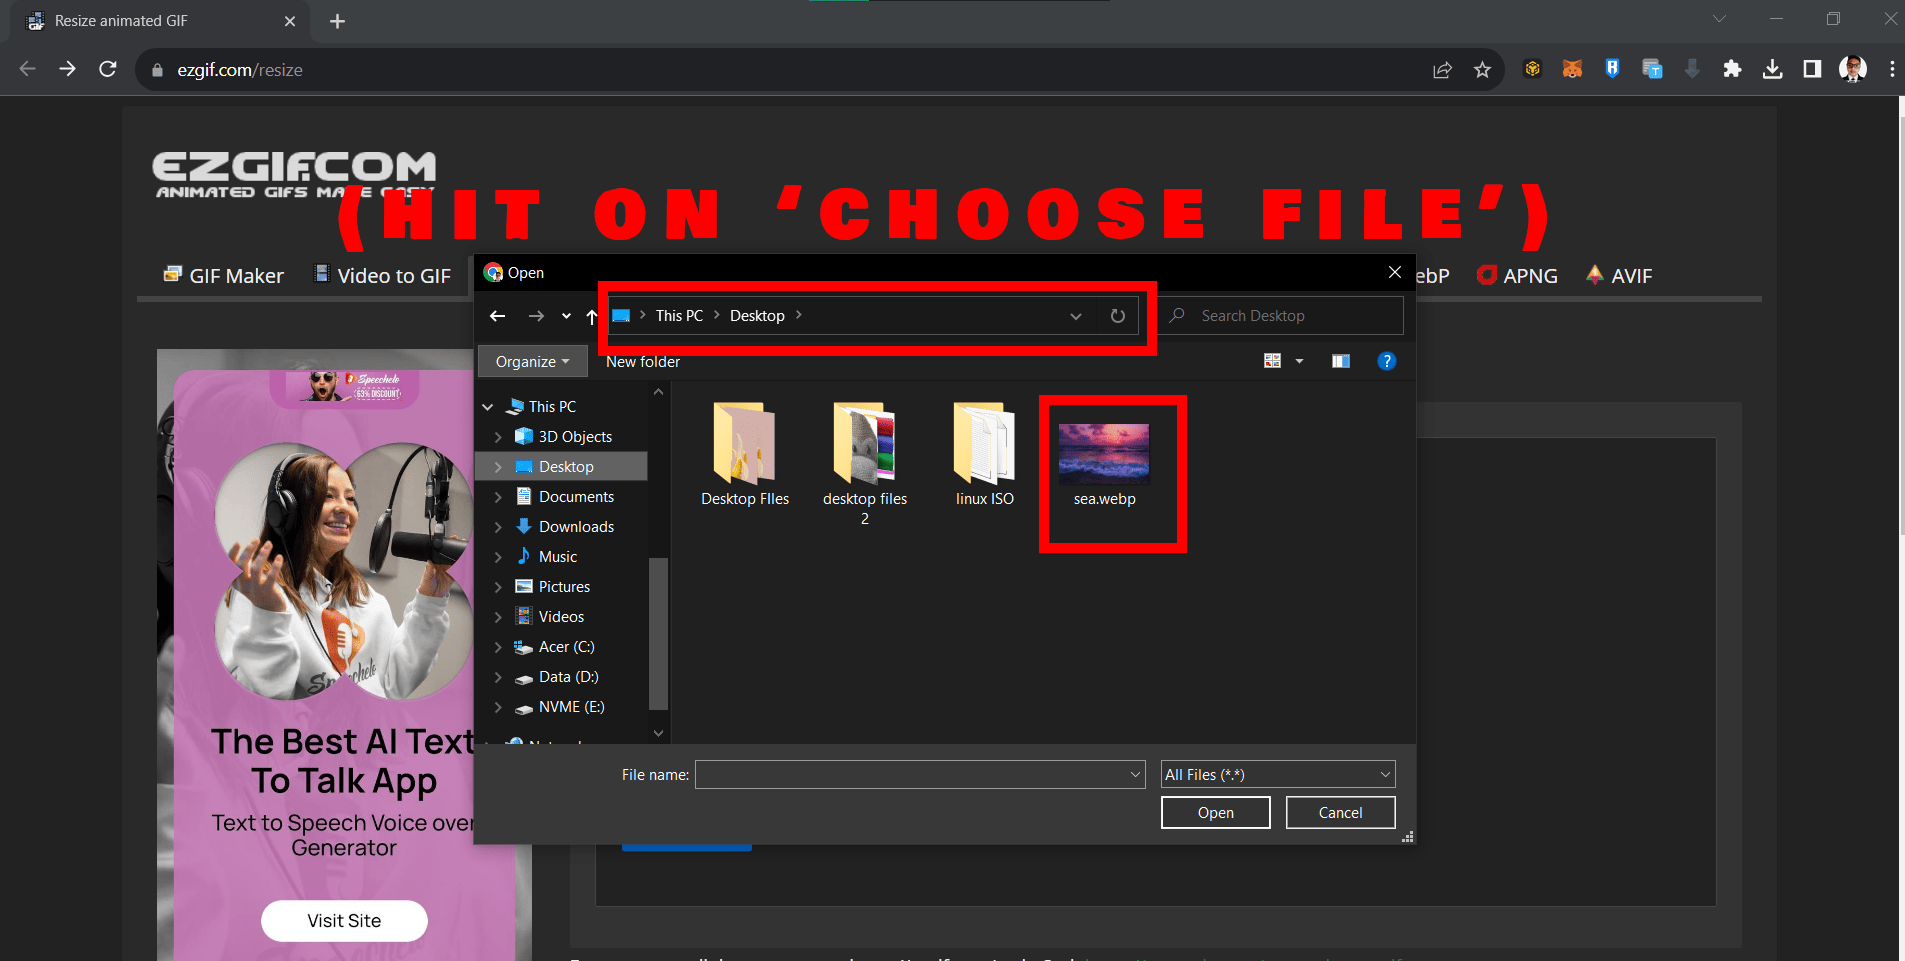
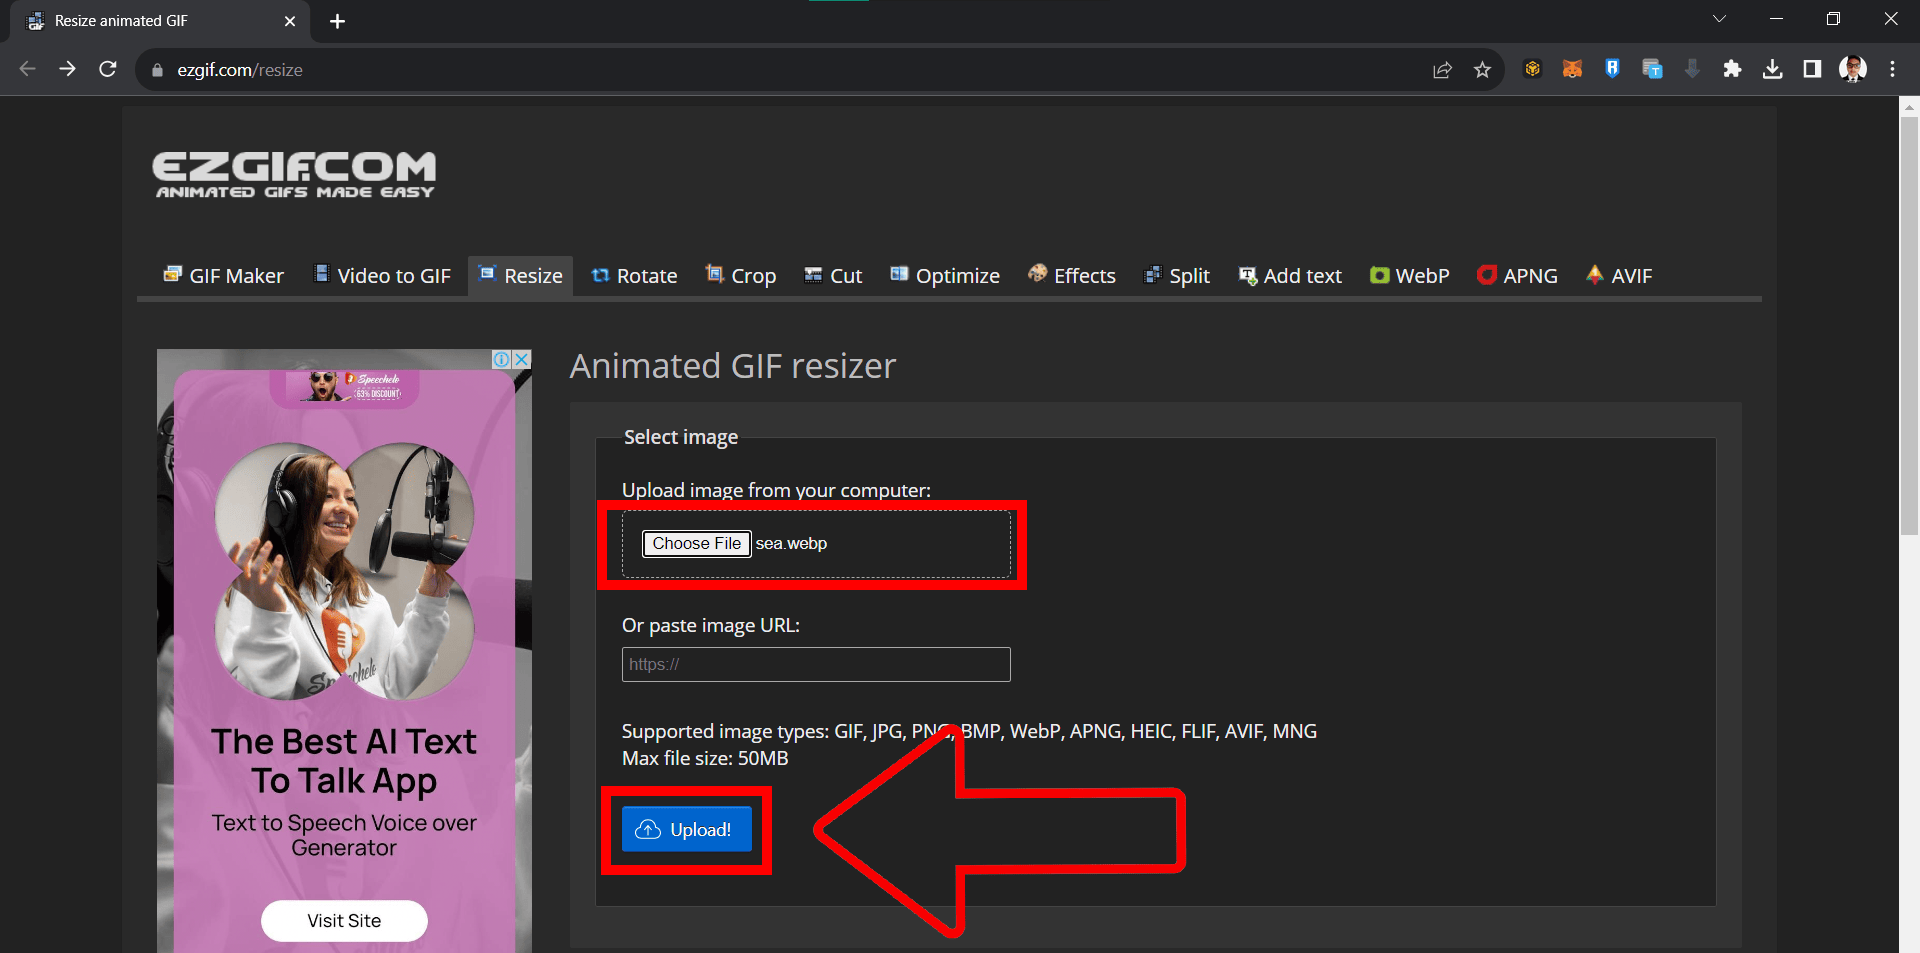
Upload Your File: Click Choose File and select your WEBP file that’s as big as an elephant. Then, hit Upload!
-
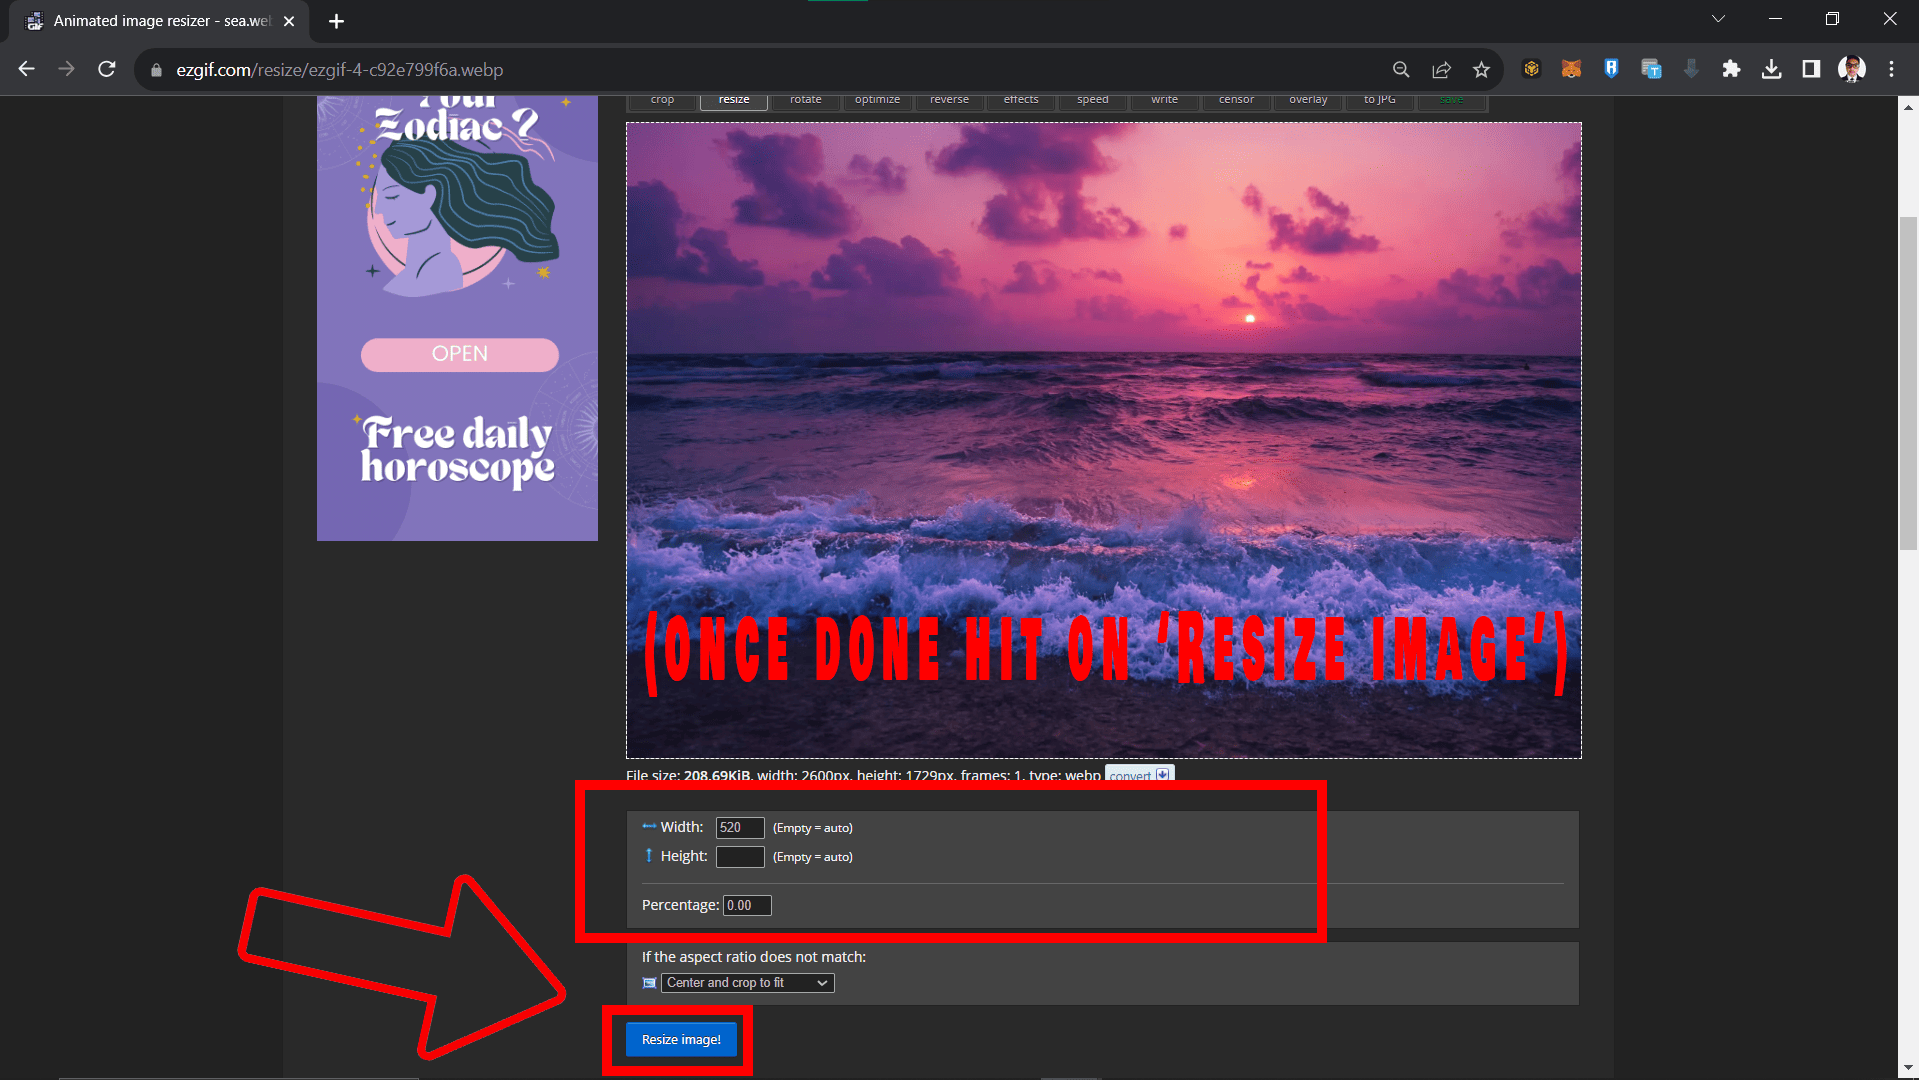
Optimize Your File: You’ll be given a few options to compress the file such as width, height, and percentage, adjust these according to your need. Just remember, the lower the quality, the smaller the file will be.
-
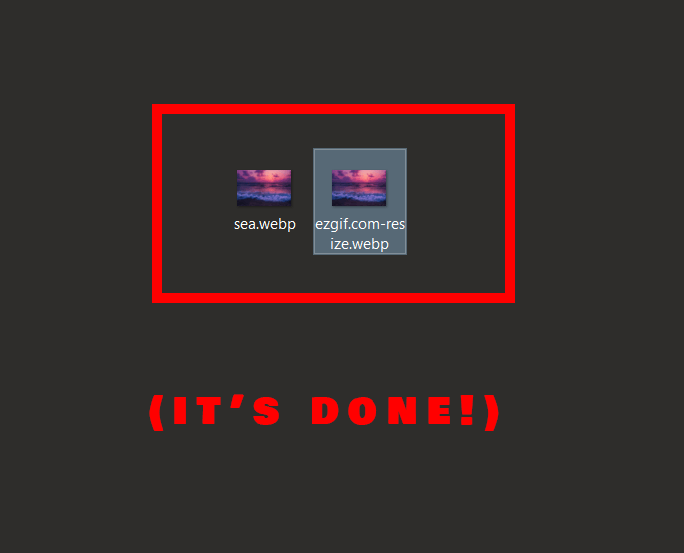
Download Your File: After the tool has done its magic, click save to download your freshly compressed WEBP file. Now, isn’t that as sweet as a ripe banana?

Now, you can compress your WEBP files no matter where you are in the jungle! This method works for both Mac and Windows operating systems.
How To Compress WEBP Files Using Adobe Photoshop
If you have Adobe Photoshop installed, it can be your helpful chimp for compressing WEBP files:
-
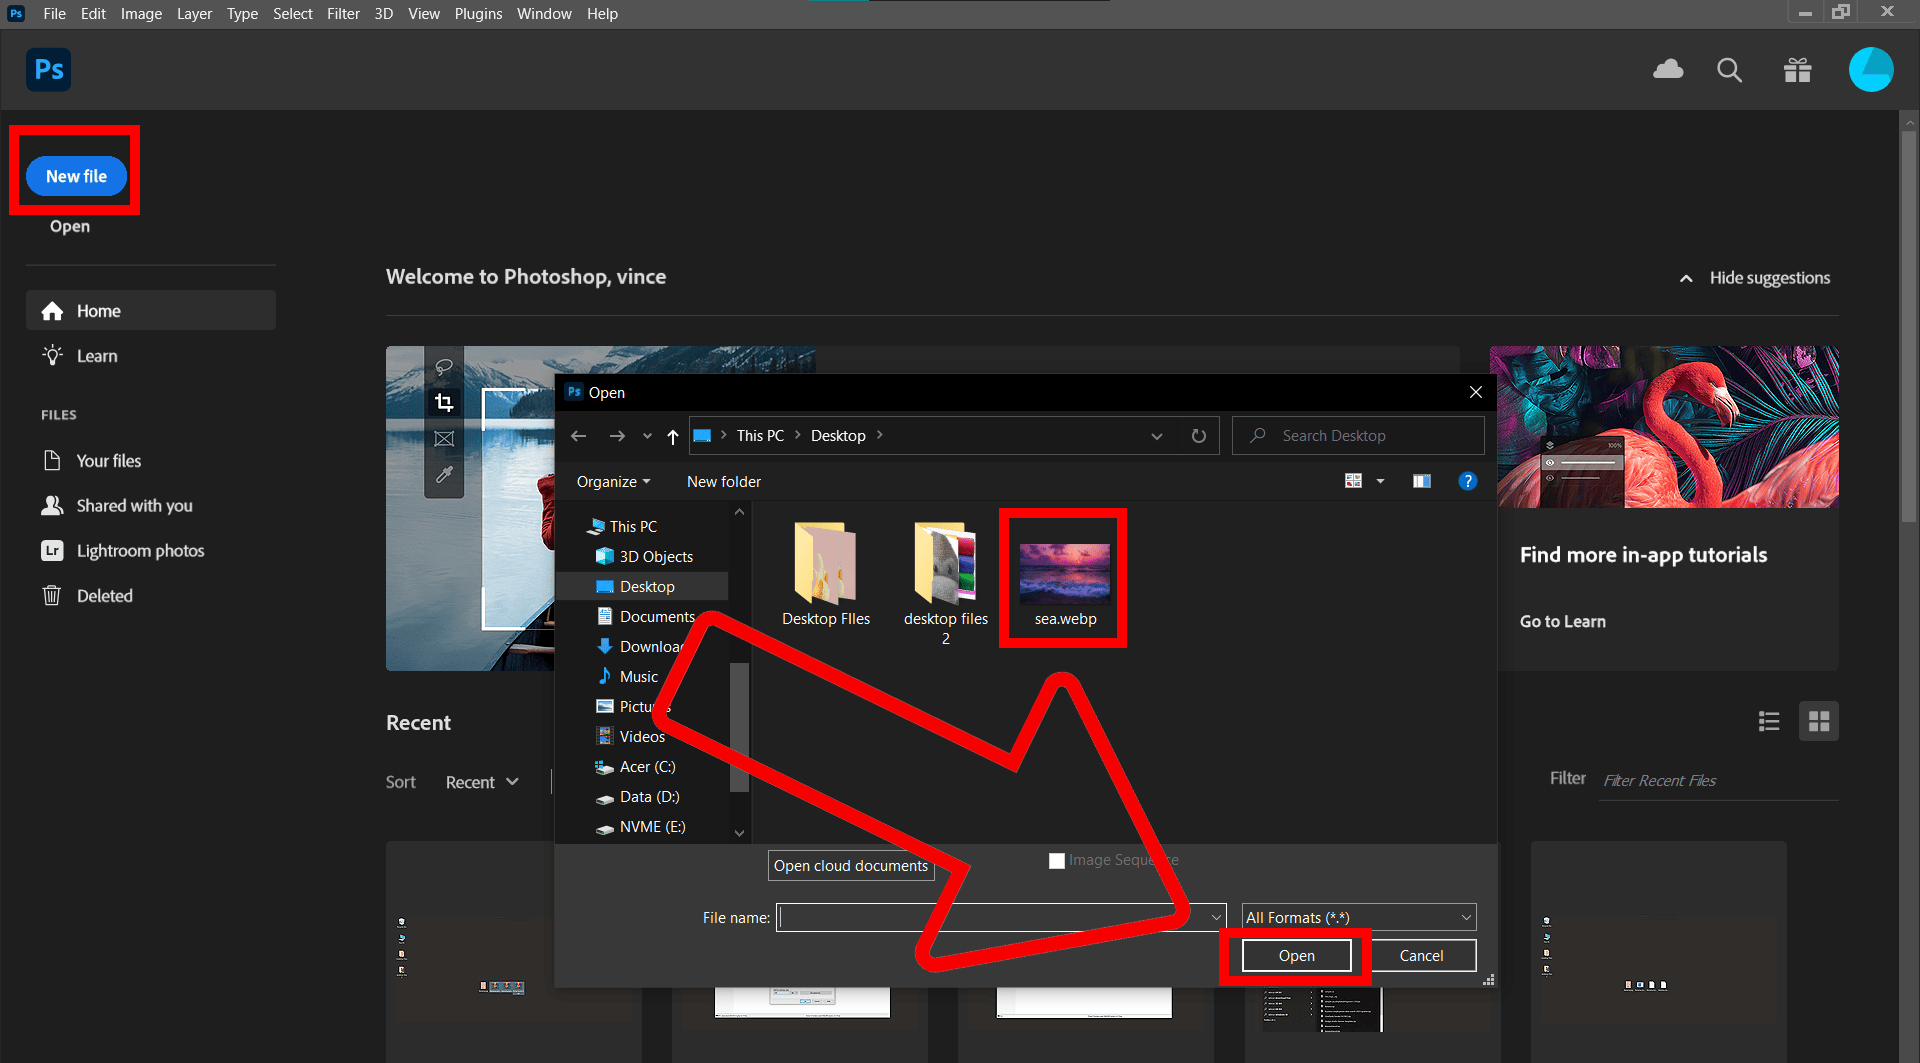
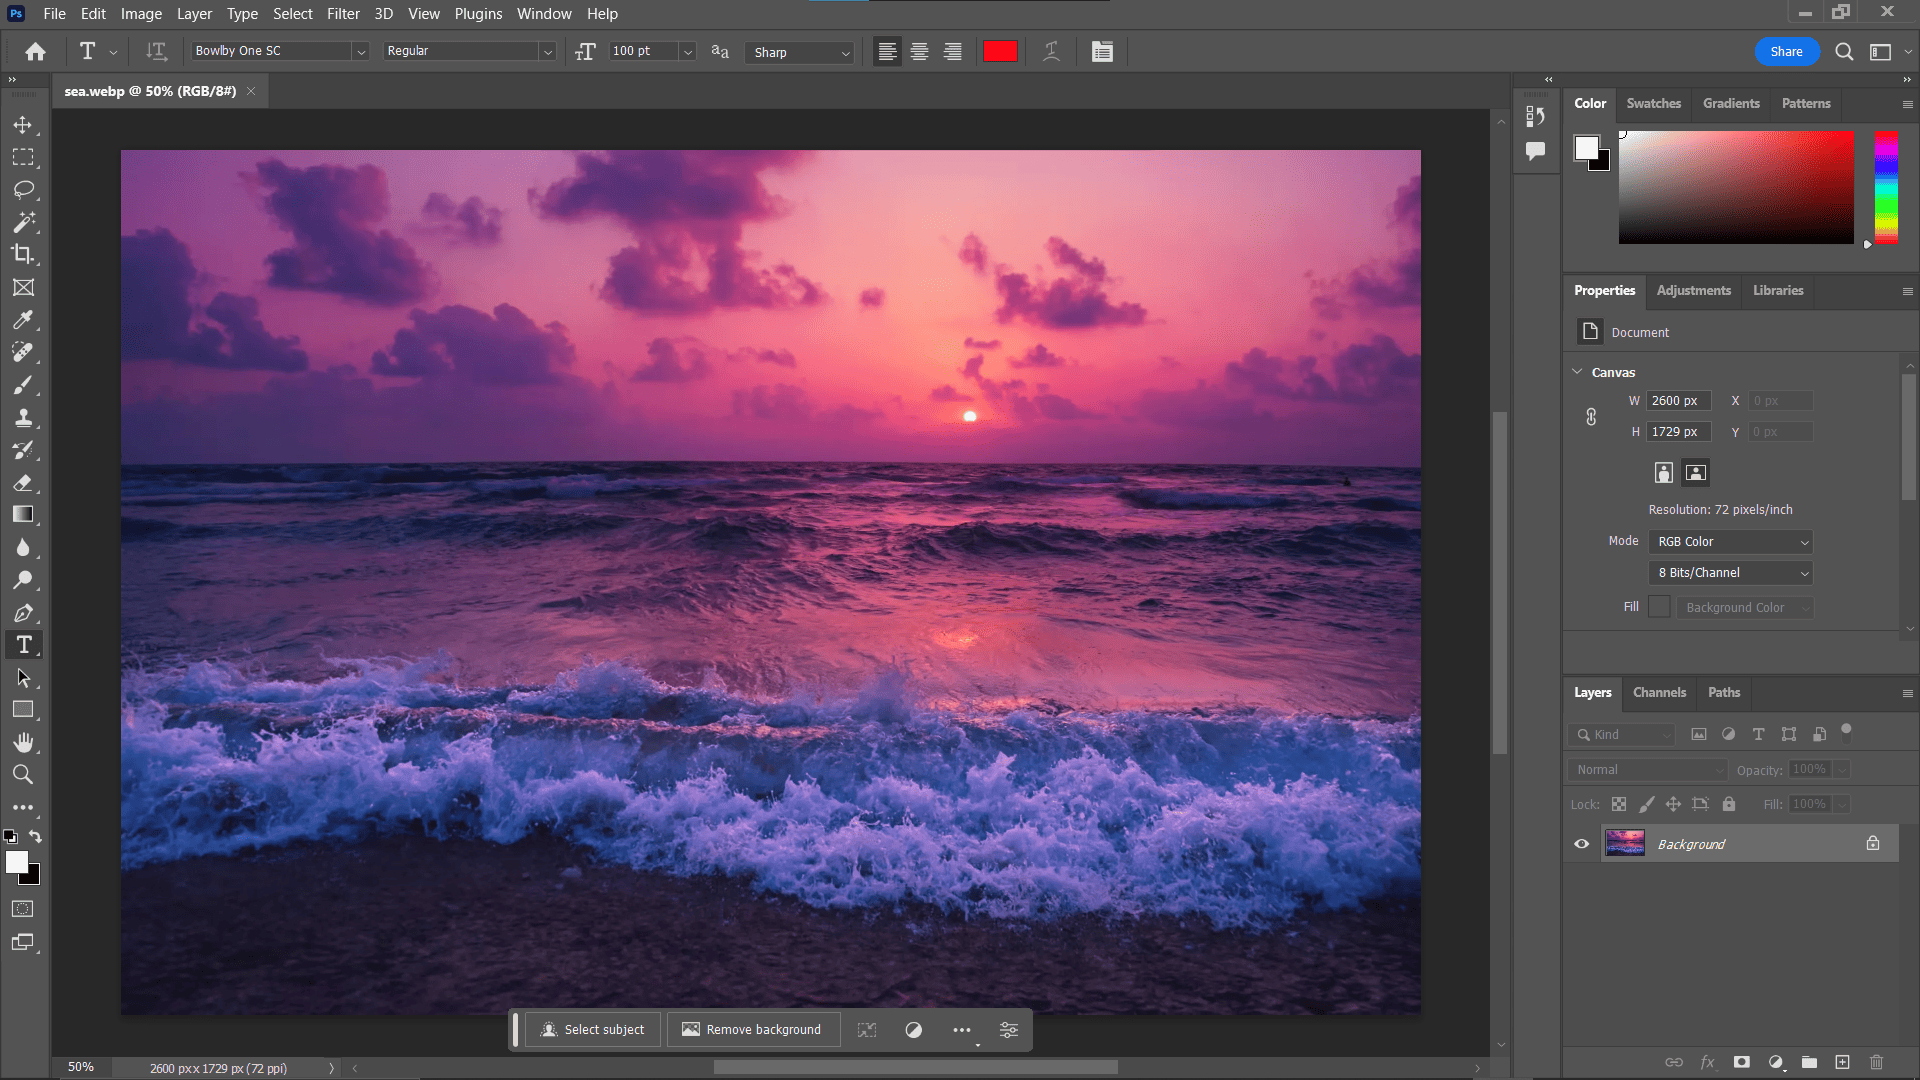
Open Photoshop: Launch Adobe Photoshop on your system. If it’s your first time, don’t worry, it won’t bite!
-
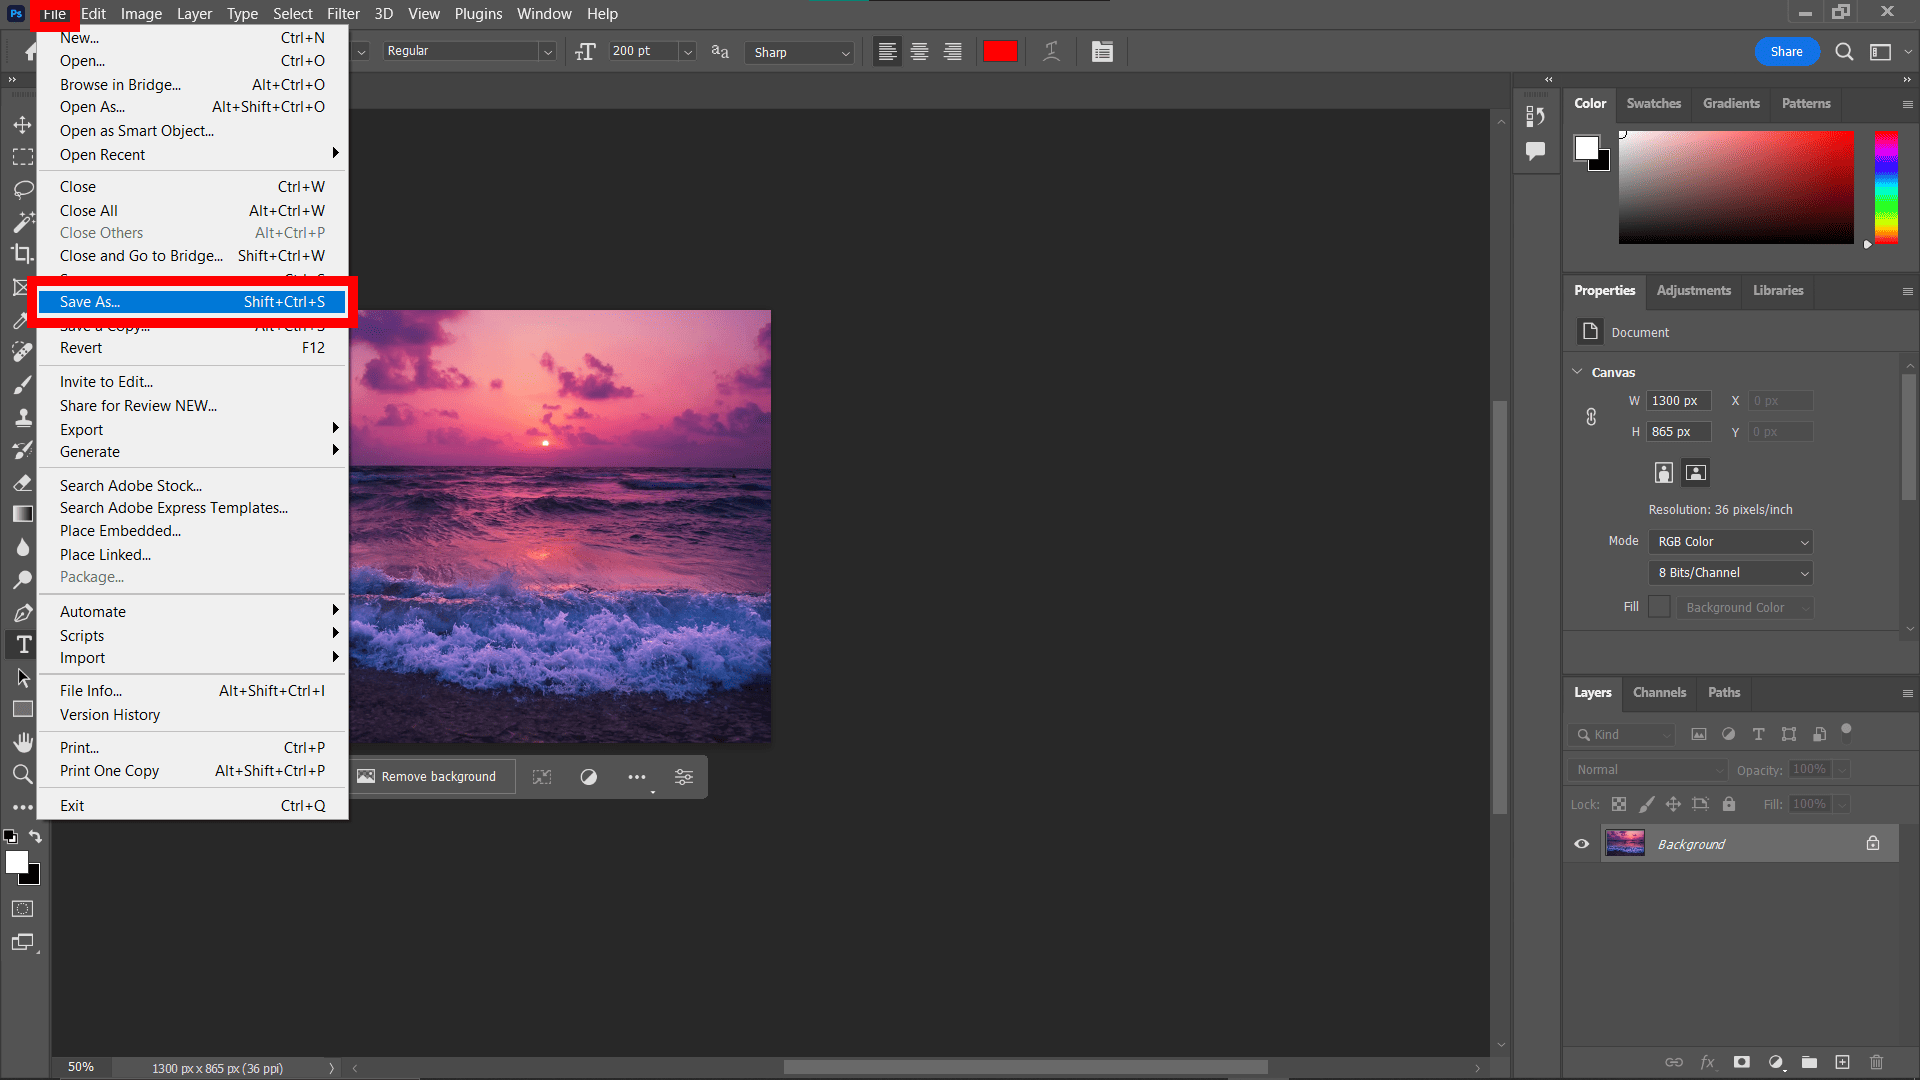
Open Your File: Click New File, select your WEBP file, then click Open.
-
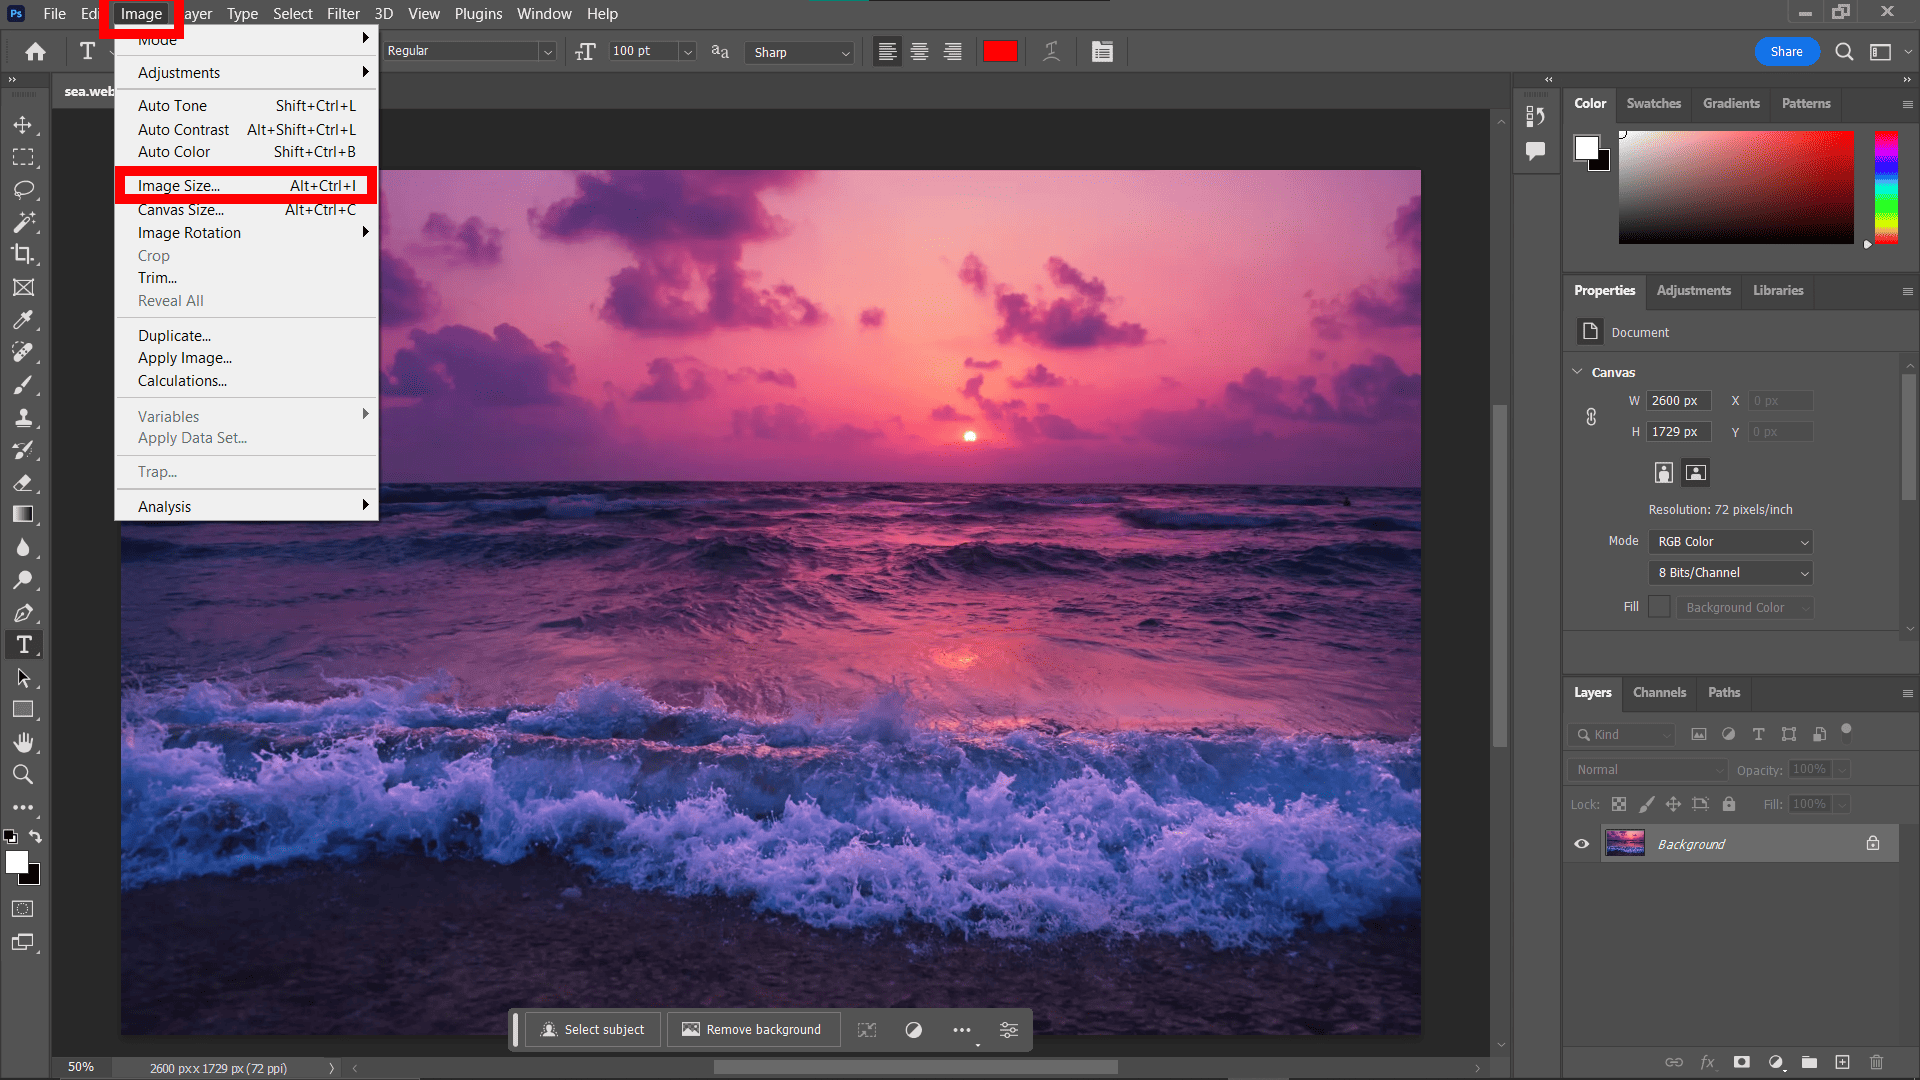
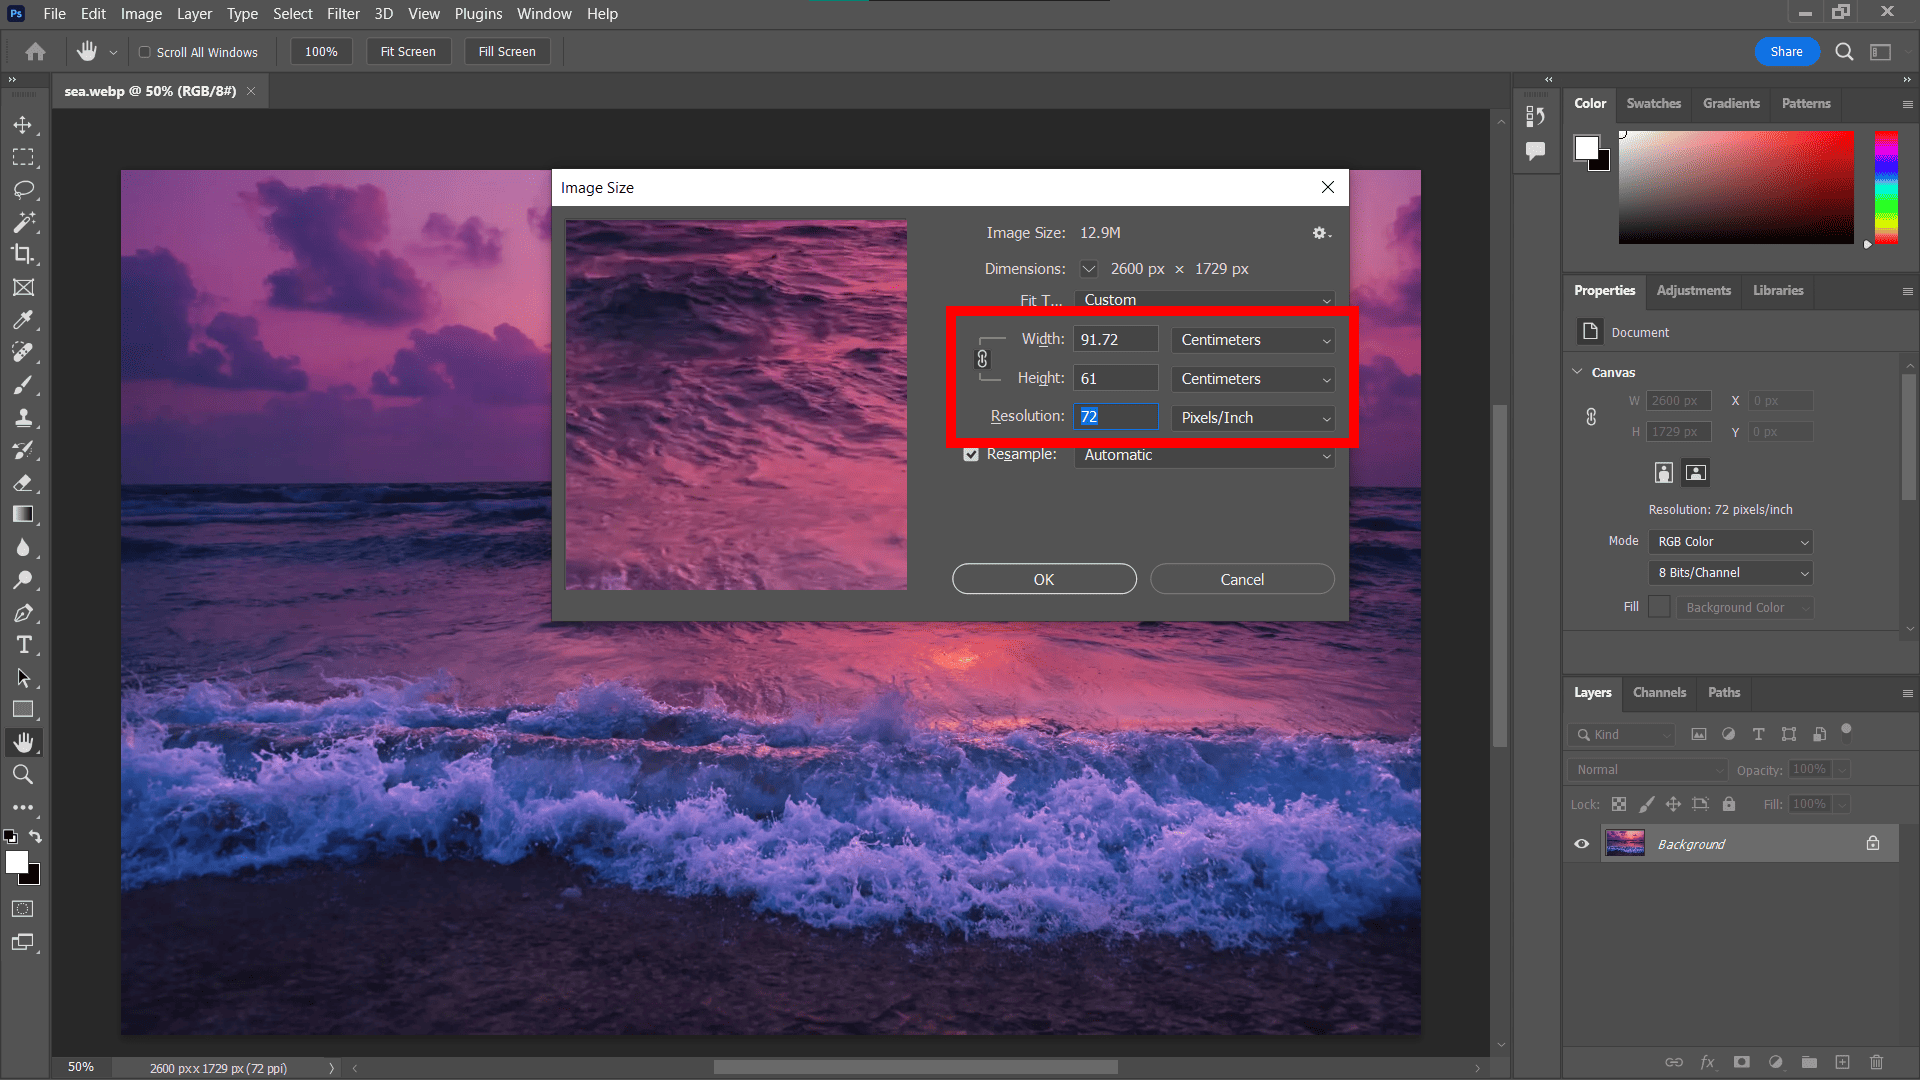
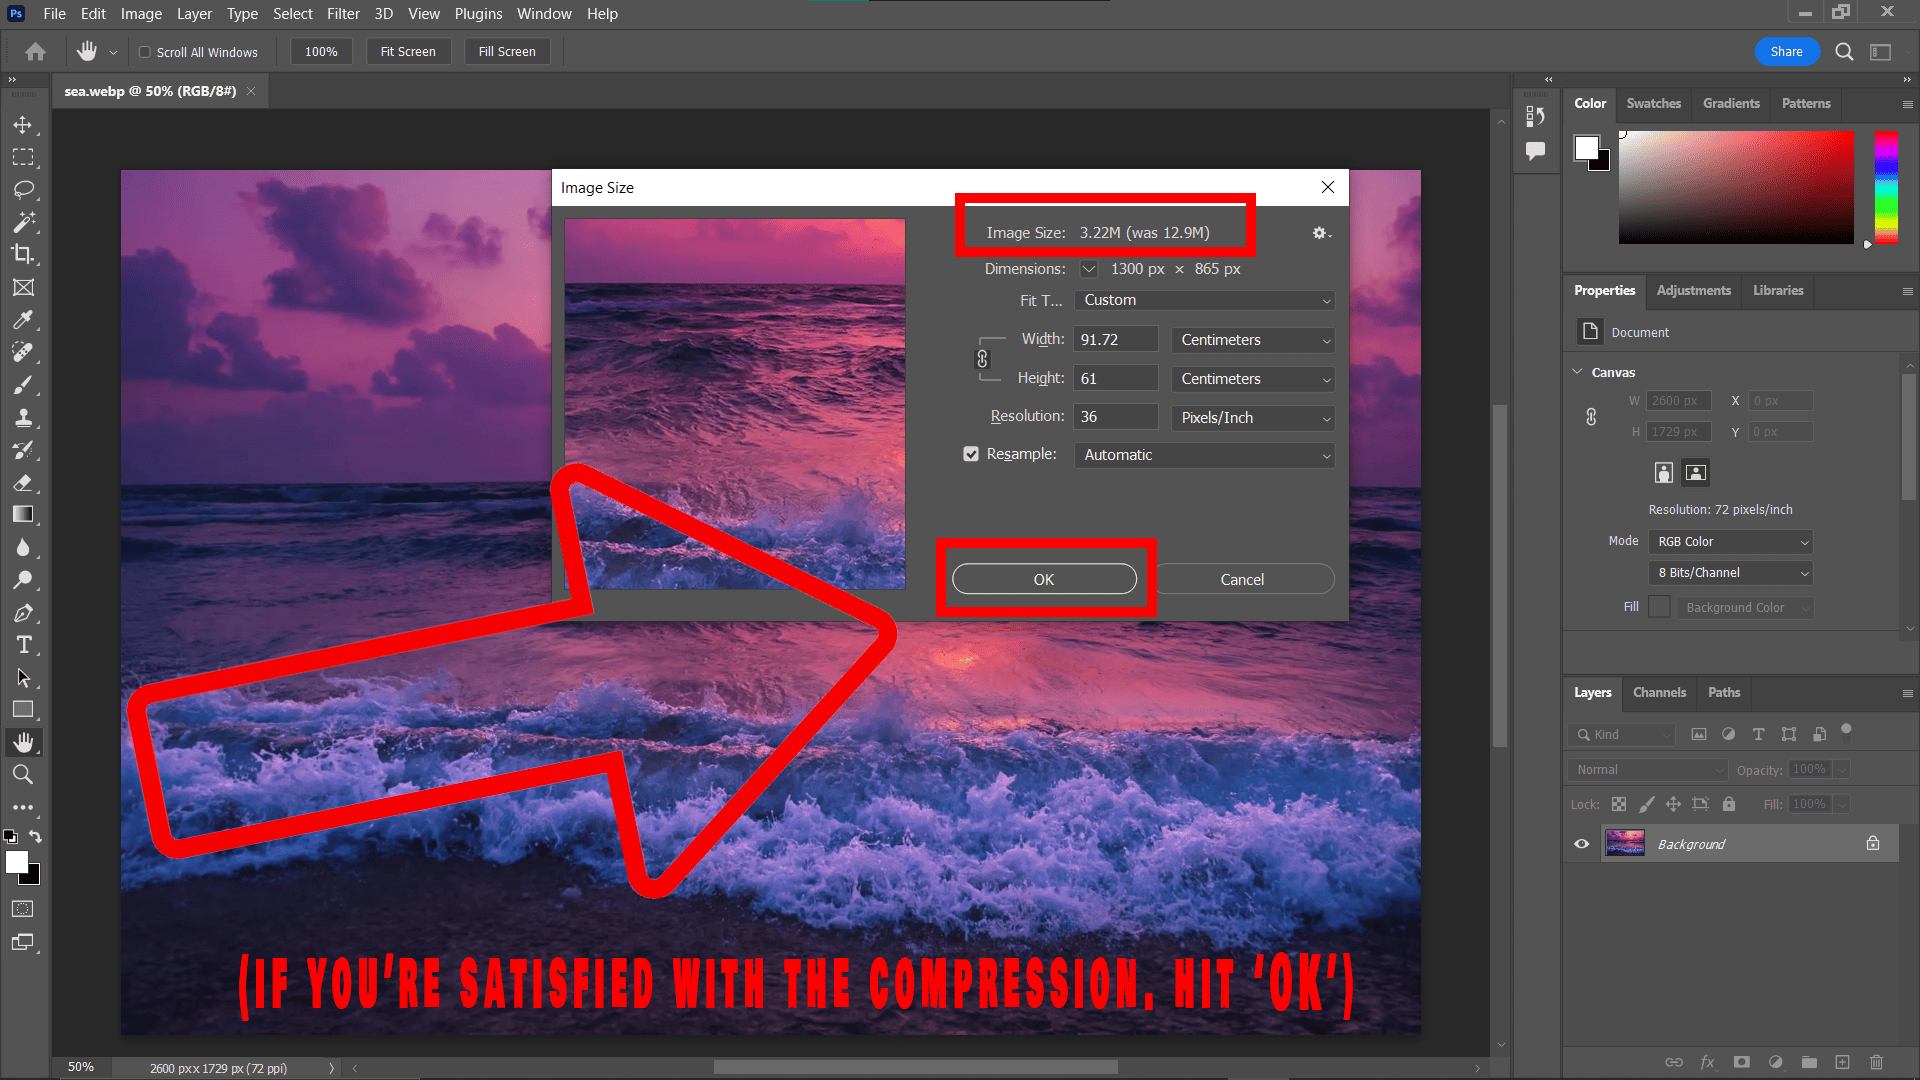
Adjust Image Size: Click Image and select Image Size Reduce the image size or resolution to help shrink the file.
-
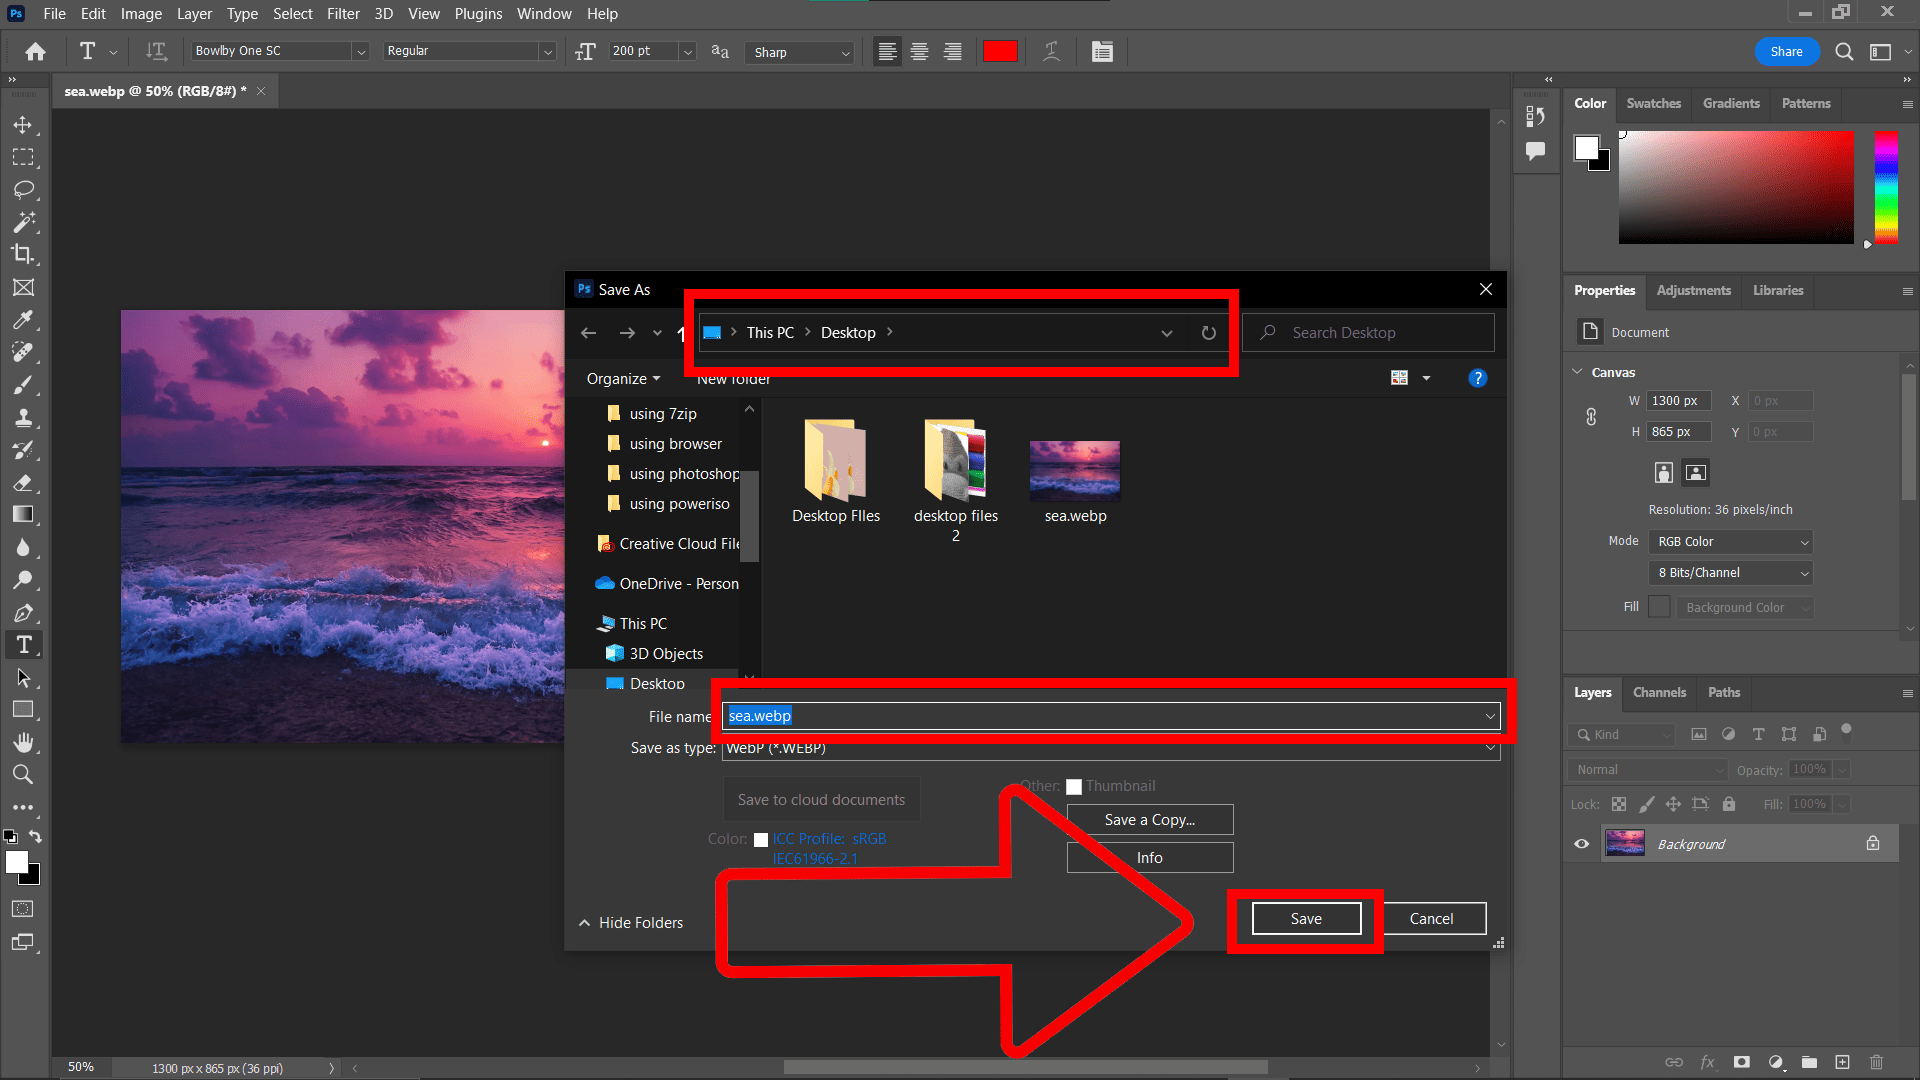
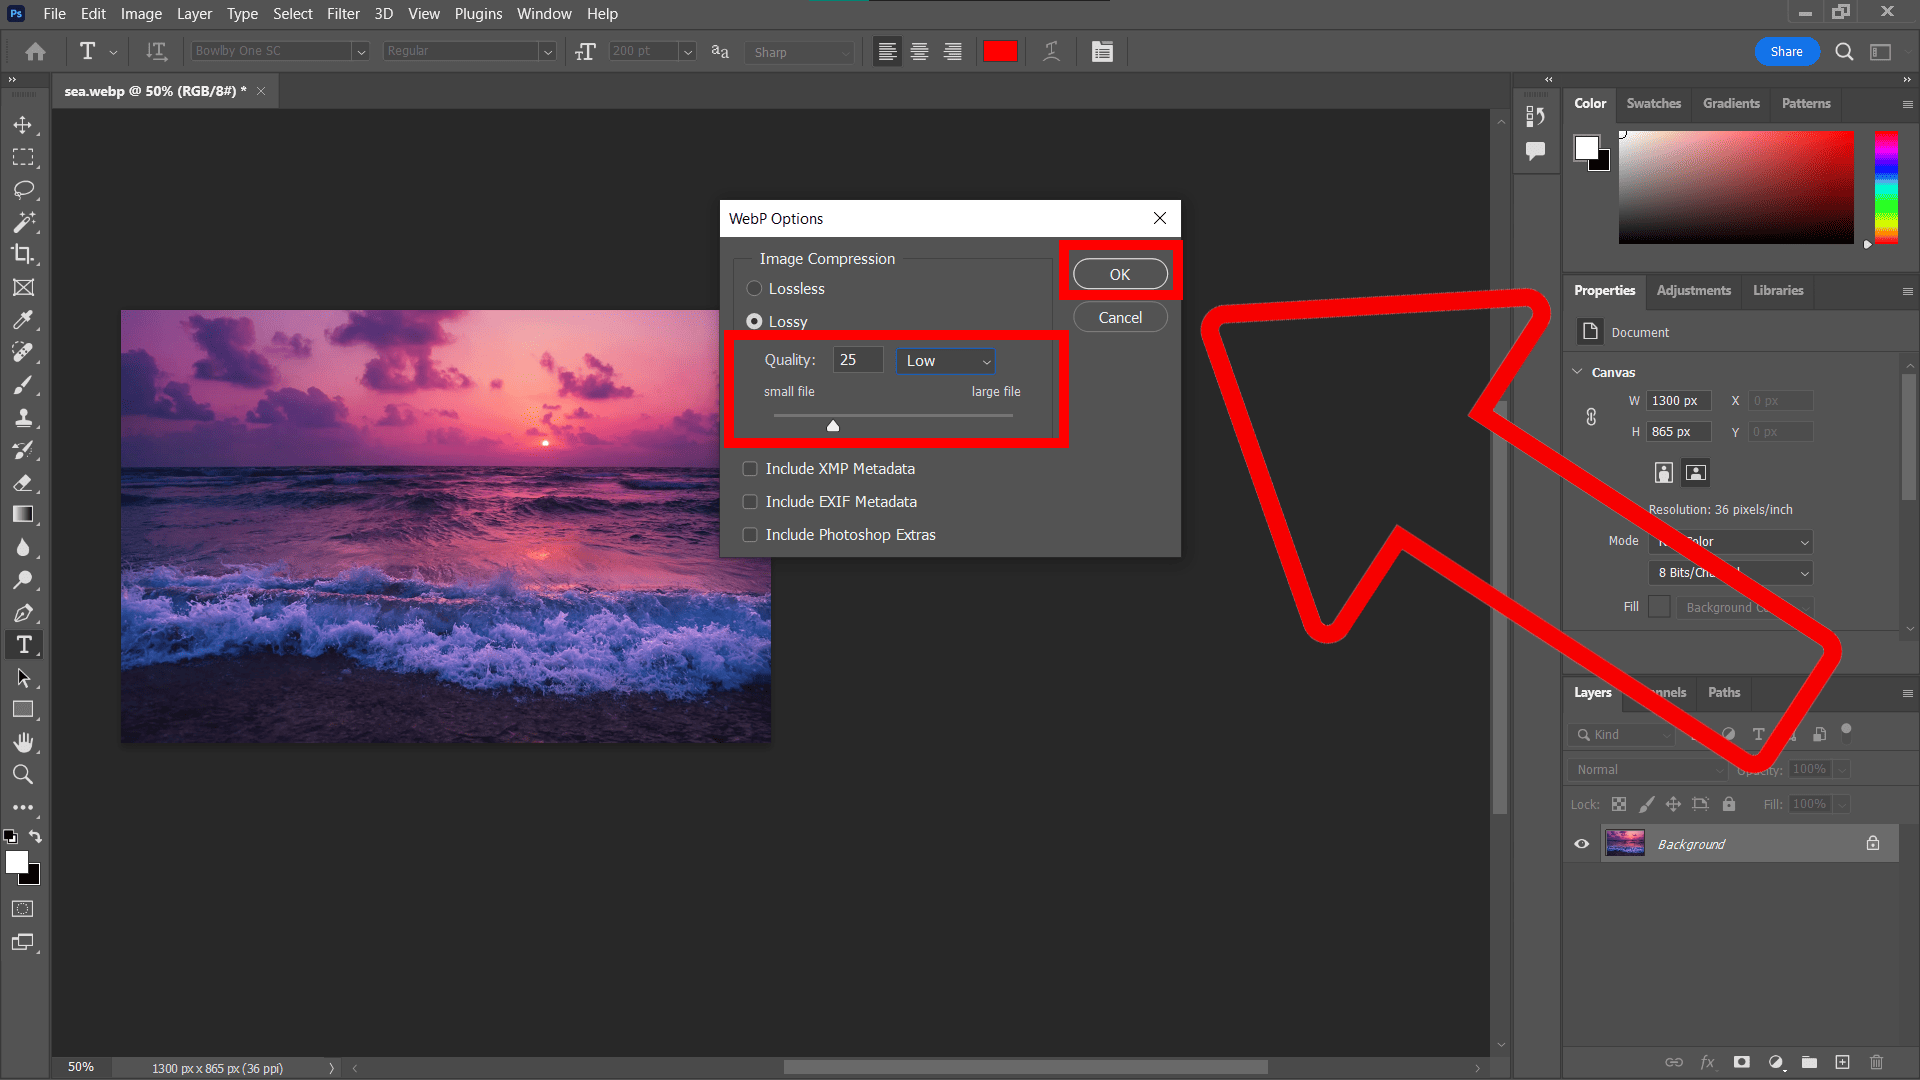
Save Your File: Click File and select Save As Choose WEBP format, and slide the quality bar to adjust the file size. The lower the quality, the smaller the file.
You see, there’s no need to go ape over large WEBP files anymore! With these simple steps, you’ll have your files as small and nimble as a baby monkey in no time.