
Are you going bananas over bloated WAV files? Feel like you’re hauling a gorilla-sized load of data every time you handle a WAV file? Well, it’s time to put down those hefty sound files and lighten your load! This guide will show you how to reduce WAV file size faster than a monkey can peel a banana!
Table of contents
- Method 1: Convert WAV To Smaller MP3 Format
- Method 2: Reduce WAV File Size Using Audacity
- Method 3: Reduce WAV File Size Using FreeConvert
- Method 4: Reduce WAV File Size Using VLC
- FAQ
Video guide showing how to convert large WAV files into smaller compressed MP3 format online.
How To Convert WAV To MP3 Online
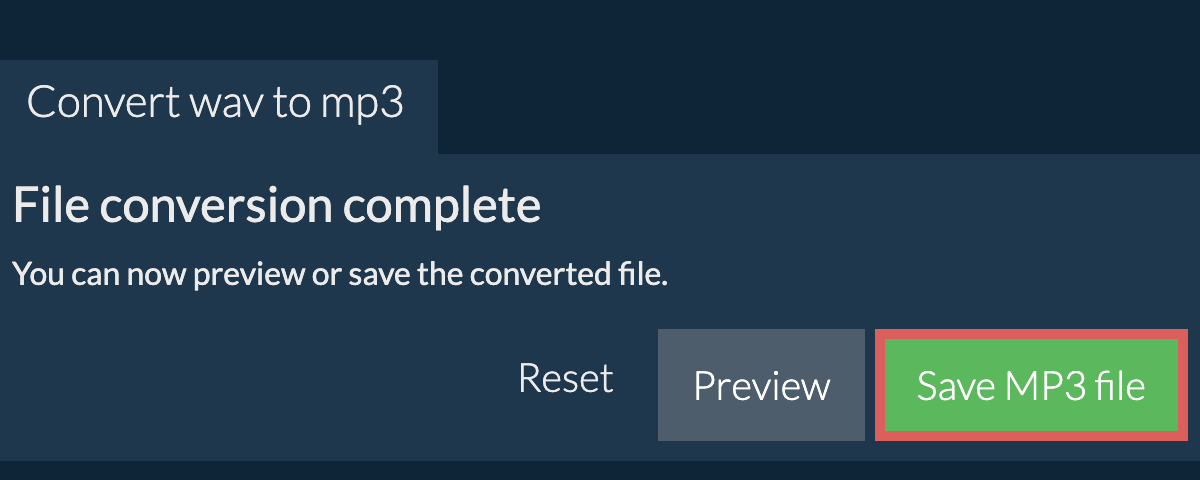
Converting your WAV files to MP3 is like switching from heavy winter fur to a light summer coat – it just makes sense! ezyZip is your go-to tool for this, making the process smoother than a banana milkshake. Here’s how you can use ezyZip to convert those chunky WAV files into sleek MP3s without breaking a sweat.
- Navigate to the WAV to MP3 converter page. It’s so simple, even a monkey with a typewriter could do it!
- Click “Select wav file to convert” to open the file chooser – as easy as spotting a banana in a fruit bowl!
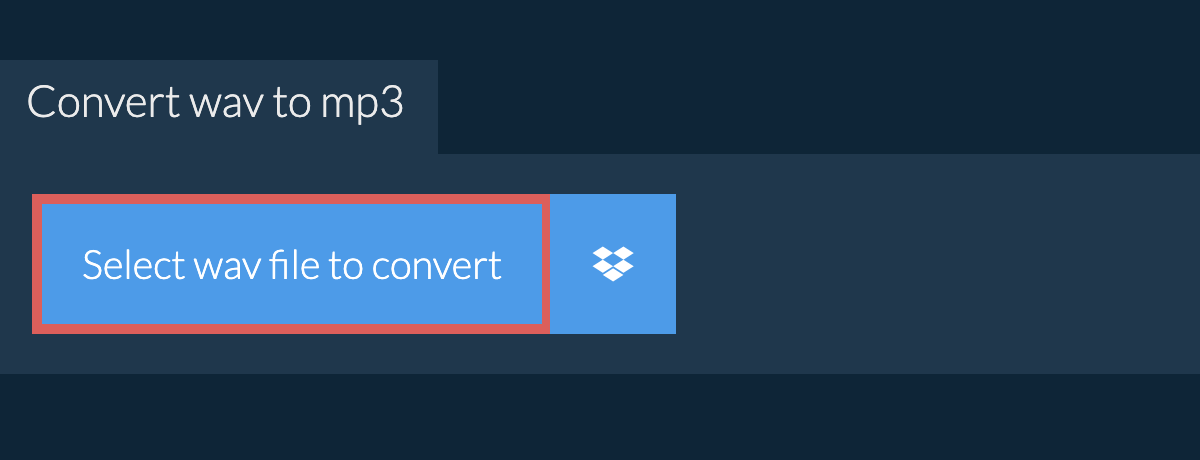
- Click “Convert to MP3”. It will start the conversion process which, unlike a monkey’s climb, might take a bit of time – patience is a virtue, even in the jungle!

- Click on “Save MP3 File” to save the converted MP3 file to your selected destination folder – it’s like stashing your bananas in the perfect tree spot!
Read on for more methods to reduce WAV file size without any monkey business! We’re just getting started, and remember, when it comes to compression software, it’s a jungle out there!
How To Reduce WAV File Size Using Audacity
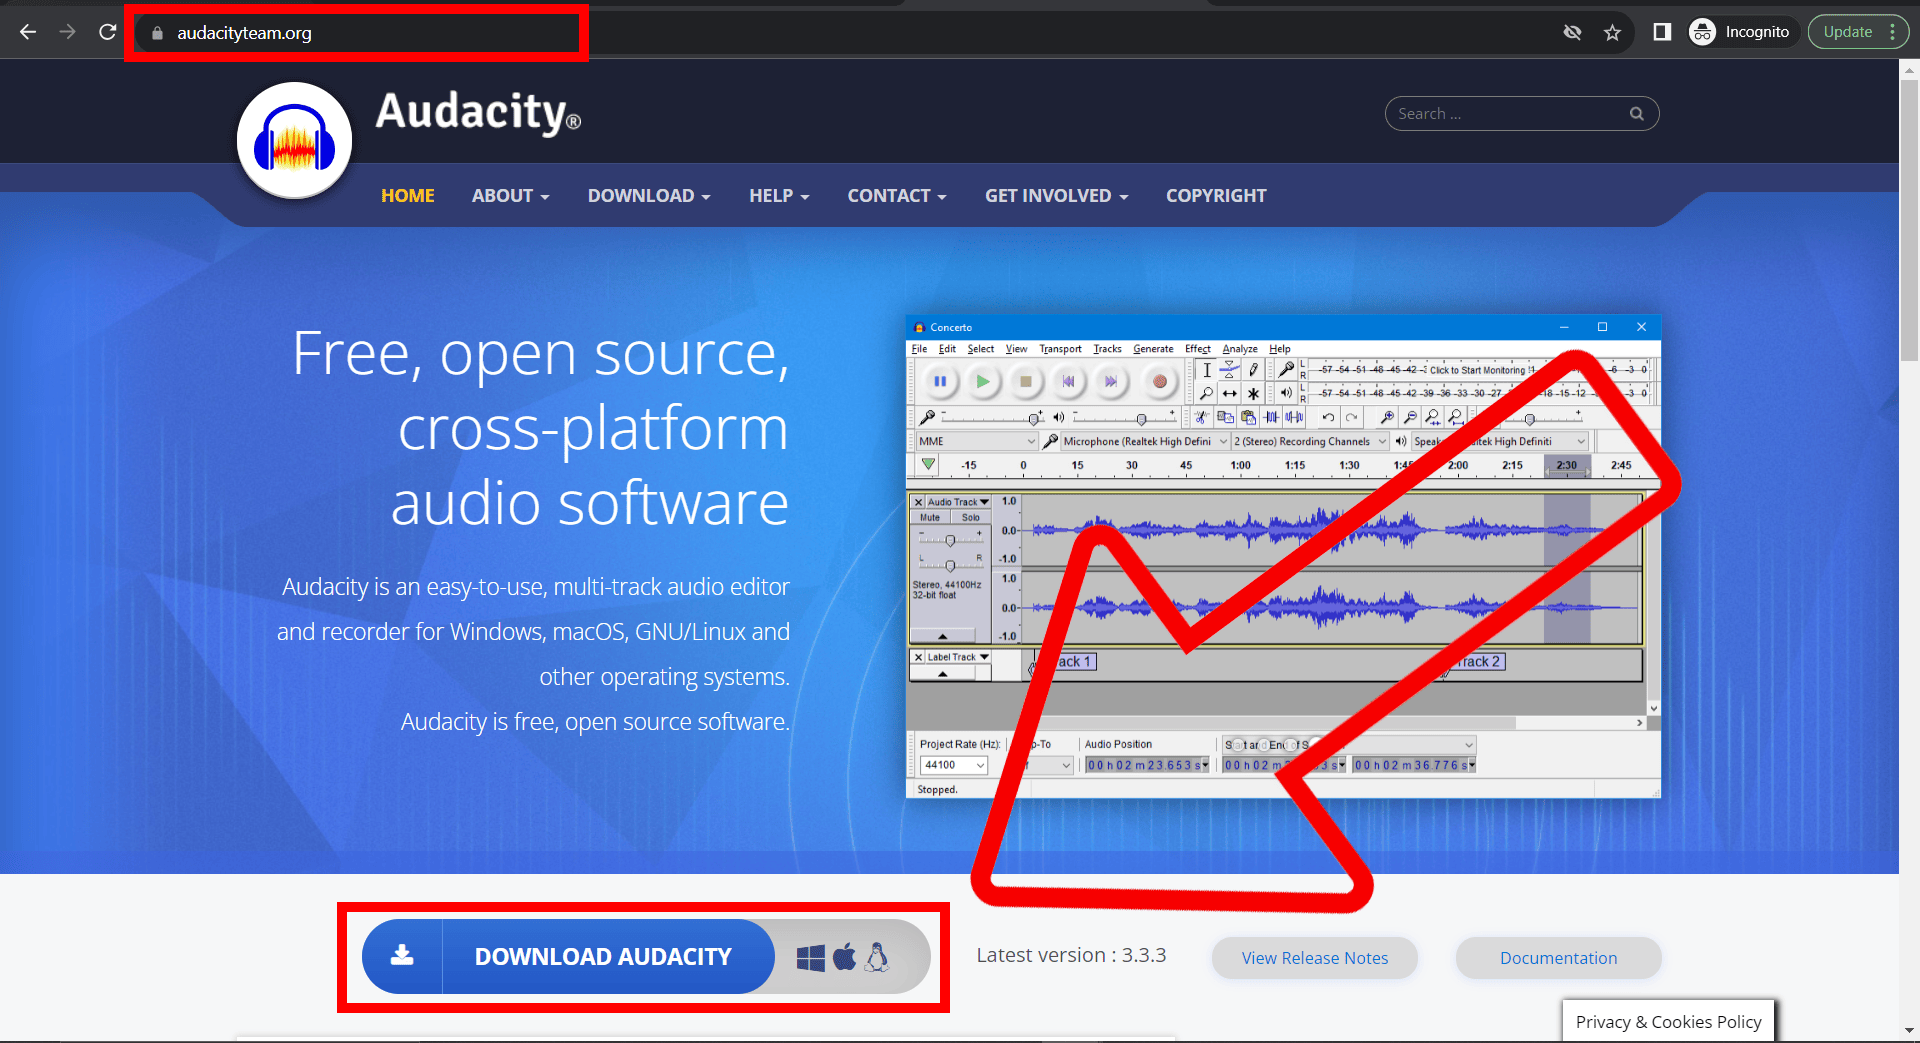
Audacity is a free and open-source audio editor that can help you squeeze your WAV files down to a more manageable size. It’s like having a friendly orangutan to help carry your audio files.
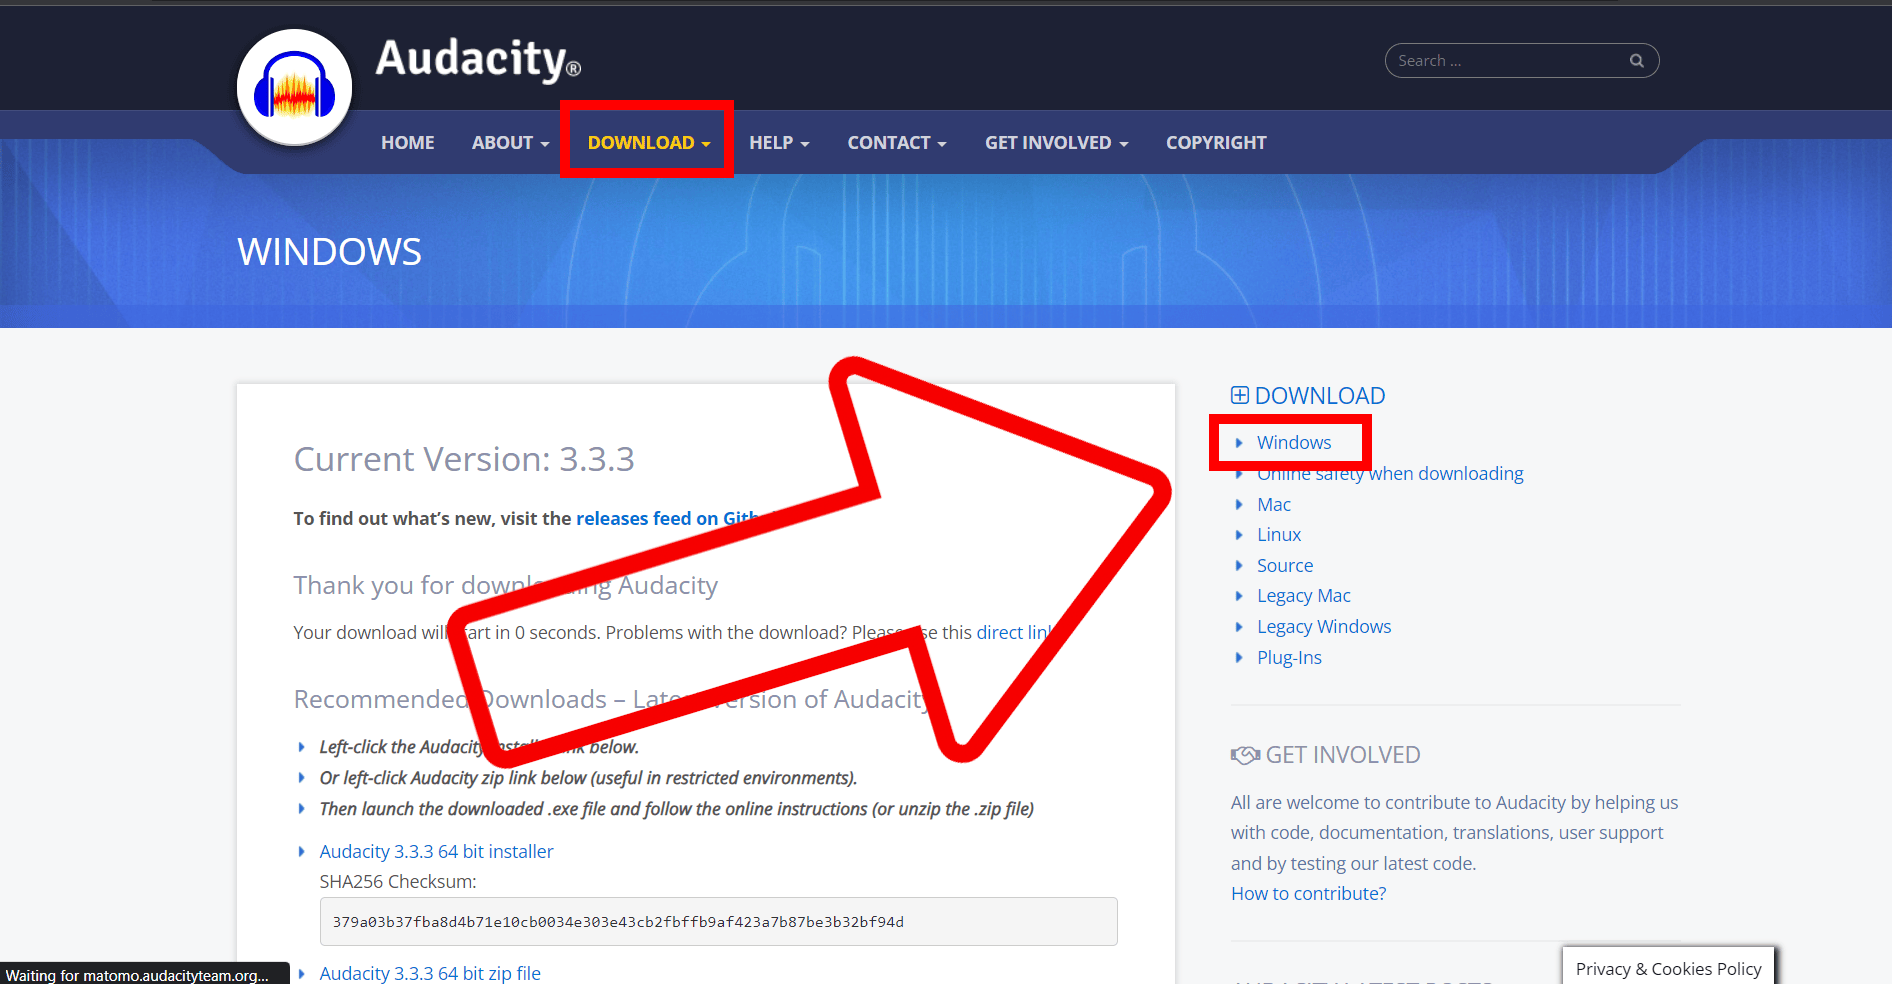
- Download Audacity and Install: If you haven’t got it already, download and install Audacity from their official website.
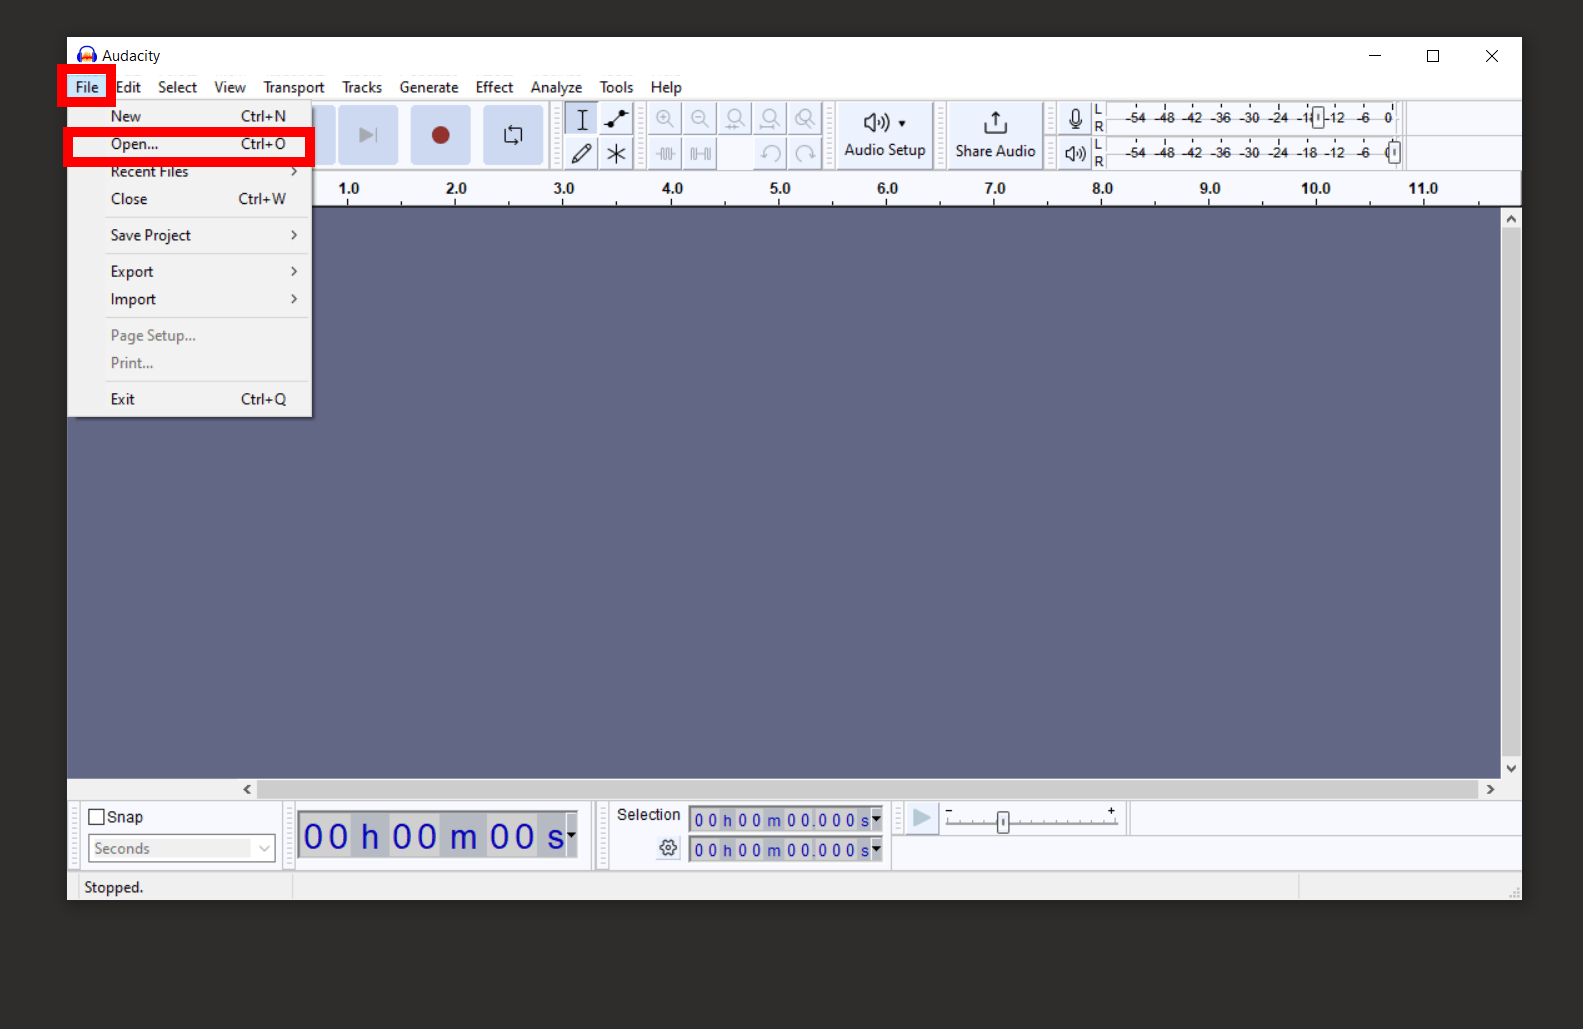
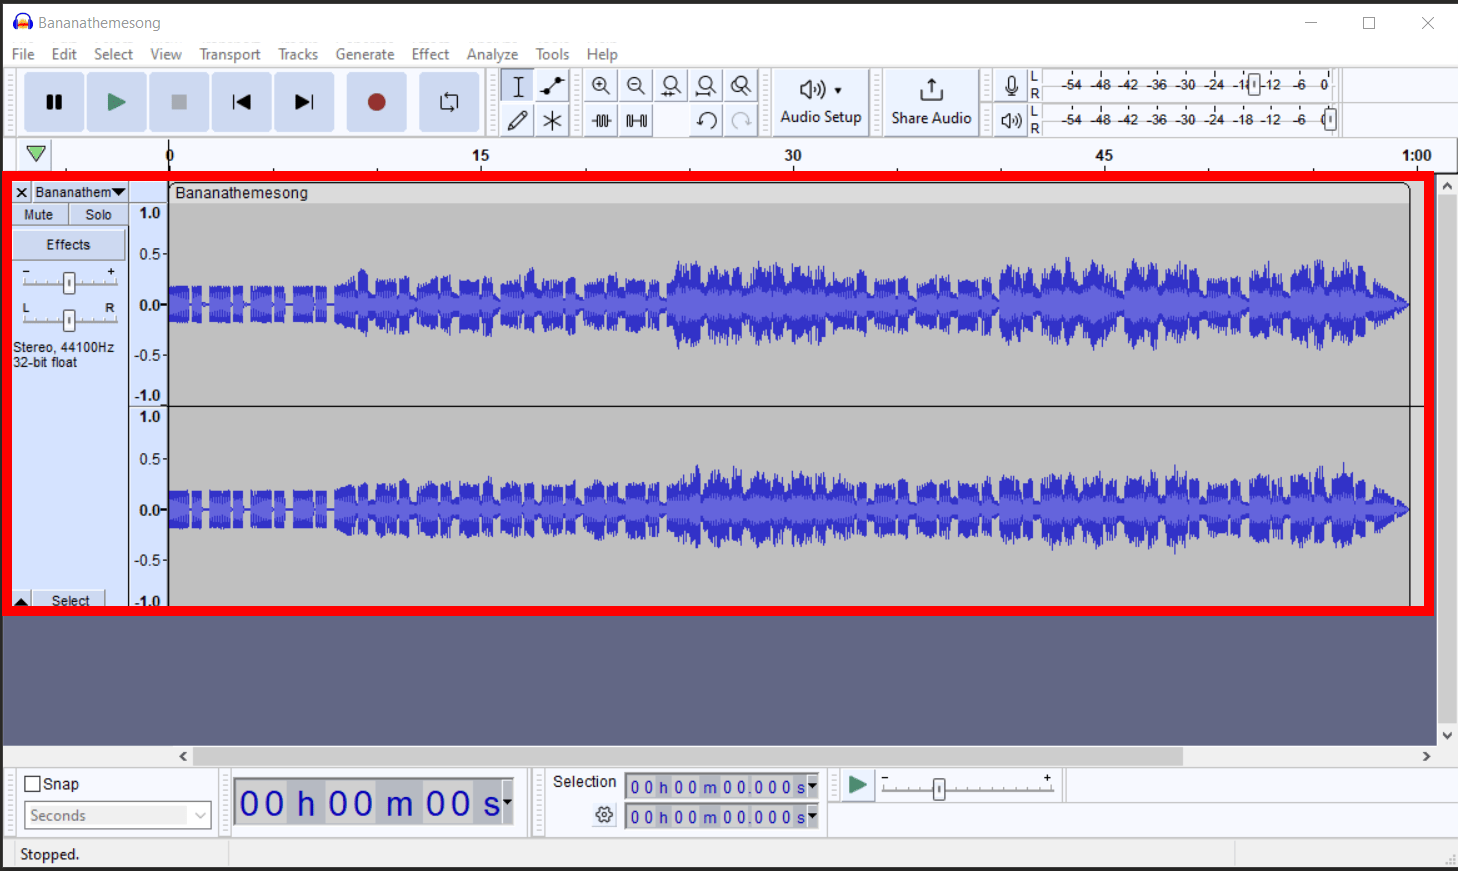
- Open Your WAV File: Launch Audacity, and go to ‘File’ > ‘Open’ to load your WAV file.

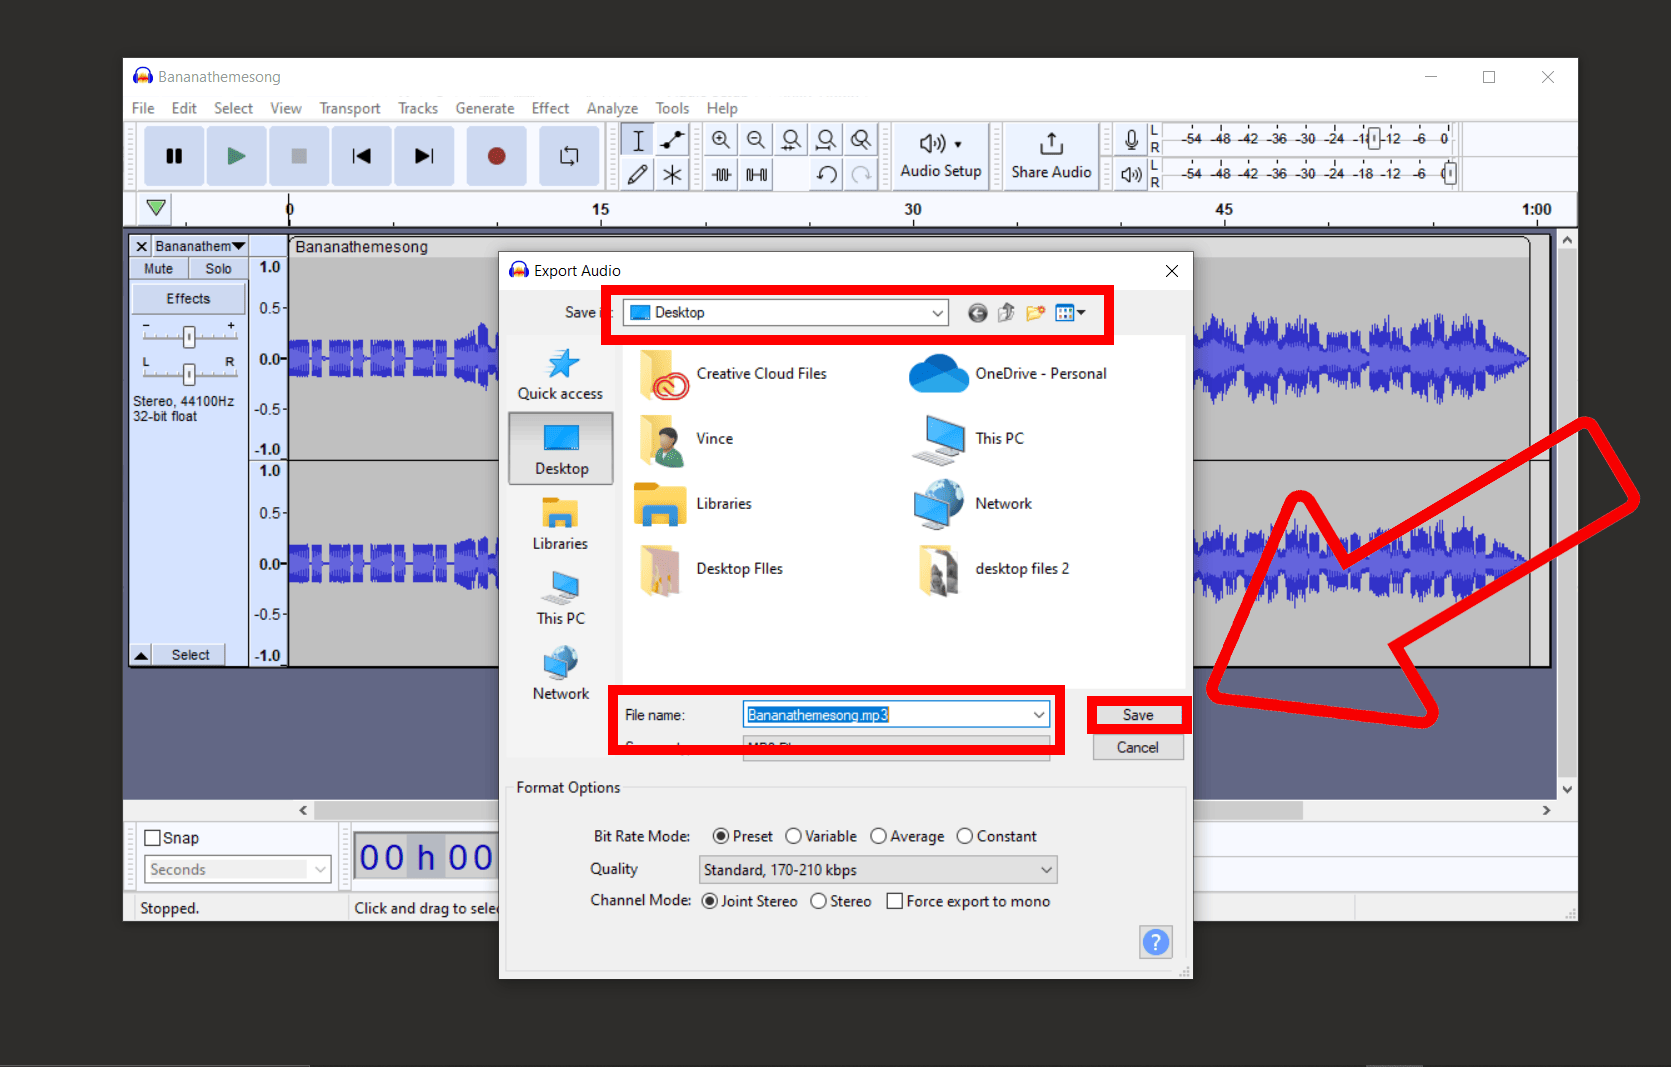
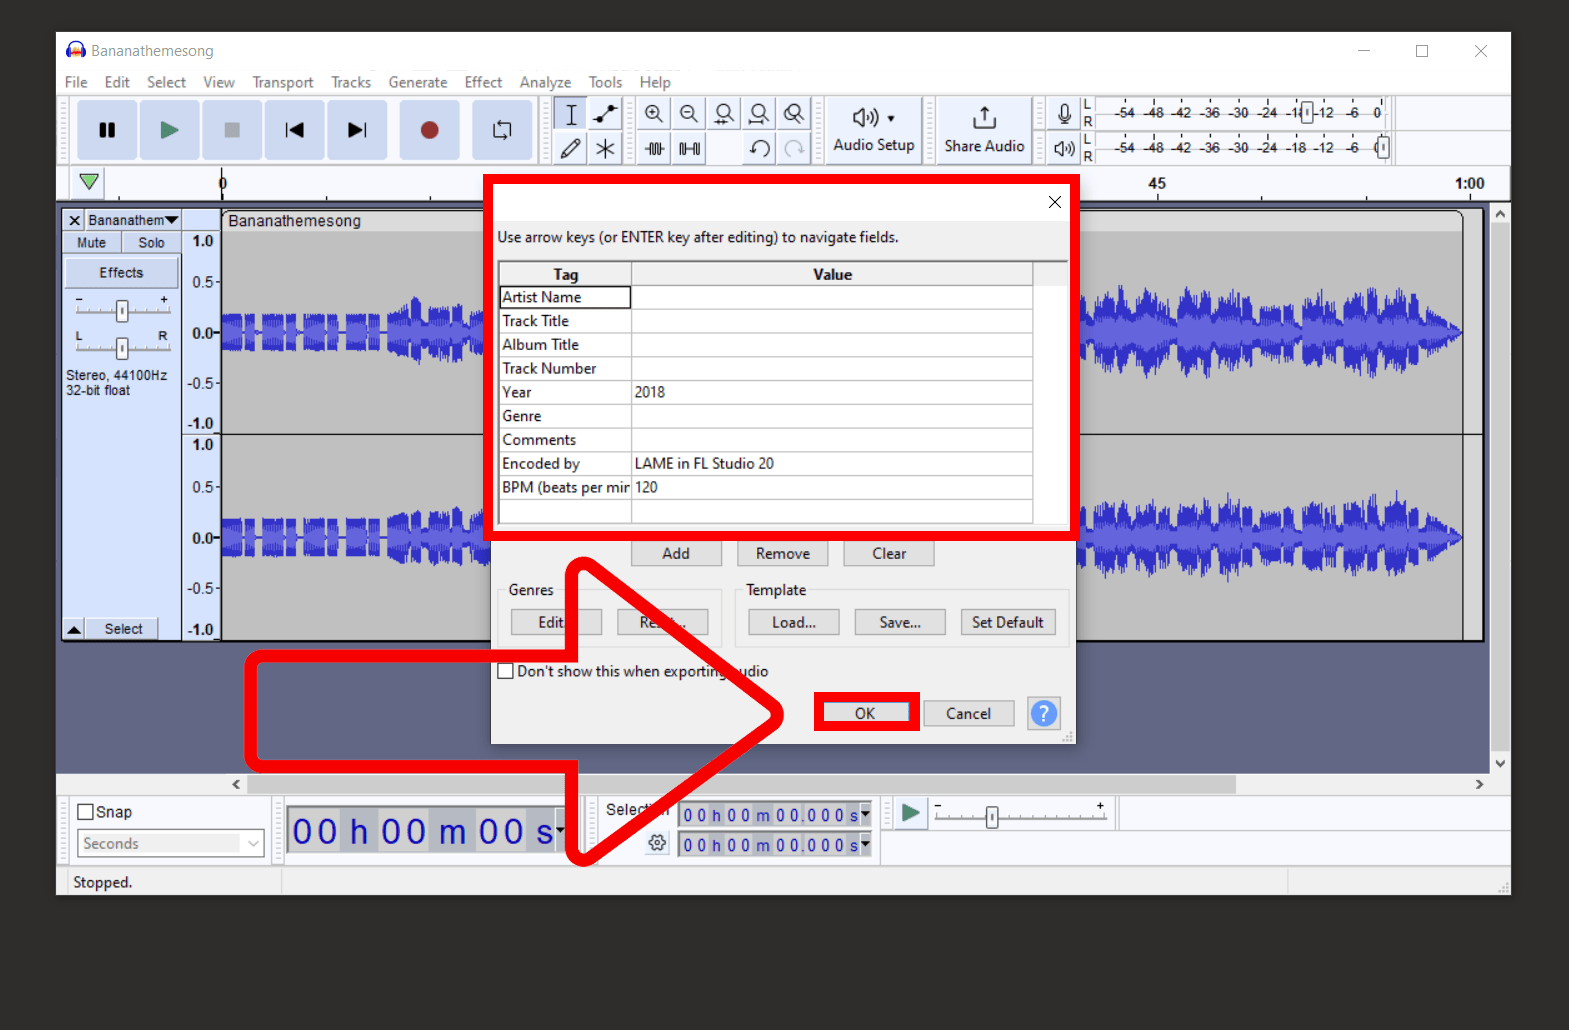
- Select the File Format: Go to ‘File’ > ‘Export’ > ‘Export as MP3’ to choose a format that typically takes up less space than WAV.
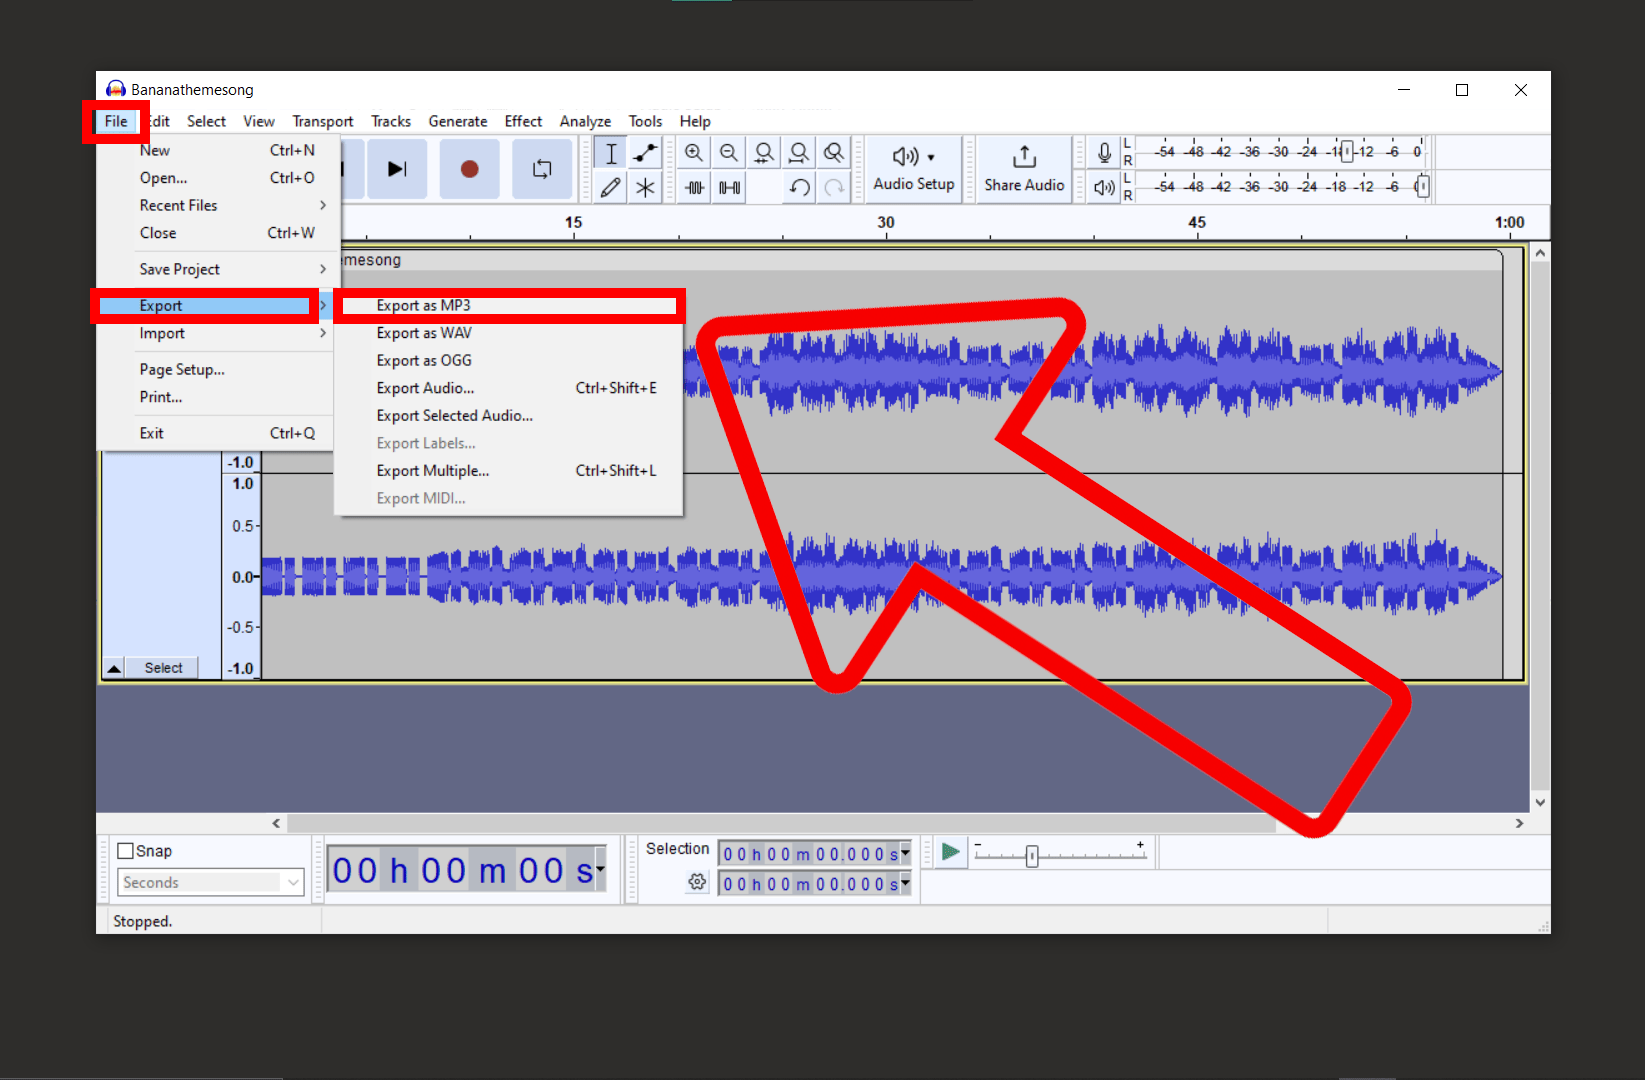
- Export Your File: Click ‘Save’ and then ‘OK’ to start the conversion process. It’s as simple as a monkey swing from one tree to another!
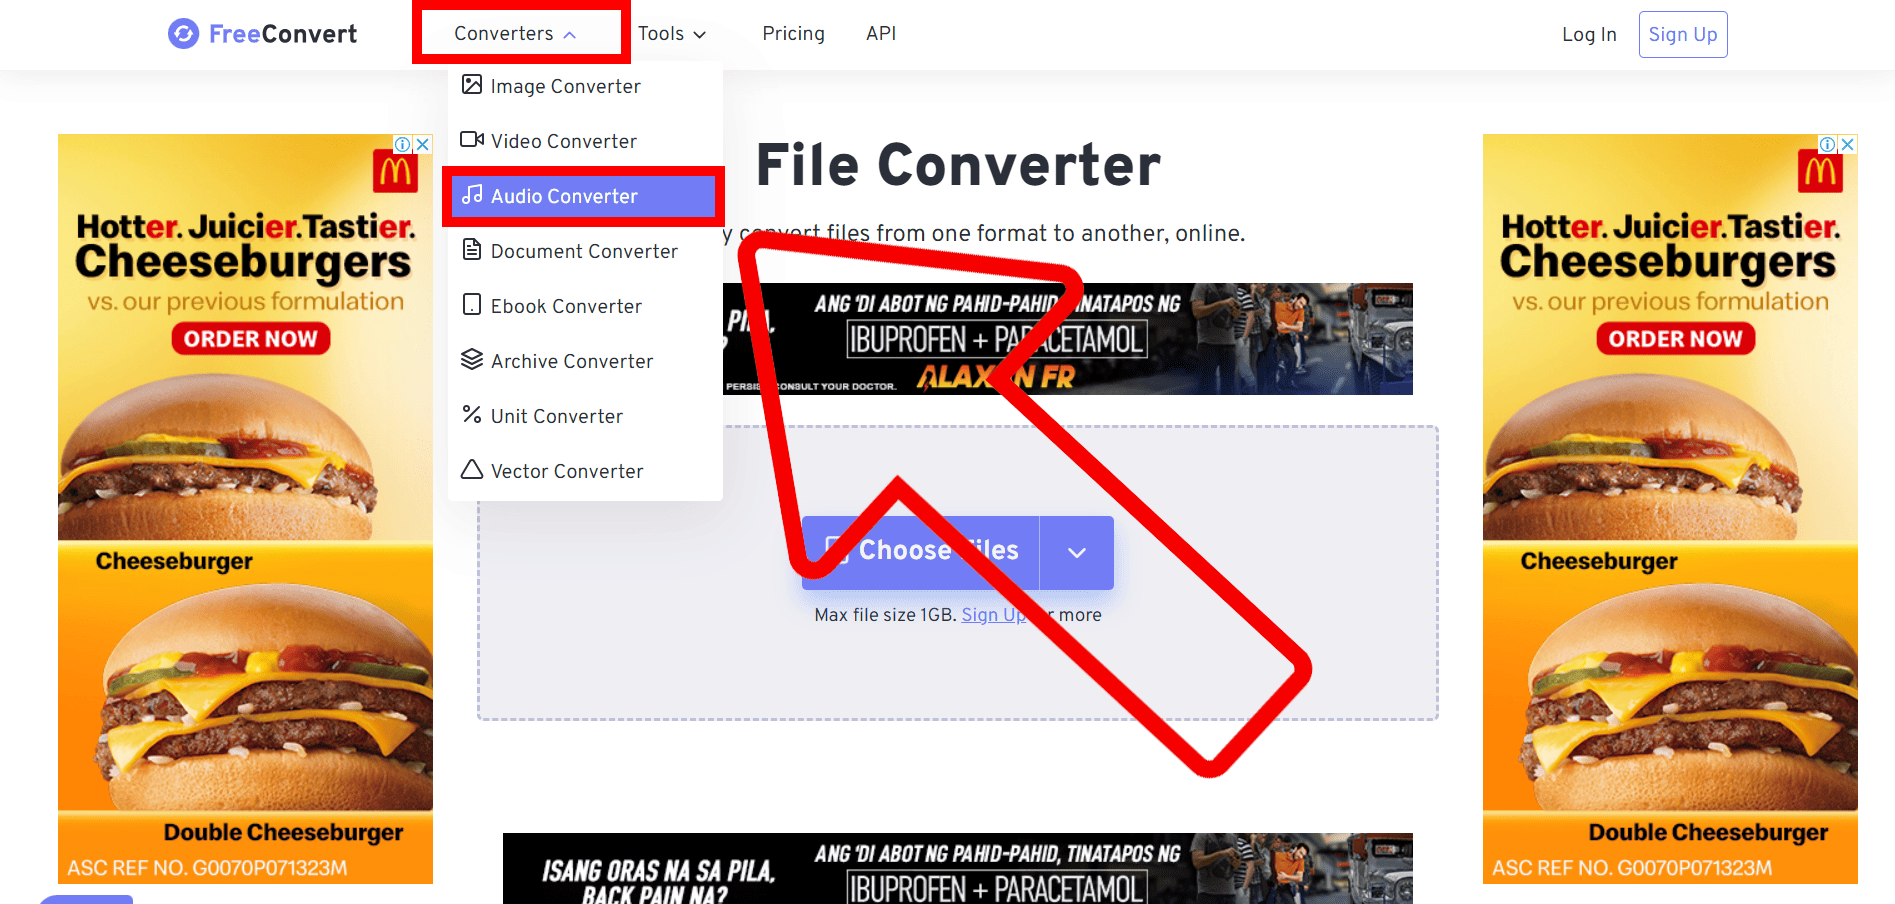
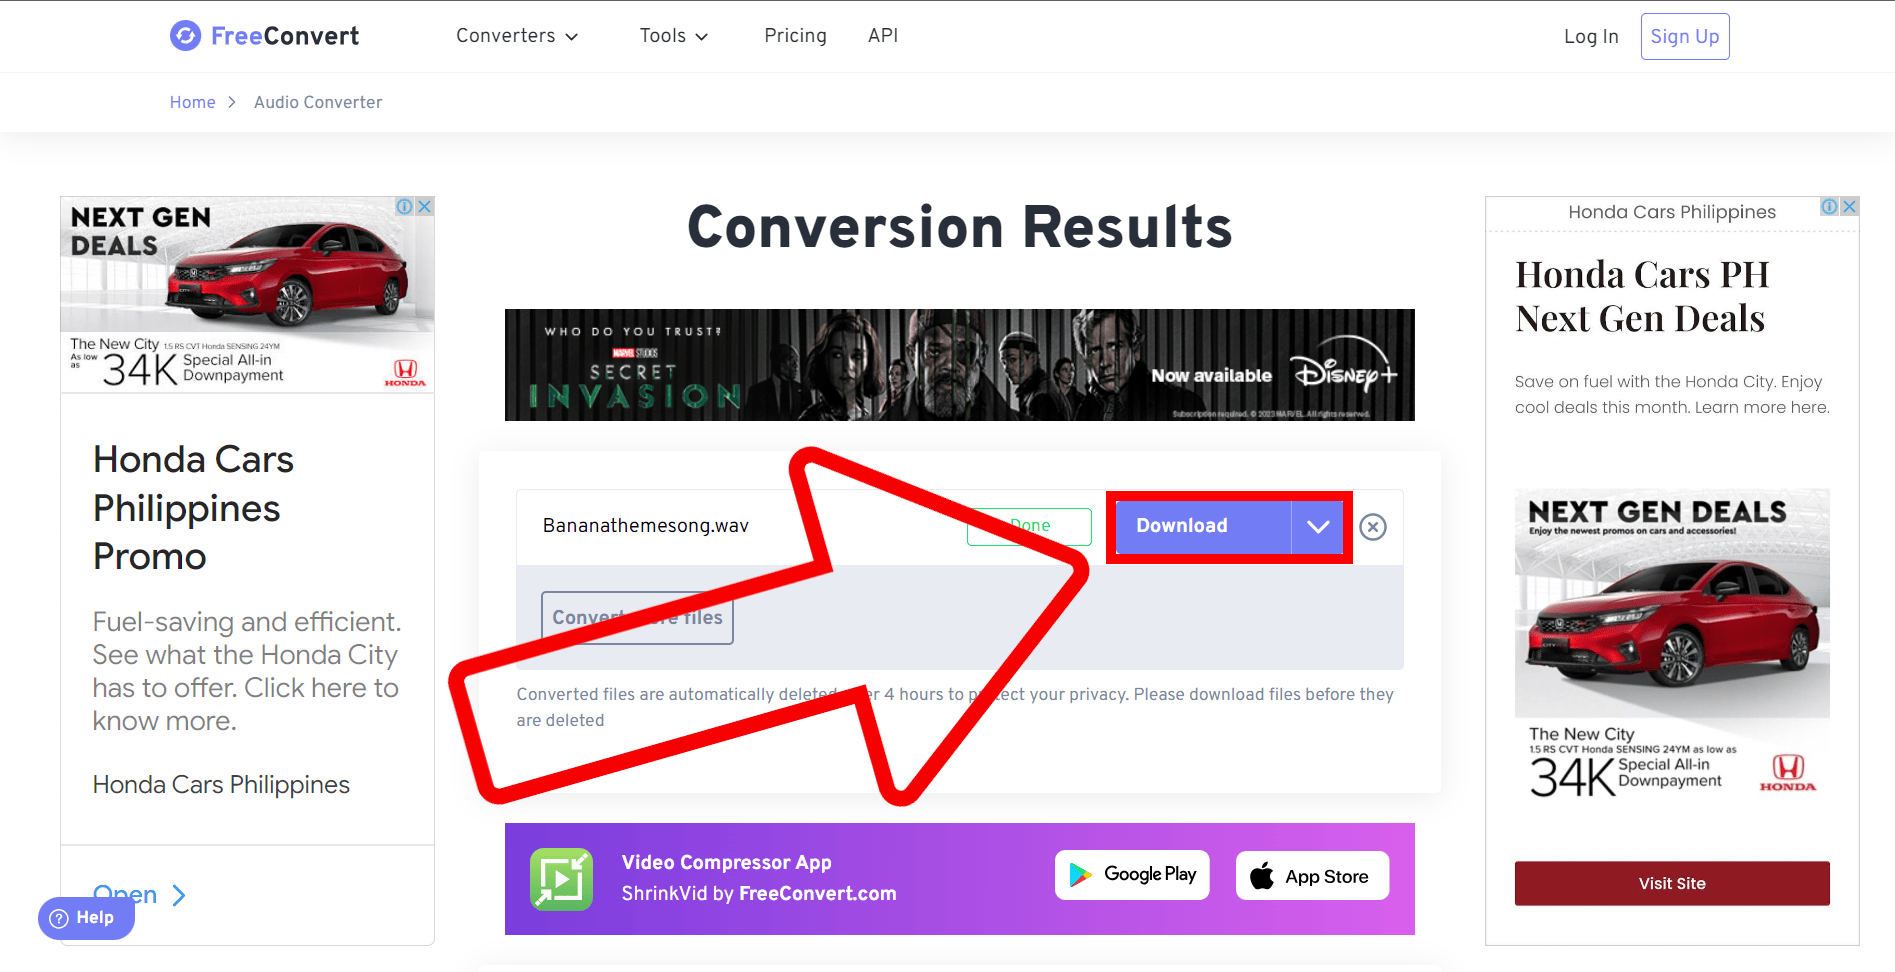
How To Reduce WAV File Size Using FreeConvert
Don’t feel like monkeying around with software installations? FreeConvert is an online converter that will have your WAV files slimmed down in no time. It’s like swinging from the digital trees – no tools required!
- Visit FreeConvert: Open your preferred web browser and navigate to the FreeConvert website.
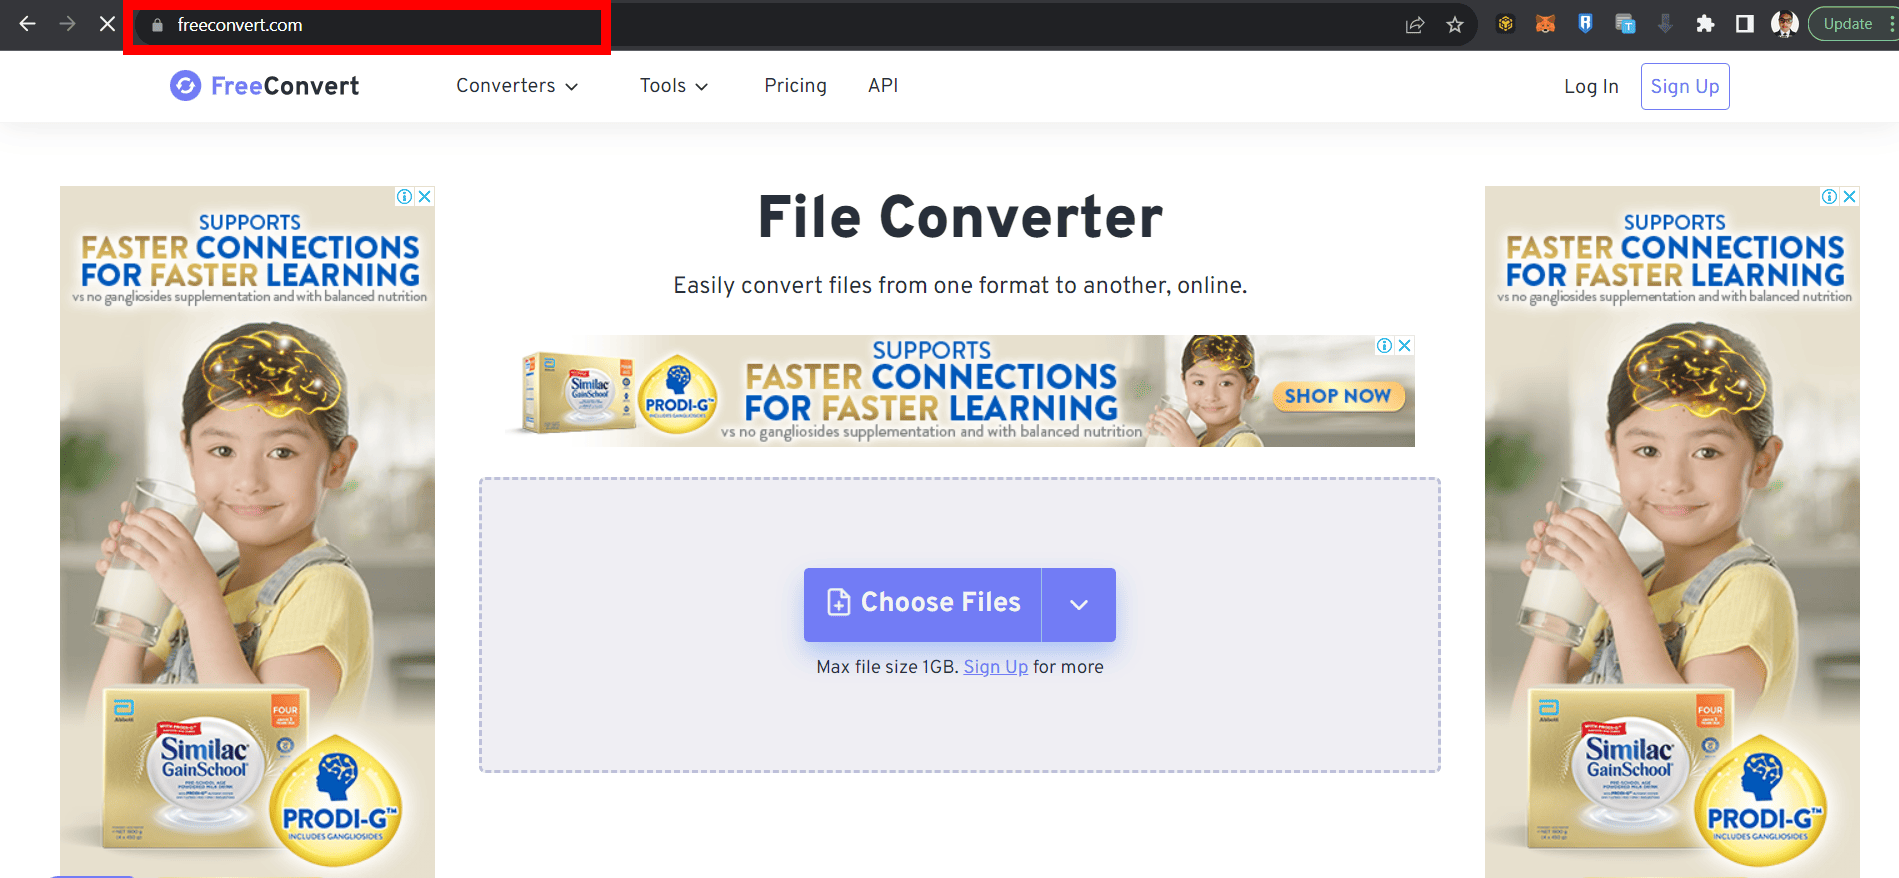
- Select ‘Audio Converter’: On the homepage, click on ‘Audio converter’. This will take you to the audio conversion tool.
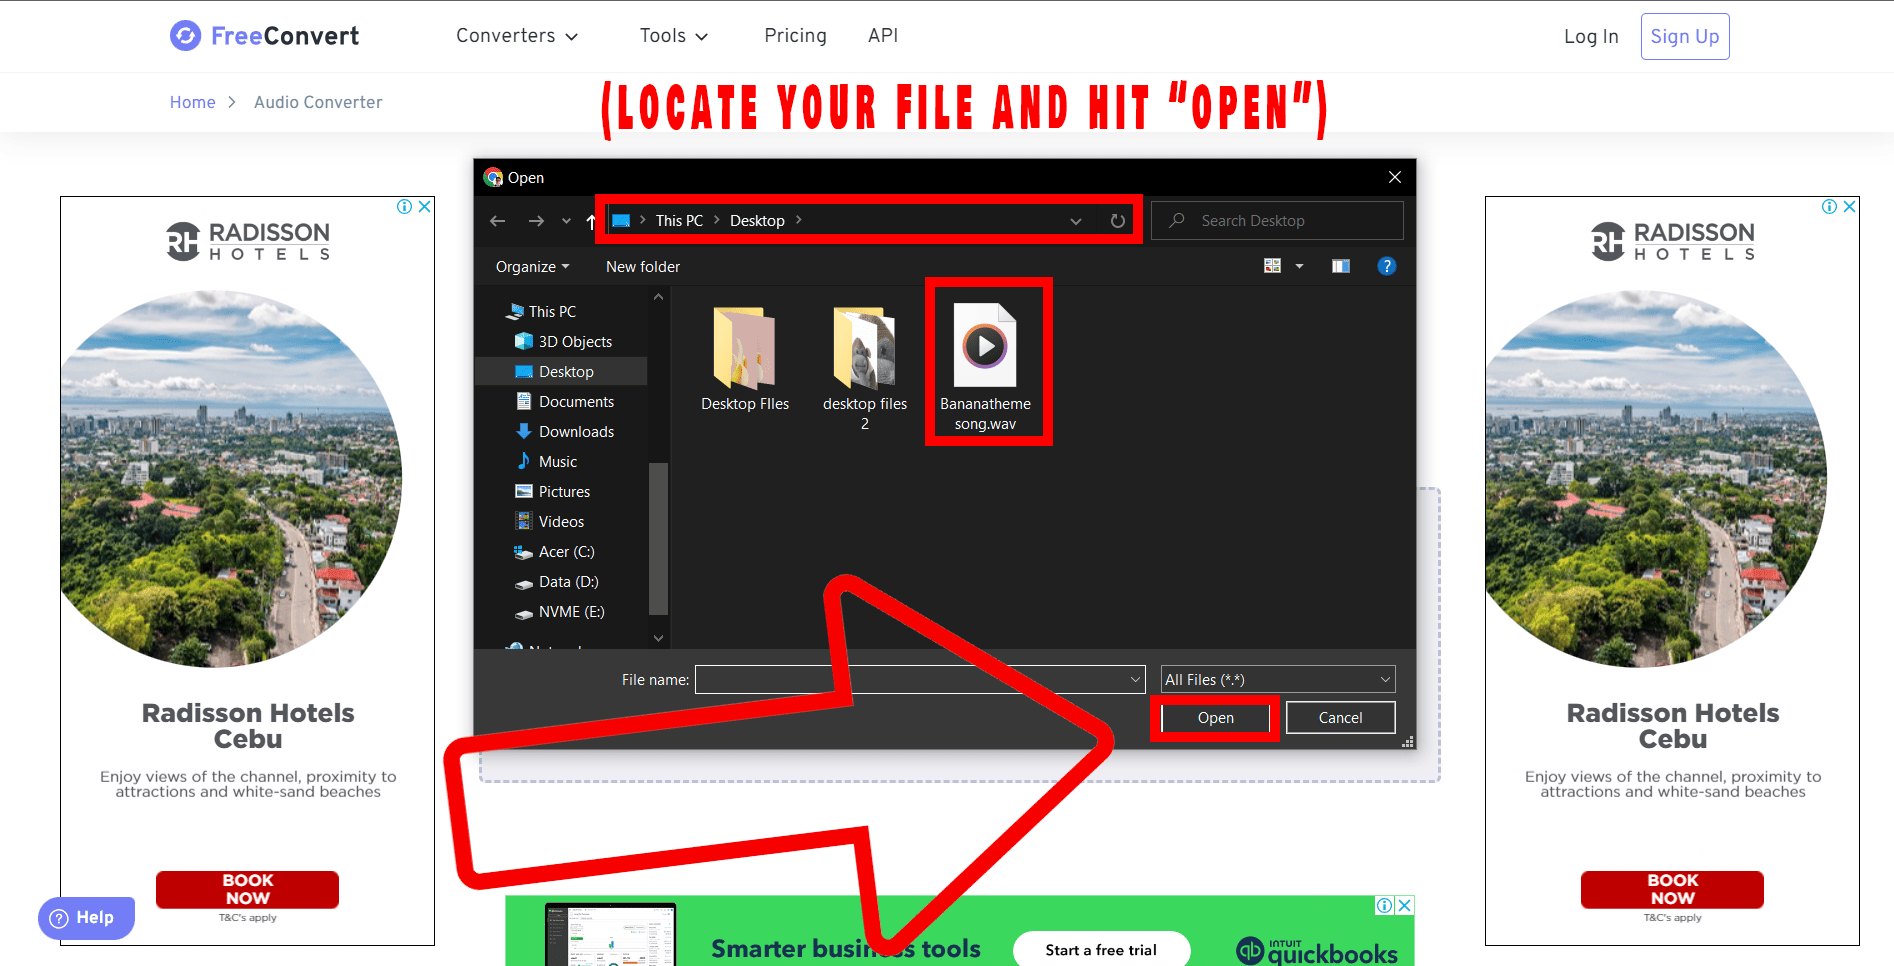
- Upload Your WAV File: Click on ‘Choose Files’ or drag and drop your WAV file into the conversion box. It’s as simple as dropping a banana into a monkey’s lap!

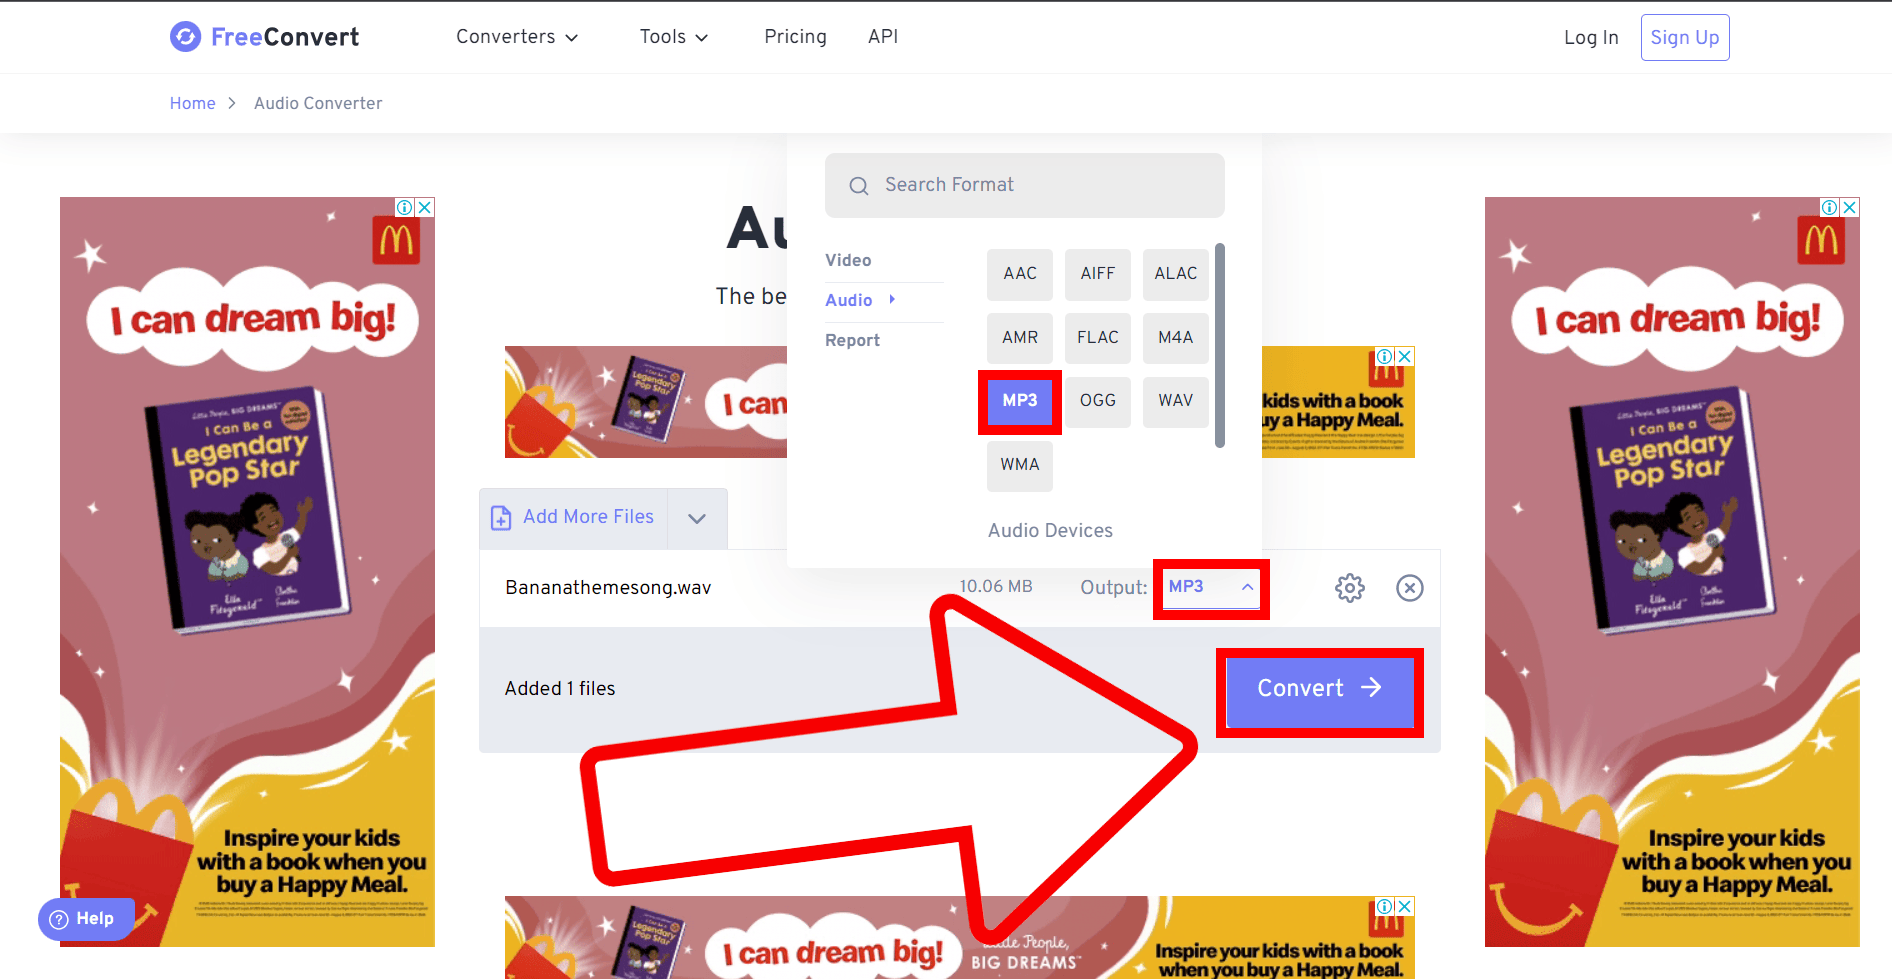
- Choose Your Output Format: Select an output format like MP3 from the ‘Convert to’ dropdown list, and Click on ‘Convert’ to start the process. MP3 typically takes up less space than WAV, much like a small, delicious fruit compared to a bulky coconut.
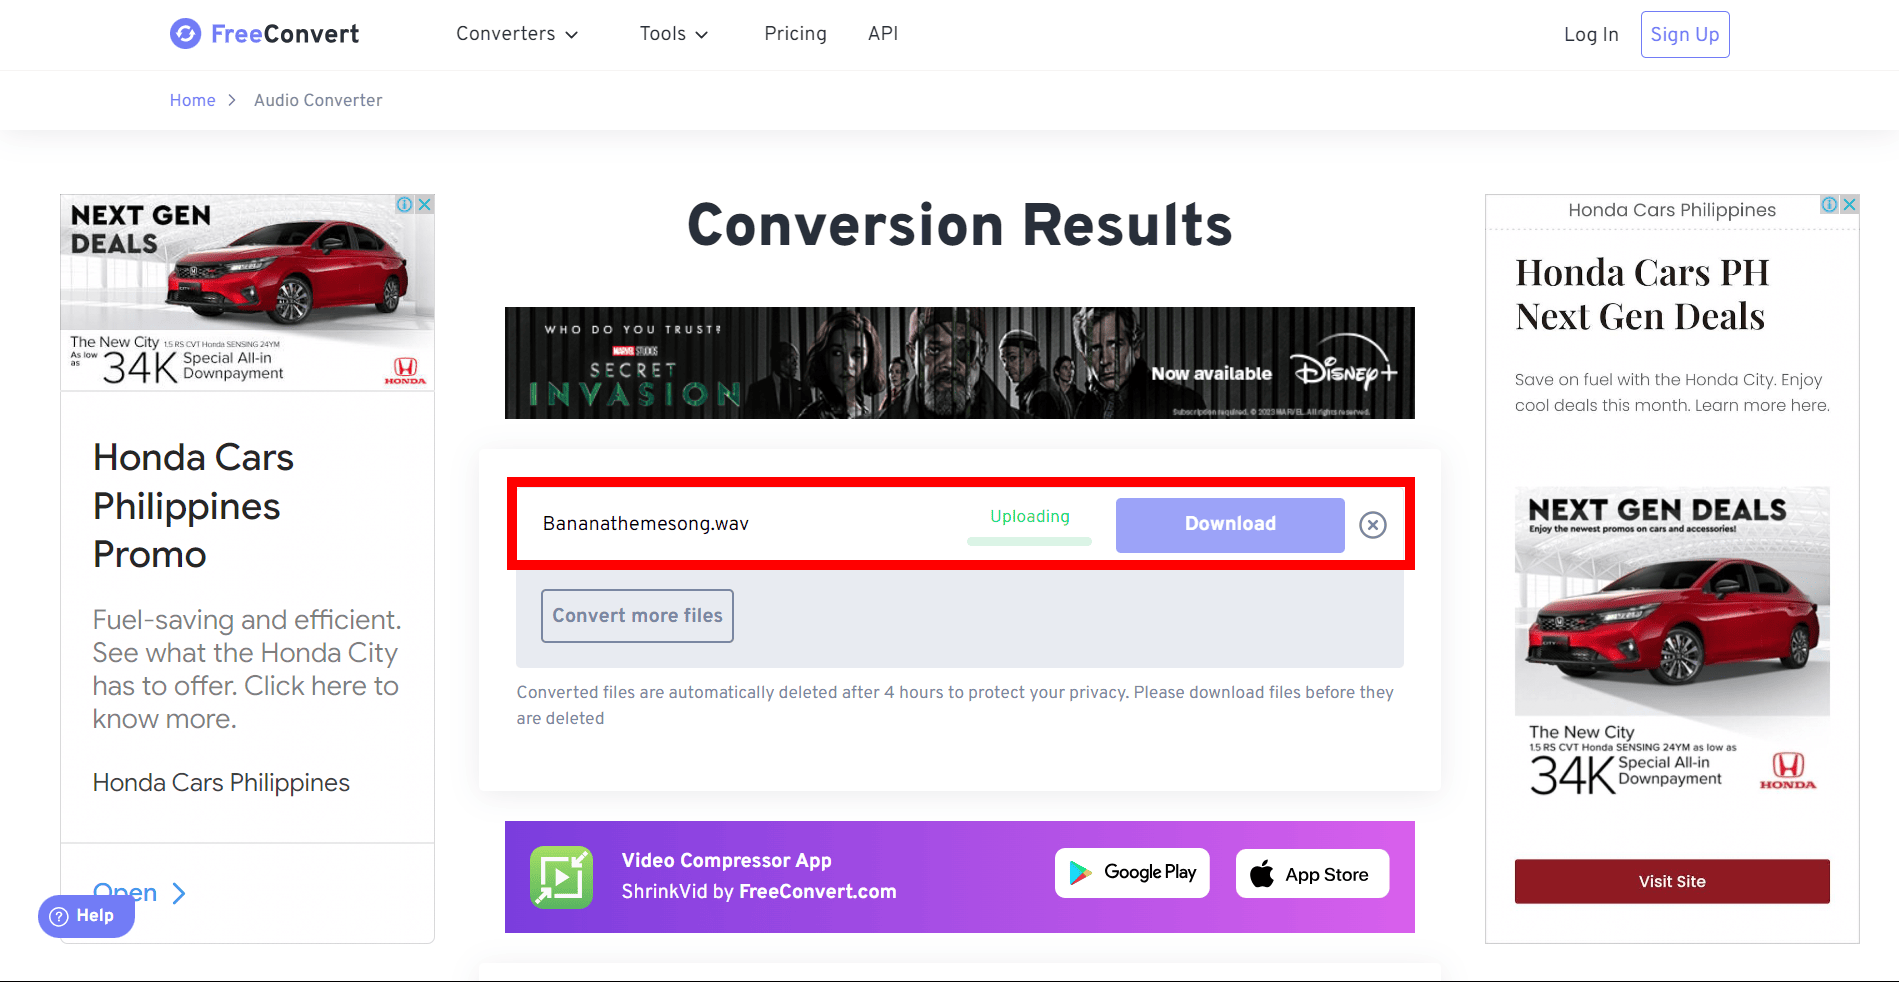
- Download Your File: Once the conversion is done, you’ll see a ‘Download’ button. Click on it to download your new, smaller audio file. Easy as monkey pie!
Now you have two hassle-free ways to reduce your WAV file size. Stay light, nimble and ready to swing through the digital jungle with ease!
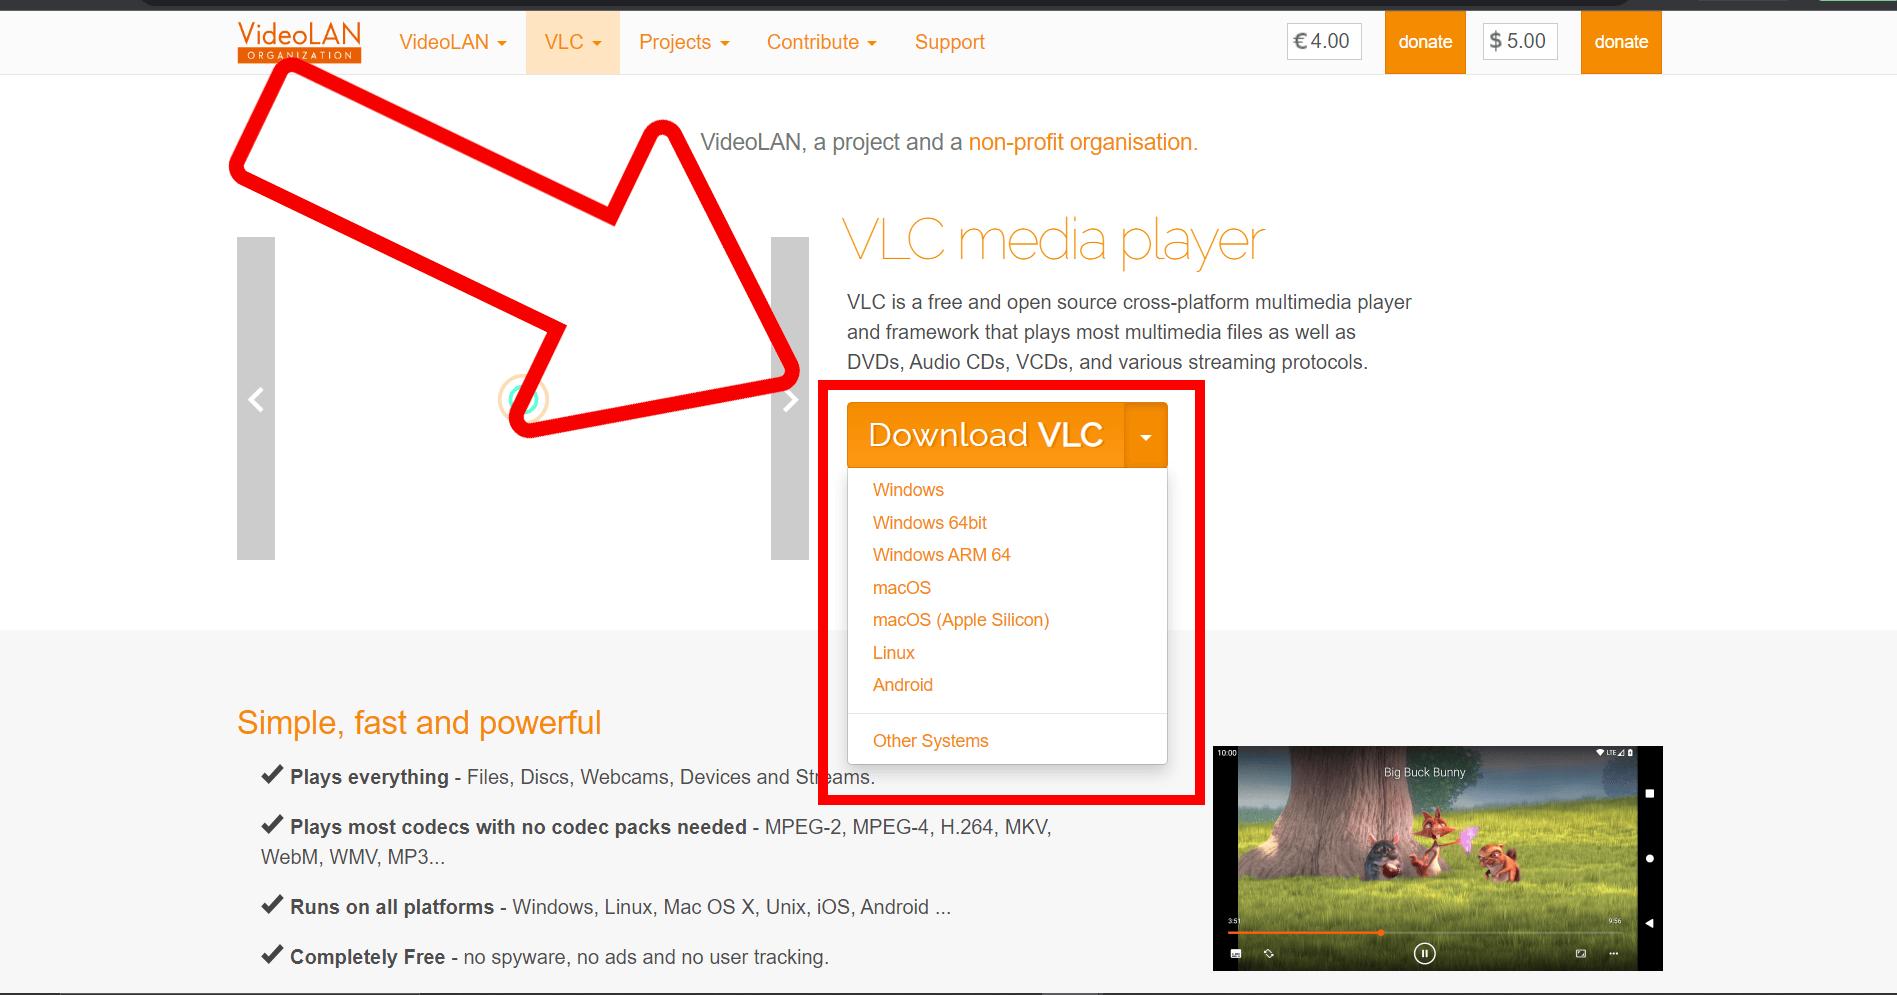
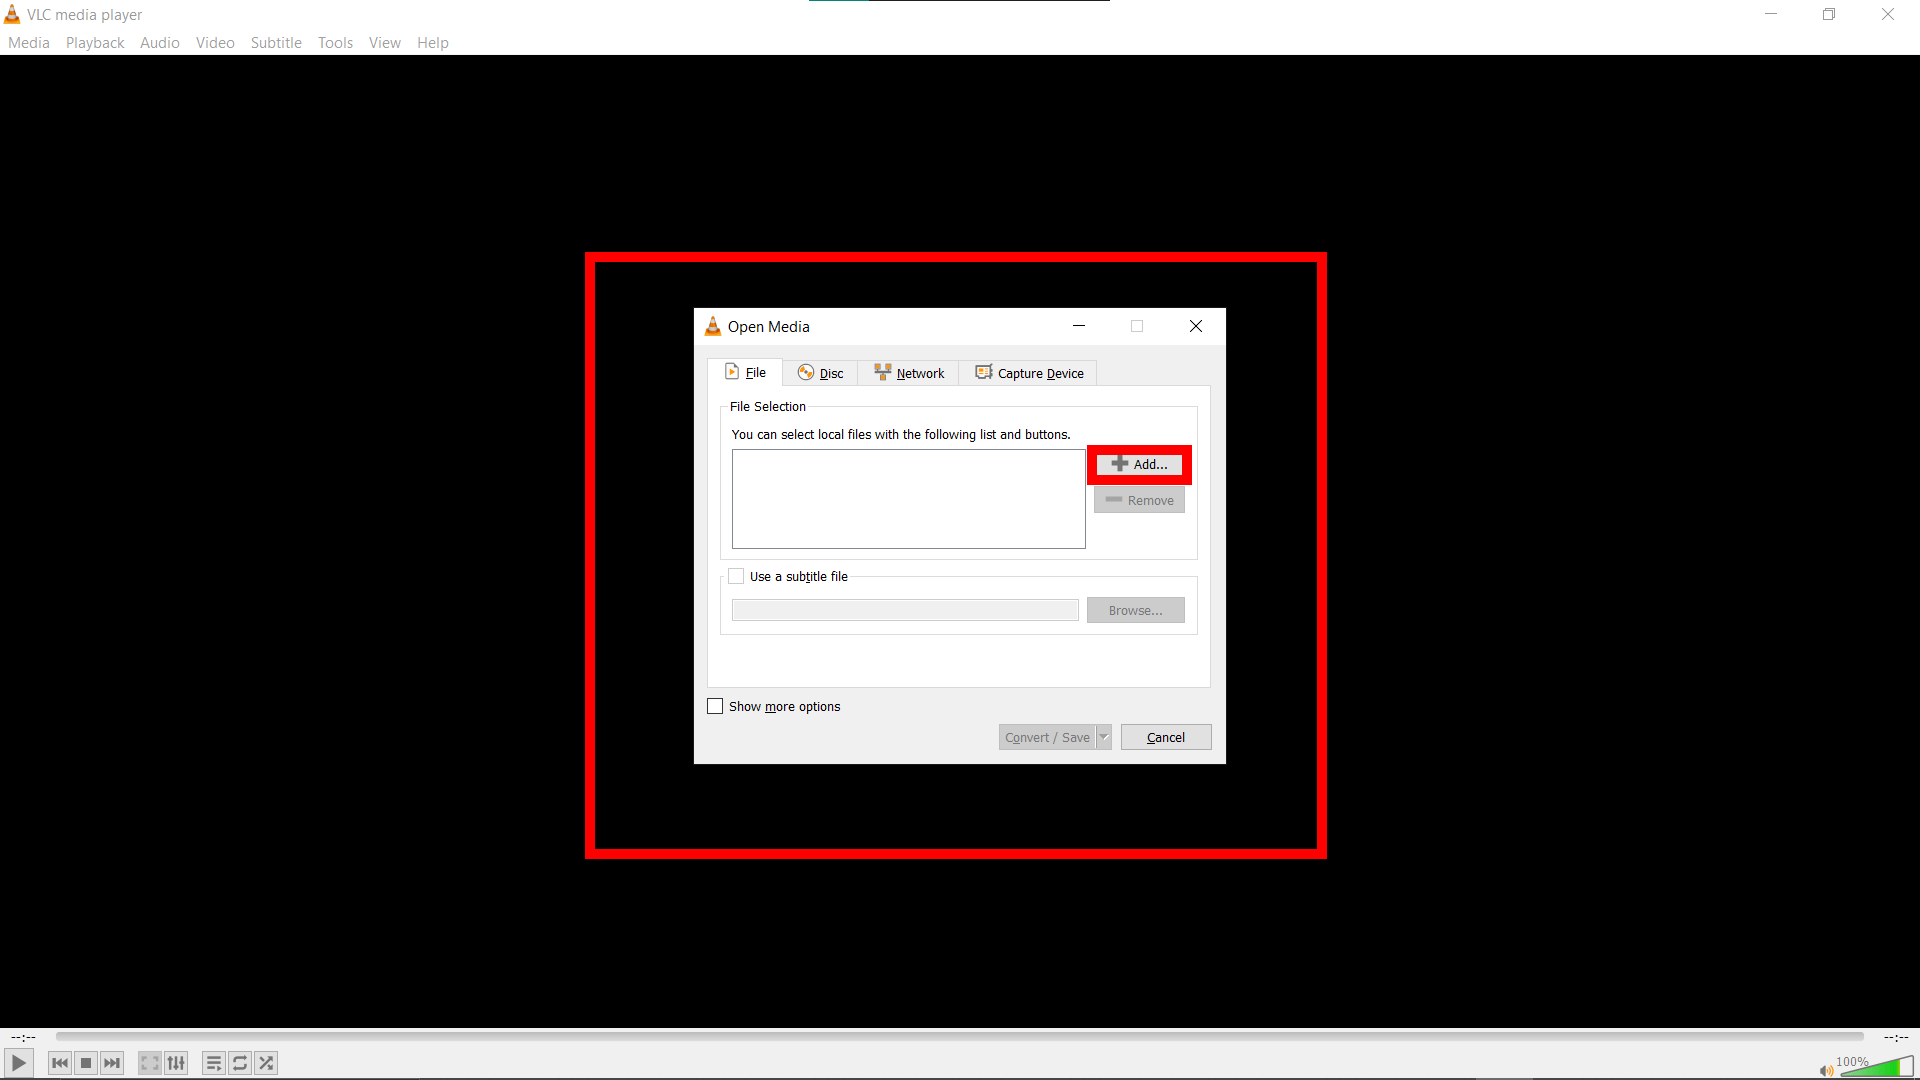
How To Reduce WAV File Size Using VLC
VLC isn’t just a media player, it’s also a pretty nifty file converter! Like a clever monkey using a rock as a hammer, let’s put VLC to work in a new way.
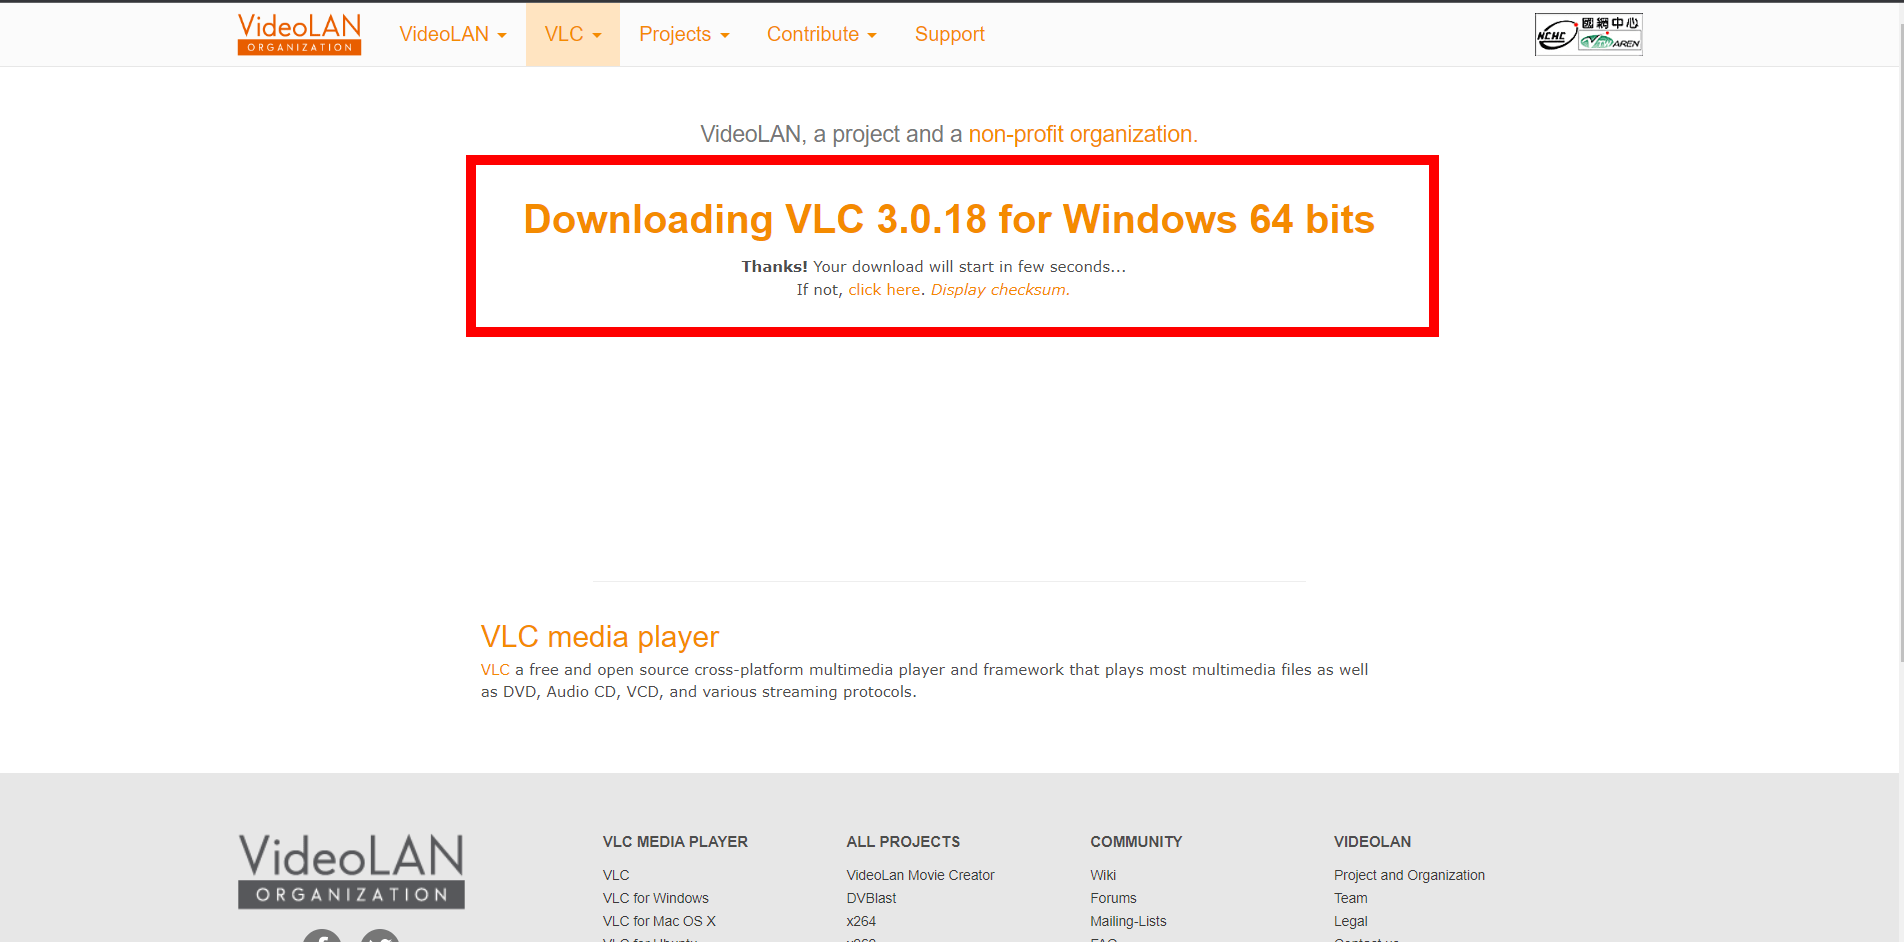
- Open VLC: Start off by opening VLC. If you don’t already have it installed, you can download it from the official VLC website.
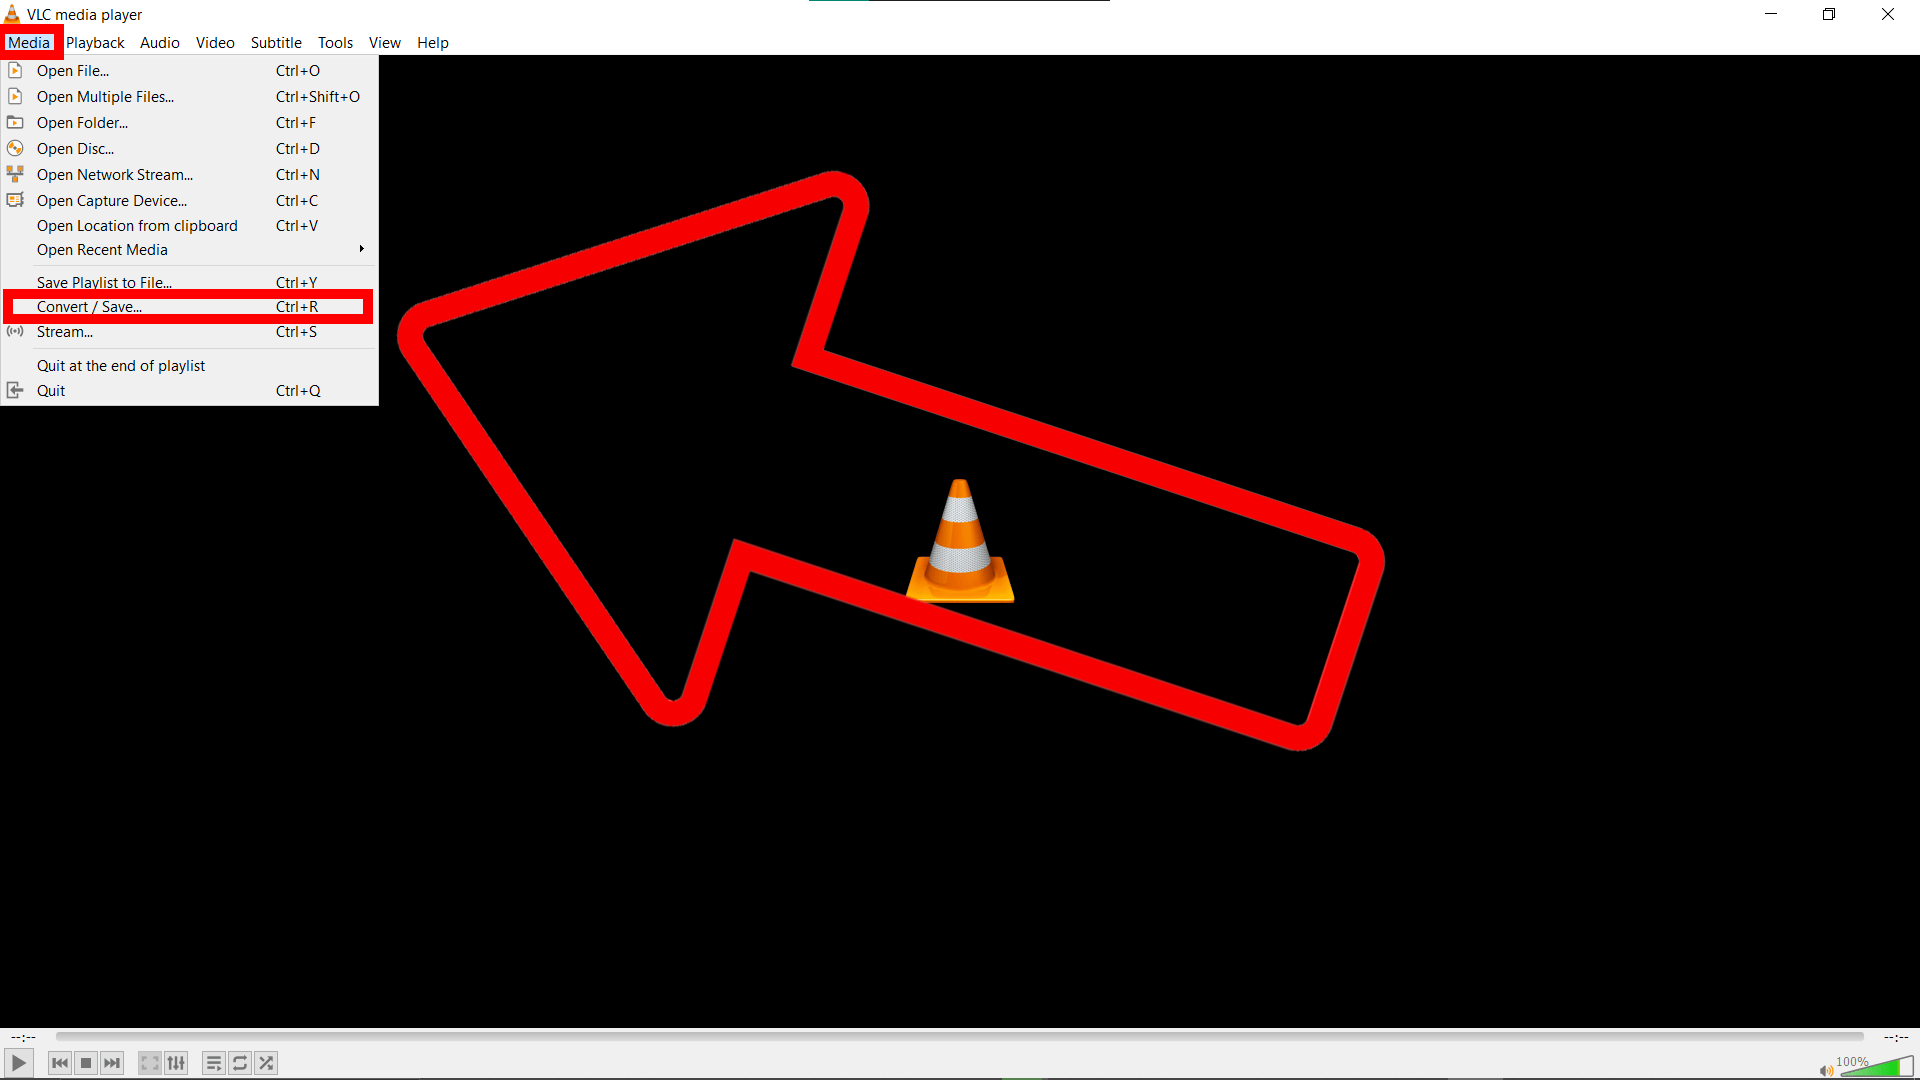
- Open the Conversion Menu: Click on ‘Media’ at the top left corner, then select ‘Convert / Save’. You’re about to convert that WAV file, monkey style!
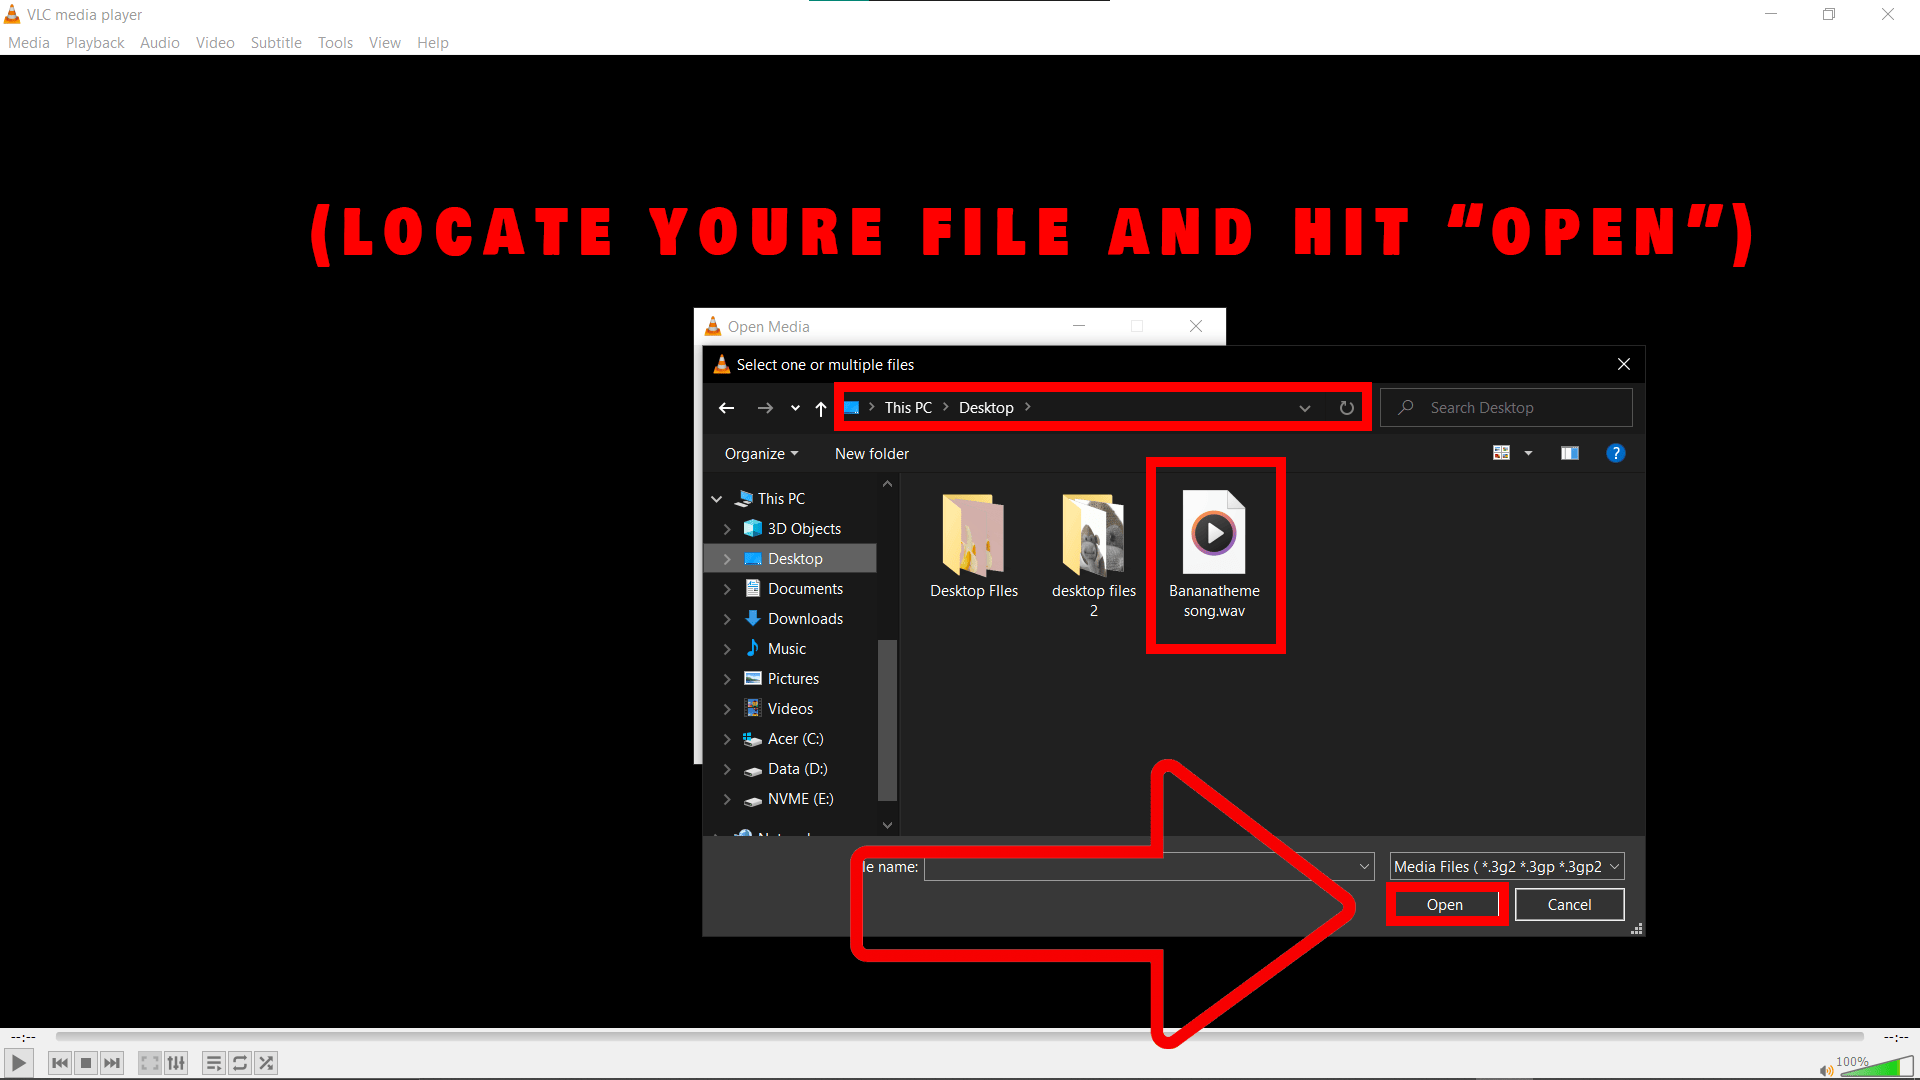
- Add Your WAV File: Click ‘Add’ to select the WAV file you want to convert. Now the file is in your grasp, just like a juicy banana!
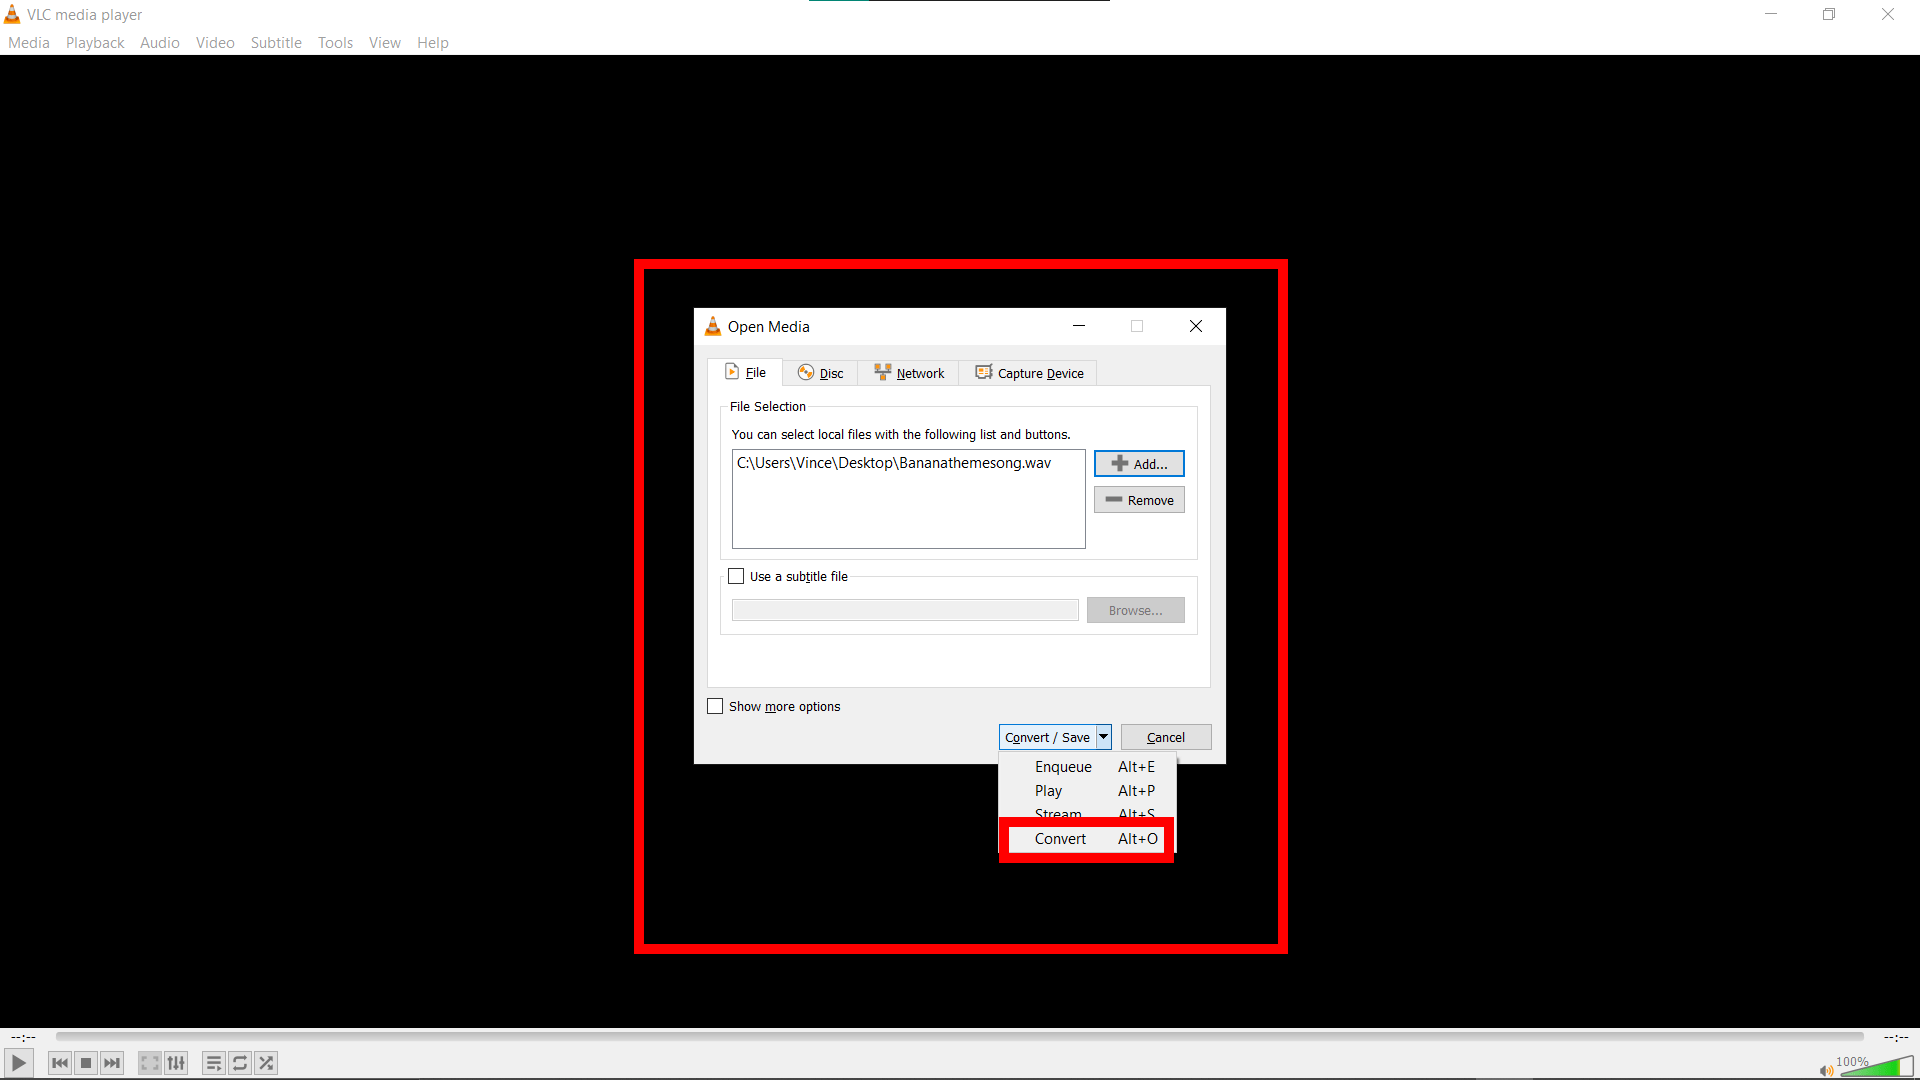
- Choose Your Output Format: Click on ‘Convert / Save’ at the bottom. In the new window that appears, select ‘Audio - MP3’ from the ‘Profile’ drop-down menu.
- Start the Conversion: Click ‘Start’ to begin the conversion process. It may take a few moments – just enough time for a quick tree swing!
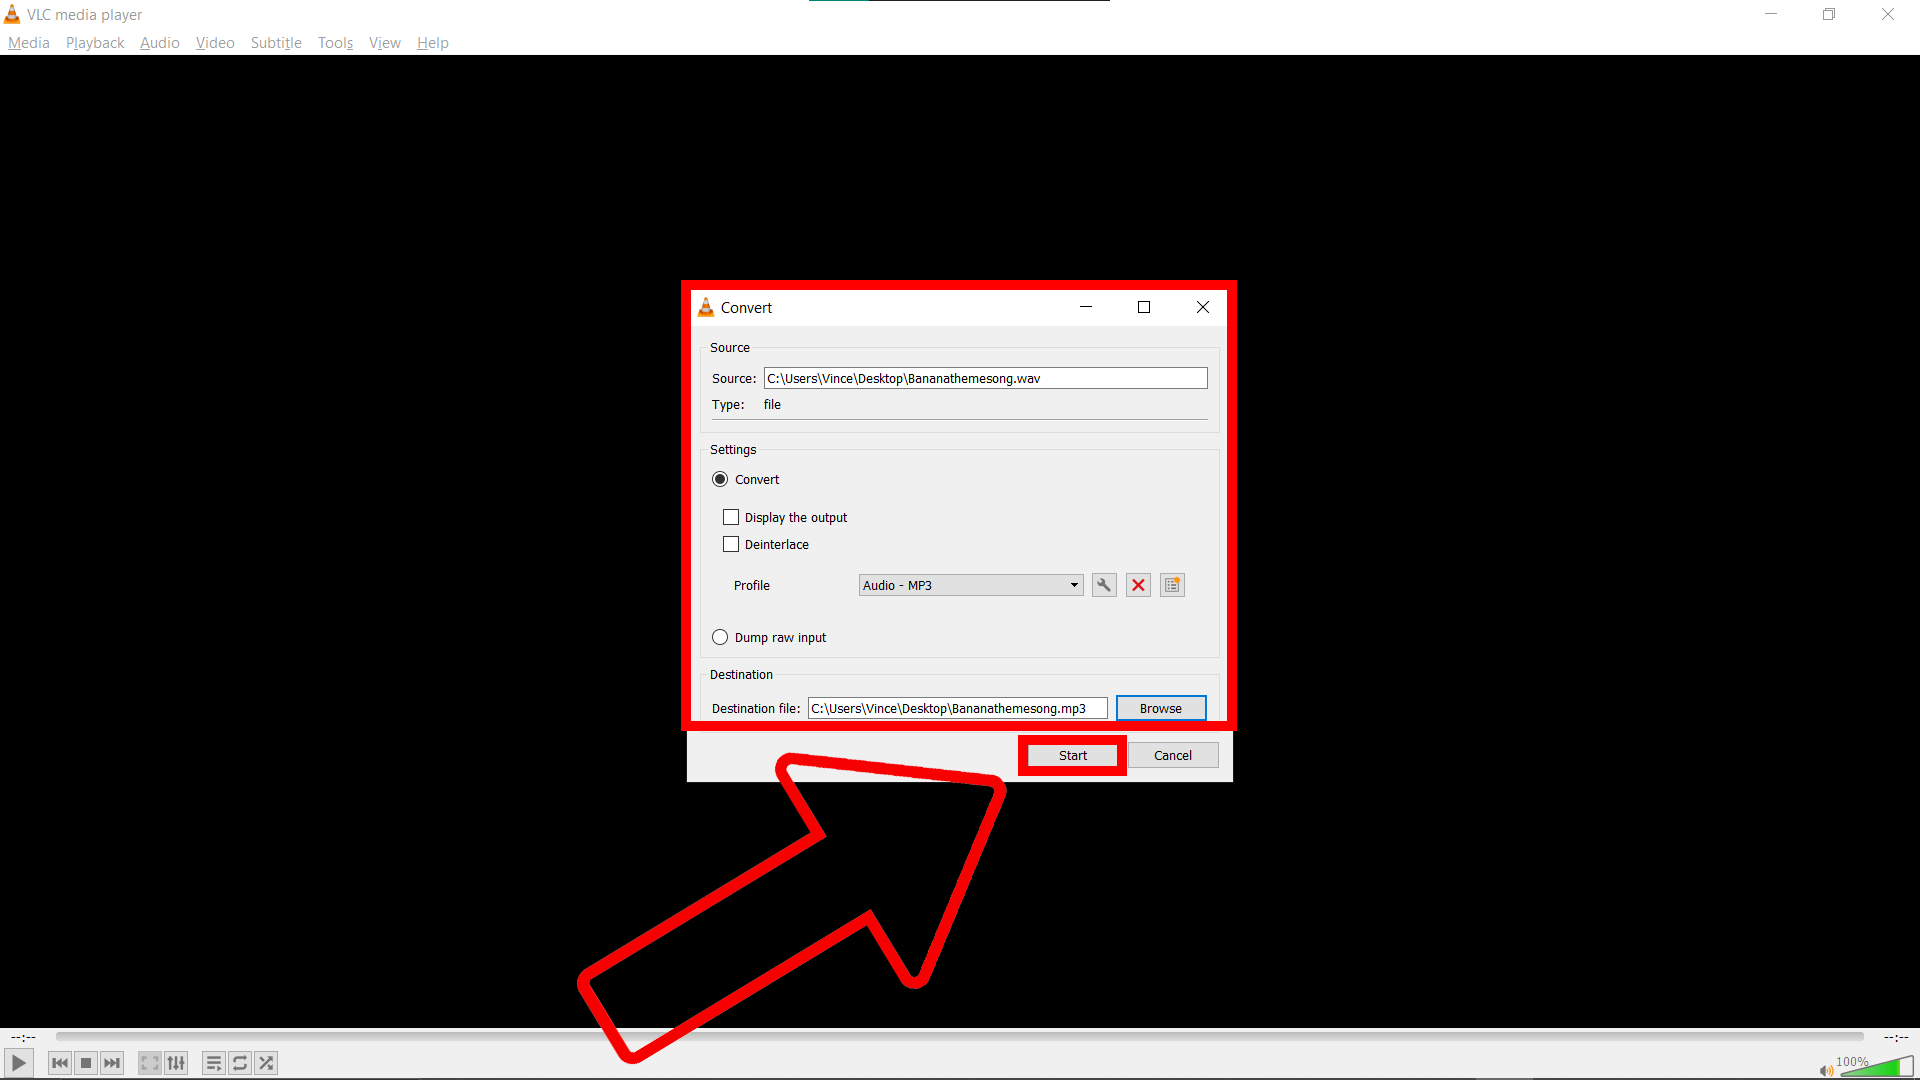
- Find Your New File: Once the process is complete, your new MP3 file will be located in the same folder as the original WAV file. It’s like finding a delicious fruit after a long tree climb!

And that’s it! Another handy method to shrink your WAV files. So no matter how big your audio files are, remember: even the biggest jungle can be tamed with the right tools!
FAQ
What is a WAV file?
A WAV file is a high-quality audio format, known for its crystal clear sound, much like how a banana tastes best when it’s perfectly ripe. But beware, its high quality means it’s also a heavyweight in file size.
Why should I convert WAV to MP3?
Converting WAV to MP3 is like trading a bulky backpack for a sleek fanny pack. It reduces file size, making it easier to store, share, and play on various devices, without losing too much audio quality – a smart move in the digital jungle!
Why can’t I just retain WAV Format and Reduce Its Size?
Keeping a WAV file while trying to reduce its size is a bit like trying to shrink a banana while keeping it just as filling – it’s a tricky balance! WAV files are inherently large due to their uncompressed, high-quality nature. While some size reduction is possible, it often involves a compromise in audio quality or complexity in processing. Converting to MP3, on the other hand, is like a well-practiced trick in the jungle, offering a significant size reduction with minimal quality loss for most listeners. If you want to store your WAV files in a smaller space, then another option is to convert it to a ZIP file.
Will converting WAV to MP3 reduce the audio quality?
There’s a slight trade-off – think of it as exchanging a bit of flavor for a more manageable banana size. While MP3 compresses the file, the quality drop is often negligible, especially for non-professional use.