
Hello, digital explorers! 🐵 If you’re venturing into the archive wilderness, 7Zip is the trusty vine you need. This guide will help you swing through its features with ease. Ready to zip, unzip, and leap over the digital trees? Let’s dive in!
Table of contents
- How To Install 7zip On Windows
- How To Install 7zip On Linux
- Create an Archive with 7Zip
- How To Create Multipart ZIP Files Using 7-Zip
- How To Create 7Z Files Using 7-Zip In Windows
- How To Create SFX Files Using 7-Zip
- How To Extract Files Using 7Zip
- Open Multipart ZIP Files Using 7-Zip
- Open A Password Protected ZIP File Using 7-Zip
- How To Add Password to 7z Files on Windows
Video guide showing how to extract 7z files using 7Zip.
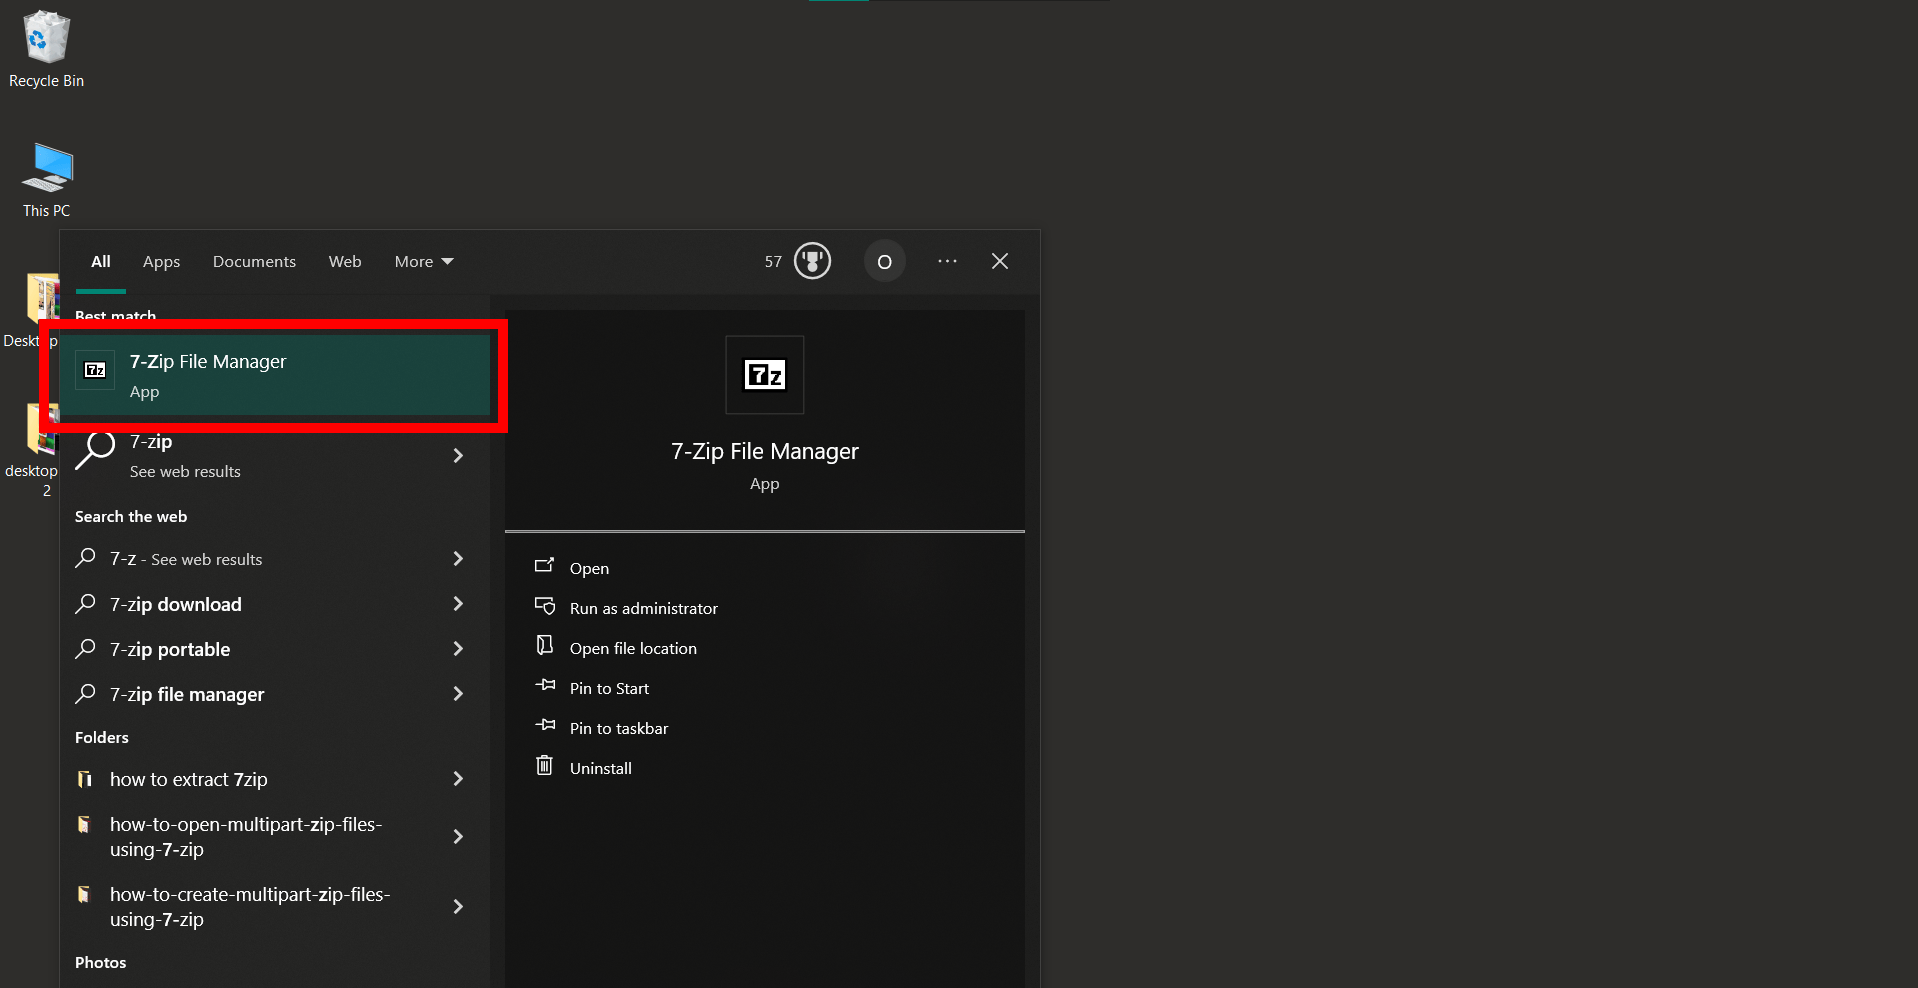
How To Install 7zip On Windows
Installing 7-Zip is straightforward and quick. Follow these steps to get it up and running on your computer:
-
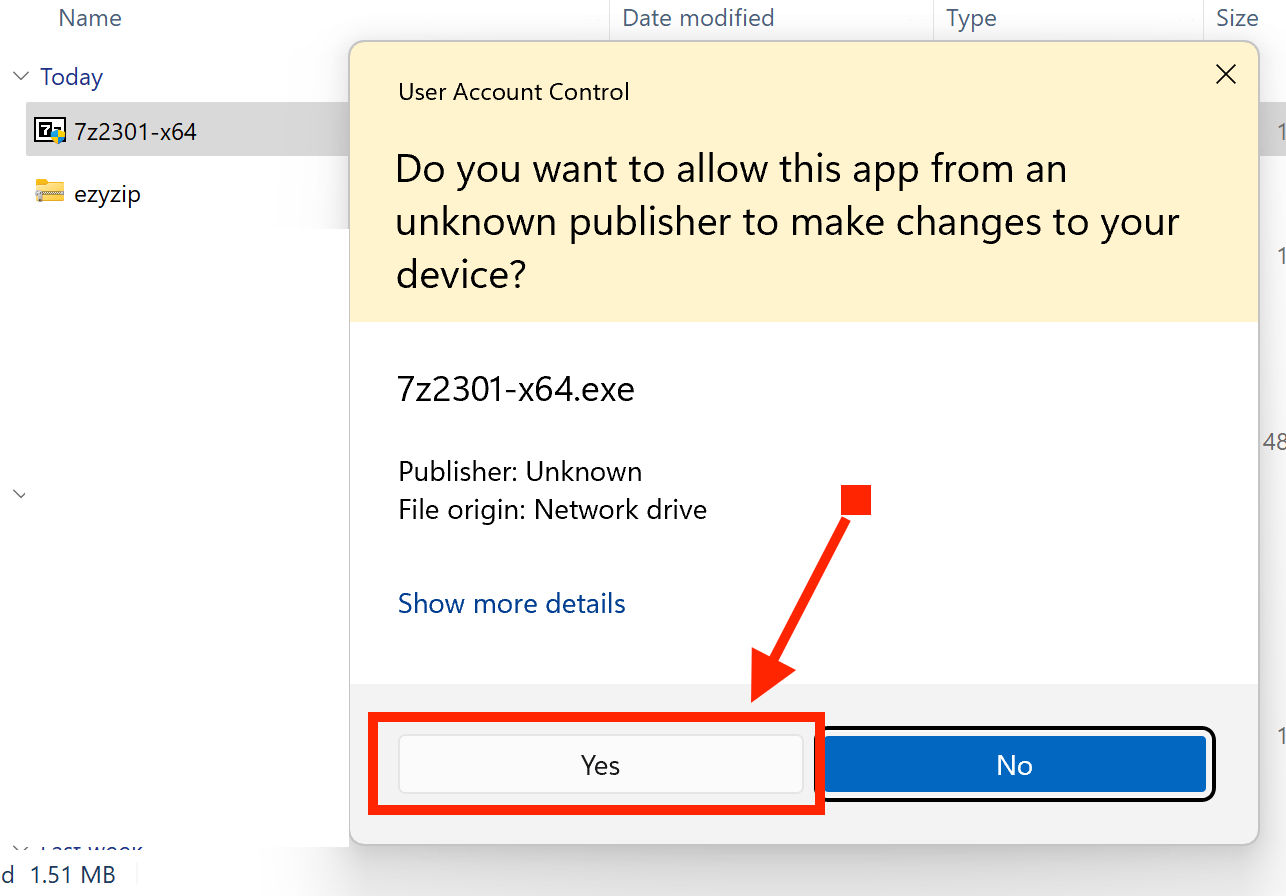
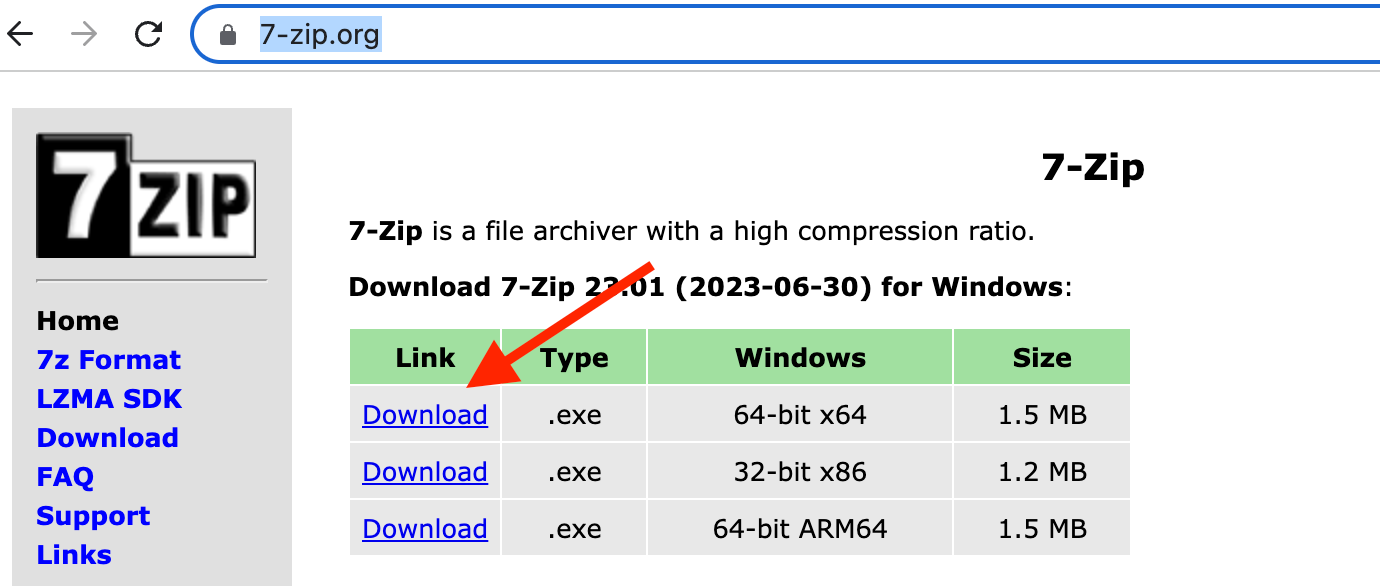
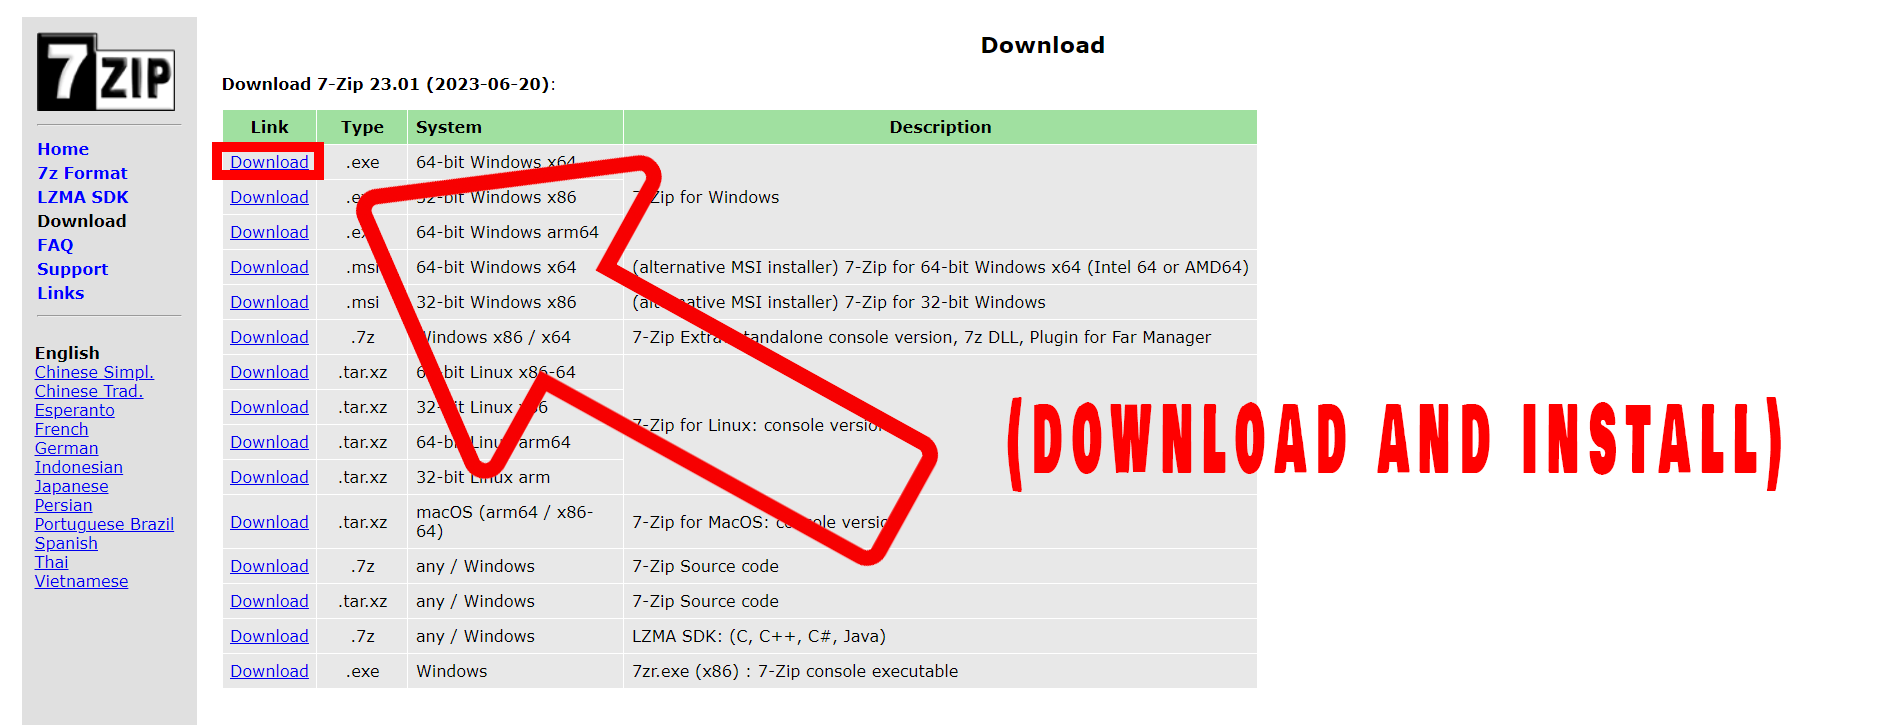
Download 7zip: Navigate to 7-zip.org and download the latest .exe for Windows.

-
Install 7-Zip: Click “Yes” if it asks “Do you want to allow this app from an unknown publisher to make changes to your device?” (Make sure you download it from official 7zip site and not some other site!)
How To Install 7Zip on Linux
Linux aficionados, it’s your time to shine! For those who believe Windows is just the side branch of the tech tree, and that Linux is where the ripest bananas hang, this section is for you. Linux may seem like an intricate web of vines at times, but installing 7Zip is like swinging from one to another with grace. Whether you’re a tuxedo-wearing penguin or just a monkey who loves the command line, here’s the simplest way to get 7Zip running in the Linux jungle.
- We like the p7zip desktop GUI. Use the following command to install it:
sudo snap install p7zip-desktop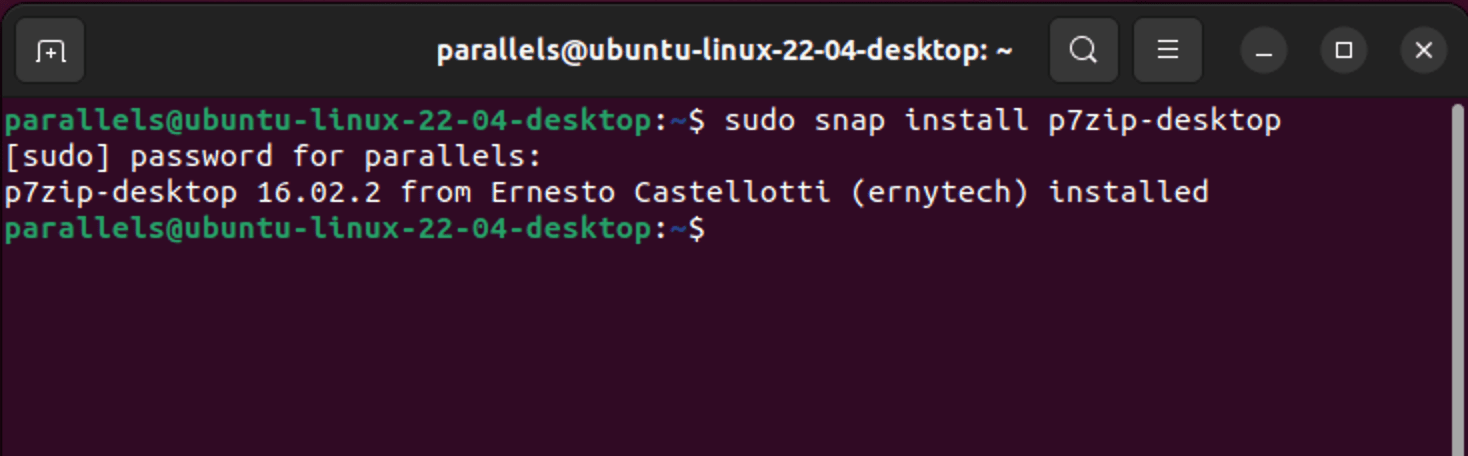
- Search and open “P7Zip Desktop”.

And there you have it, my primate pals! p7Zip GUI is your trusty tool to tackle those 7z archives. If the terminal is more your thing, then check out our extensive guide to using 7z on the command line.
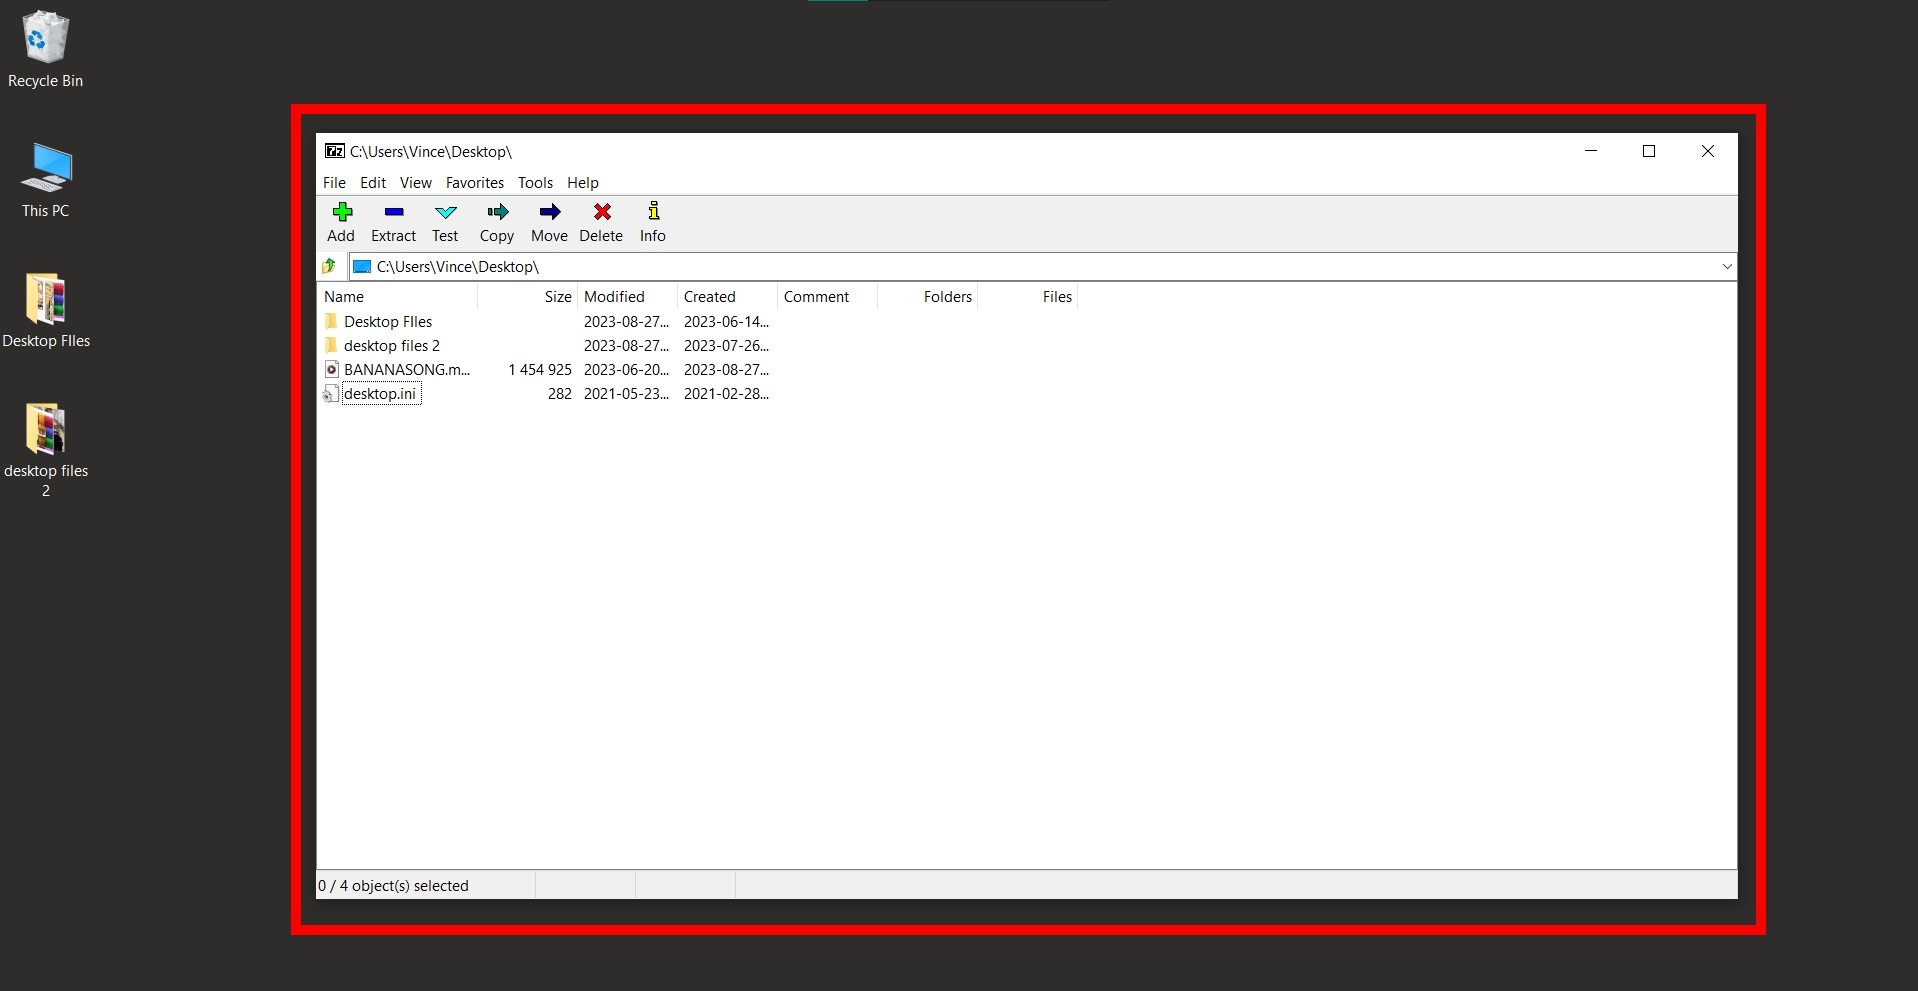
How To Create an Archive with 7Zip
Packing up for a digital journey? Here’s how:
-
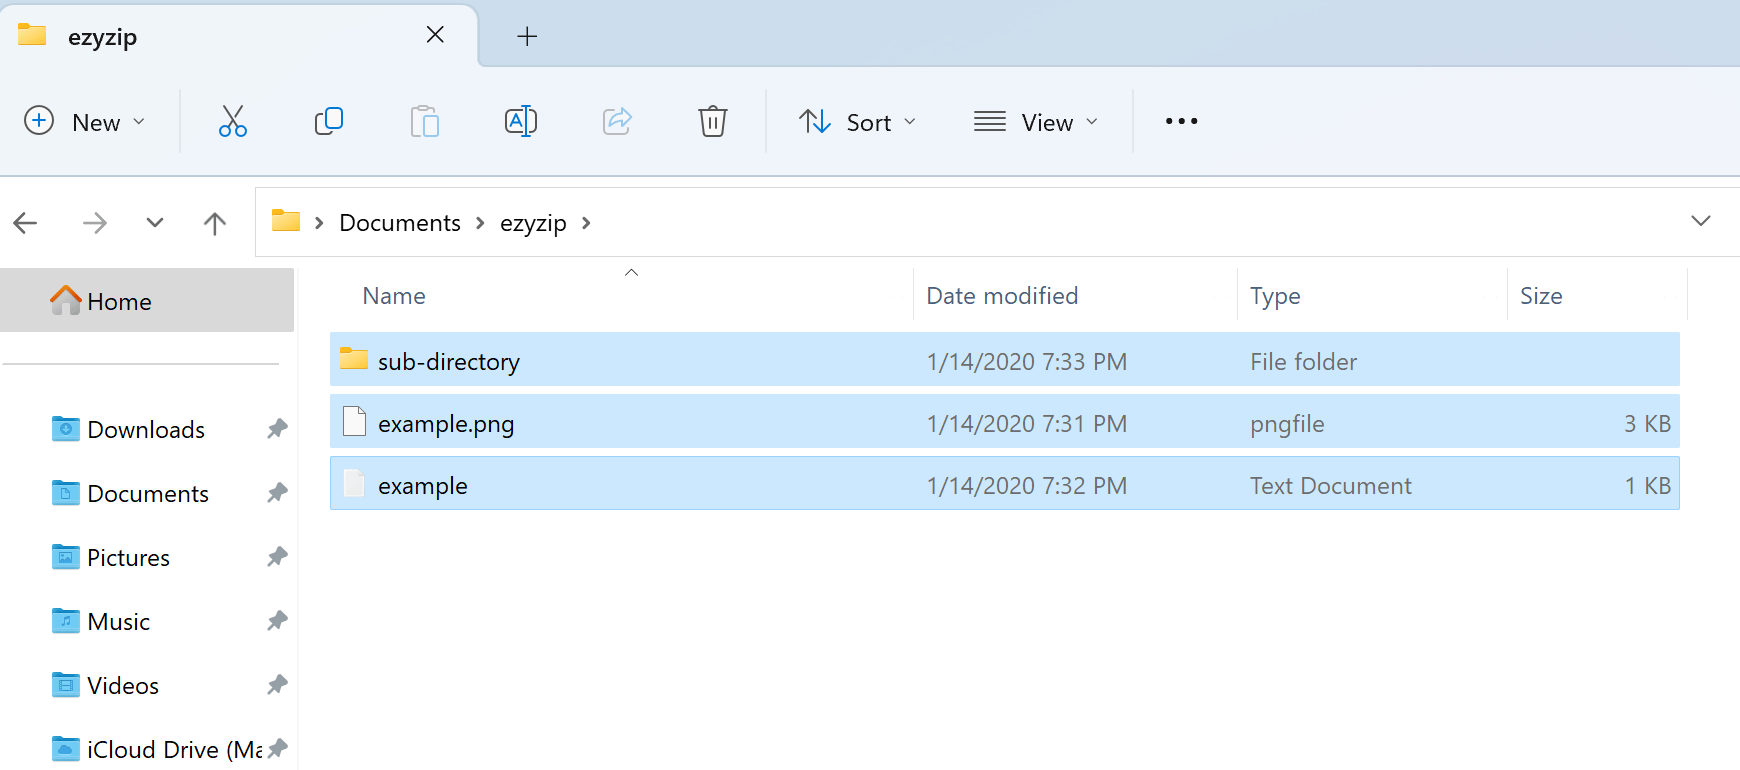
Once installed, select one or multiple files you want to compress in File Explorer.
-
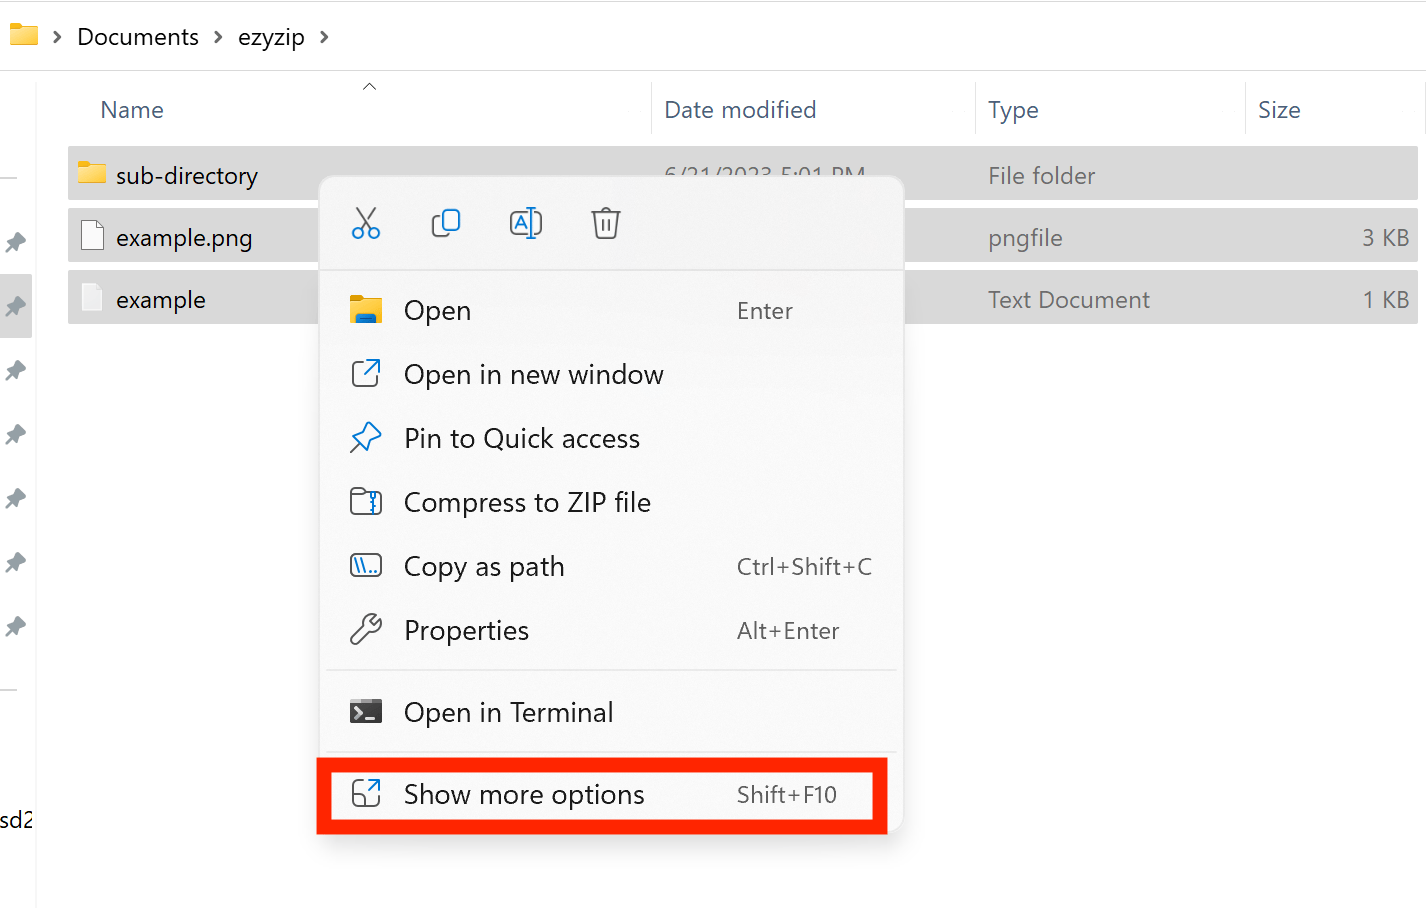
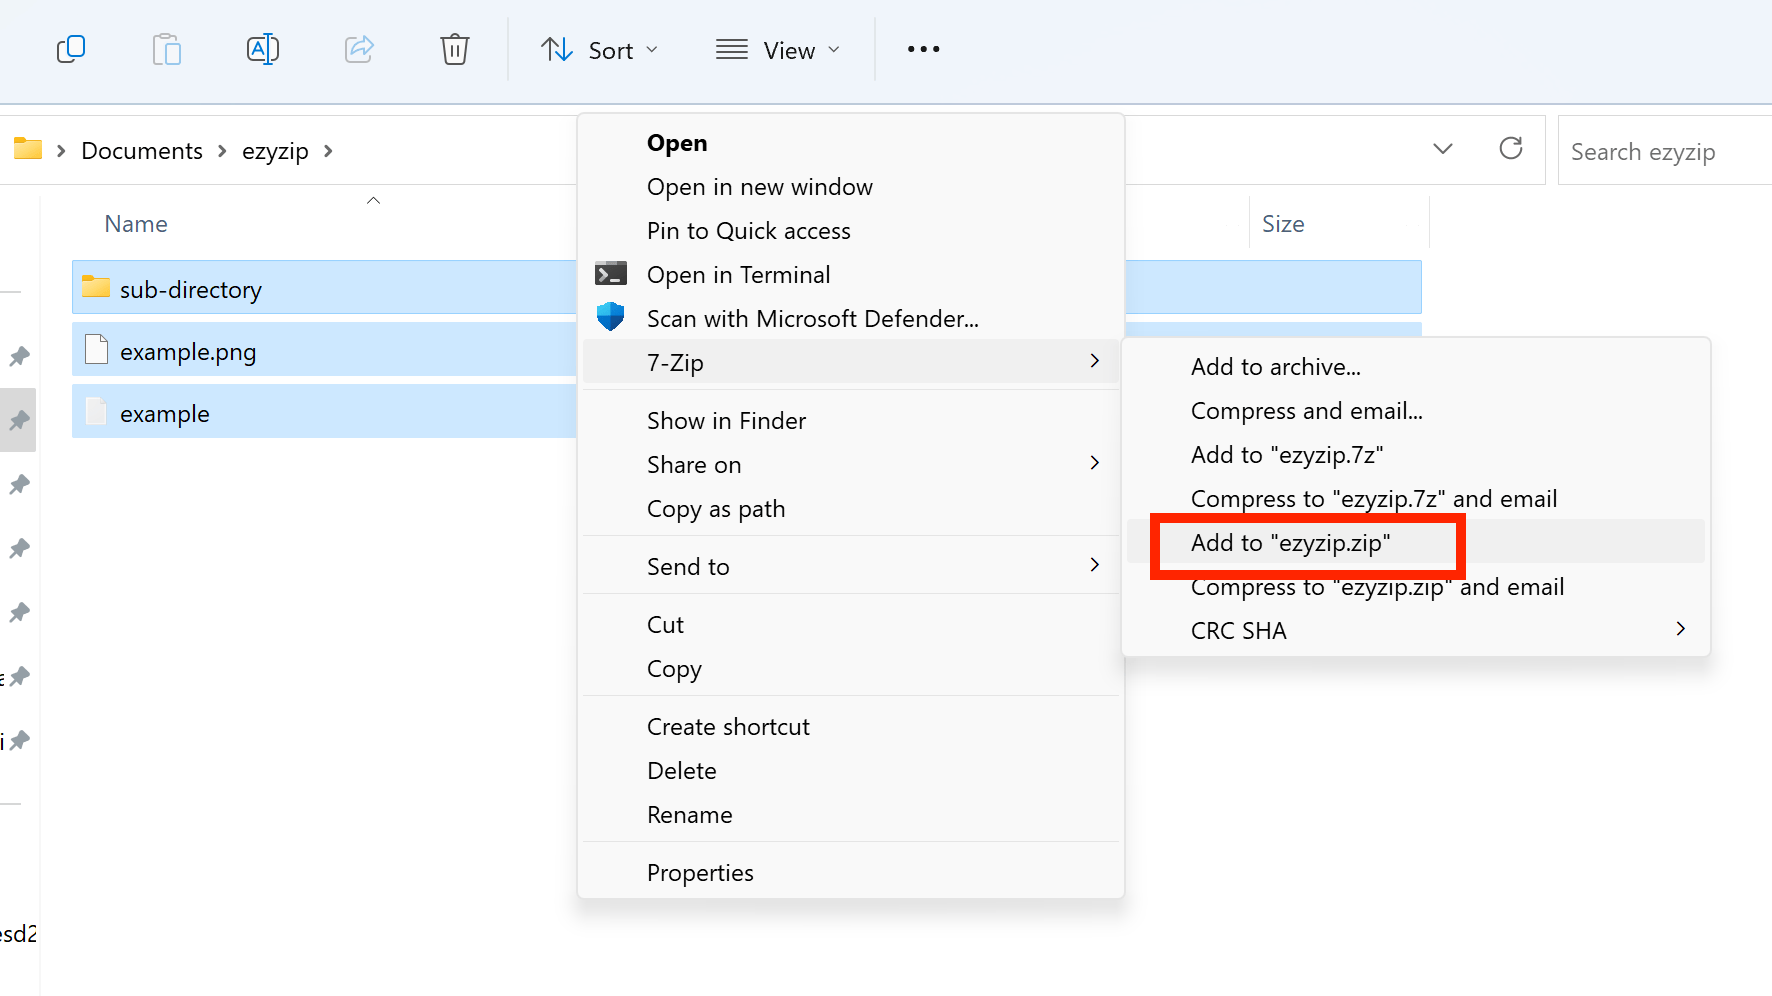
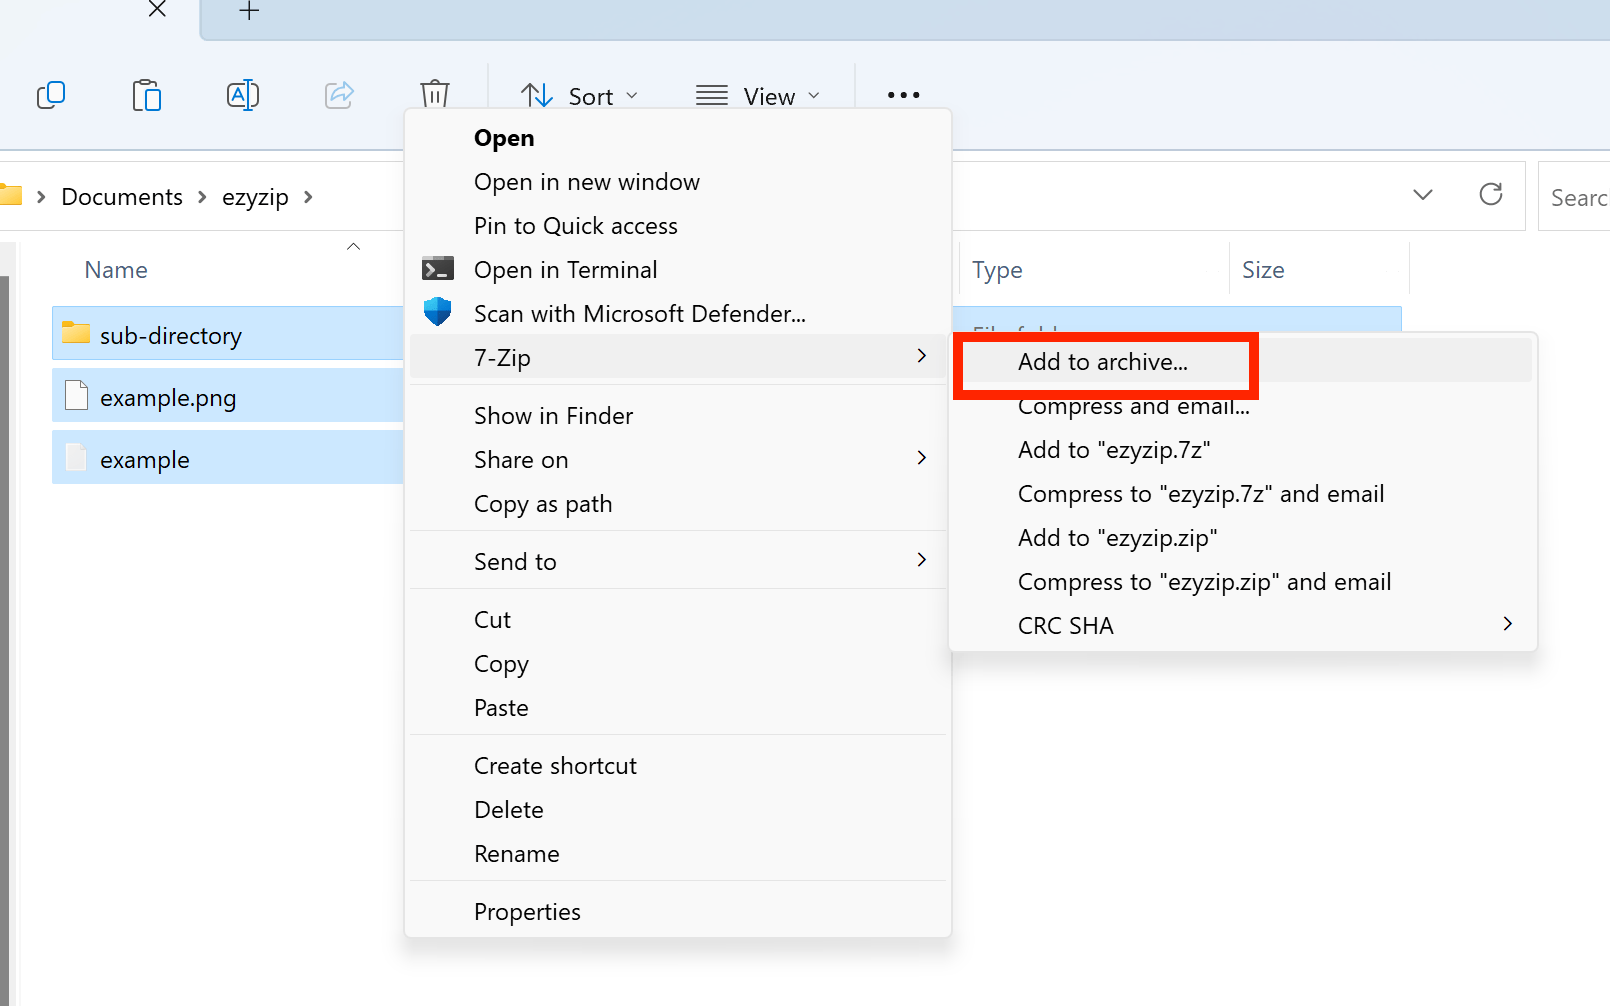
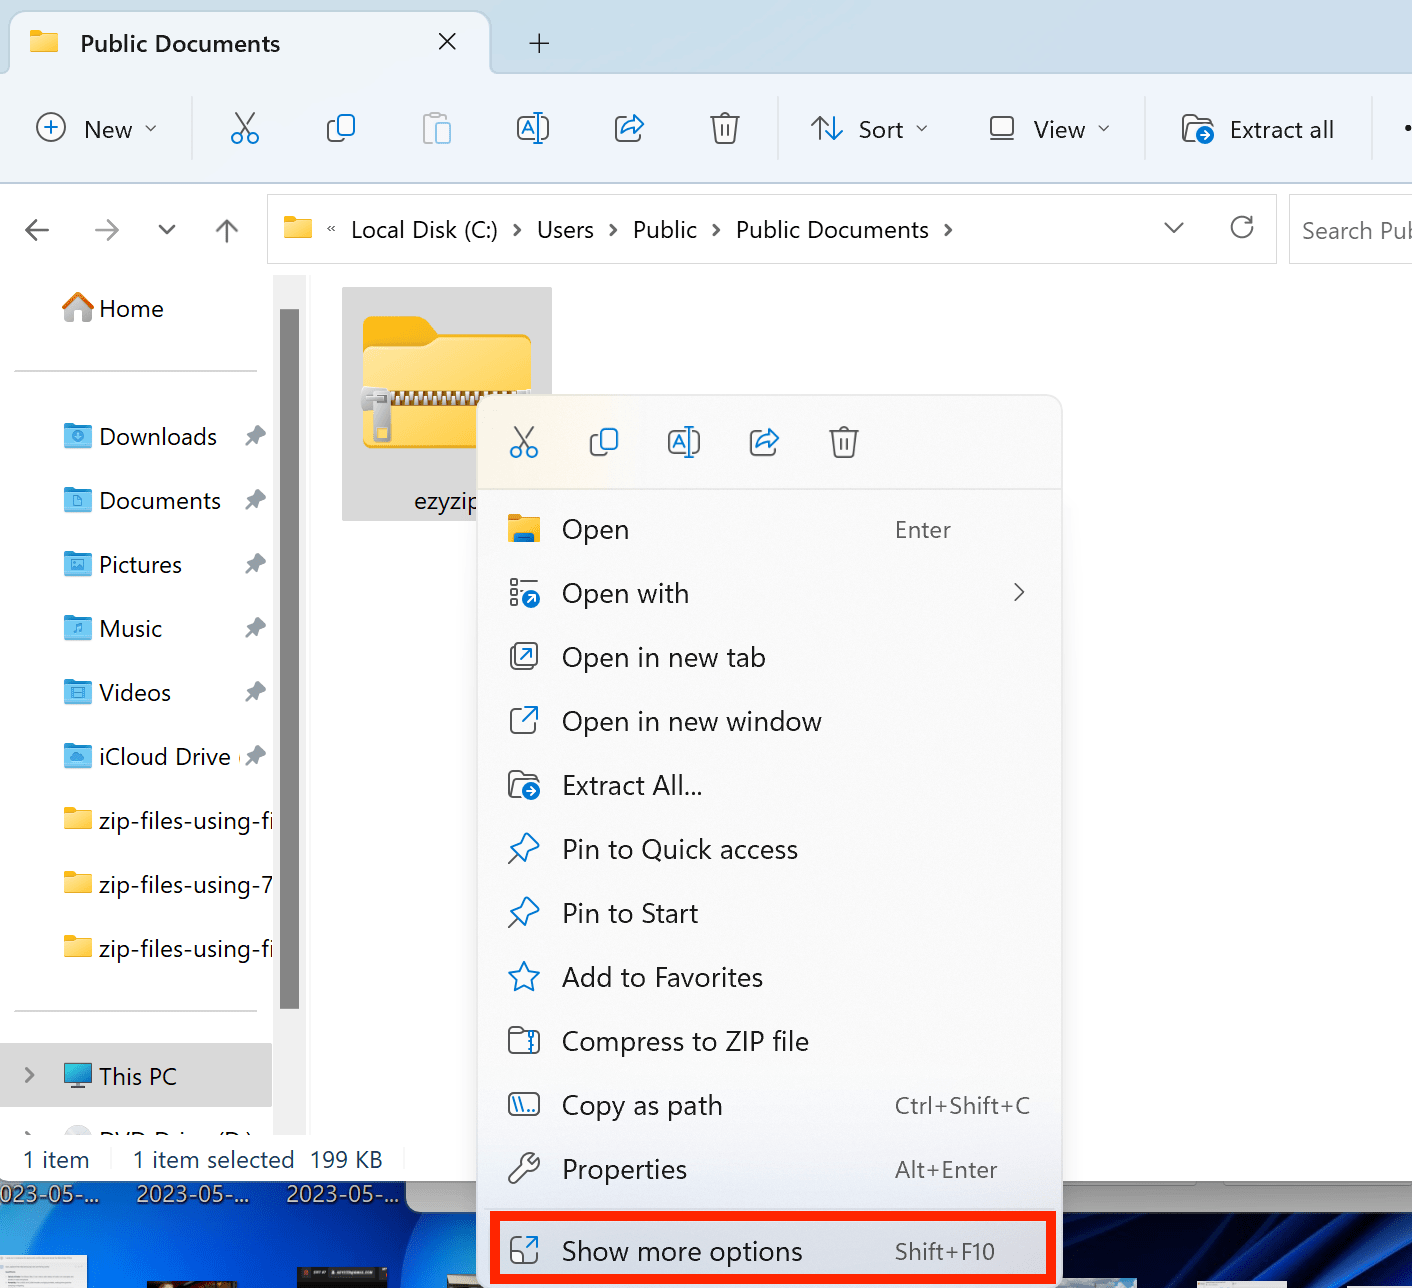
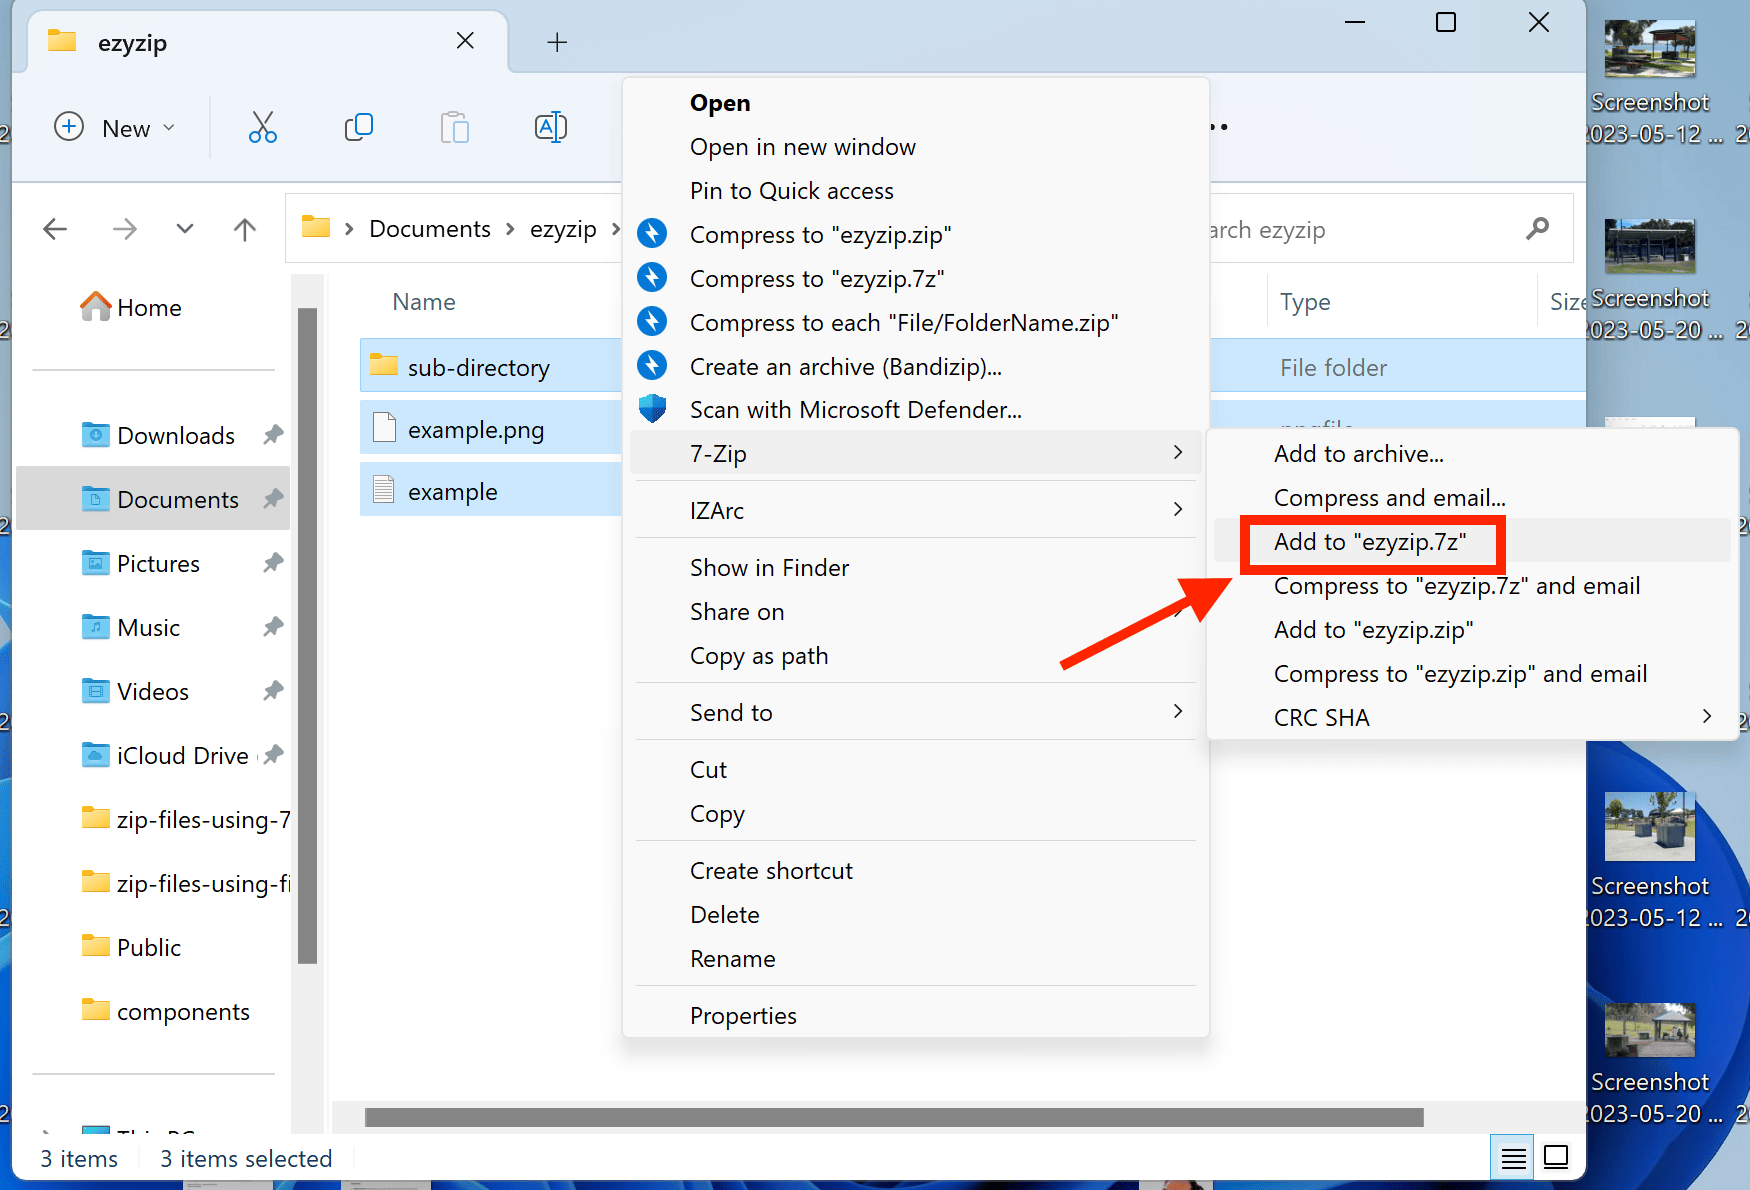
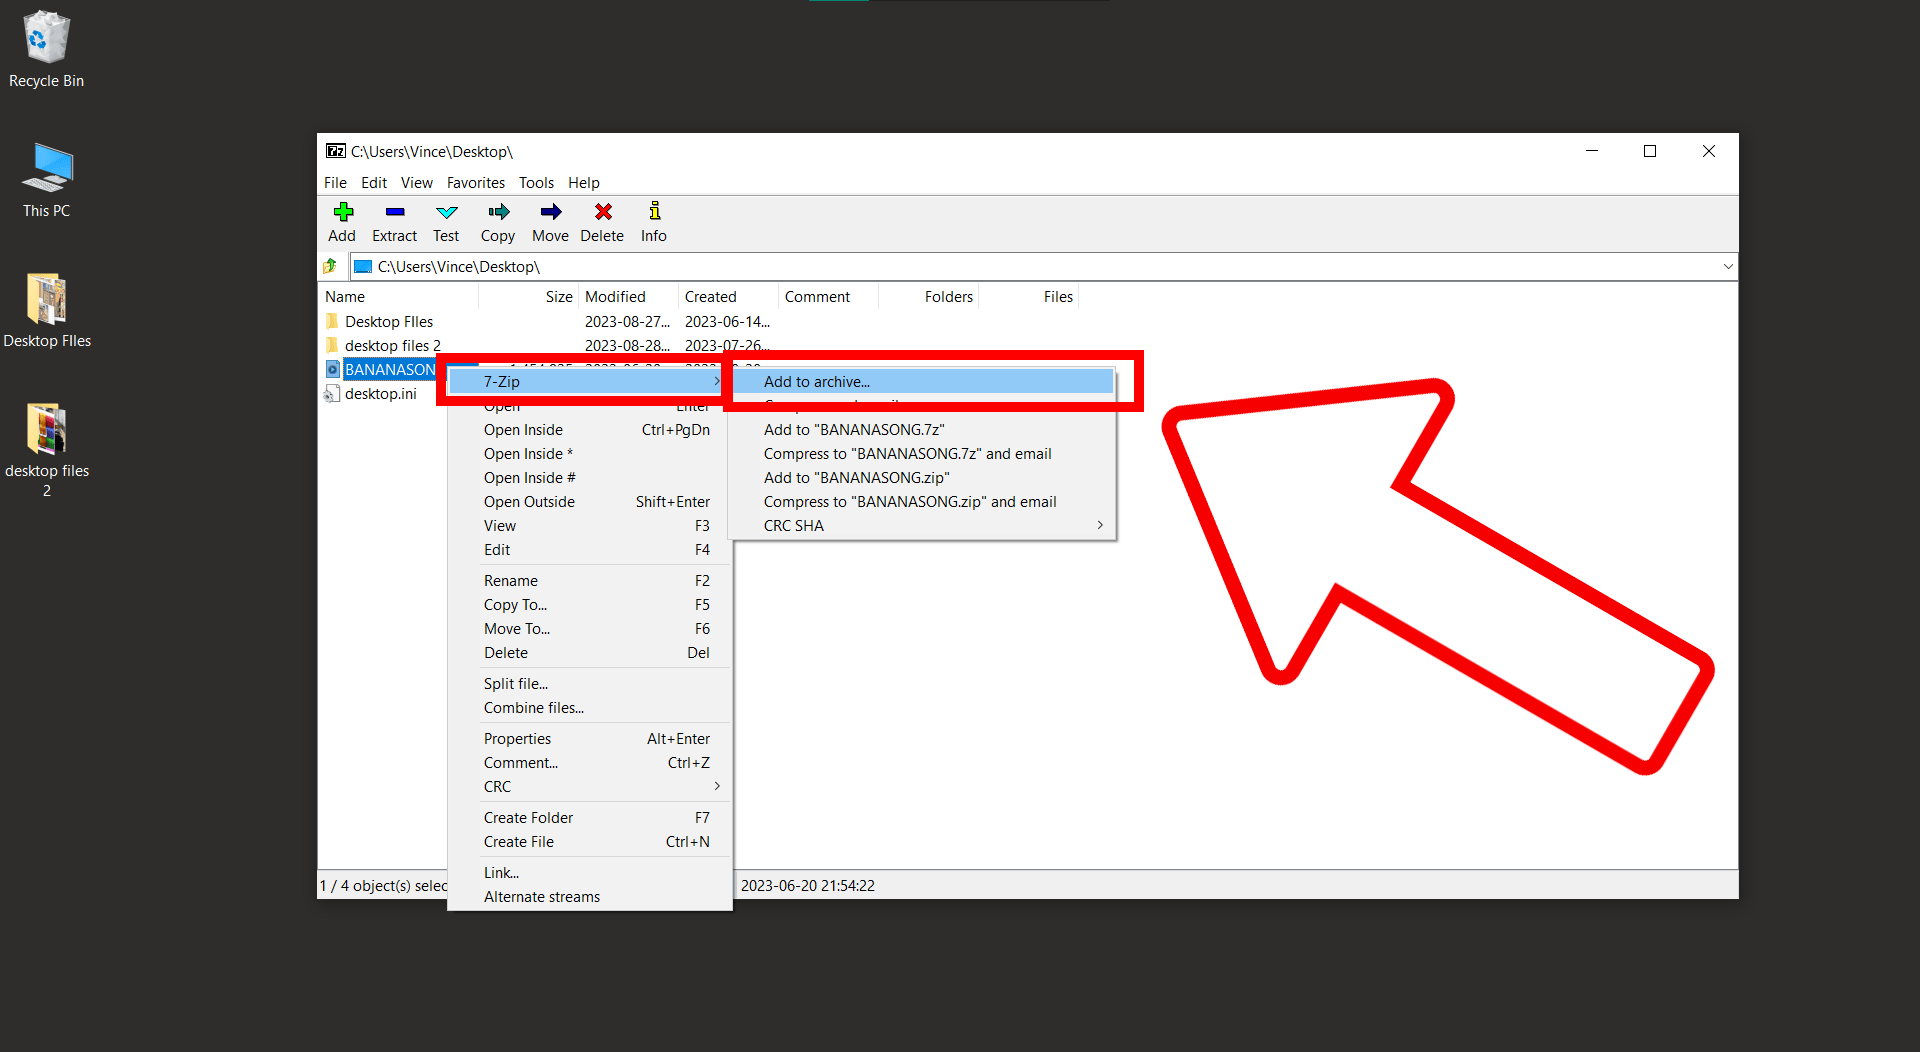
Right-click the selection and select ‘Show more options’. More options, more fun!
-
Hover over ‘7-Zip’ and select either ‘Add to filename.zip’ for quick compression. It’s like sending your files to a spa day!
-
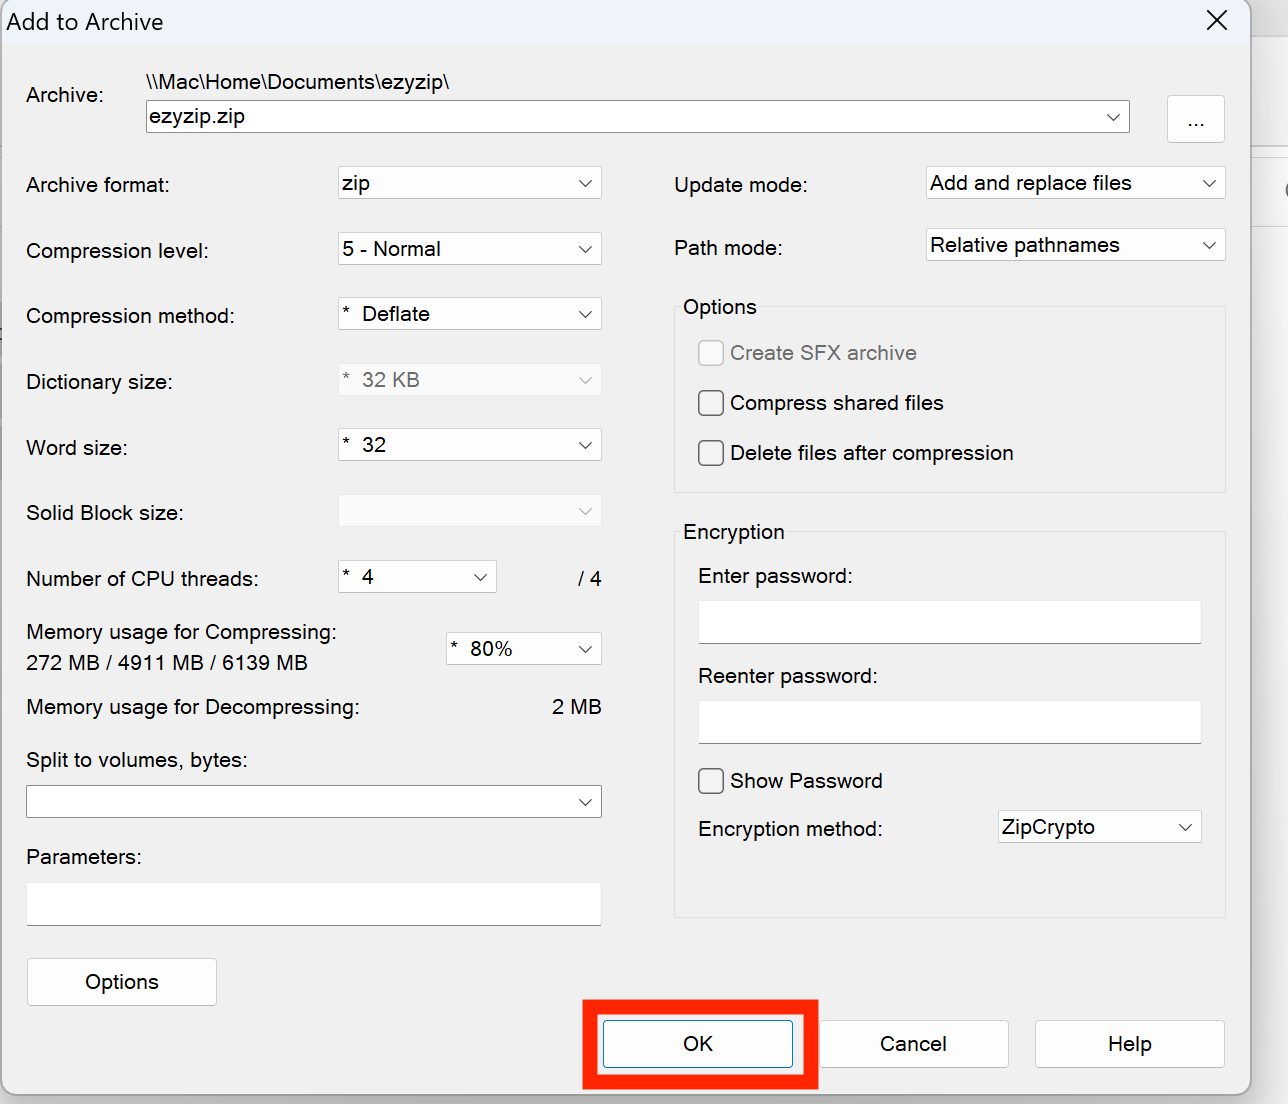
If you want to customize the compression settings, select ‘Add to archive’ instead. Here, you can select different file formats, manage the compression level, choose different compression methods, or even split the archive into several parts. Make sure to select the archive format as “ZIP”.
-
Once you’re done adjusting to your heart’s content, click ‘OK’ to start the compression.
Note: When extracting or opening multipart ZIP files, ensure all parts are in the same directory, and start by opening the ‘.001’ file or the main ‘.zip’ file.
With these steps, you can efficiently break down large files into manageable parts using 7-Zip.
How To Create Multipart ZIP Files Using 7-Zip
Multipart ZIP files allow you to split large files into smaller chunks, ideal for sharing or storage. Here’s how you can create them using 7-Zip:
-
Select your Files: In 7-Zip, navigate to the files you want to zip up. Like choosing the ripest bananas for your banana bread!
-
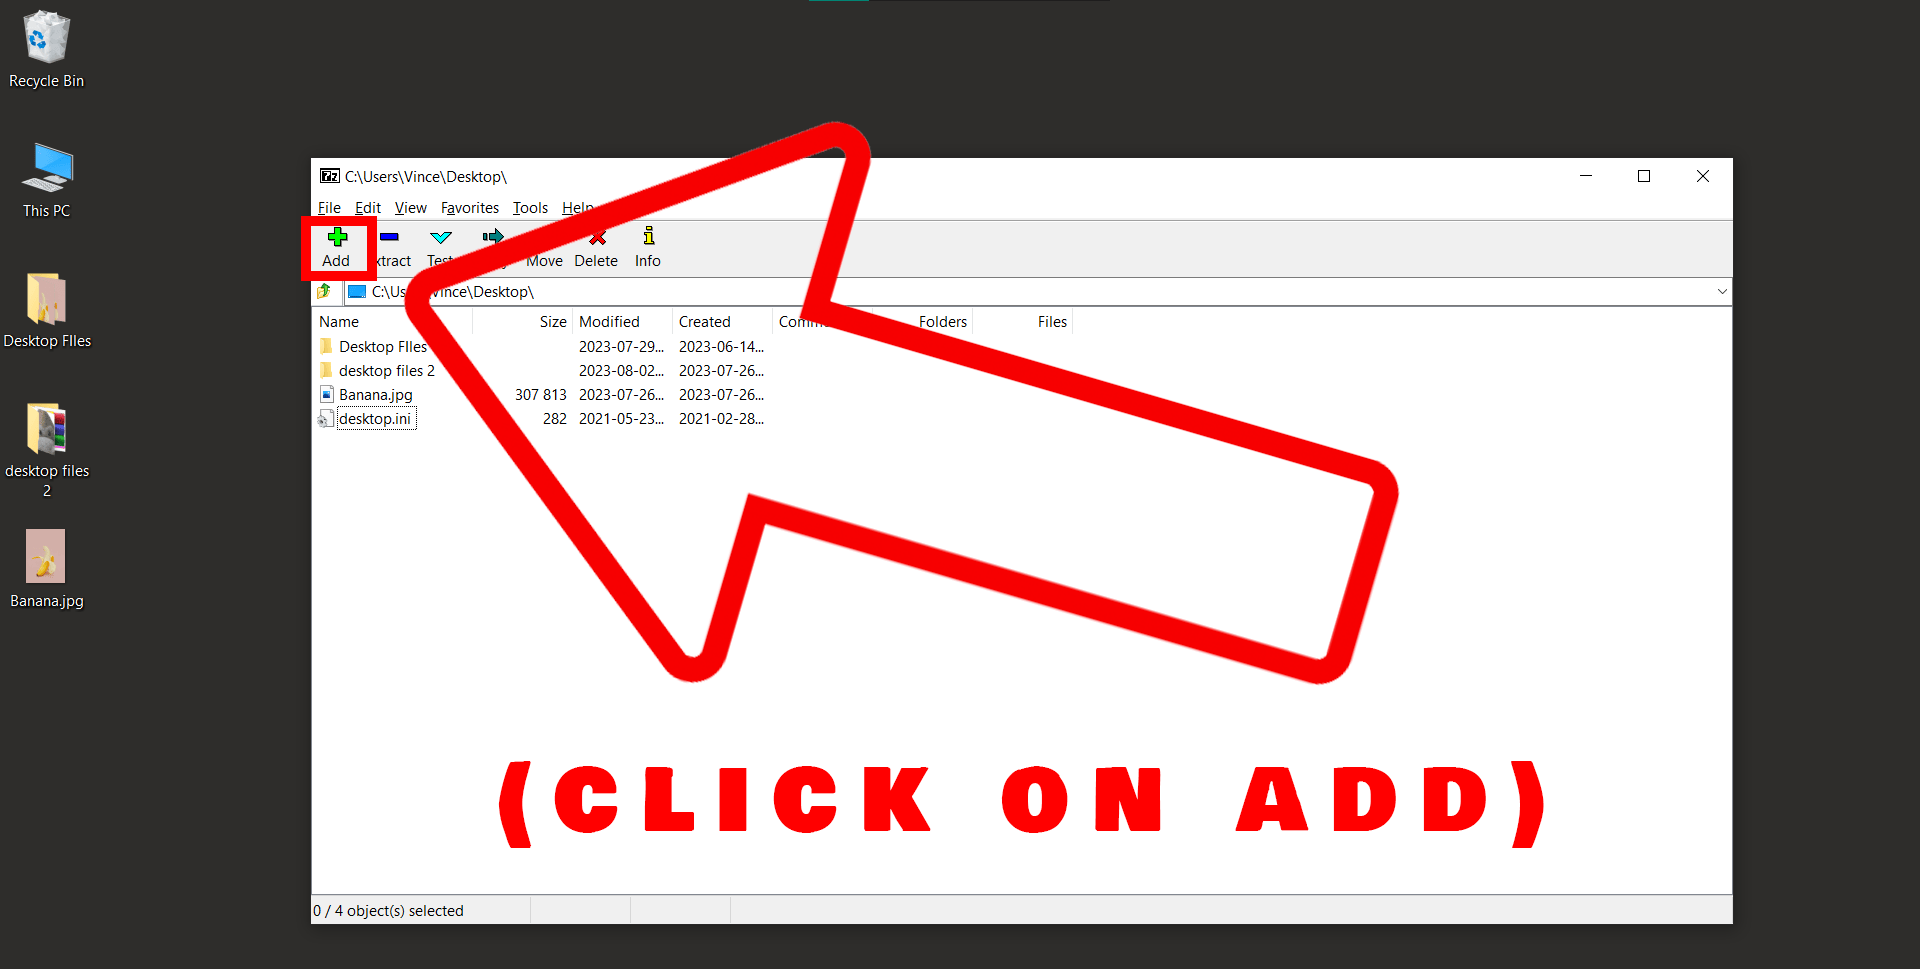
Add to Archive: Once you’ve selected your files, click on ‘Add’. A new window will pop up. Here’s where we’re going to create some zip magic.
-
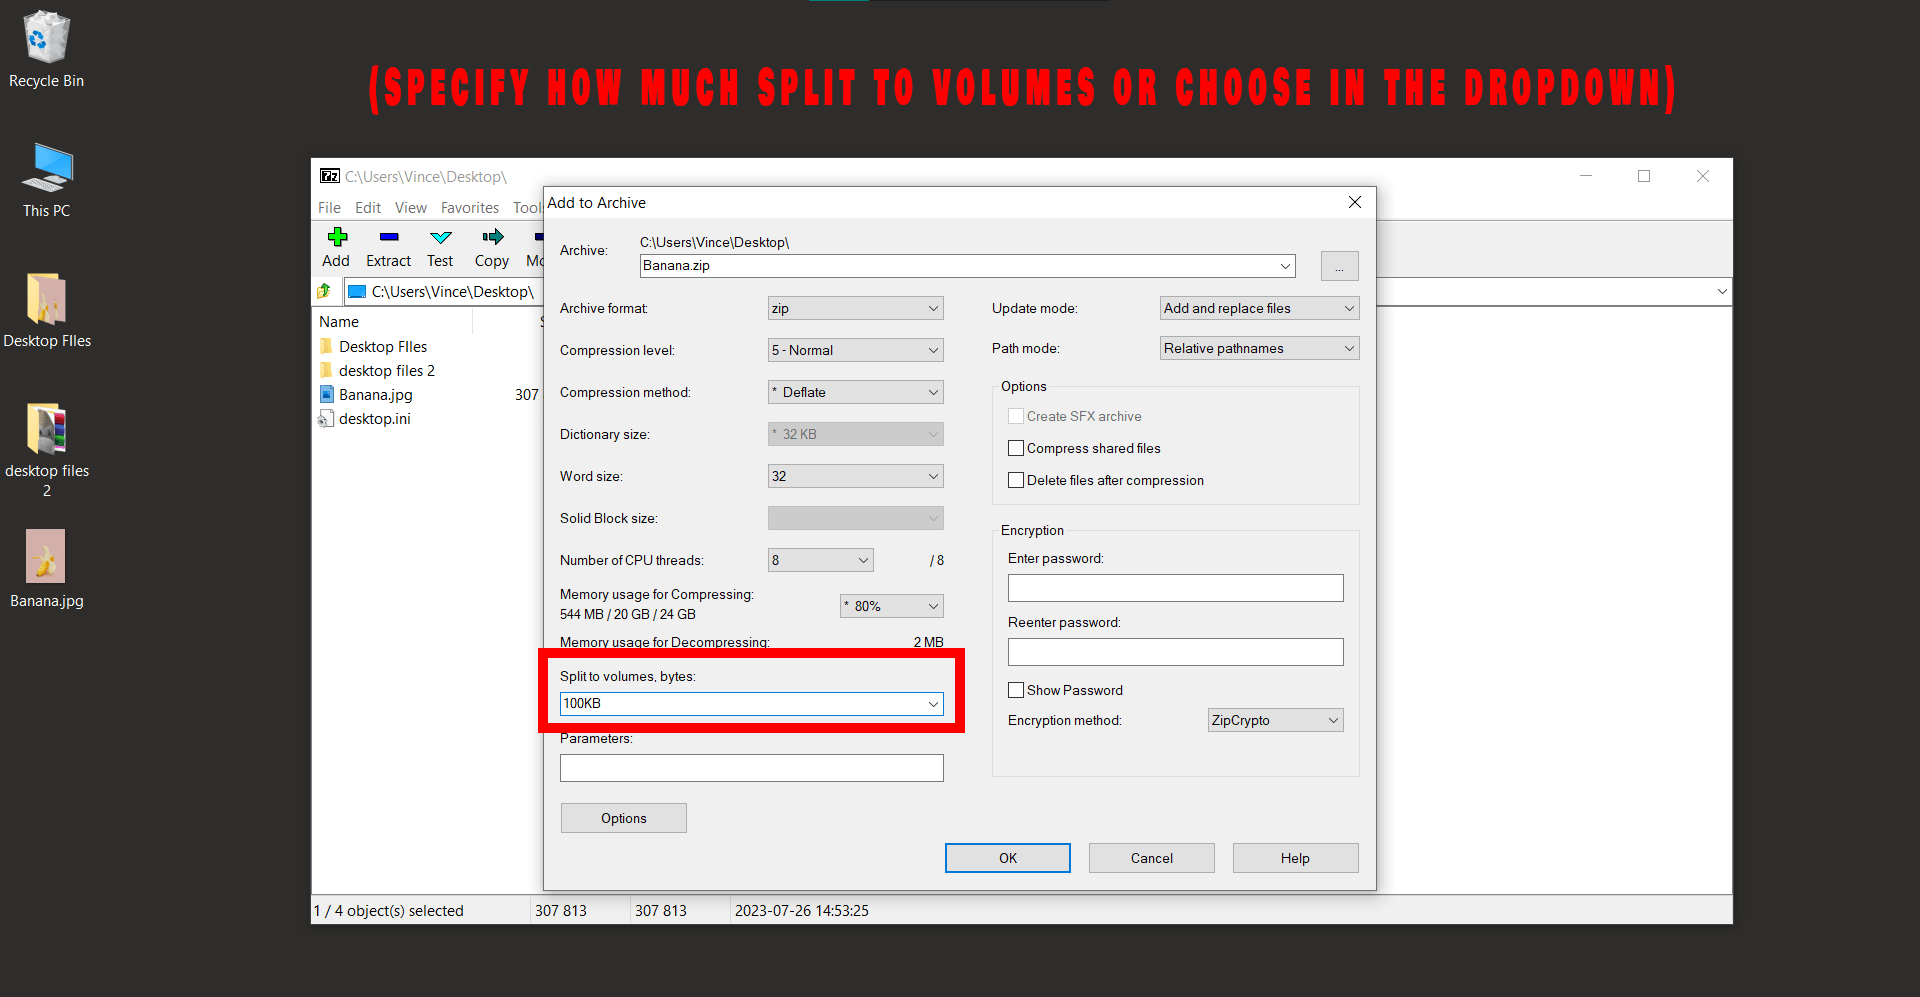
Split to Volumes: In this window, you’ll see an option called ‘Split to volumes, bytes’. Click on this dropdown and select the size that you want each part of your ZIP file to be. This is the equivalent of deciding how big you want your slices of banana bread to be.
-
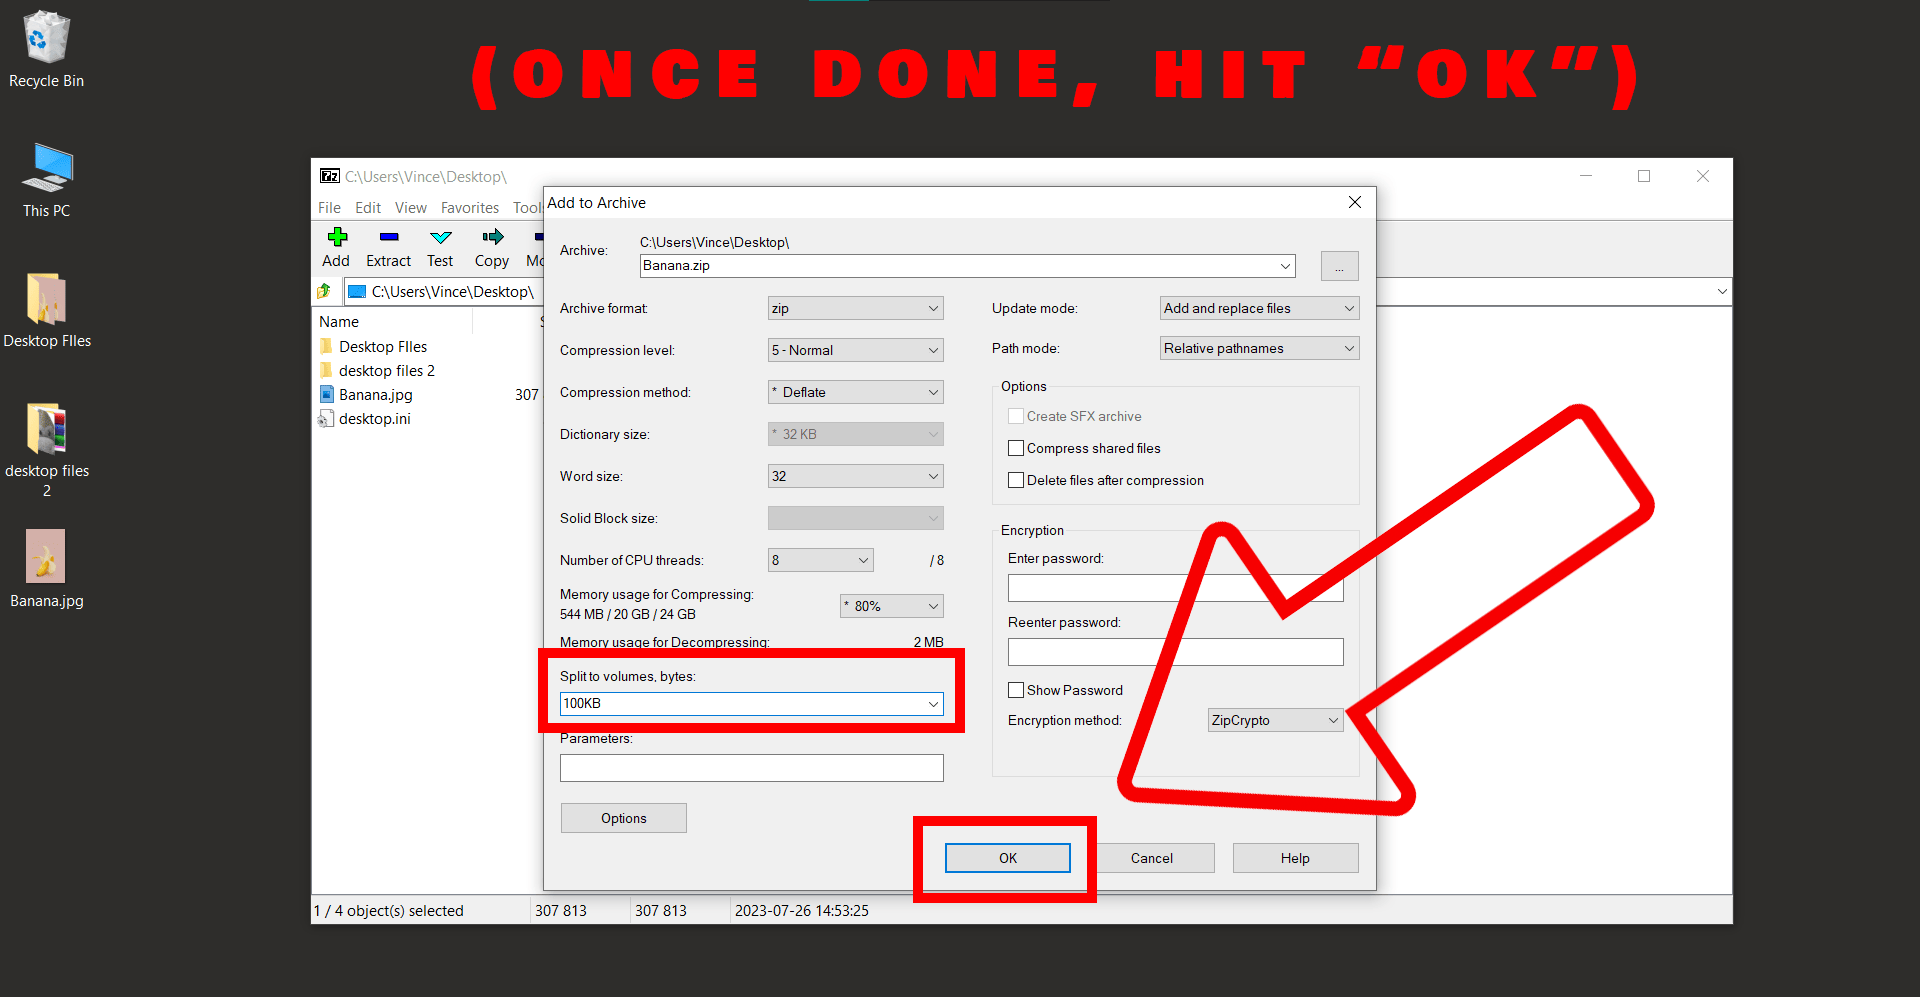
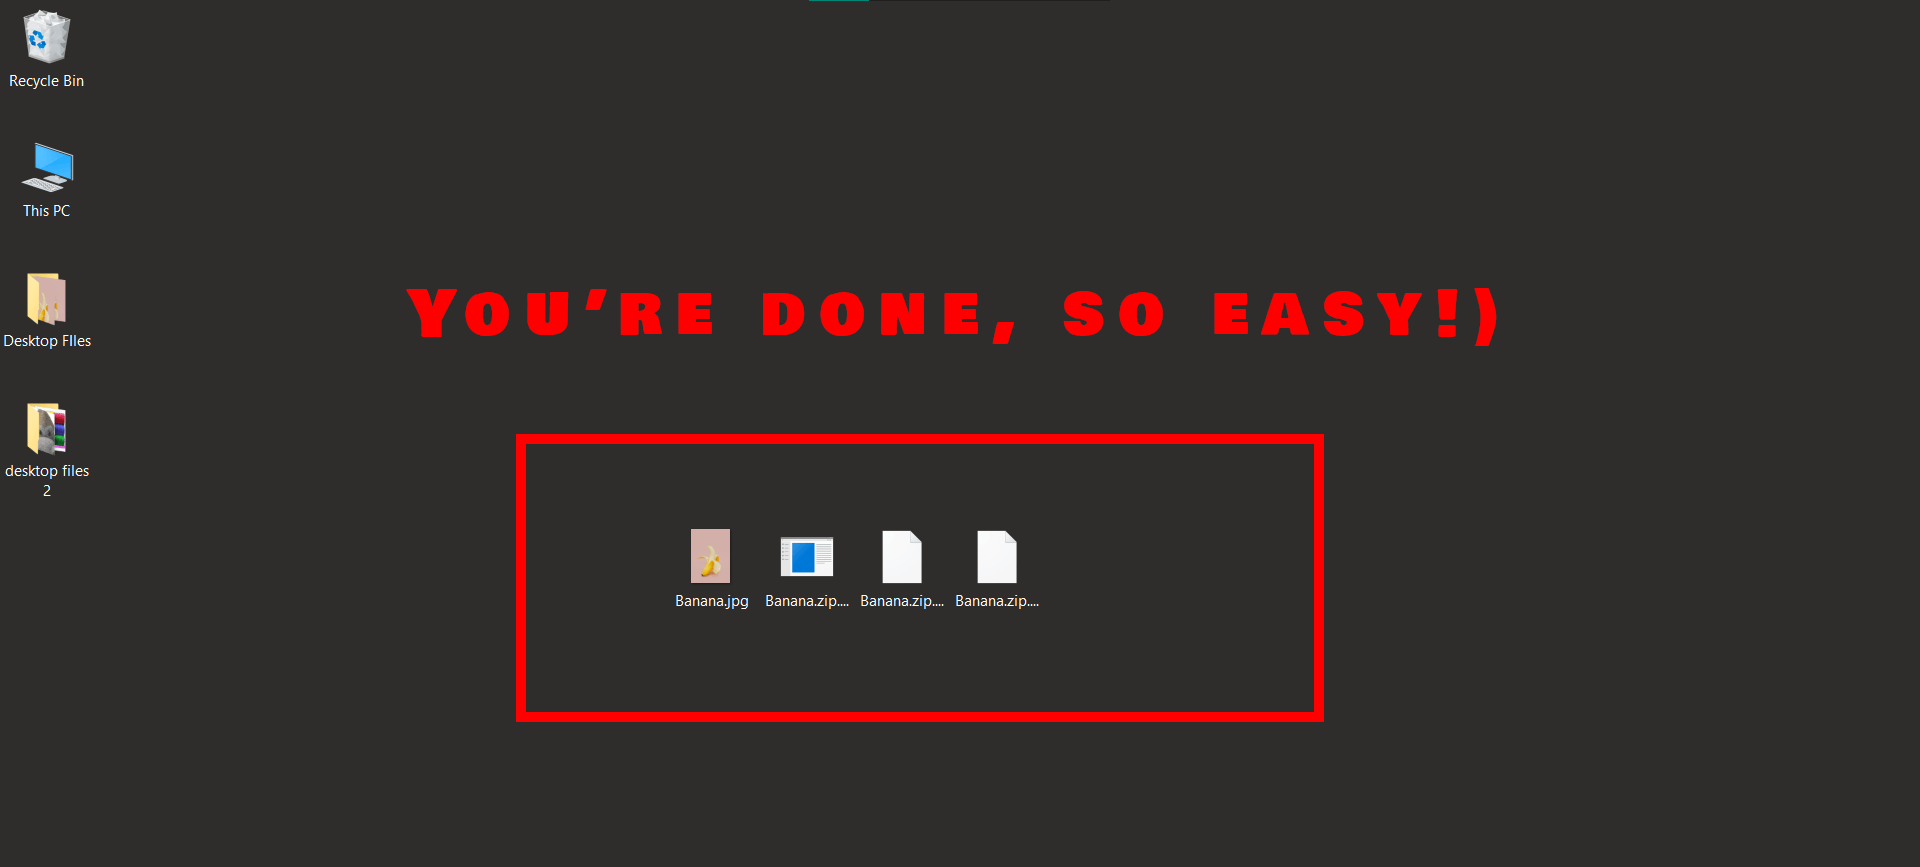
Click OK: After selecting your size, click ‘OK’. 7-Zip will start creating your multipart ZIP. It’s like slicing up that banana bread. In a few moments, you’ll have several smaller ZIP files instead of one giant one.
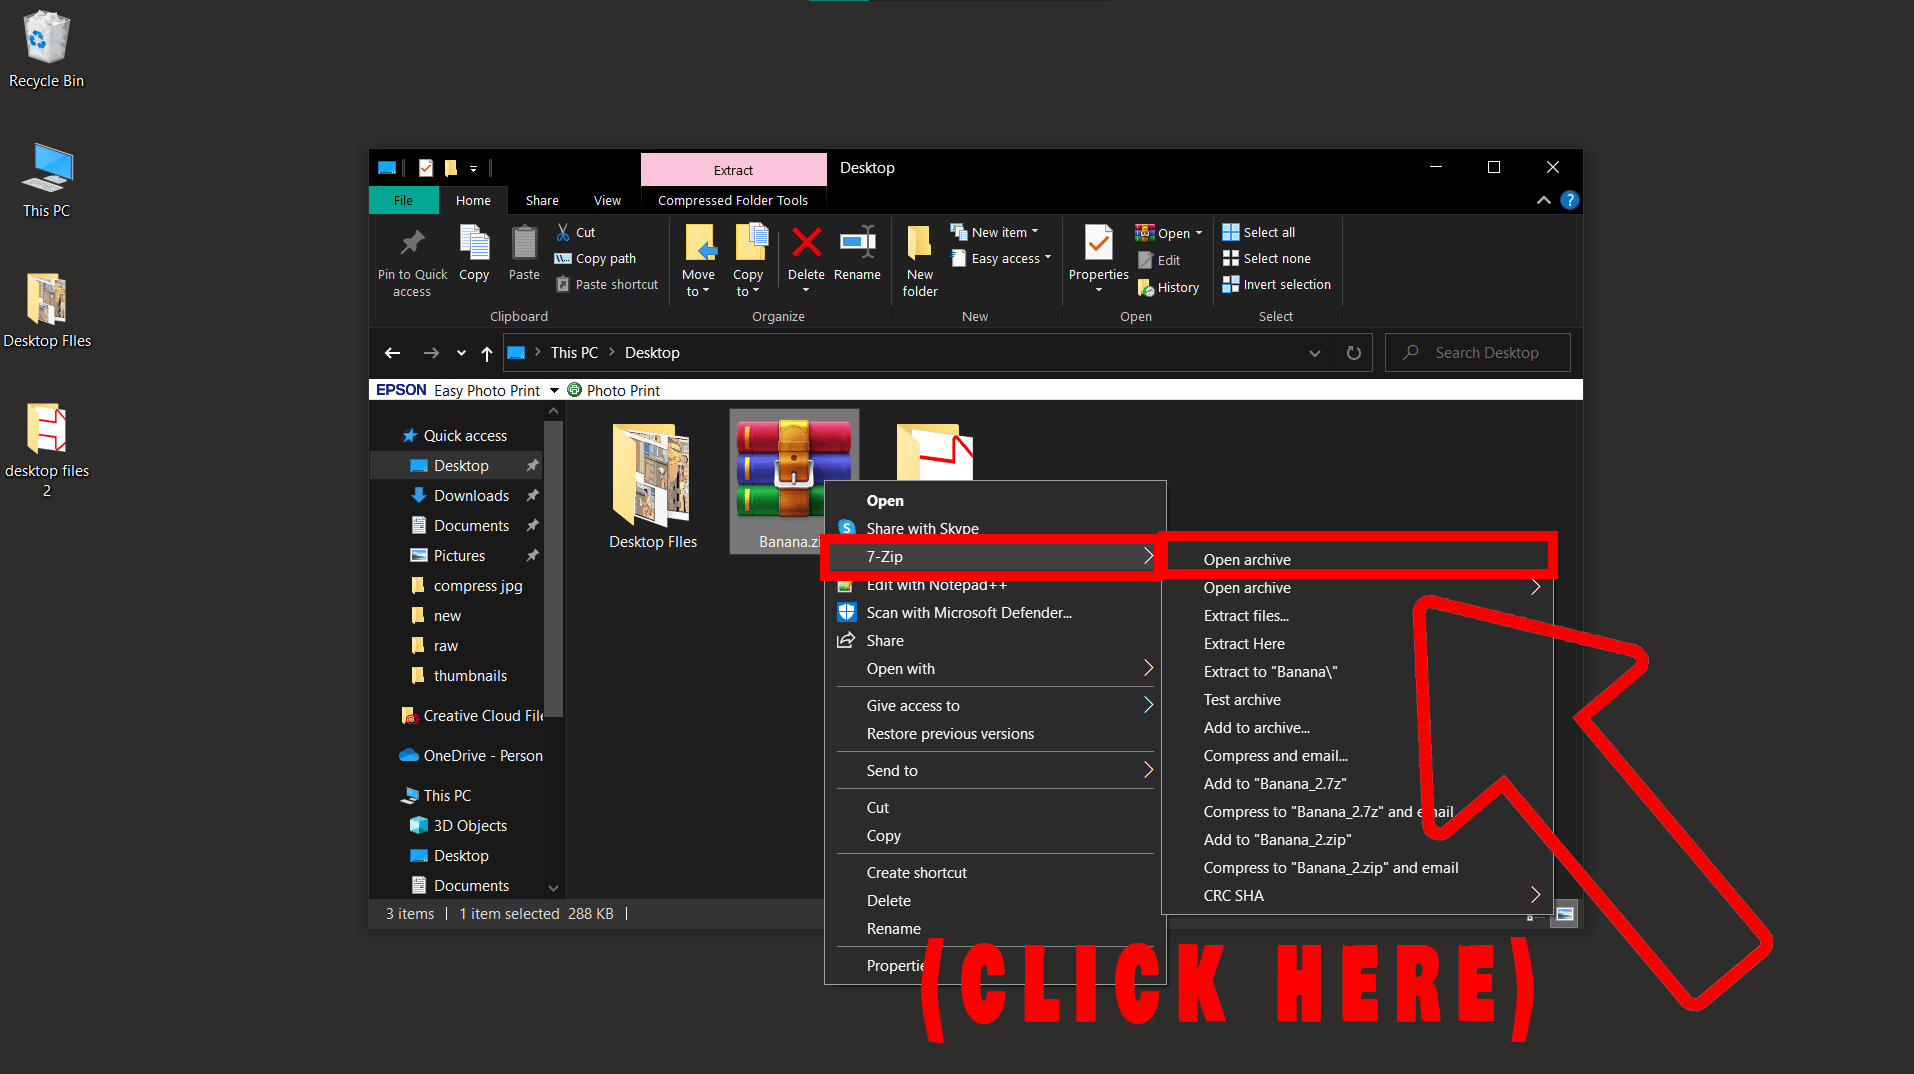
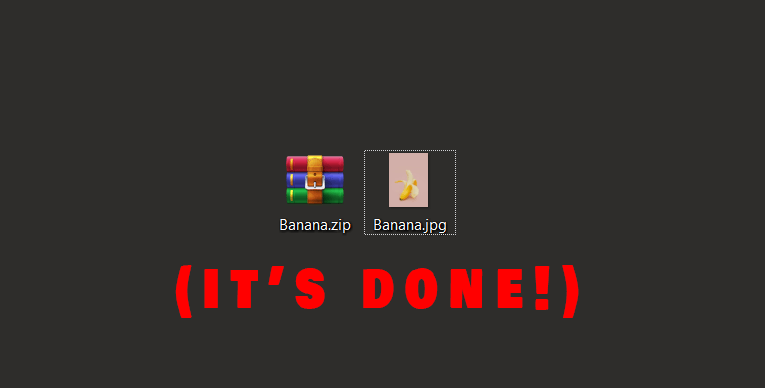
How To Extract Files Using 7Zip
Unwrapping digital goodies? Follow these steps:
-
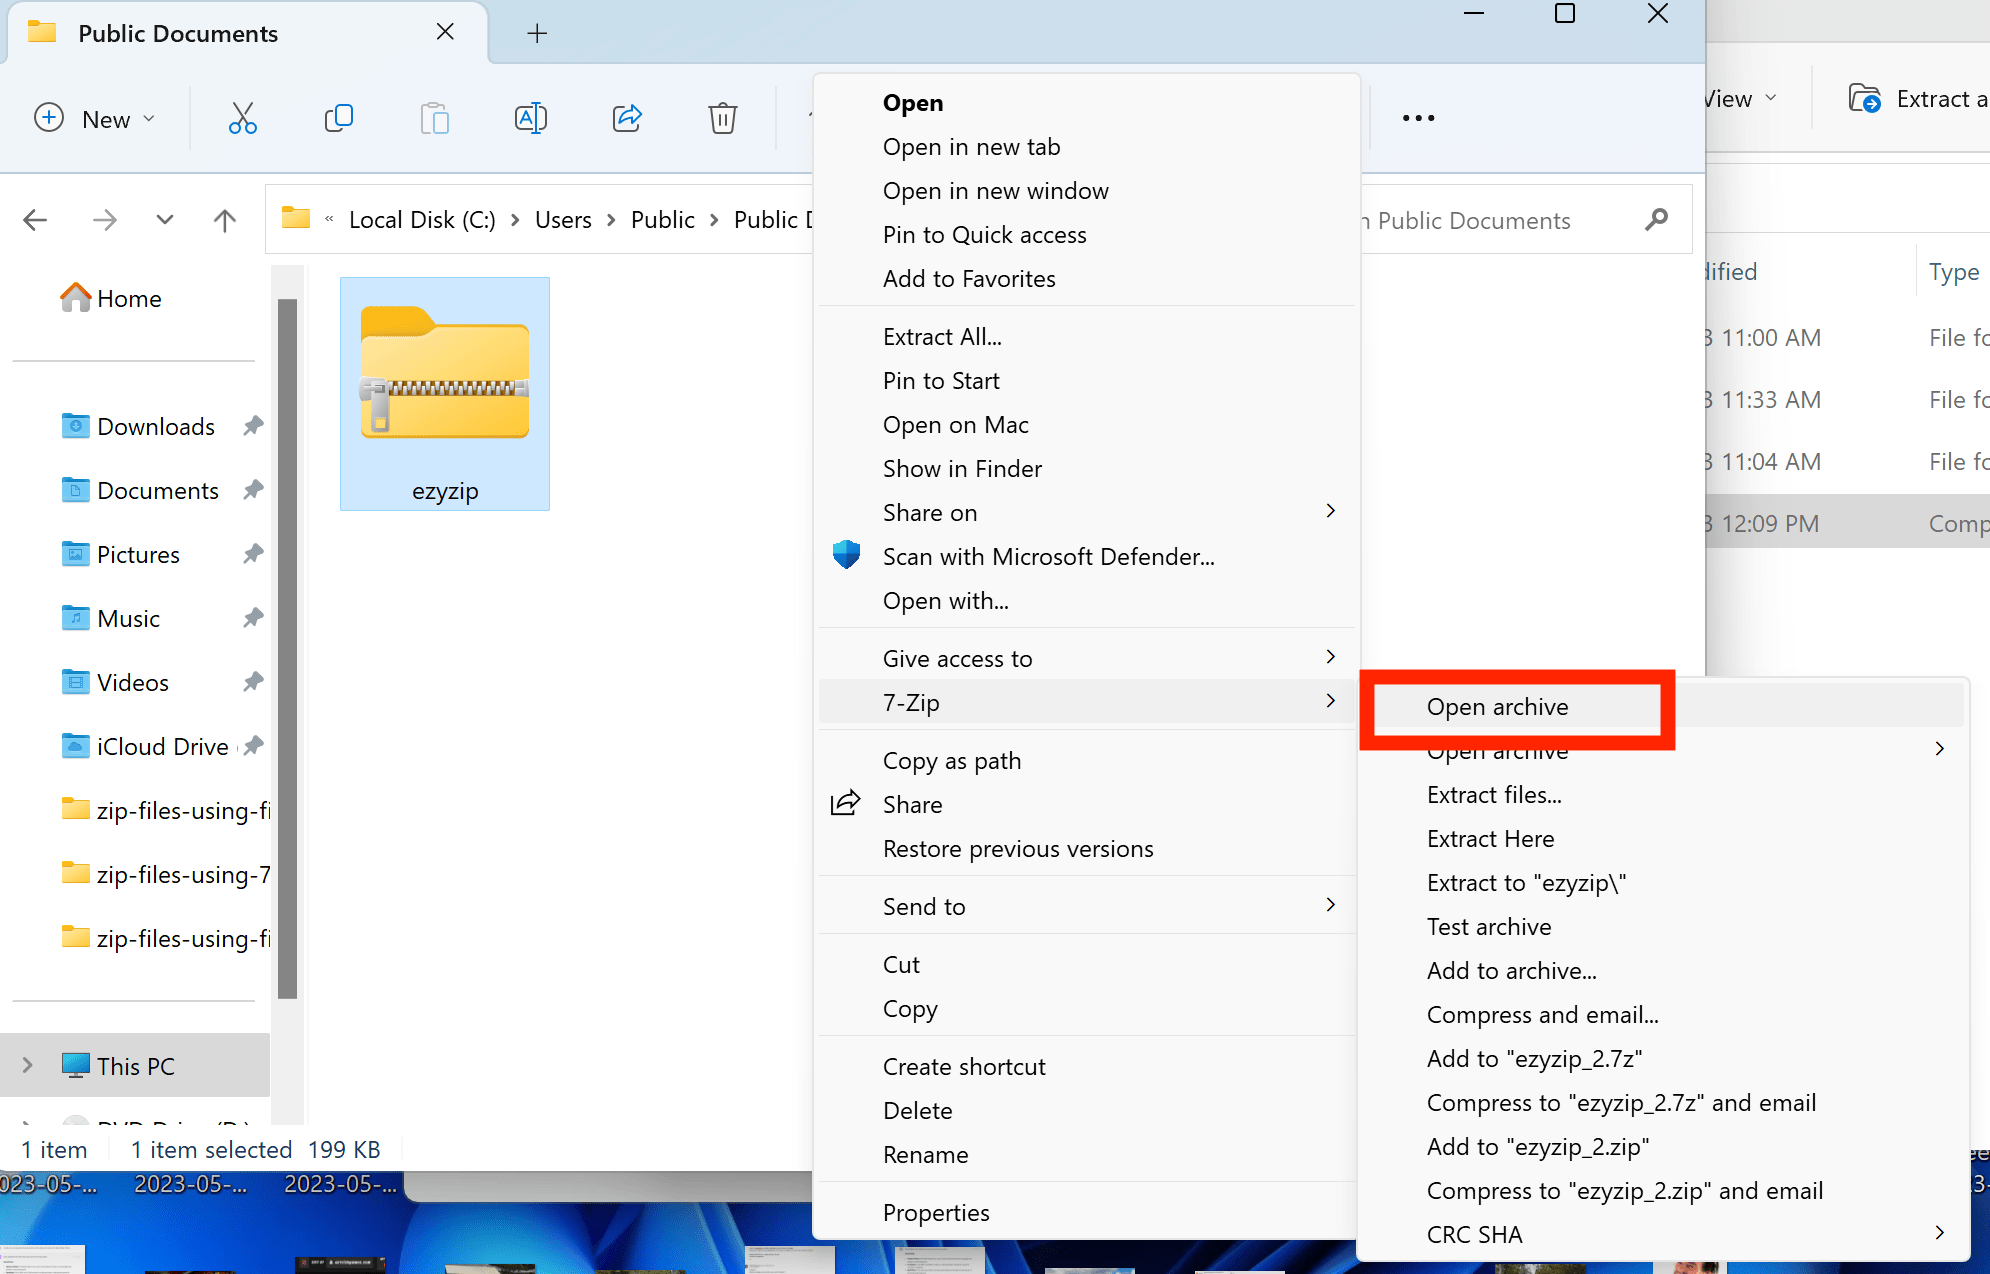
Once you have 7-Zip installed, find your zip file and right-click on it. Select “Show more options”.
-
From the drop-down menu, hover over ‘7-Zip’ and select ‘Open Archive’. It’s like you’re peeking into the zip file’s diary.
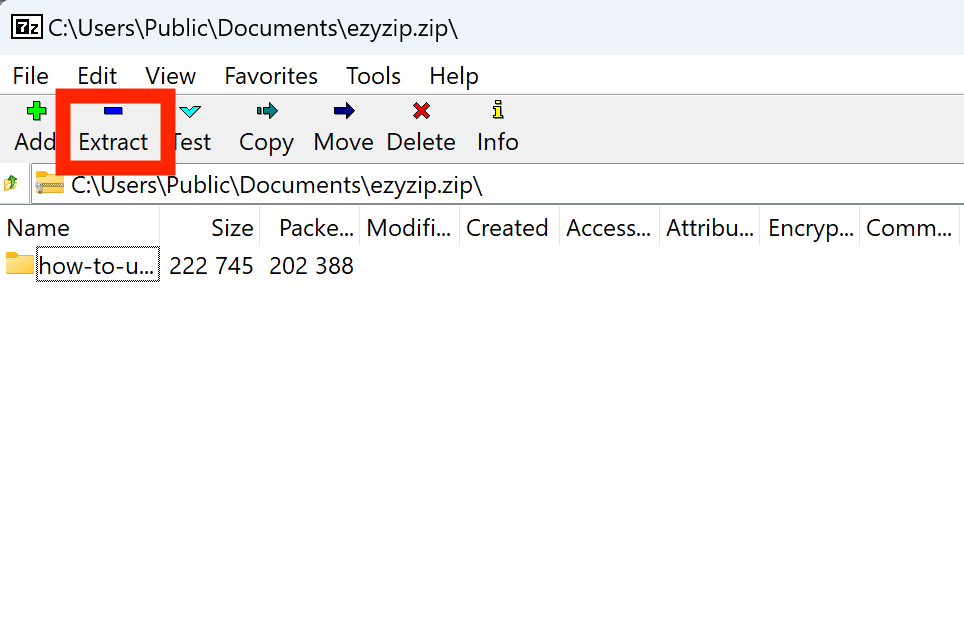
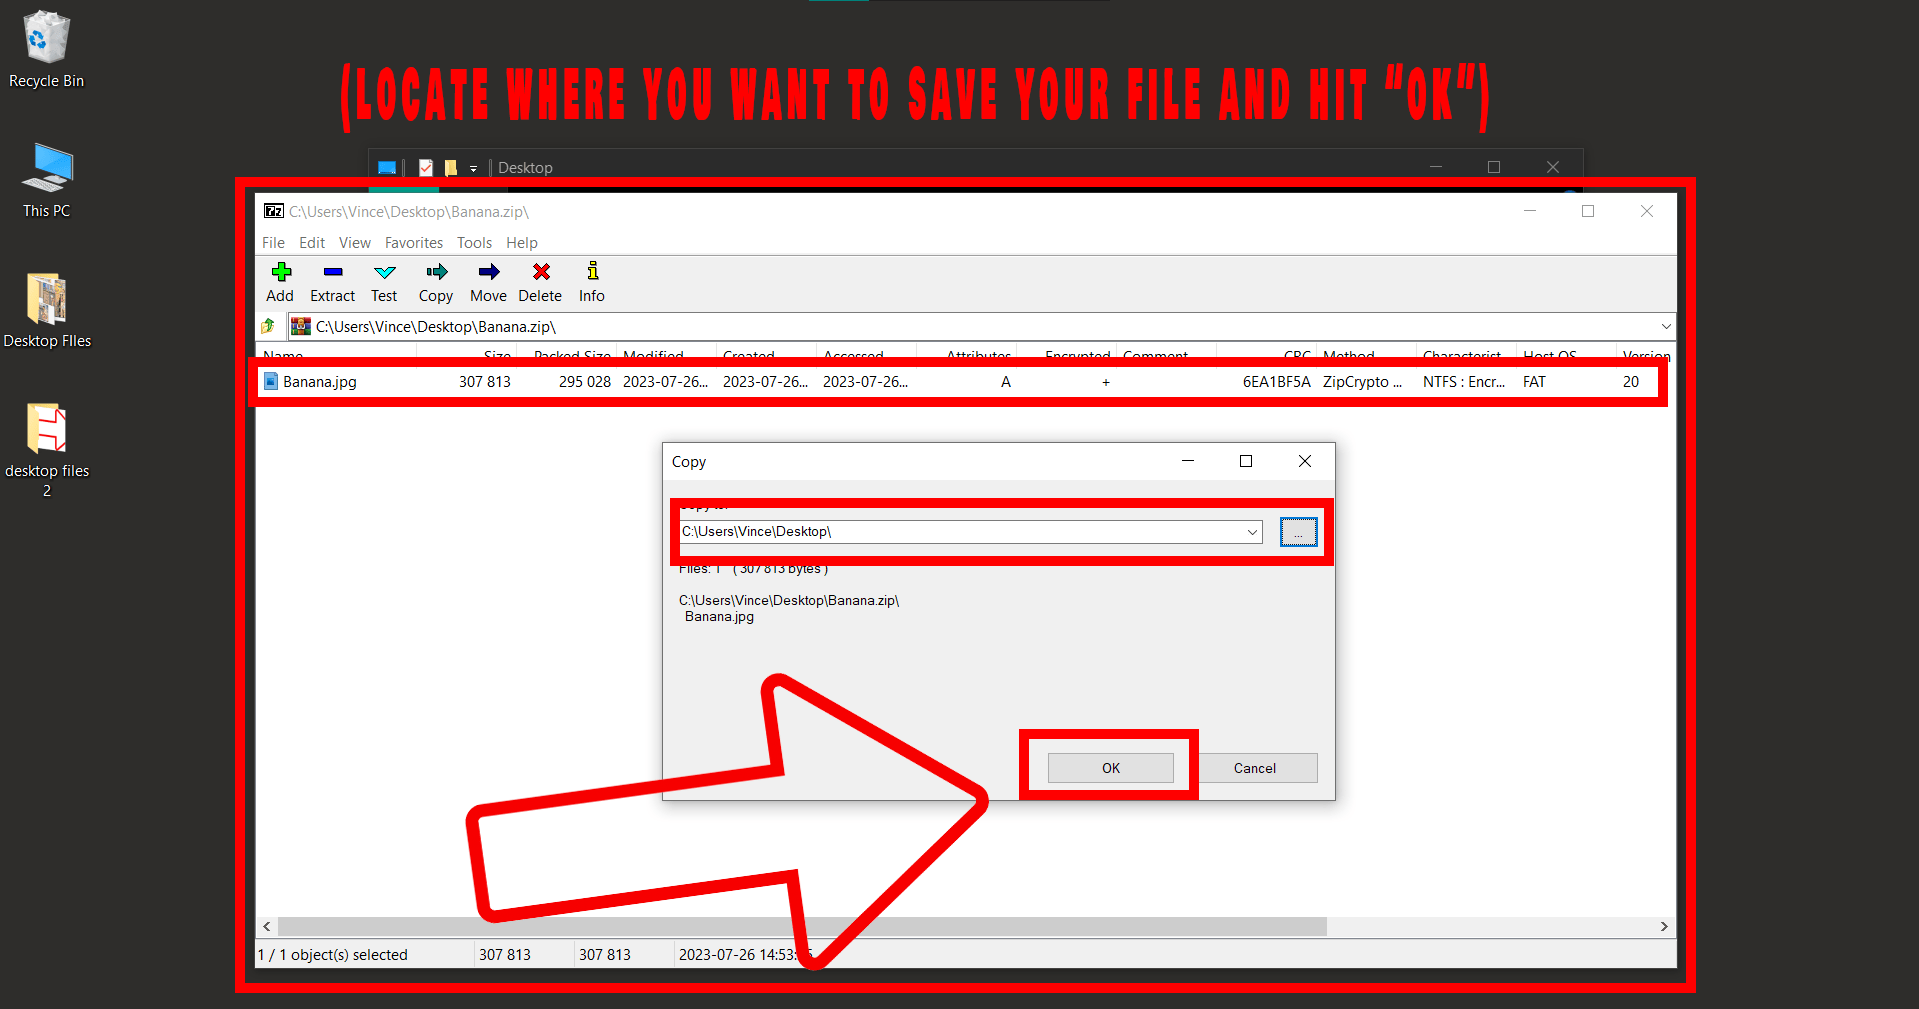
-
Inside the 7-Zip window, you’ll see the contents of the archive. To extract, you can either drag and drop the files to a File Explorer window or use the ‘Extract’ button at the top. It’s like choosing whether to lift weights or use the machine at the gym.
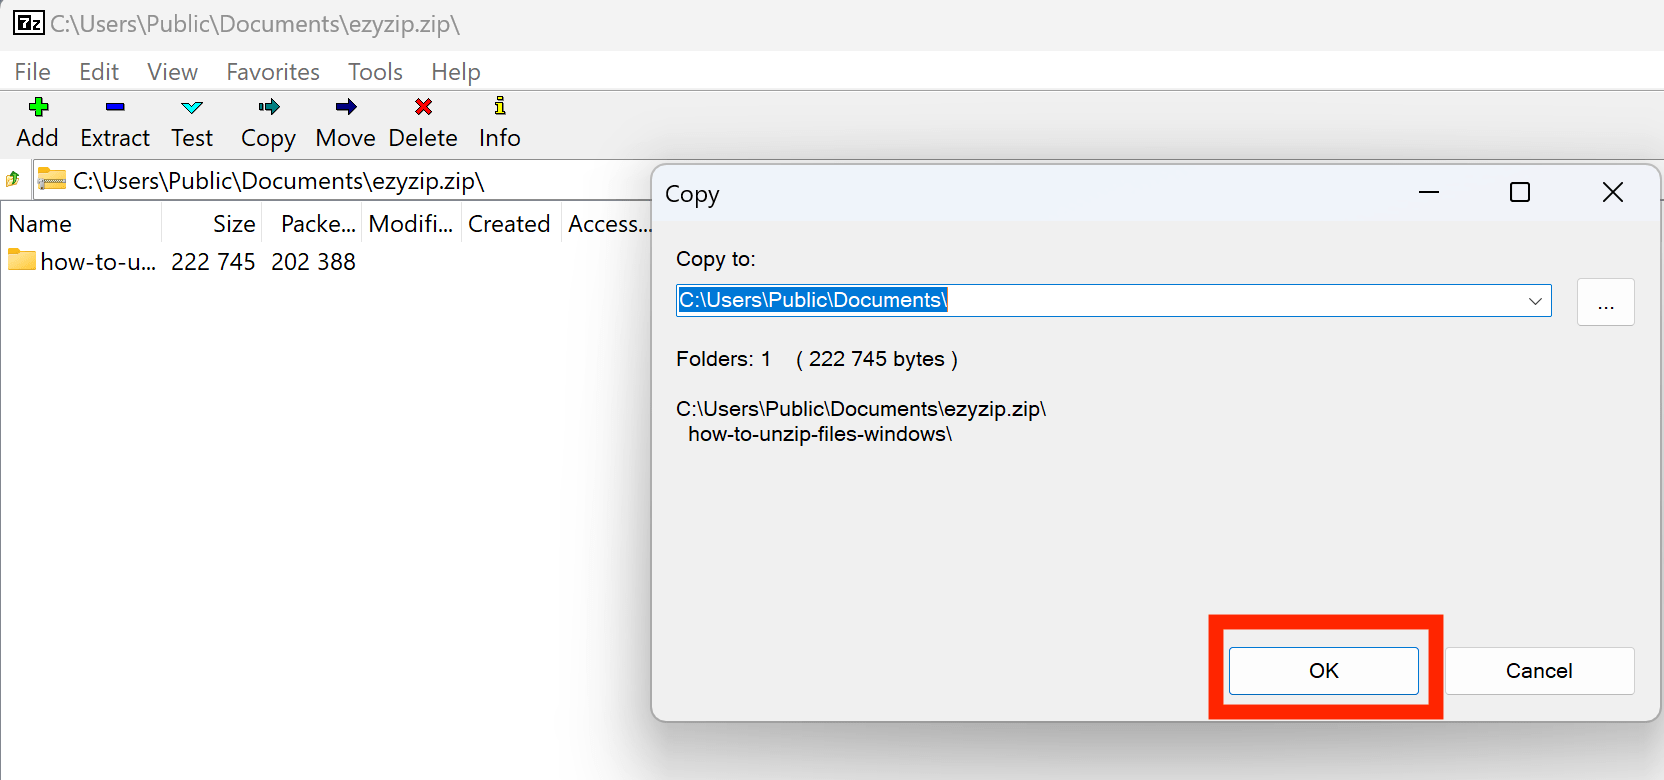
-
If you chose the ‘Extract’ button, you’ll need to select where you want the files to go. Choose a location, then click ‘OK’. It’s as easy as ordering takeout, but without the guilt of not cooking.
How To Create 7Z Files Using 7-Zip In Windows
Creating a 7Z archive with 7-Zip is a straightforward process that allows you to compress files efficiently. Here’s a step-by-step guide:
-
Download & Install 7-Zip: Follow the previous steps to download and install 7-Zip. It’s as easy as peeling a banana!
-
Select Files: Navigate to the files you want to compress. It’s like selecting the ripest bananas from the bunch.
-
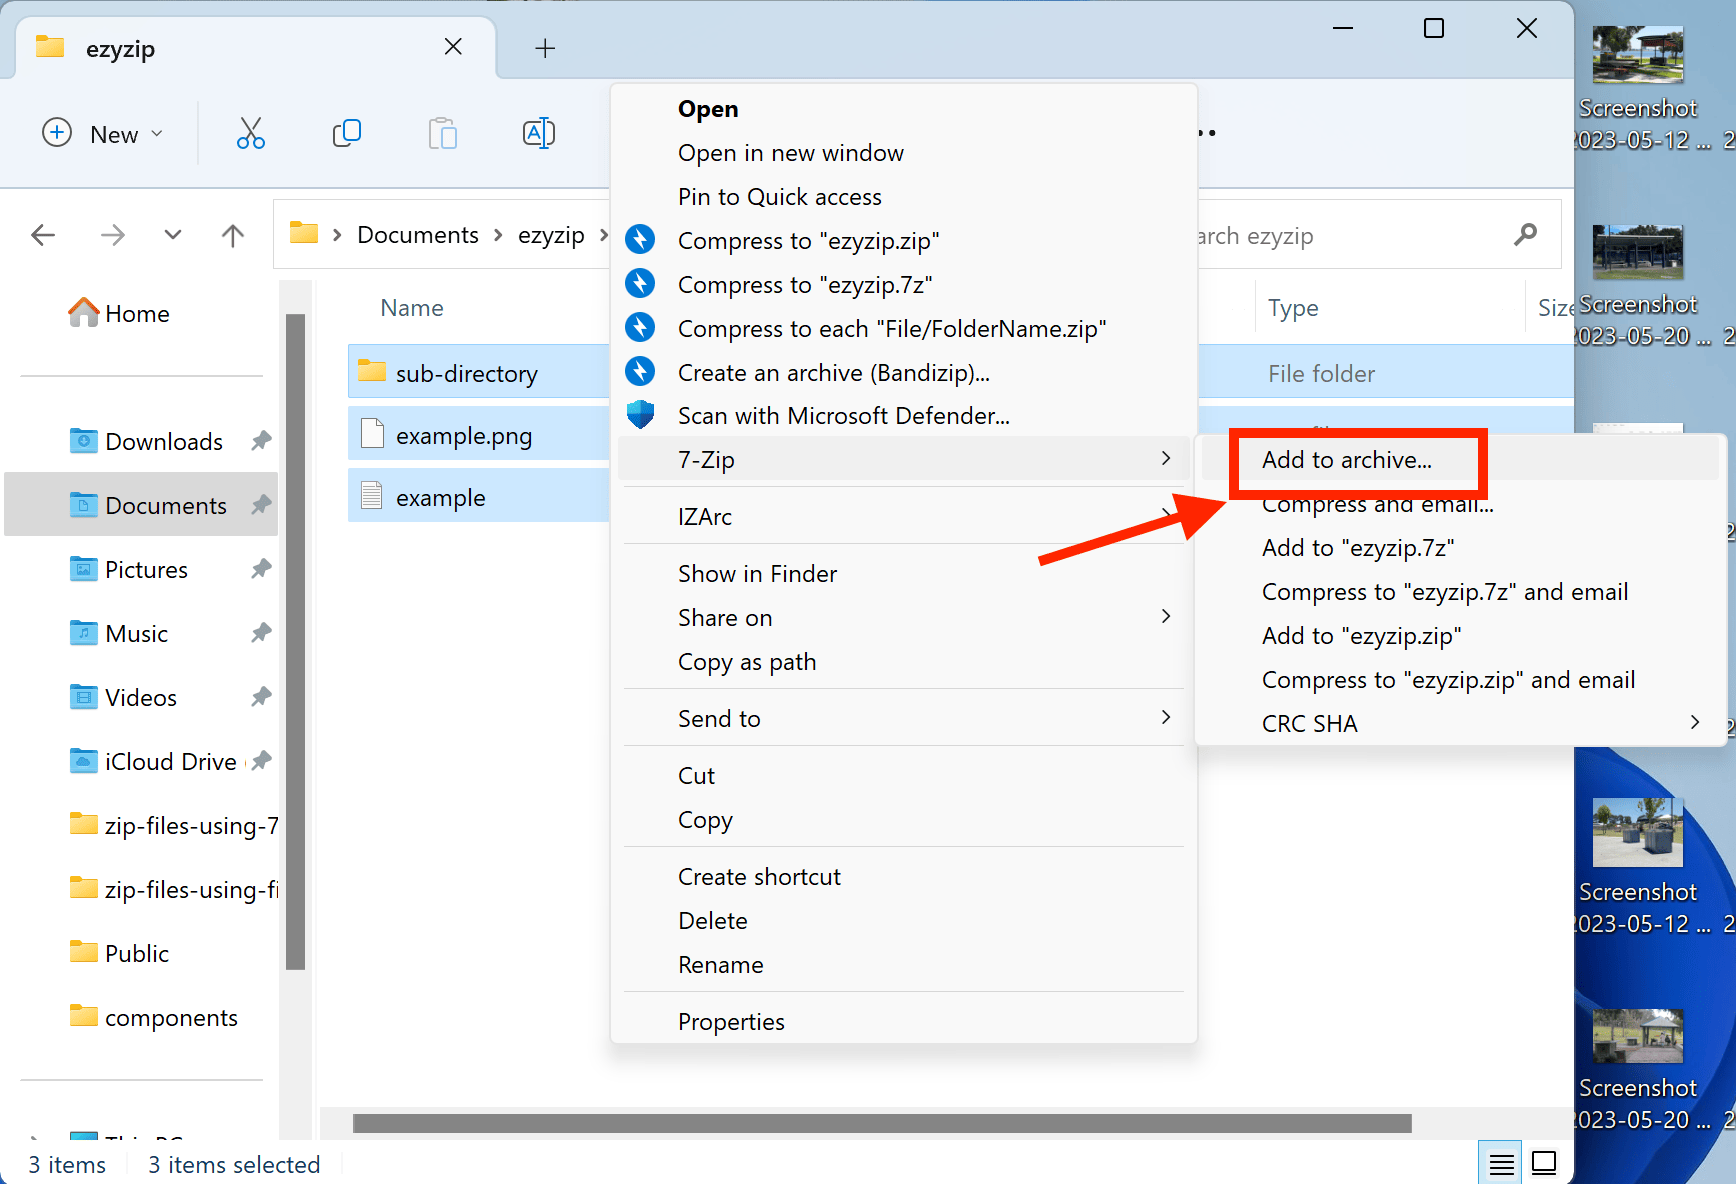
Compress Files: Right-click on the files, click on “Show more options” and then hover over the 7-Zip option, and then click on “Add to archive…“. It’s like squashing bananas into a smoothie, but without the mess!
-
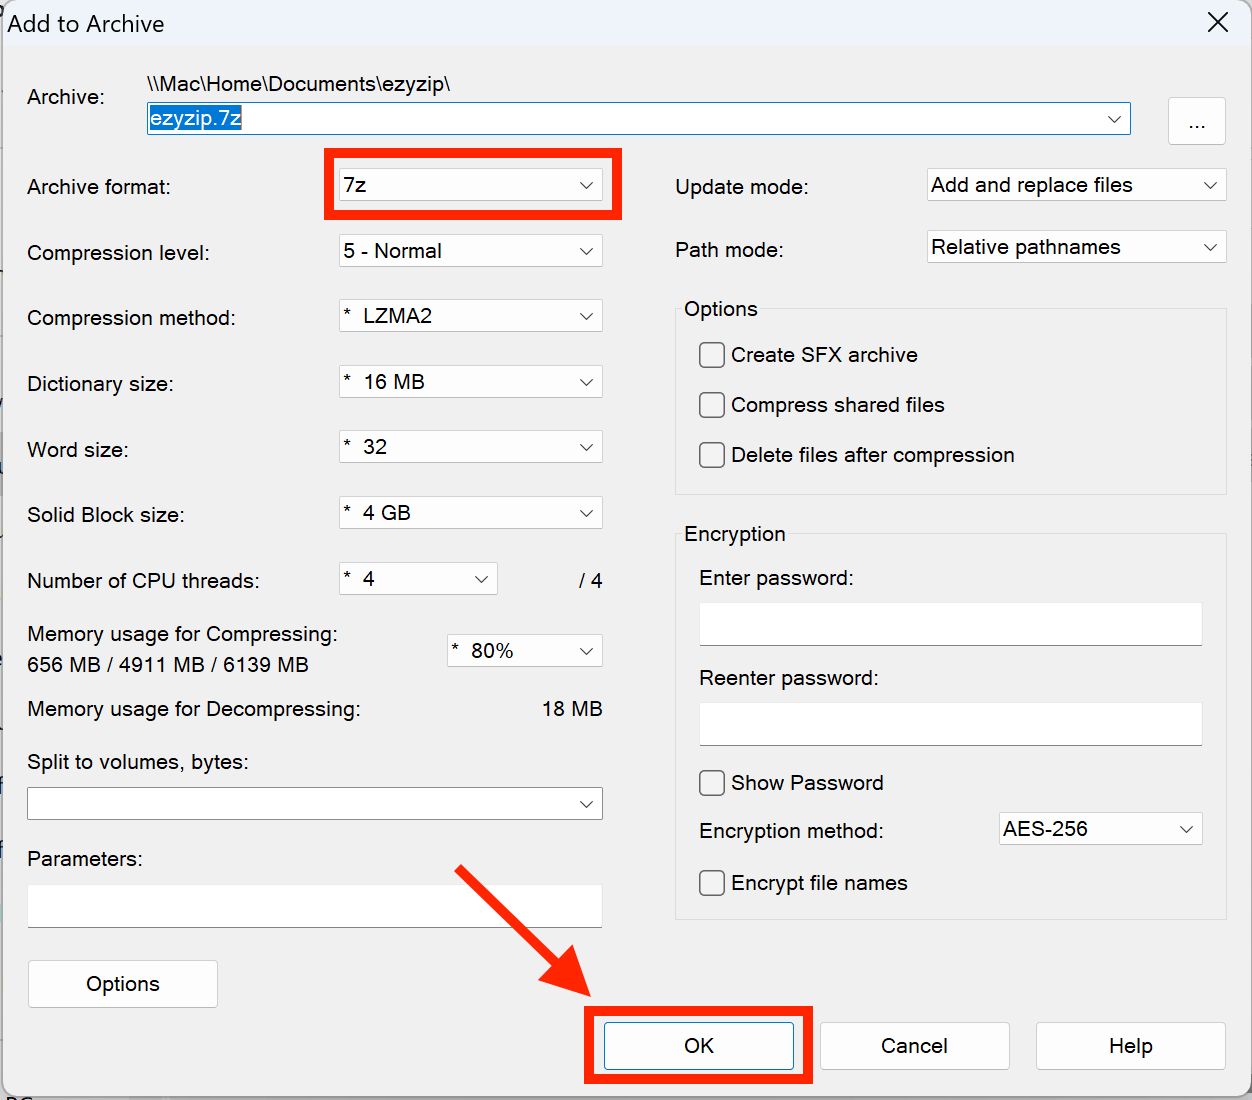
Confirm: In the Archive format dropdown, select 7Z and click OK. Your files will now be compressed into a 7Z file. No more monkeying with file sizes, we’ve got it zipped!
There you have it. A fresh new 7z file!
How To Create SFX Files Using 7-Zip
Creating a Self-Extracting Archive (SFX) with 7-Zip allows you to distribute files in an executable format that can be unpacked without any external software. Here’s a step-by-step guide:
- Install 7-Zip: Hop over to the 7-Zip website and download it. Follow the jungle drums (or on-screen instructions) to install it.
- Gather Files: Locate the files or folders you want to compress, right-click, navigate to “7-Zip” in the context menu, and select “Add to archive…“.
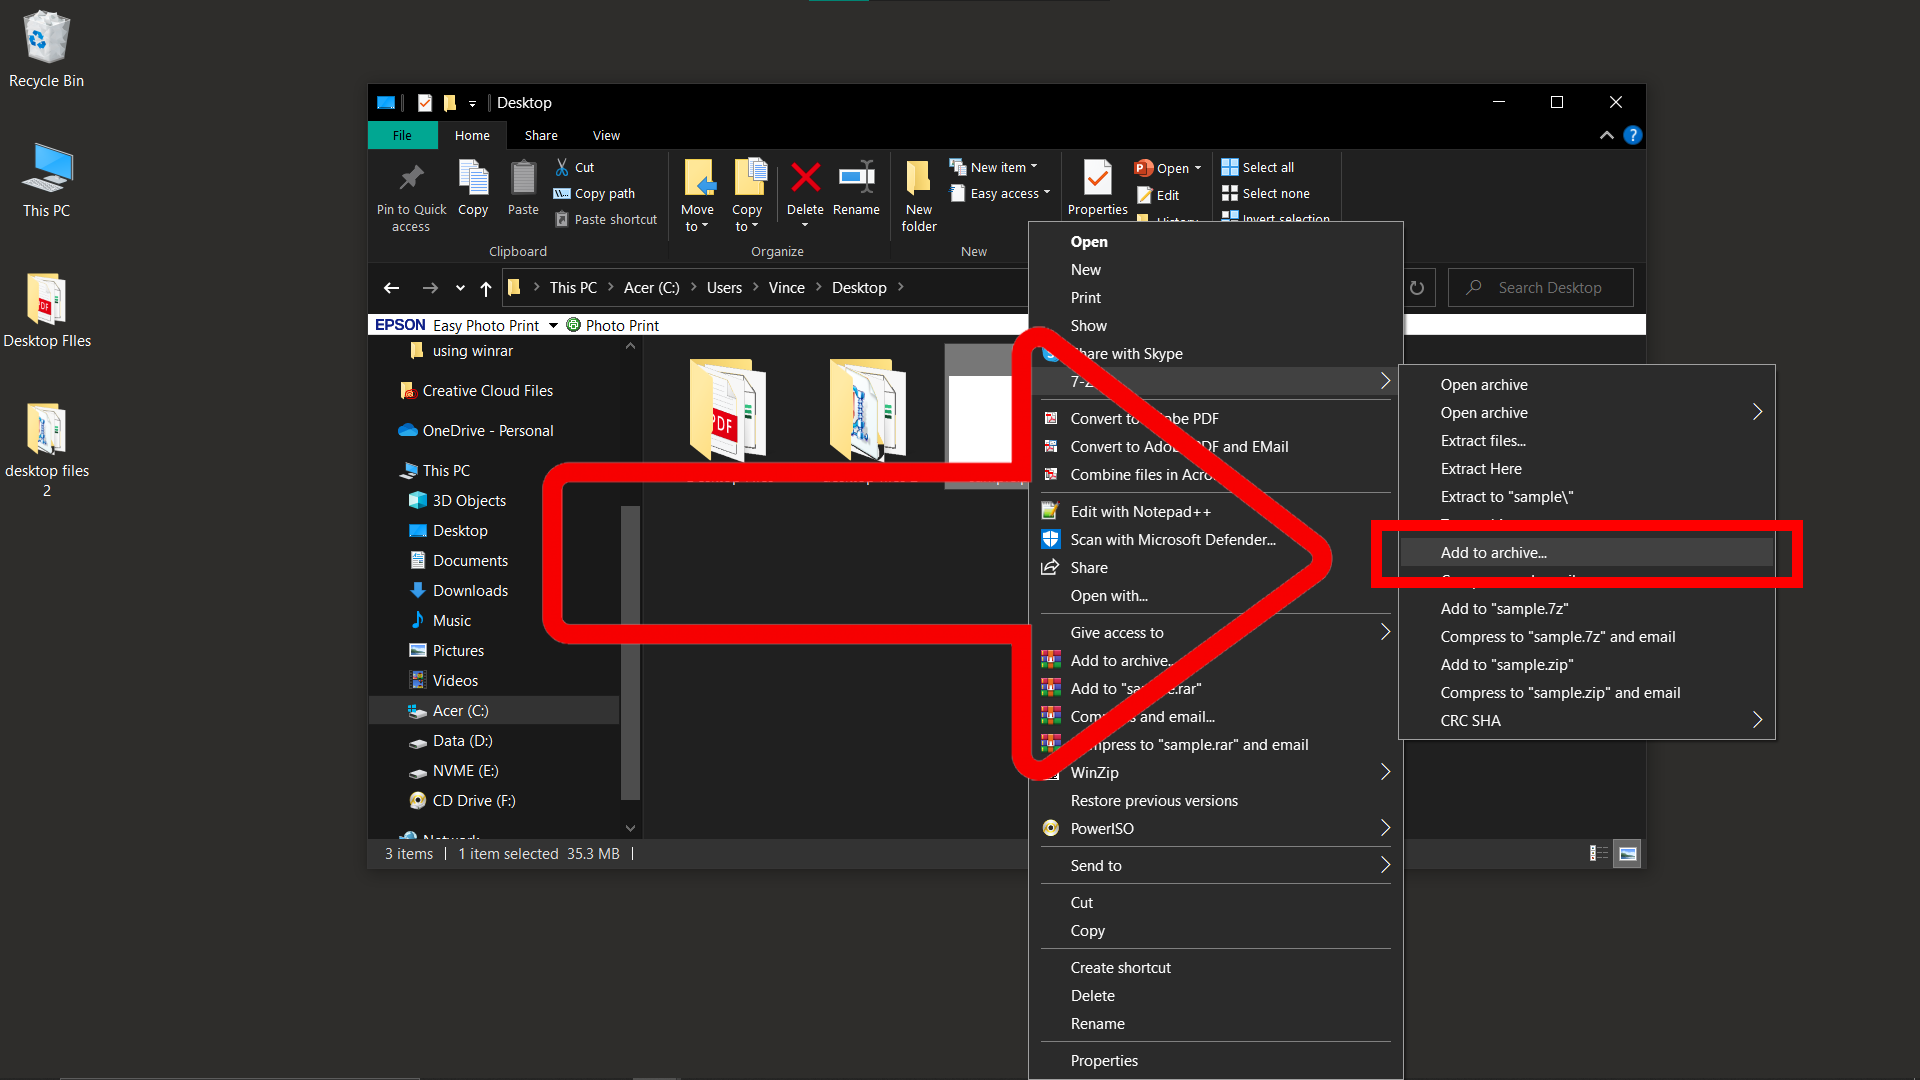
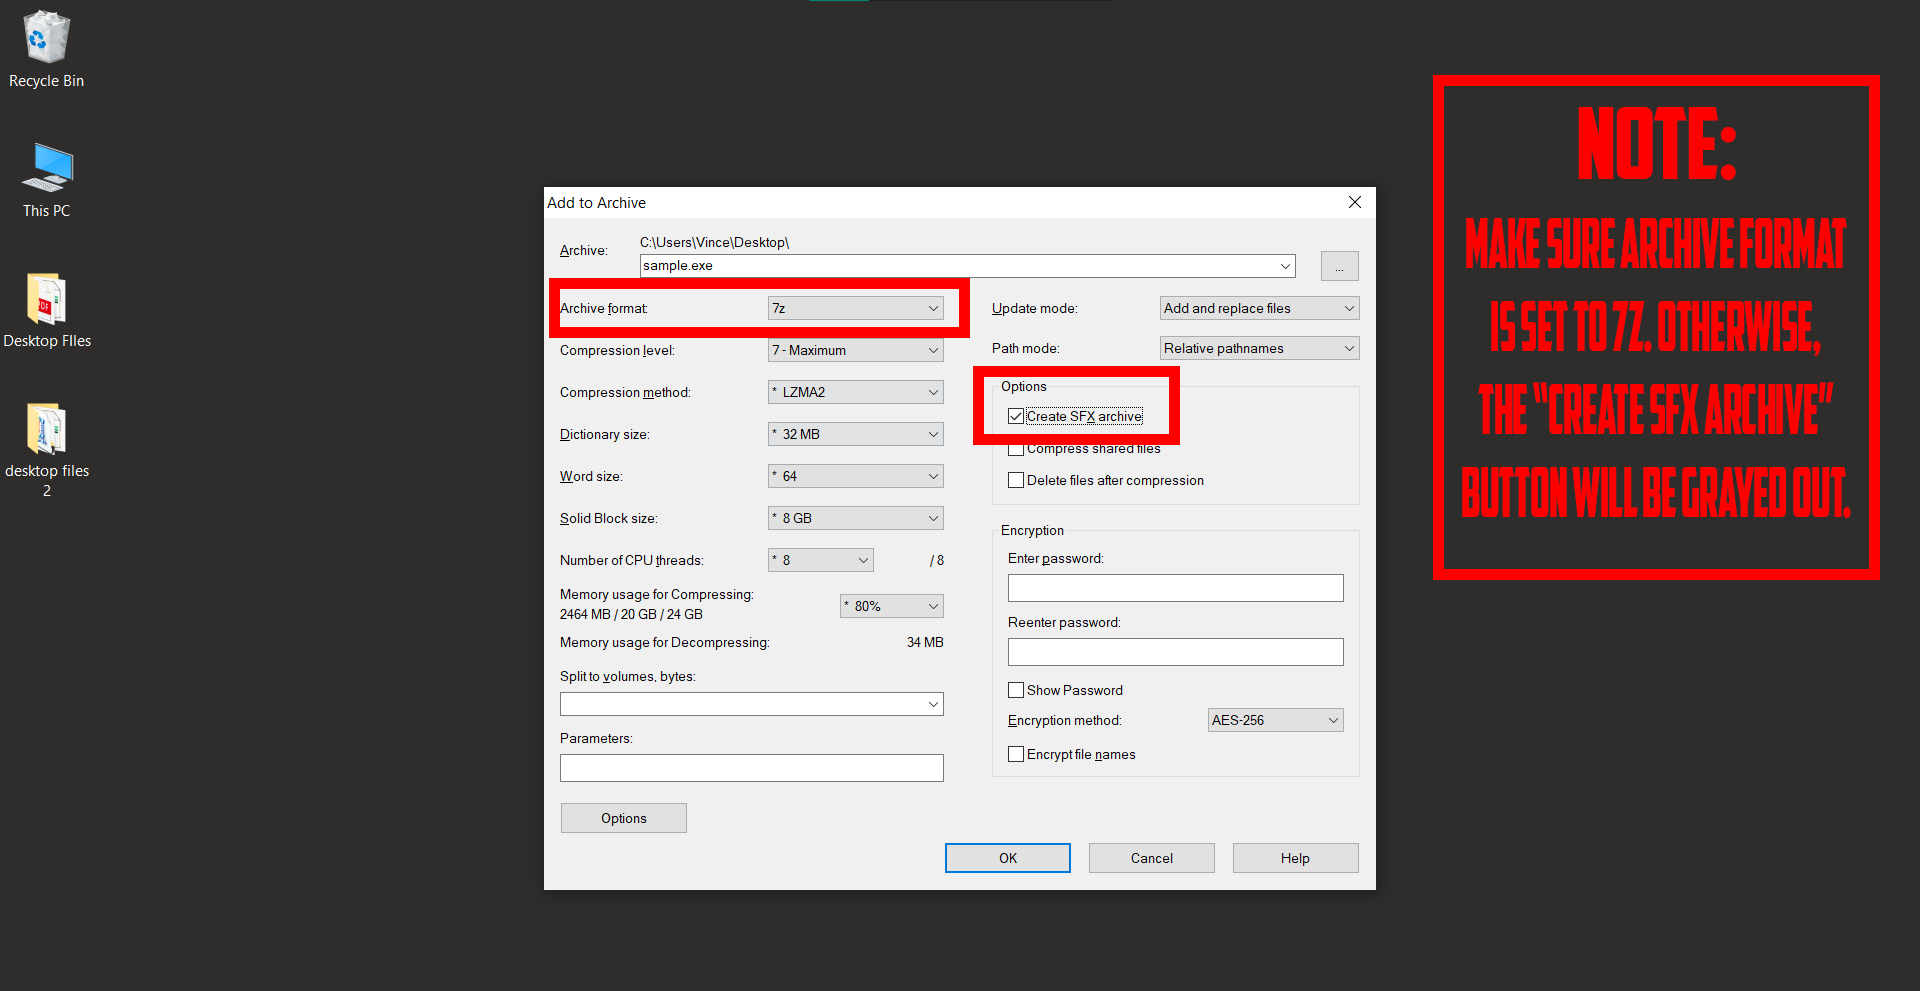
- SFX Magic: In the archive window, select “7z” as the format and check the “Create SFX archive” option. Your archive will now be a self-extracting one!
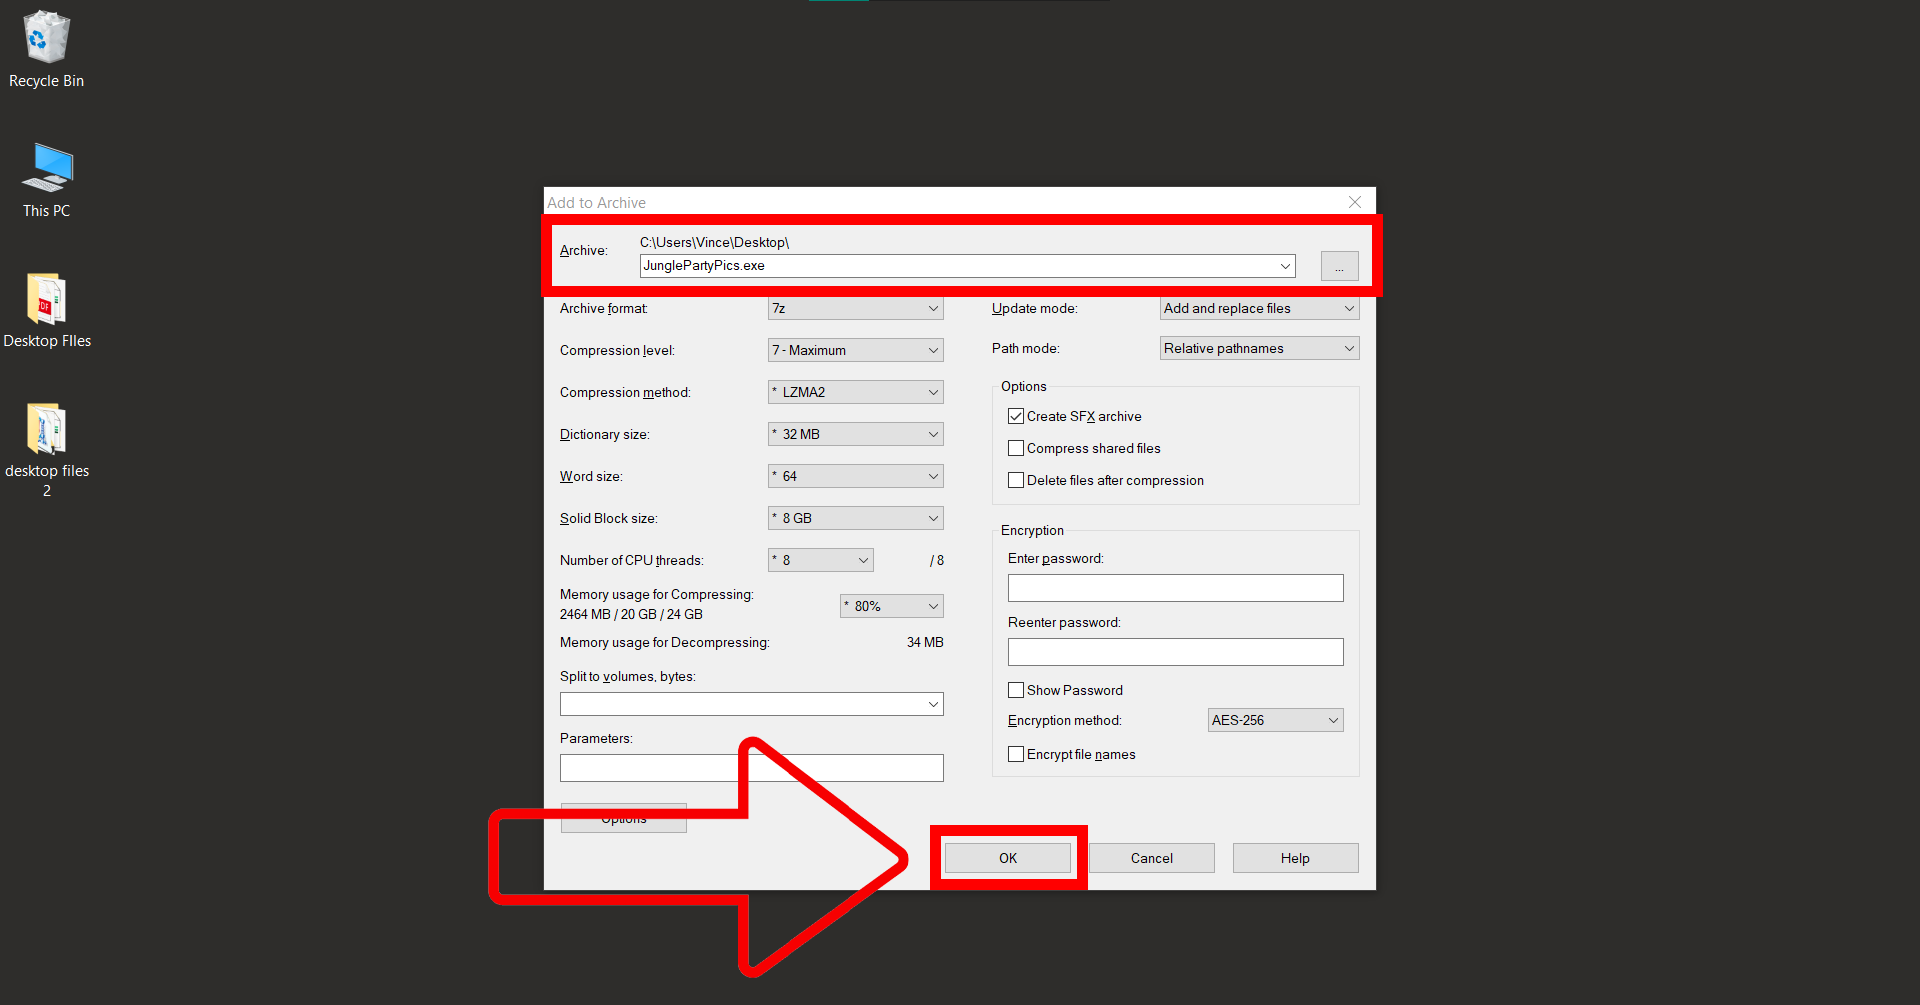
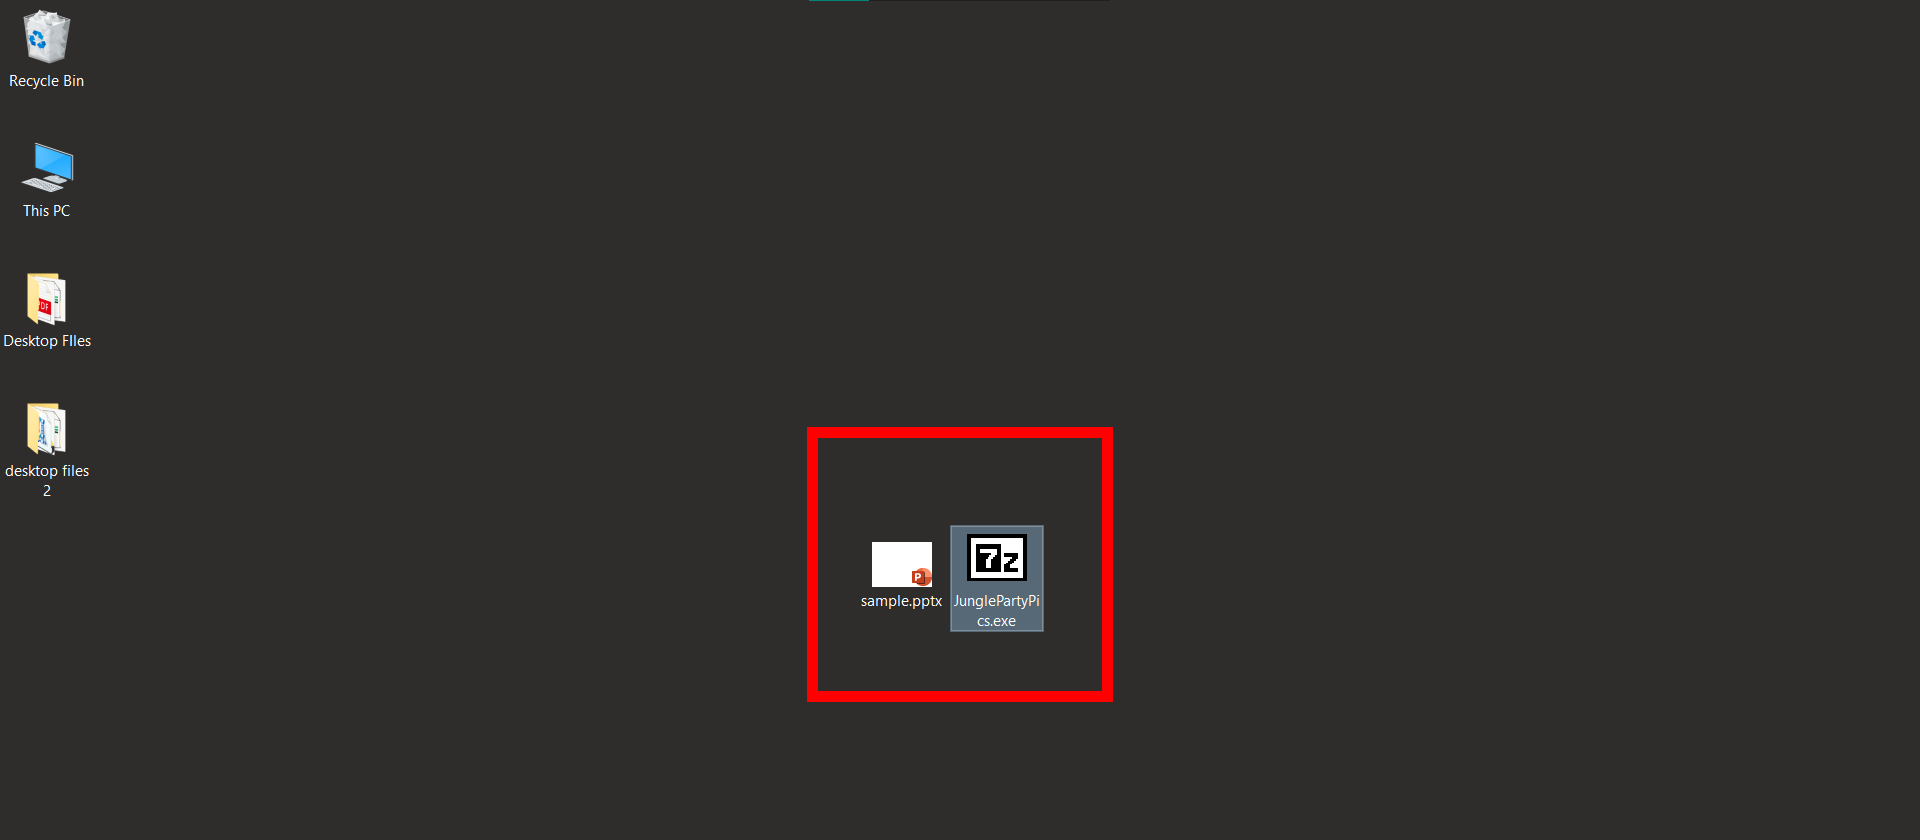
- Name and Save: Give your archive a catchy name, like “JunglePartyPics”, and click “OK”. Let 7-Zip do its thing.
- Share with the Troop: Send your self-extracting archive swinging through the digital jungle to its destination. Your friends will be able to access the files with ease, no 7-Zip needed!
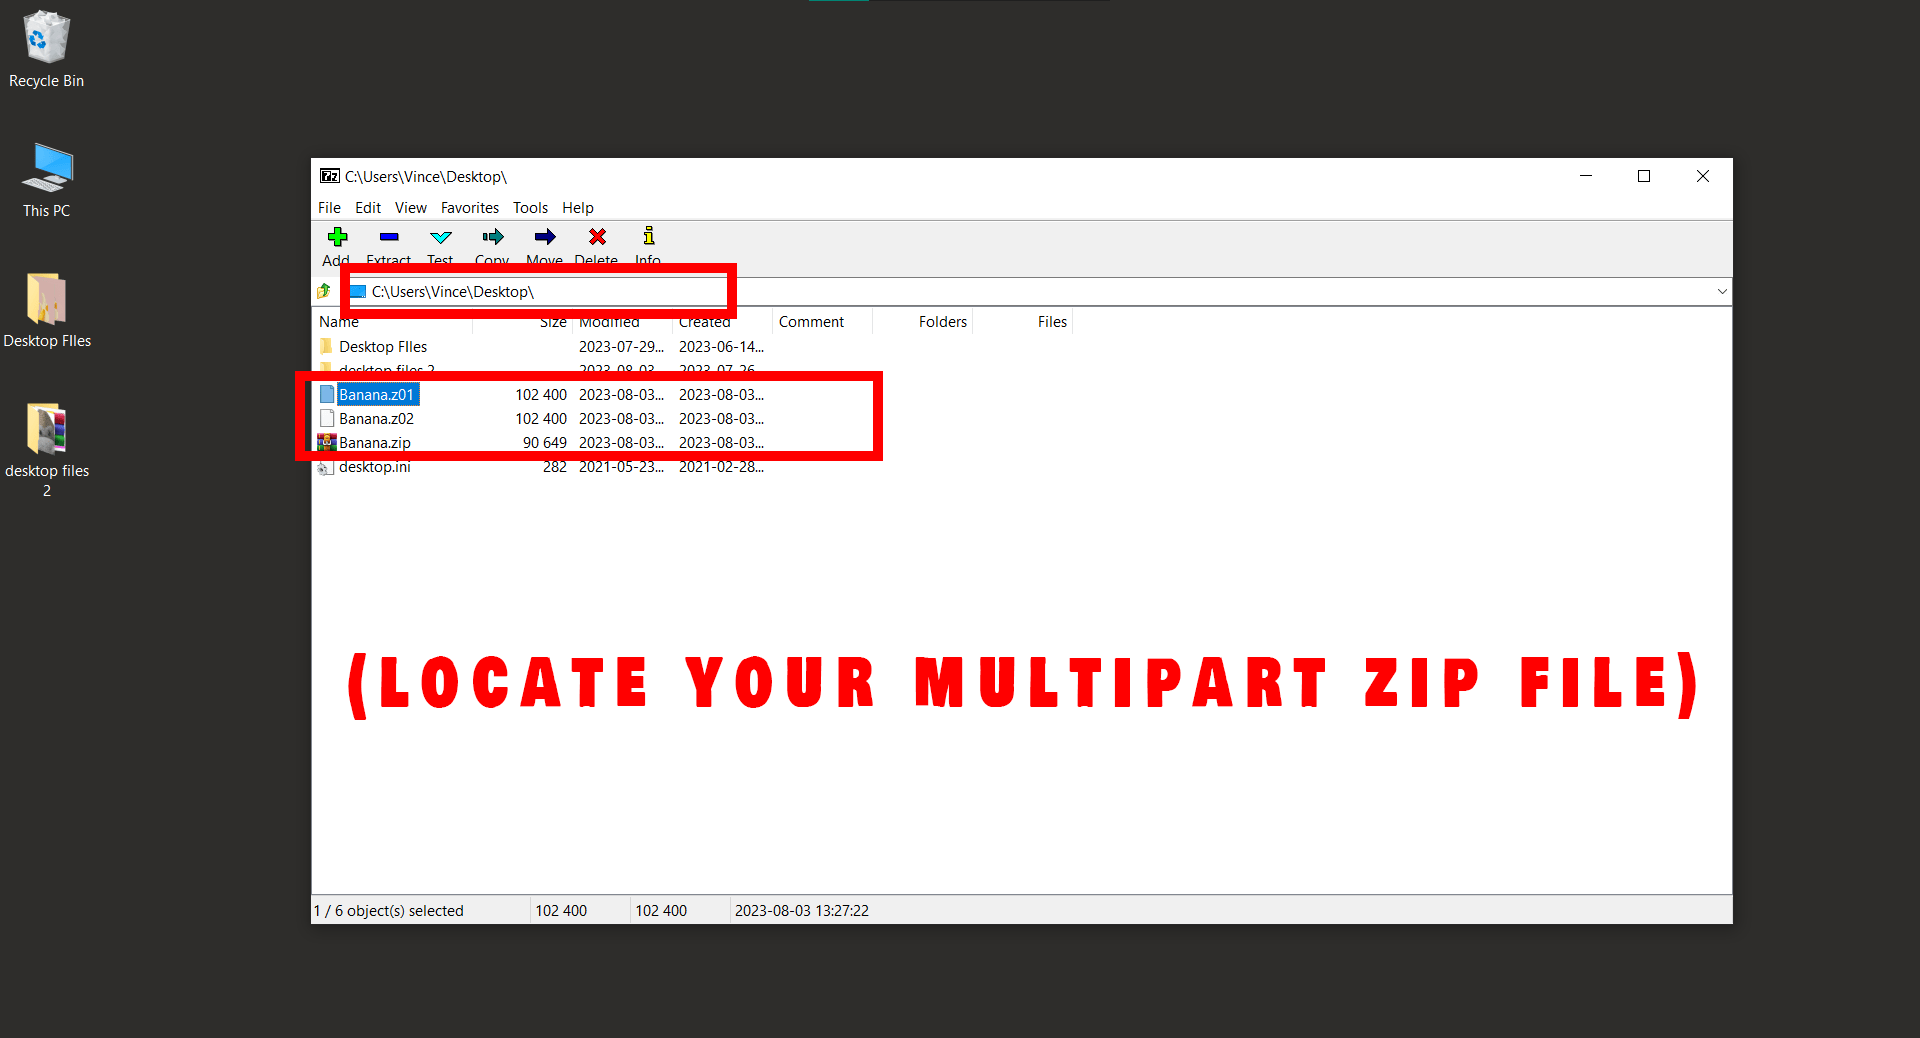
How To Open Multipart ZIP Files Using 7-Zip
Multipart ZIP files are like an exciting series of novels, each part leading to the next. Opening them with 7-Zip is a breeze, even if it seems like there’s a jungle of files in front of you. Follow these steps, and you’ll be through the vines in no time!
-
Open 7-Zip and Navigate to your files: Once installed, open 7-Zip, in the 7-Zip file manager, navigate to the location of the multipart ZIP files. It’s as simple as a monkey opening a banana.
-
Open the first part: Double-click on the first part of the ZIP file (usually the one with the .zip extension), then choose where you want your file to be saved and hit ”OK”. It’s like peeling the first banana from the bunch.
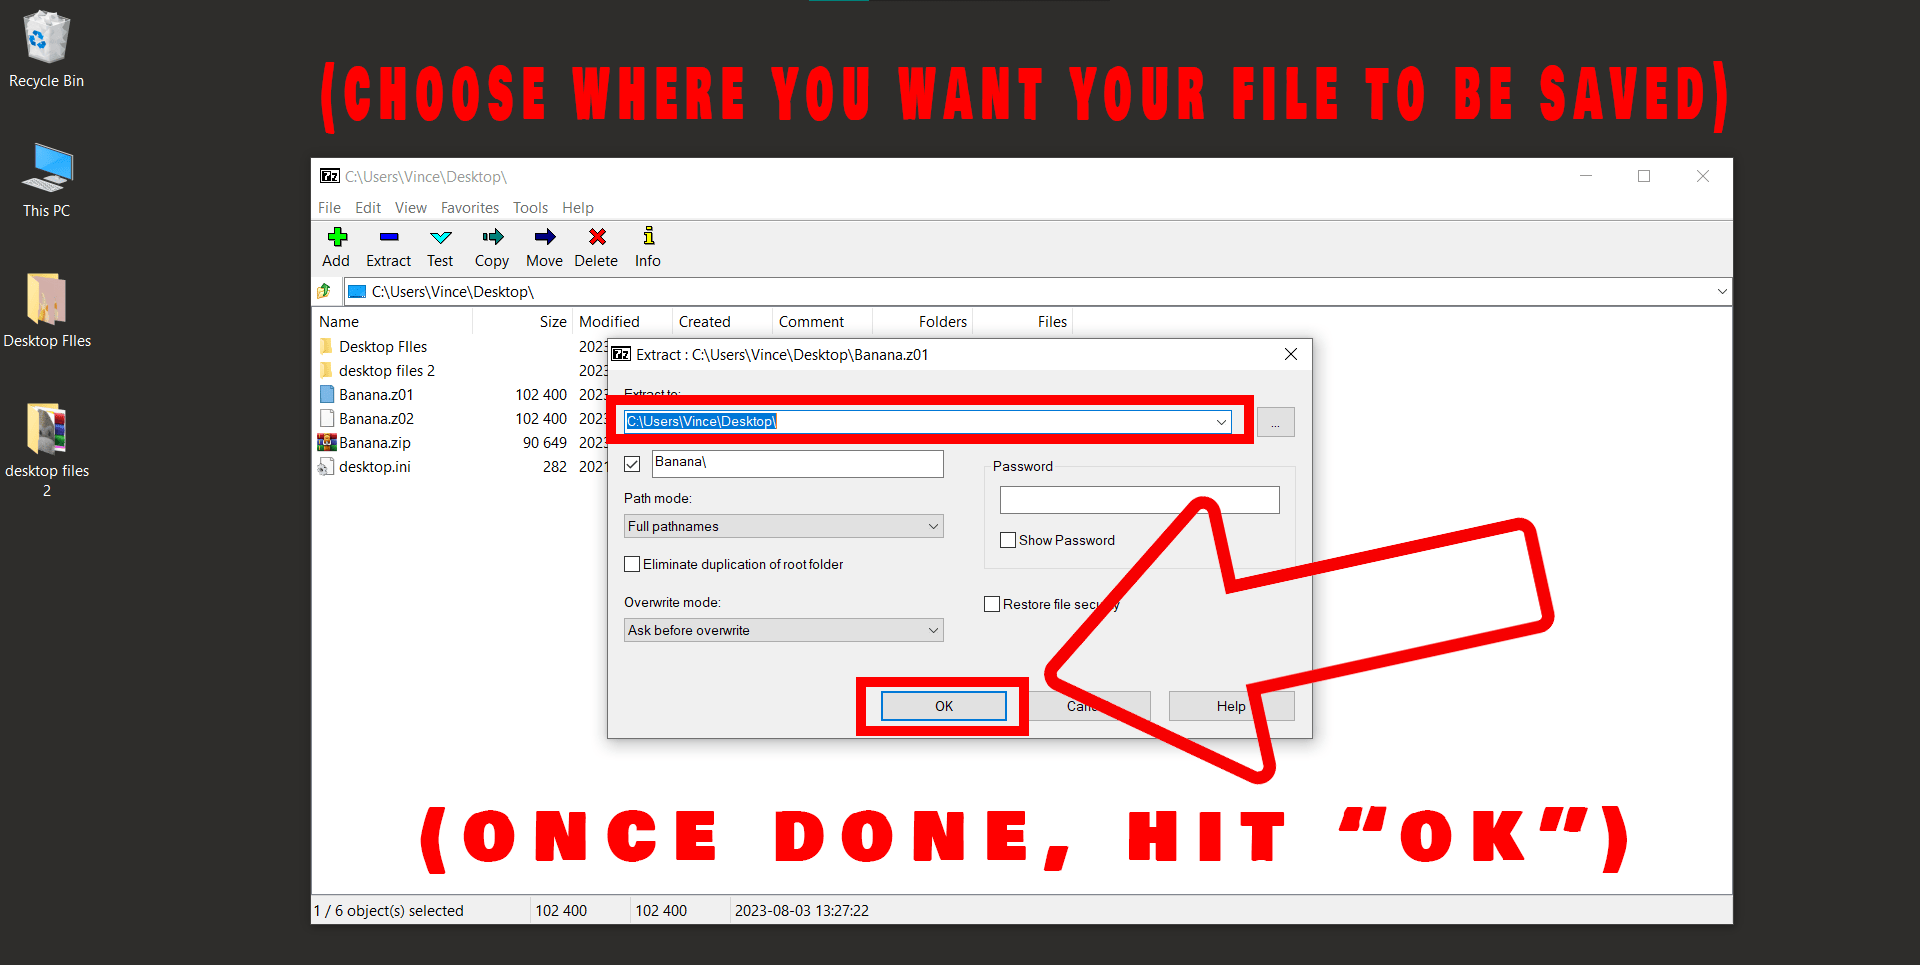
-
Done, It’s that easy!: And voila! Your files are now as open as a peeled banana.

And there you have it! Multipart ZIPs might seem tricky, but with 7-Zip and a bit of monkey wisdom, they’re a walk in the jungle. Happy unzipping! 🐒🌿
How To Open A Password Protected ZIP File Using 7-Zip
Stumbled upon a password-protected ZIP file? It’s like finding a locked treasure chest in the jungle! But don’t worry, with 7-Zip and the right key (password), you can unlock its secrets. Here’s how:
-
Find Your ZIP File: Navigate to the location of your password protected ZIP file. Remember, the jungle is vast and mysterious, but your file explorer isn’t!

-
Open 7-Zip: Right-click the ZIP file, select ‘7-Zip’ from the context menu, then click ‘Open archive’. It’s easier than climbing a tree!
-
Choose Your Location: Once the archive opens, select the files you want to extract, and then click ‘Extract’. Select where you want your files to land. It can be any branch of your jungle…I mean, folder of your choice.
-
Enter the Password: You’ll be prompted to enter the password. No banana for guessing, it’s the password for your ZIP file!

-
Extract the Files: Once you hit ‘OK’, extraction will take place and it’s done!. It’s as satisfying as squashing a banana…without the mess!
Note: If you don’t have the password, unlocking the ZIP file can be a real challenge. Always make sure to keep track of passwords or obtain them from the file’s original creator.
And just like that, you’ve swung across the password-protected ZIP vine with ease. Always remember, in the 7-Zip jungle, having the right tools and knowledge makes you king (or queen)! 🐒👑
How To Add Password to 7z Files on Windows
In this section, we’ll leap through the straightforward steps to password-protect your 7z files using 7-Zip. It’s as simple as peeling a banana, only with fewer fruit flies.
- Launch 7-Zip: Start up your 7-Zip application from the desktop or start menu.
- Select Items: Identify the files or folders you’re keen on encrypting.
- Add to Archive: Right-click, hover over 7-Zip, and pick Add to archive.
- Encryption Time: Under Encryption, type in a password and ensure AES-256 is selected.
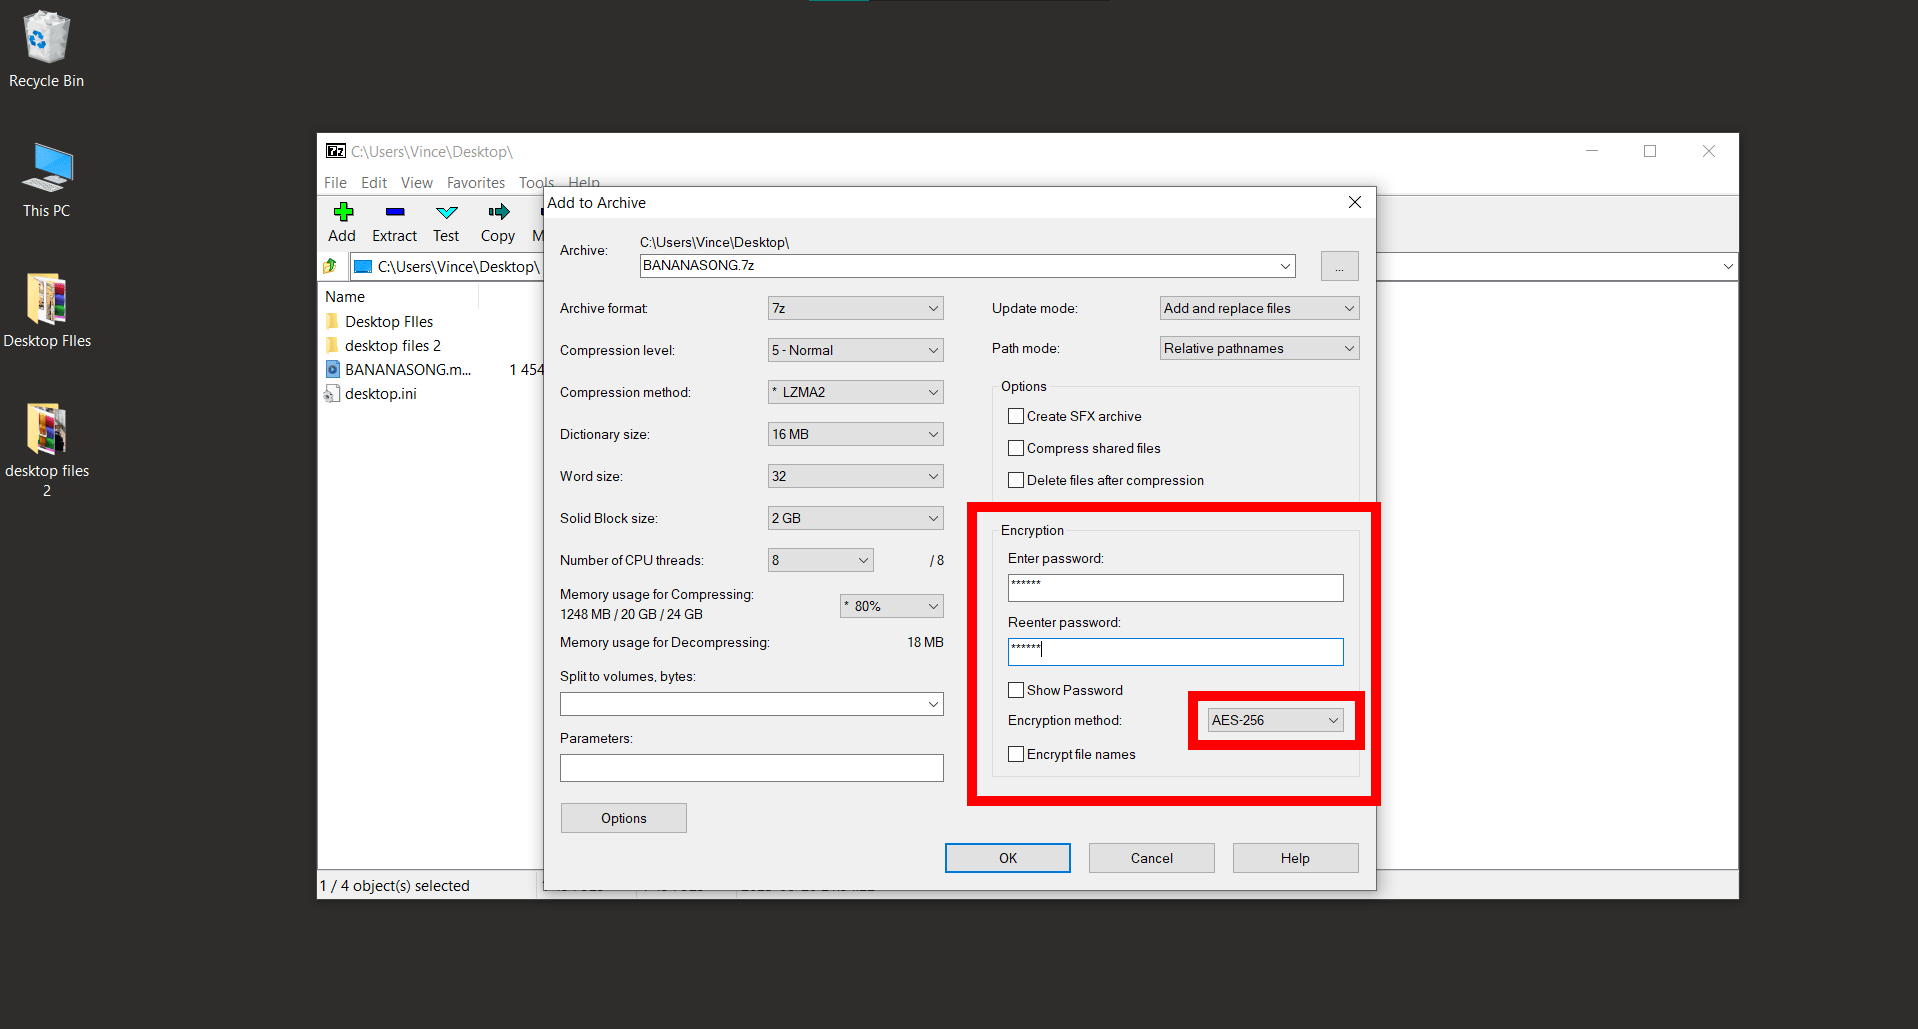
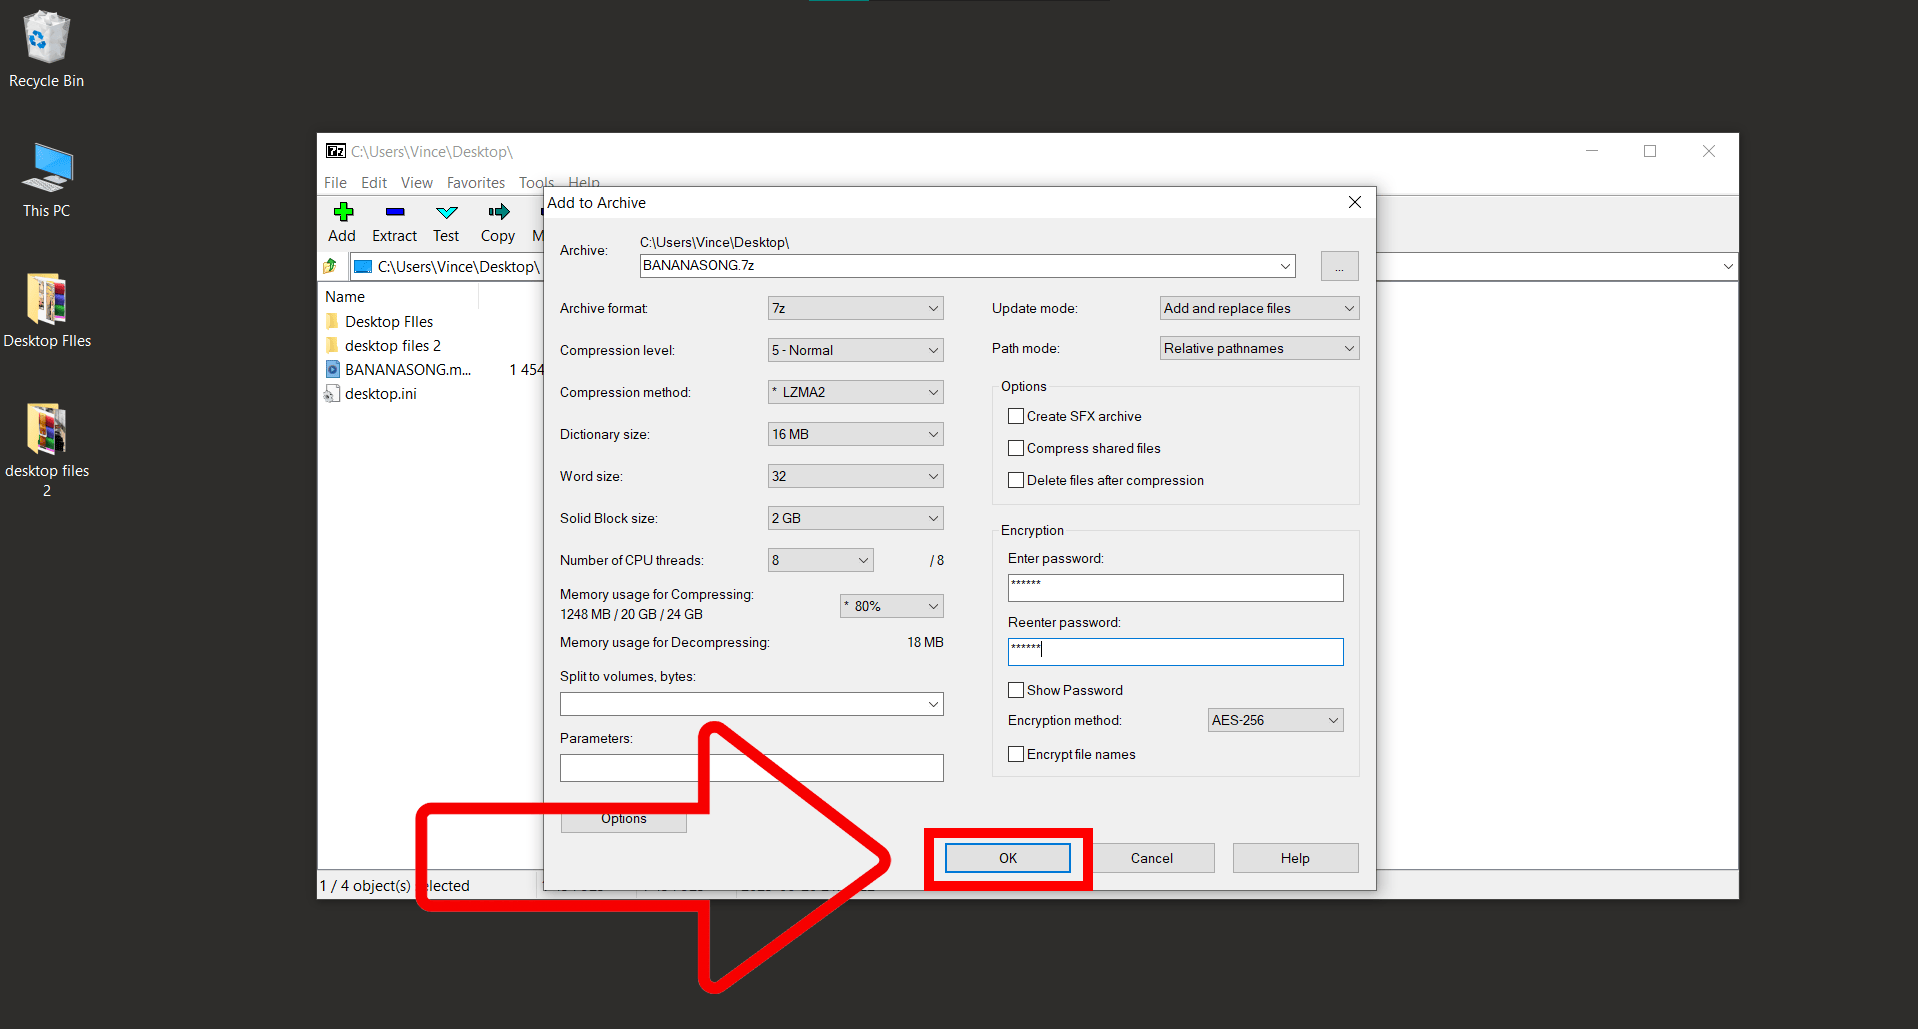
- Seal the Deal: Click OK and let 7-Zip work its magic.
Conclusion
Armed with this guide, you’re ready to navigate the 7Zip jungle like a pro. Whether you’re packing, unpacking, locking treasures, or whispering commands, you’ve got this! Happy adventures! 🐒