
Hello, my tech-curious primates! 🐵 If you’re venturing into the vast digital jungle of archiving, WinRAR is your trusty vine. In this guide, you’ll learn to navigate its features with the grace of a jungle acrobat. Ready to swing into action? Grab your bananas, and let’s get started!
Table of contents
- Install WinRAR
- Install WinRAR For Mac
- Create RAR Files on Windows
- Create Self Extracting Files Using WinRAR
- Create Multipart RAR Files
- Extract RAR Files
- Open Password Protected RAR Files
- Add Password To RAR Files on Windows
- Add Password To RAR Files on Linux or MacOS
Video guide showing how to install winRAR.
How To Install WinRAR
Setting up base camp is essential before diving into any jungle adventure.
-
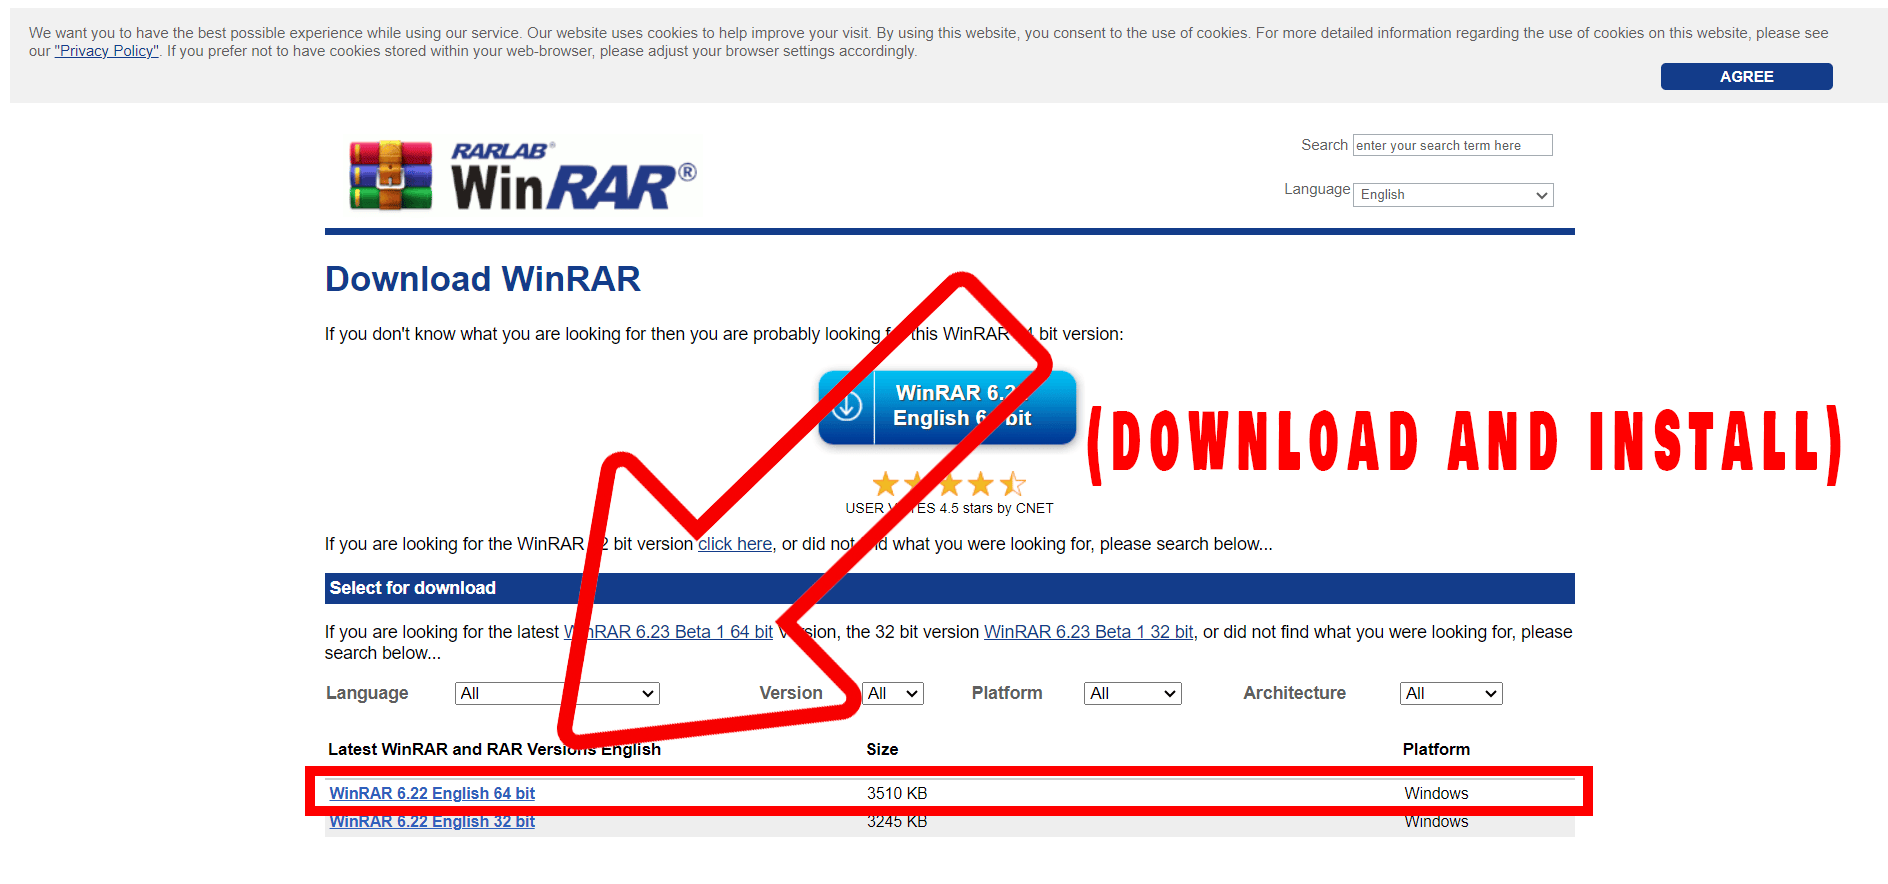
Download WinRAR: Set a course for the official WinRAR website and click the “Download WinRAR” button. Simpler than a sea shanty!

-
Install WinRAR: Open the downloaded .exe file and follow the on-screen instructions. It’s like building a model ship, but without the glue fumes.
Check our WinRAR installation guide for more detailed instructions.
How to install WinRAR for Mac
While WinRAR is primarily associated with Windows, there’s a version for Mac users known as “RAR for Mac OS X”. Here’s how you can get it running on your Mac:
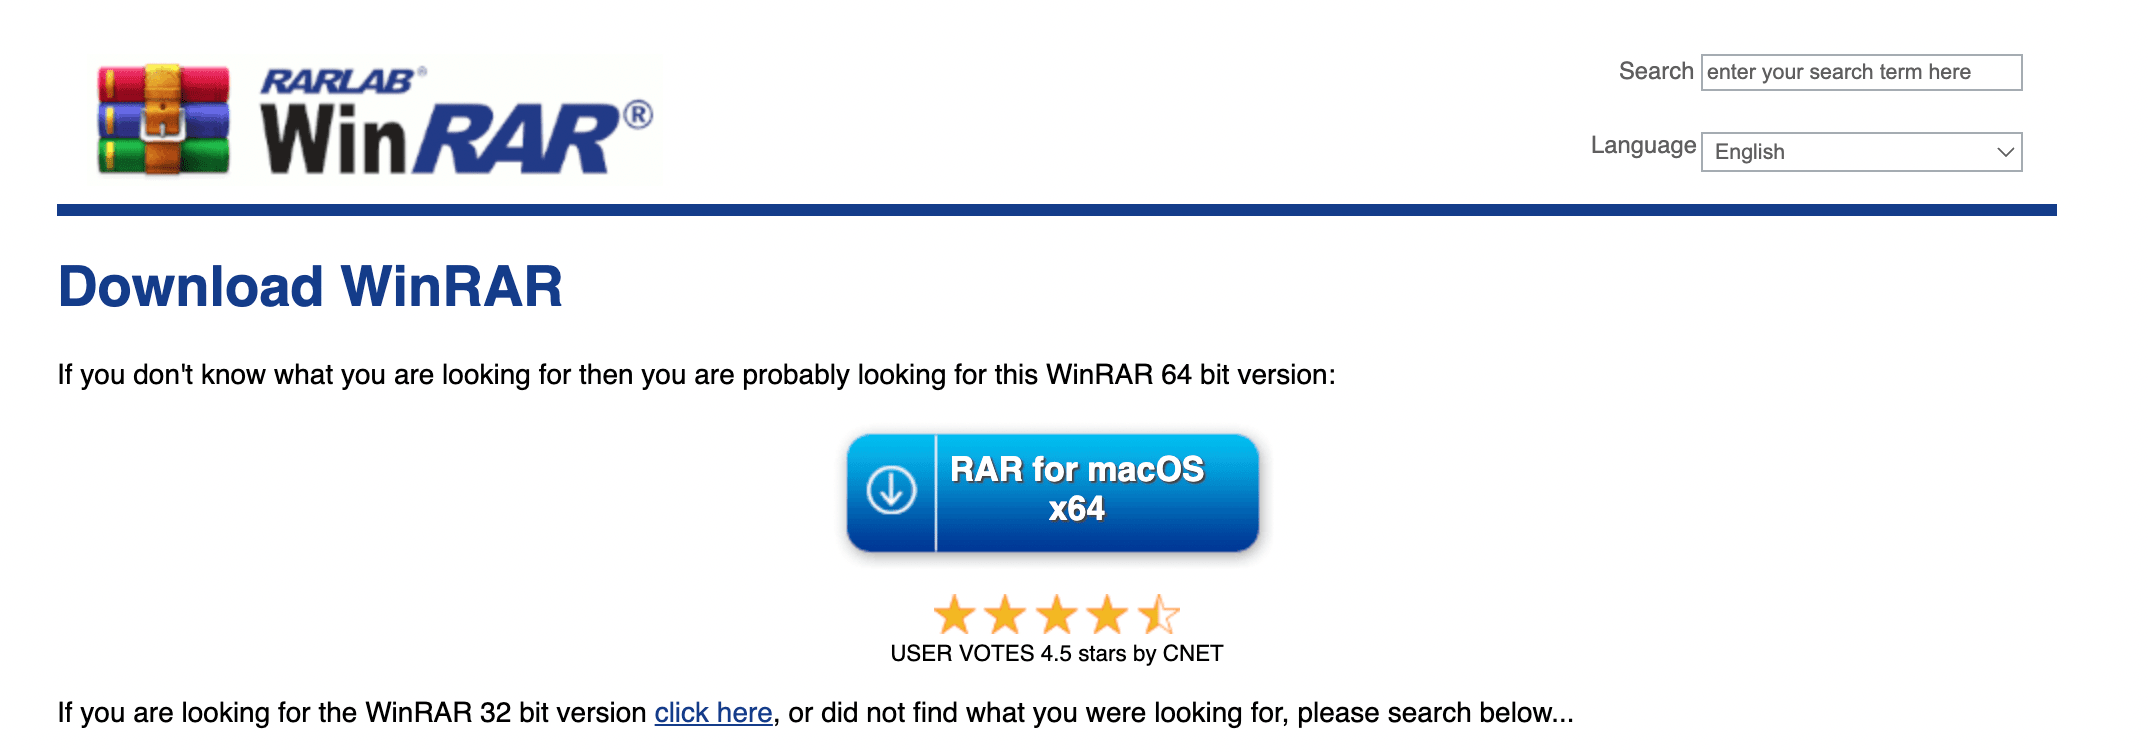
- Navigate to the WinRAR download page and click on “RAR for macOS” to download the installation package
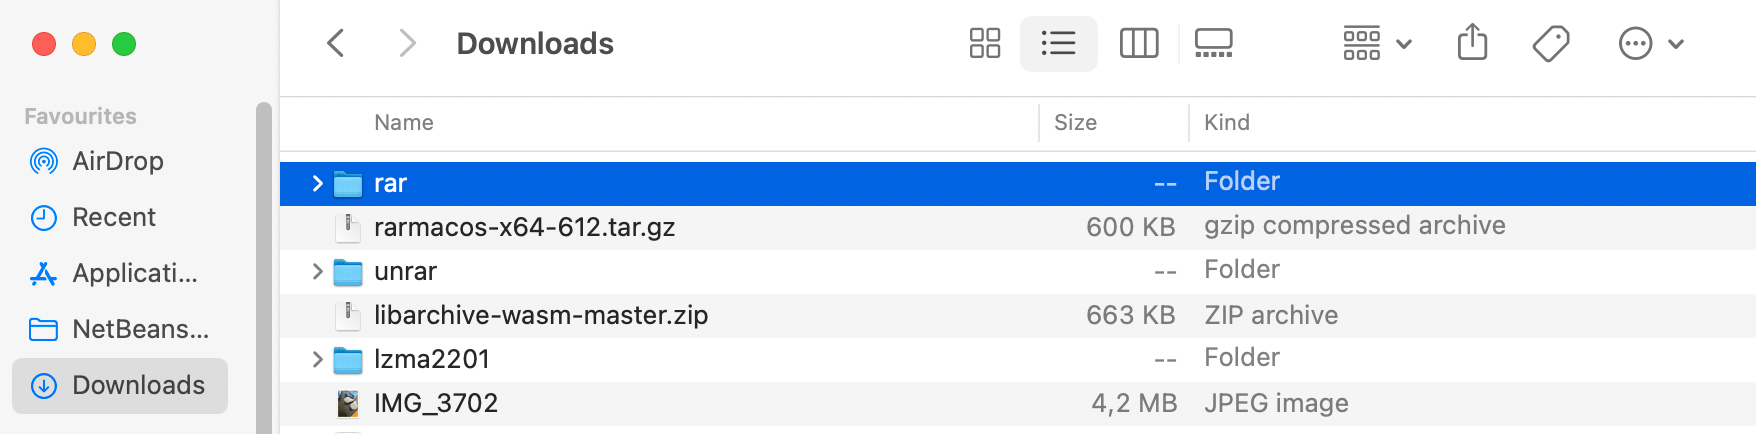
- Double click on the downloaded WinRAR package. It will extract it to a “rar” folder.
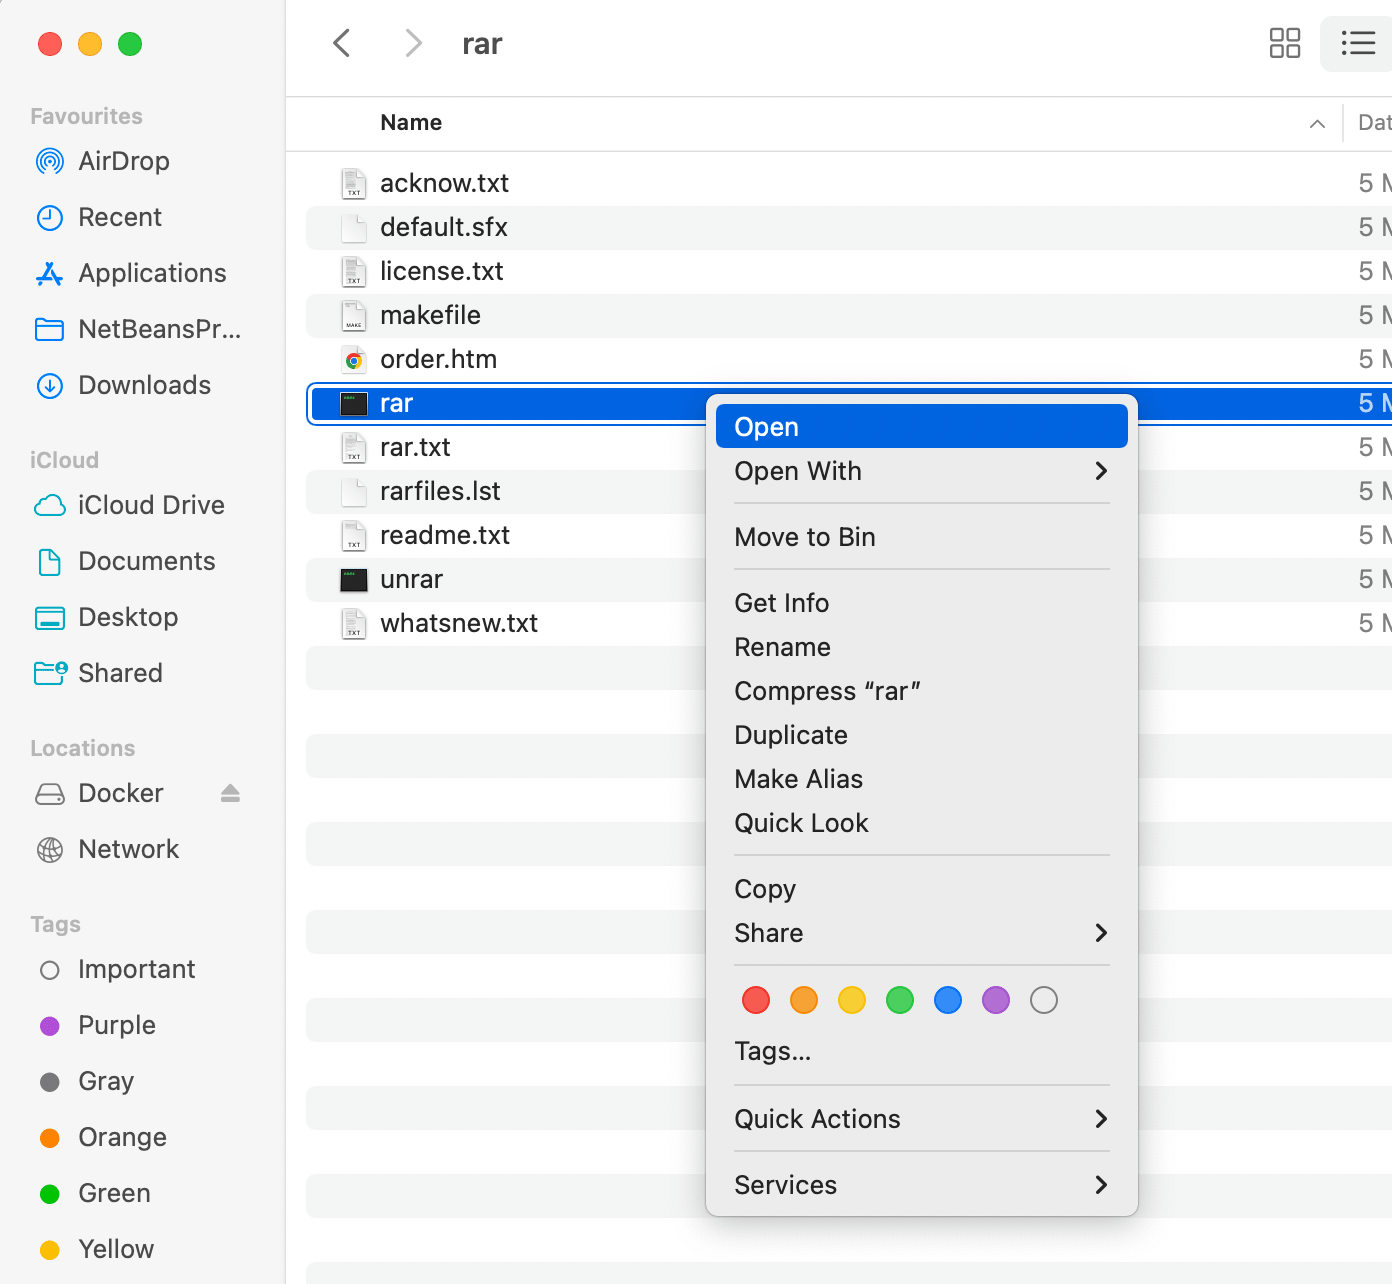
- Go into the rar folder and right click on “rar” and click Open.
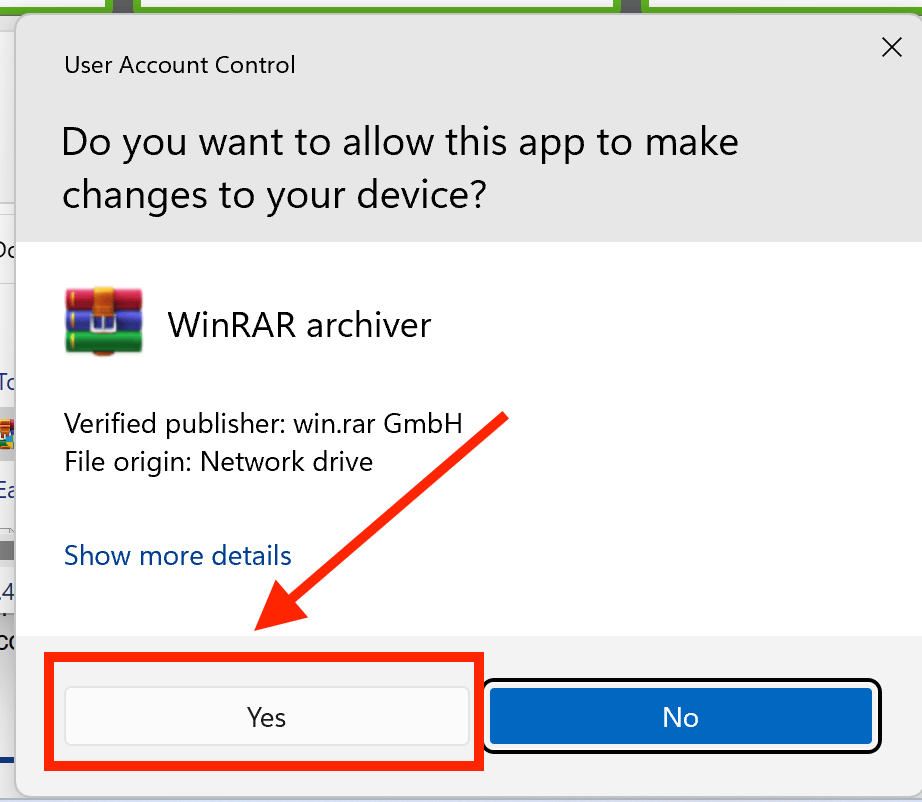
 If you get a prompt warning you about the source, click on Open:
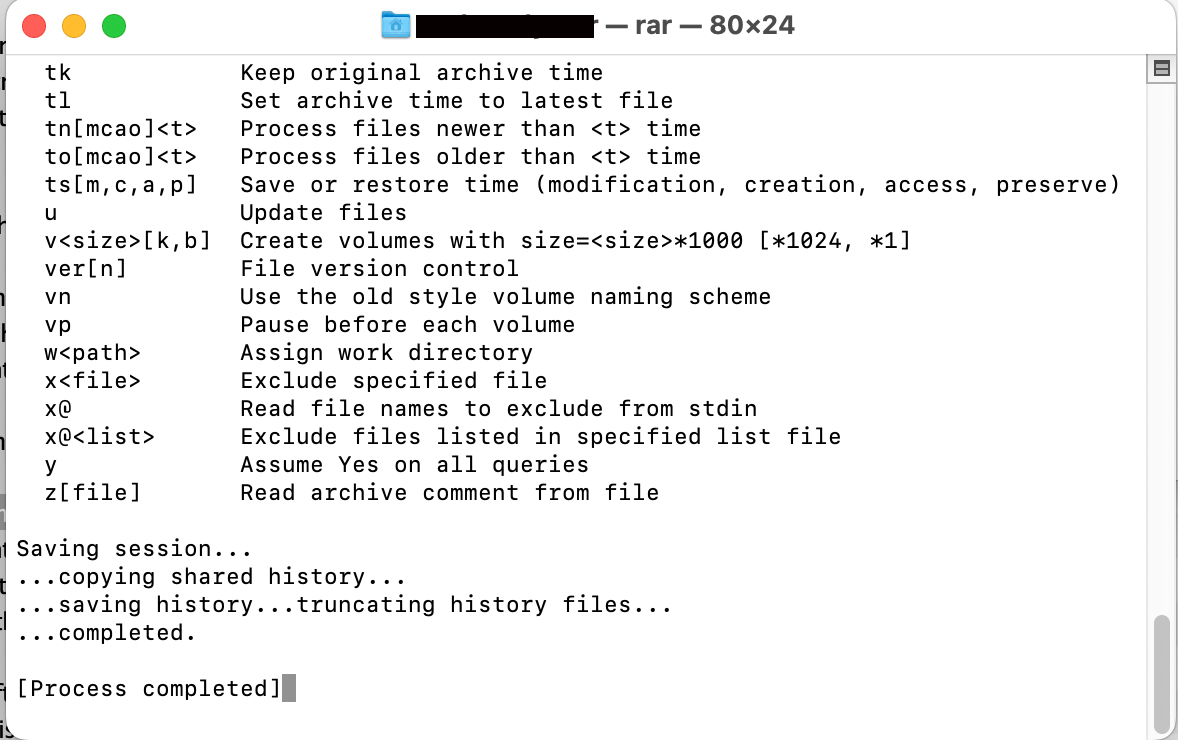
 You should get the following terminal output:
 That’s it. Check out our Creating RAR Files on Mac guide for a more comprehensive guide on creating Rar Files on Mac.
How To Create RAR Files on Windows
- Installation Dance: First, install WinRAR by following the instructions above. It’s easier than climbing a tree!
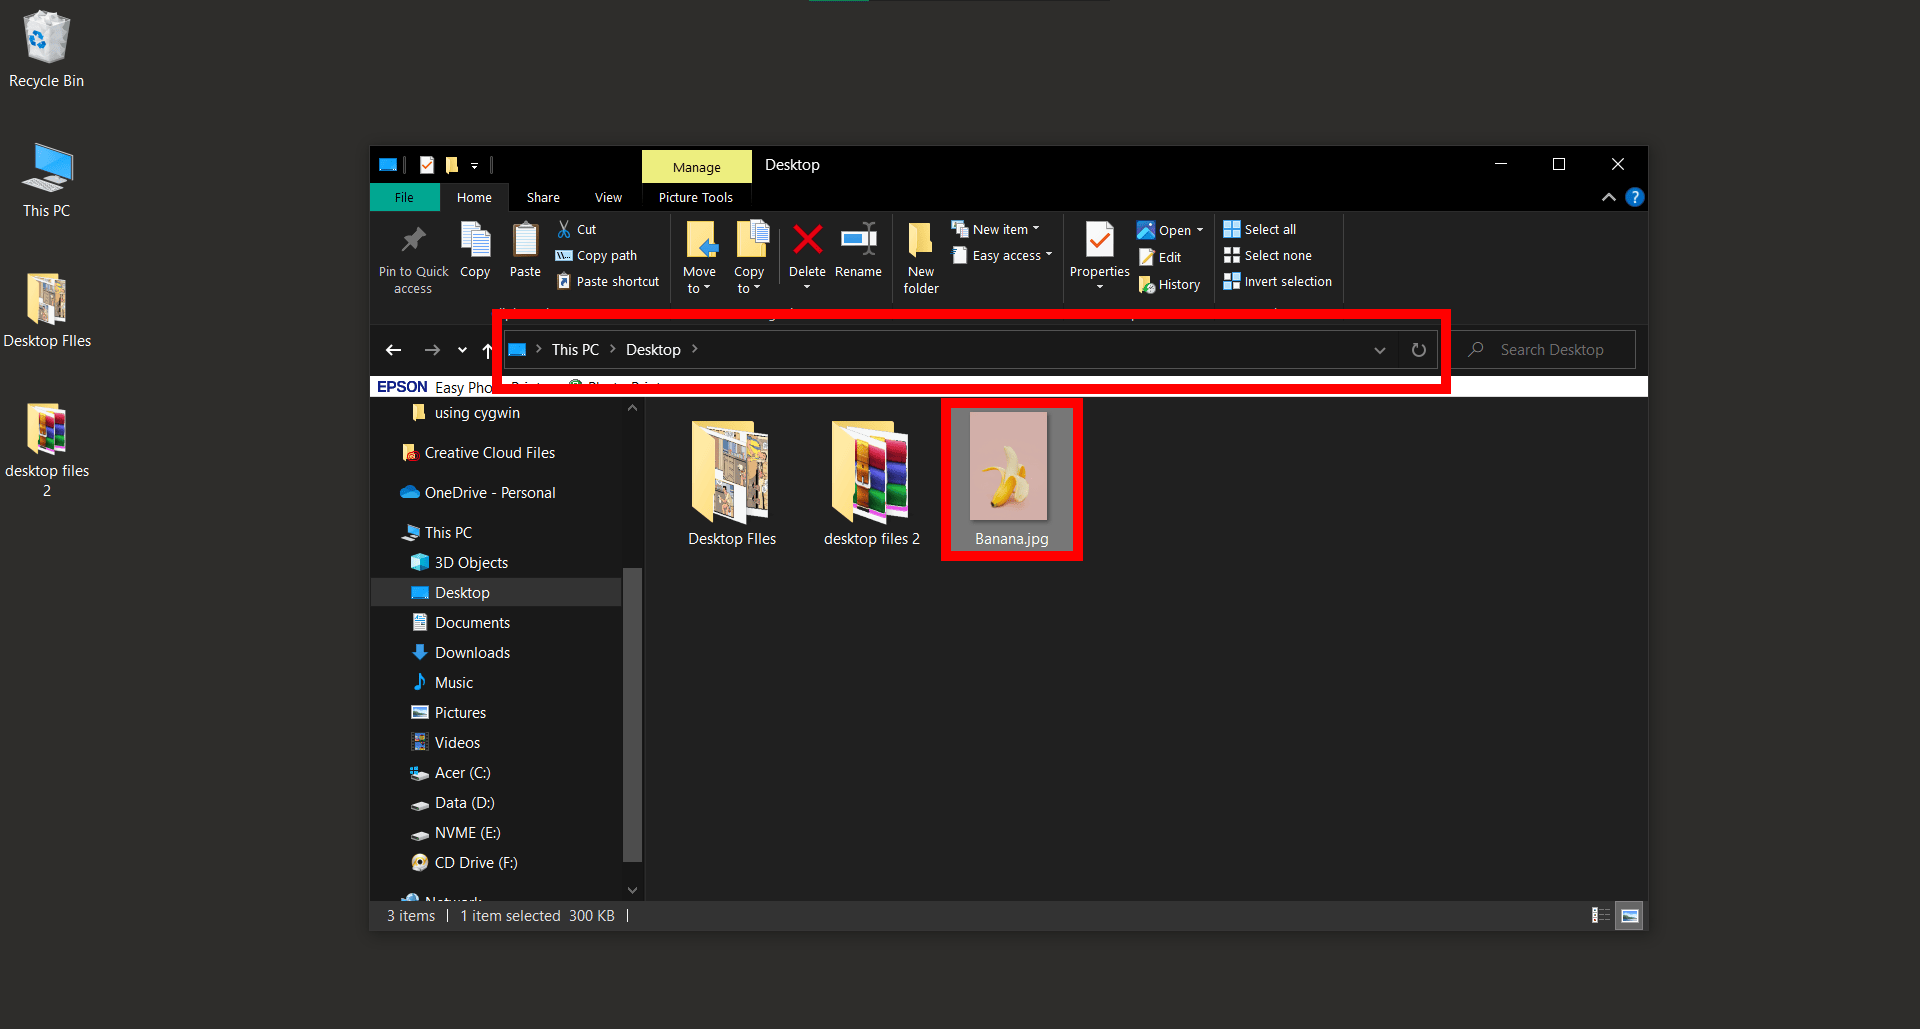
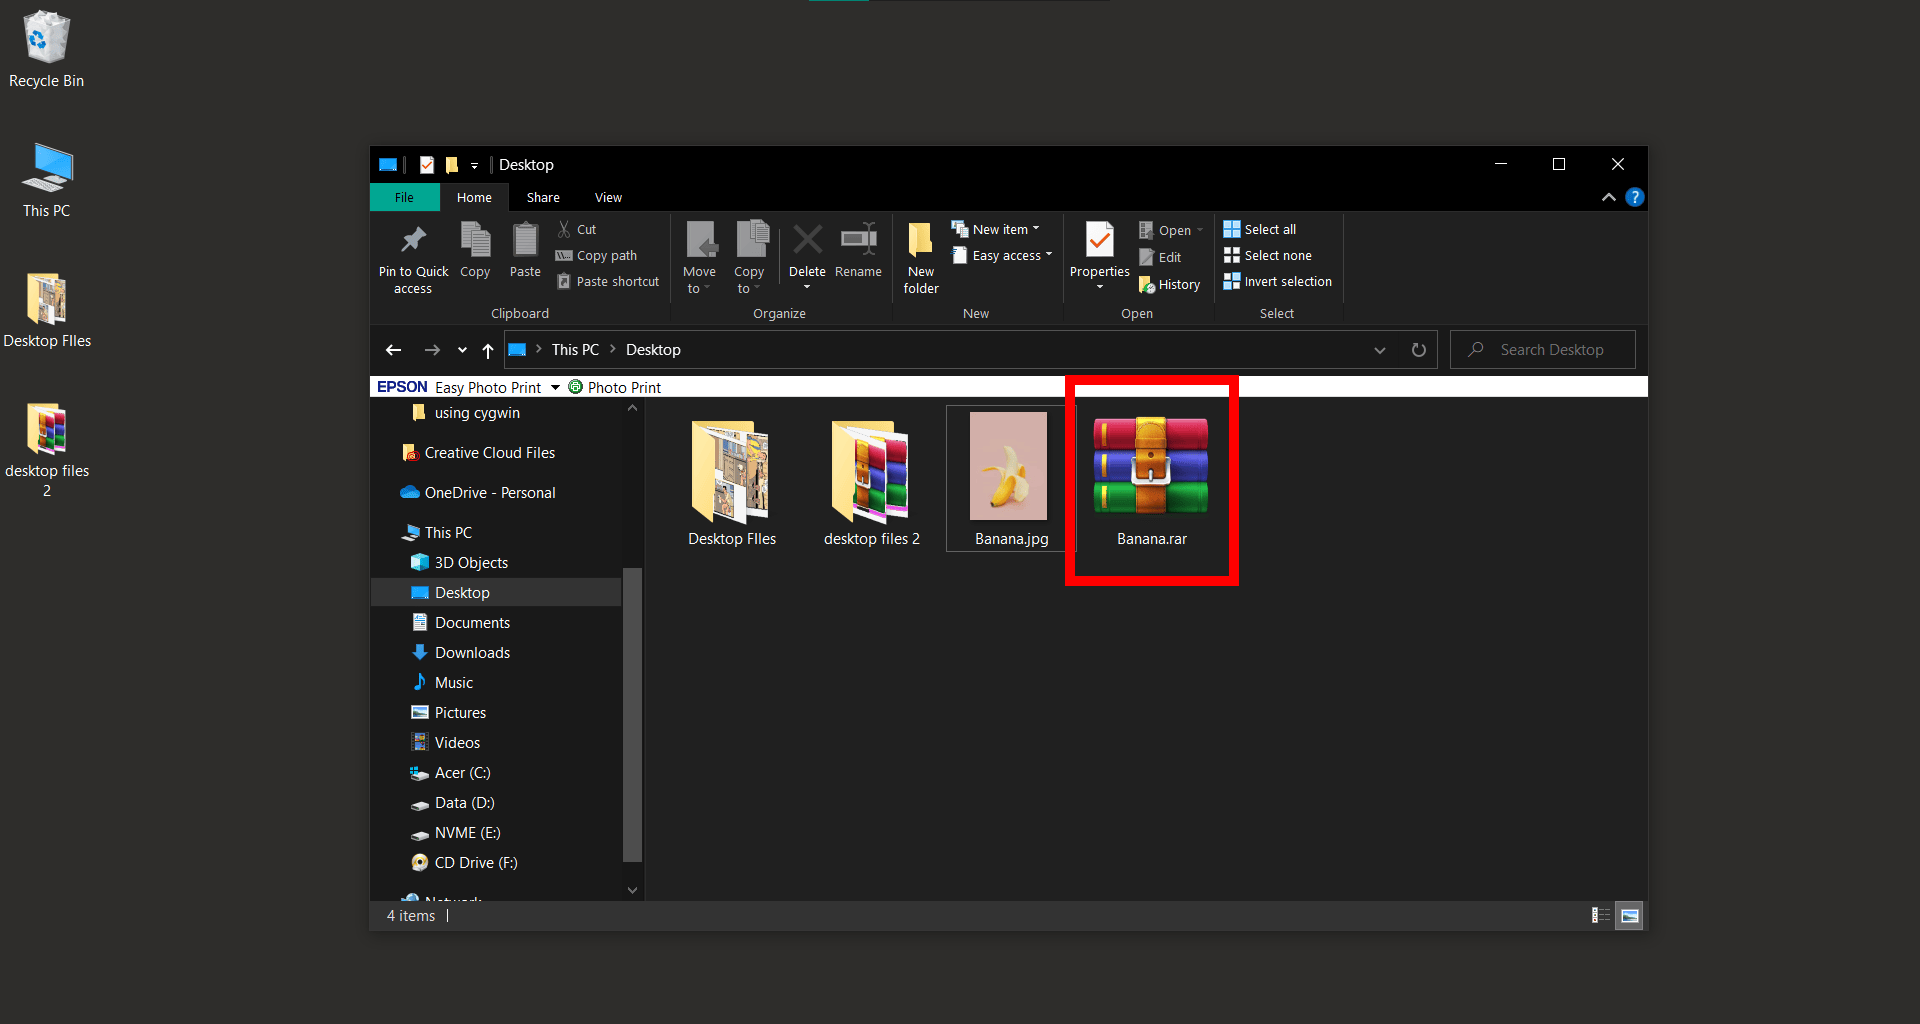
- Select Your Bananas: Highlight the files or folders you want to compress into a RAR file.
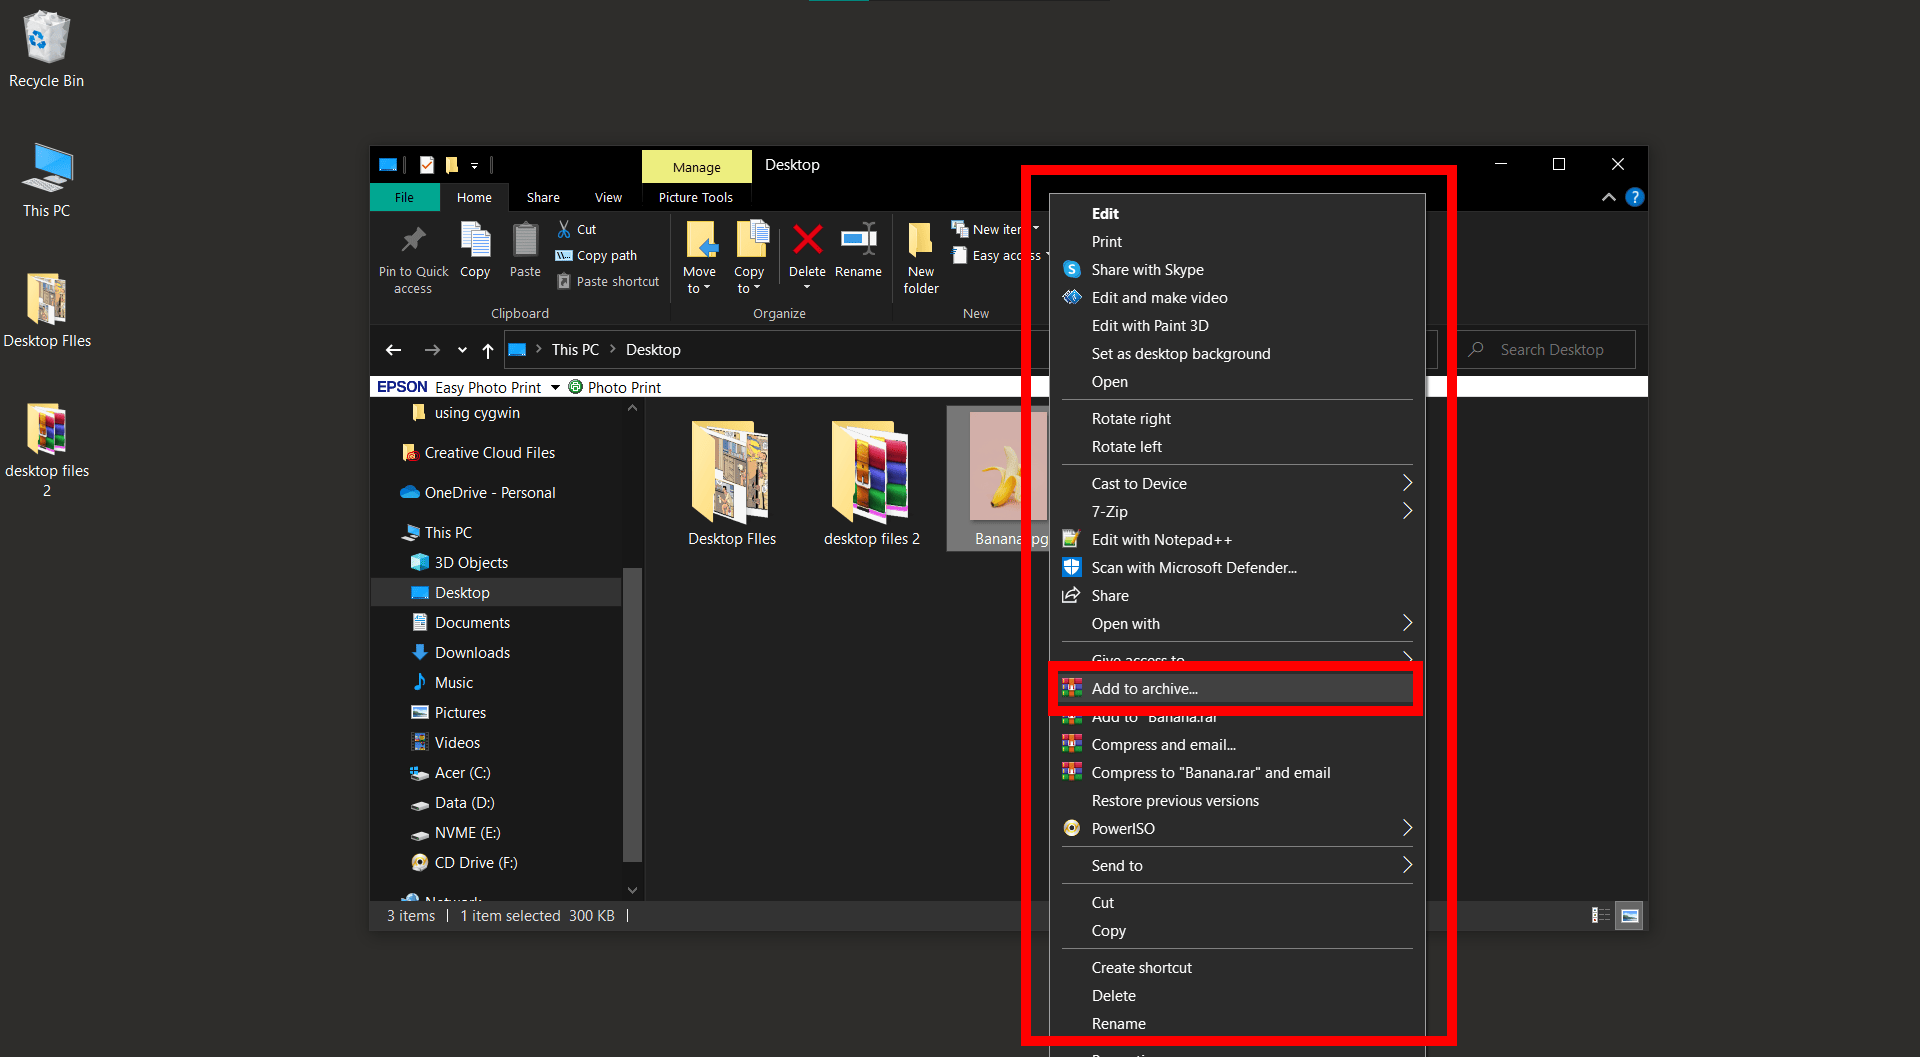
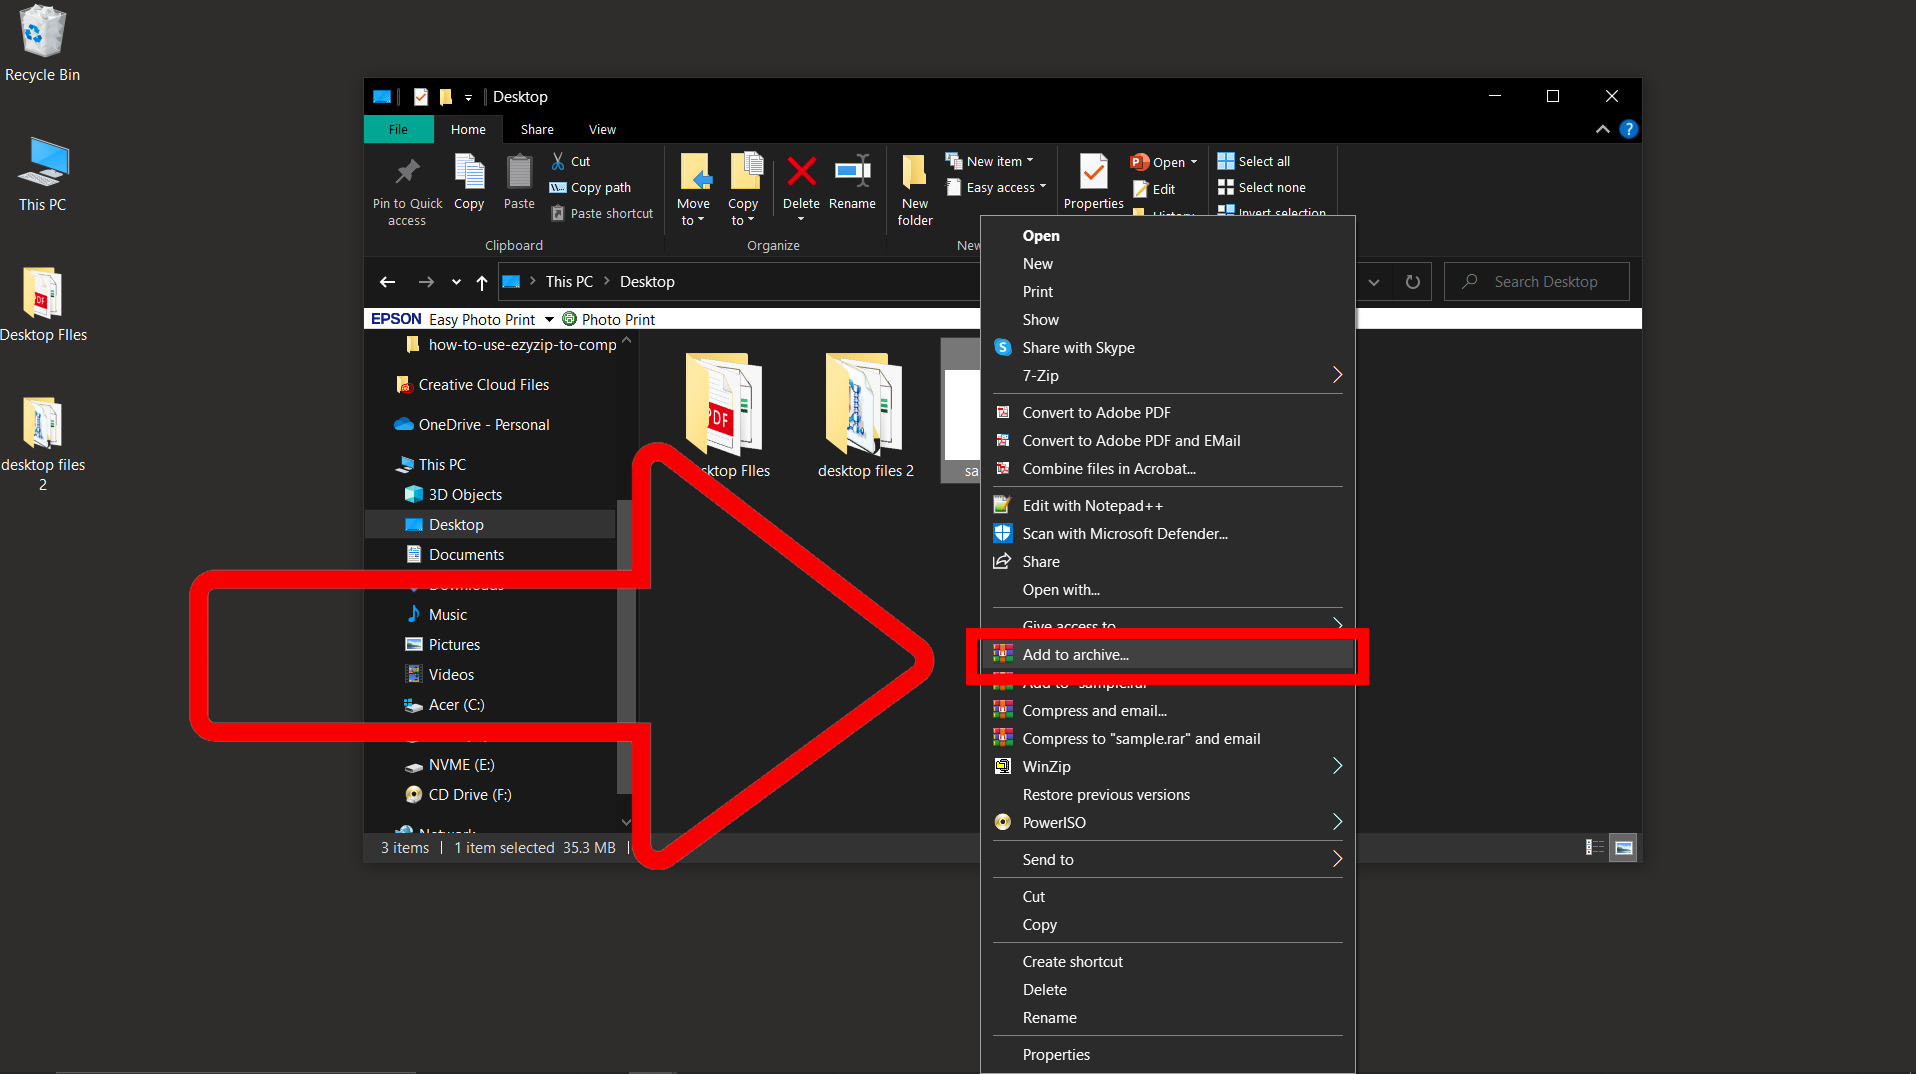
- Right Click Magic: After selecting, right-click on the highlighted items. In the context menu, hover over the ‘Add to archive…’ option.
- Choose RAR: A new window will pop up. Here, make sure to select the ‘RAR’ option under ‘Archive format’.
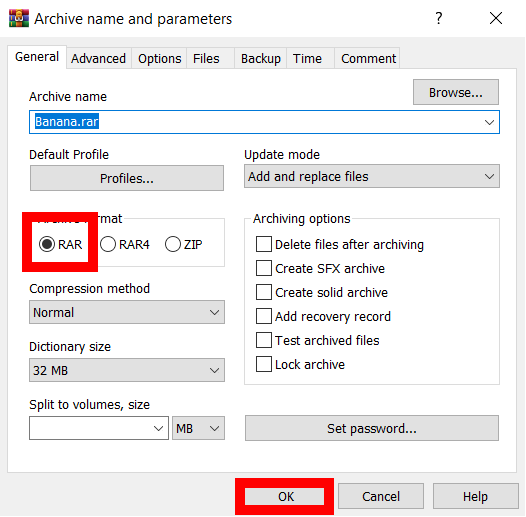
- Final Swing: Click ‘OK’ to create the RAR file. Your RAR file will be saved in the same location as the original items.
 And there you have it, a fresh RAR file, ready to swing through the digital jungle!
How To Create Self Extracting Files Using WinRAR On Windows
Creating a Self-Extracting Archive (SFX) with WinRAR is like handing someone a magic banana that peels itself. 🍌 It’s a standalone file that can unpack its contents without needing any external software. Here’s your step-by-step guide:
- Install WinRAR: Follow the steps above to install WinRAR.
- Select Your Files: Find the files you want to compress, right-click, and choose “Add to archive…“.
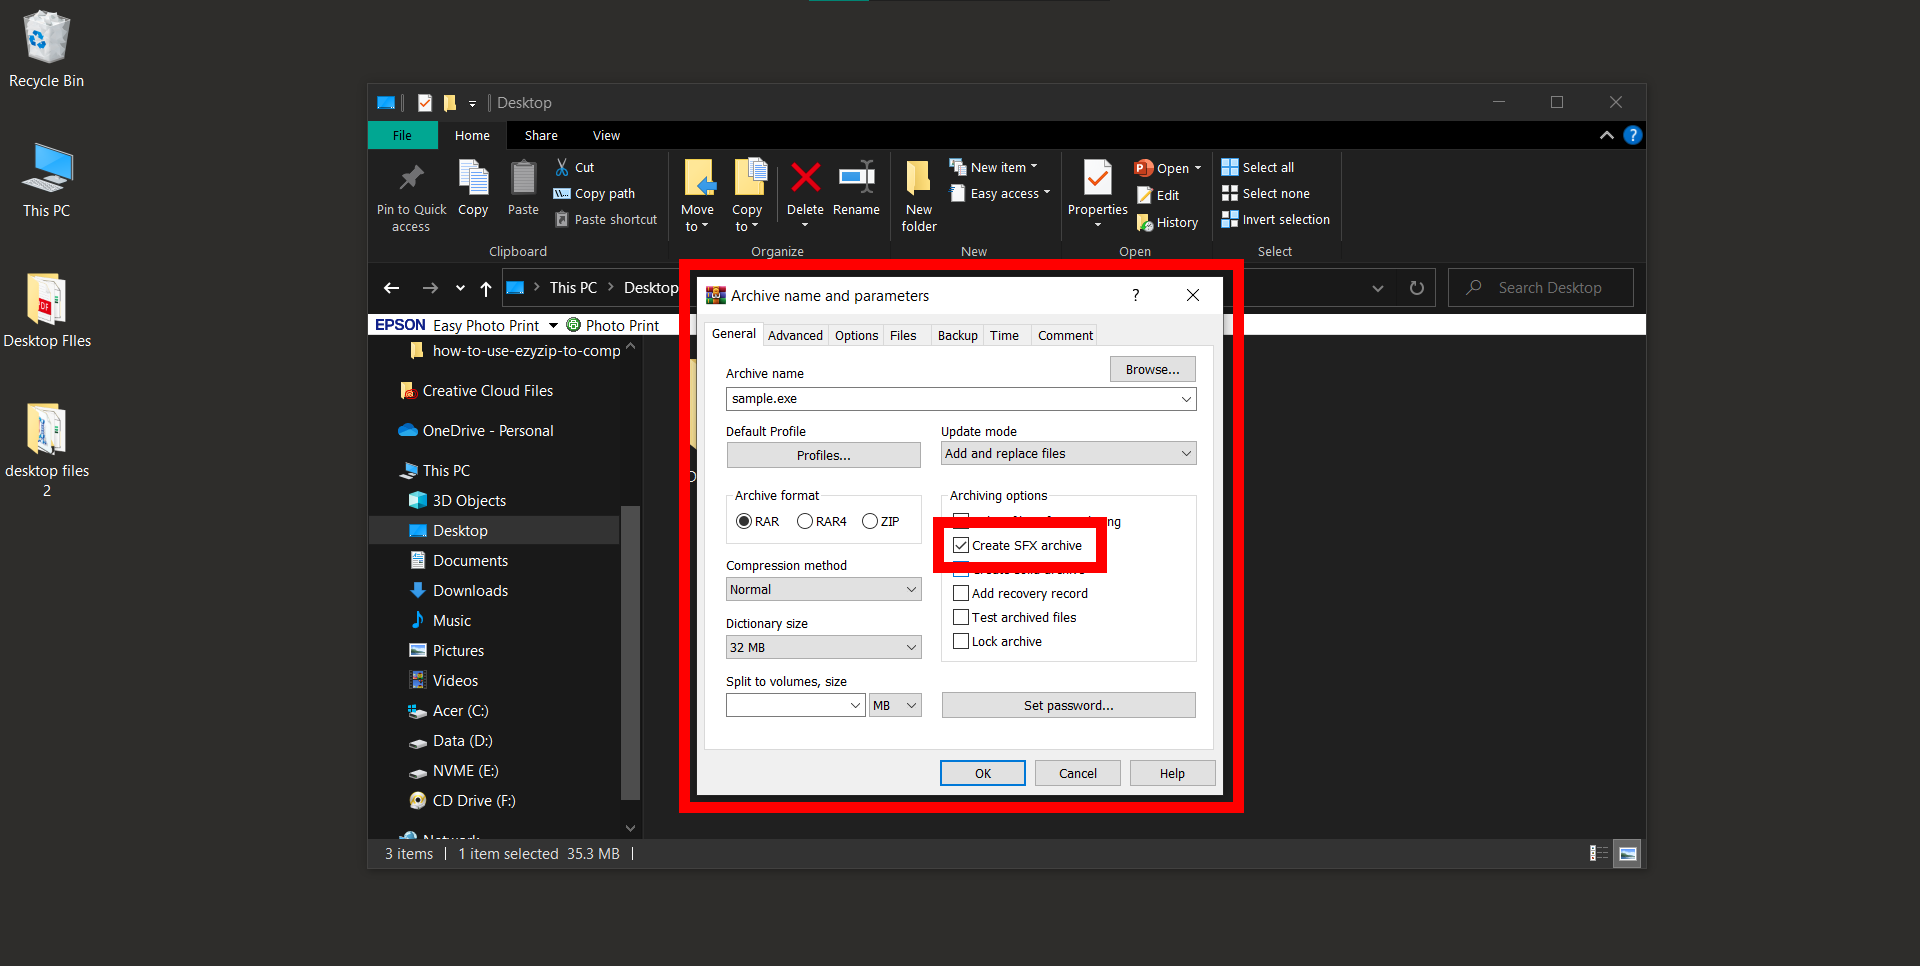
- Choose SFX: In the WinRAR window, select “Create SFX archive” under the “Archiving options” tab. This is the magic that turns your regular archive into a self-extracting one!
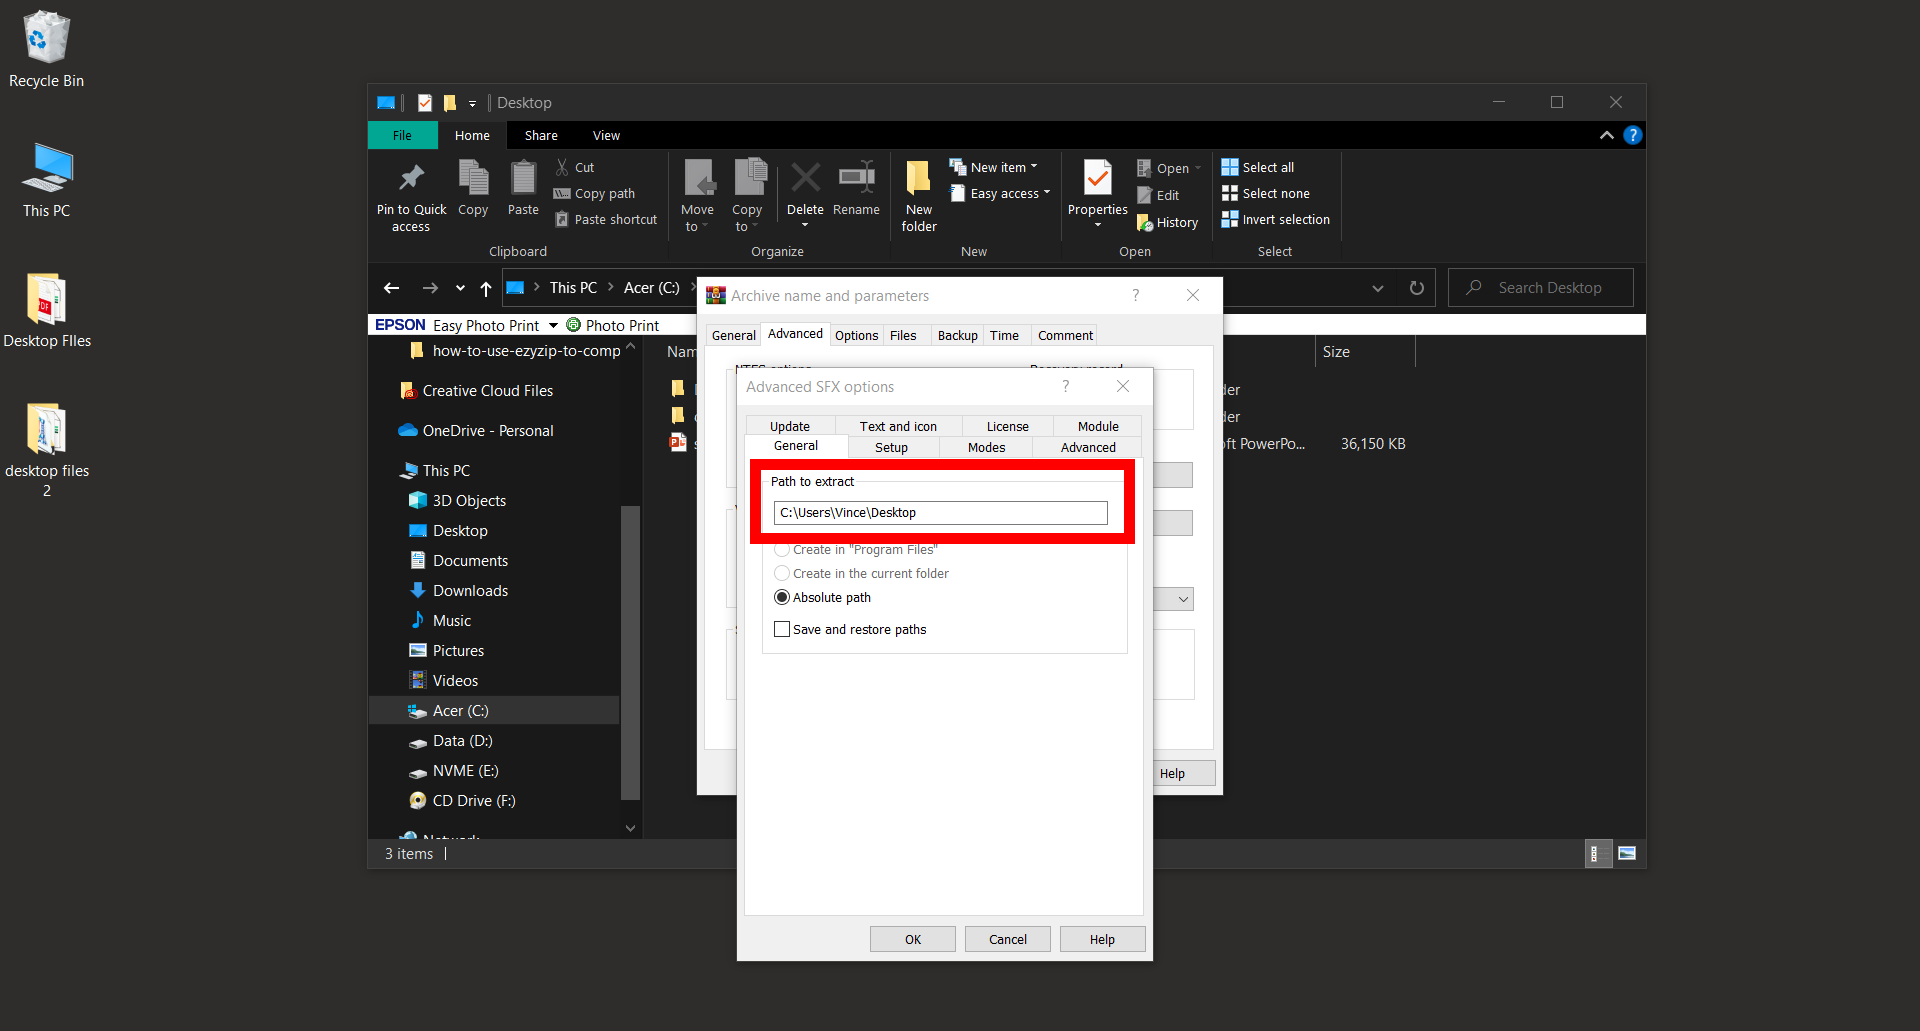
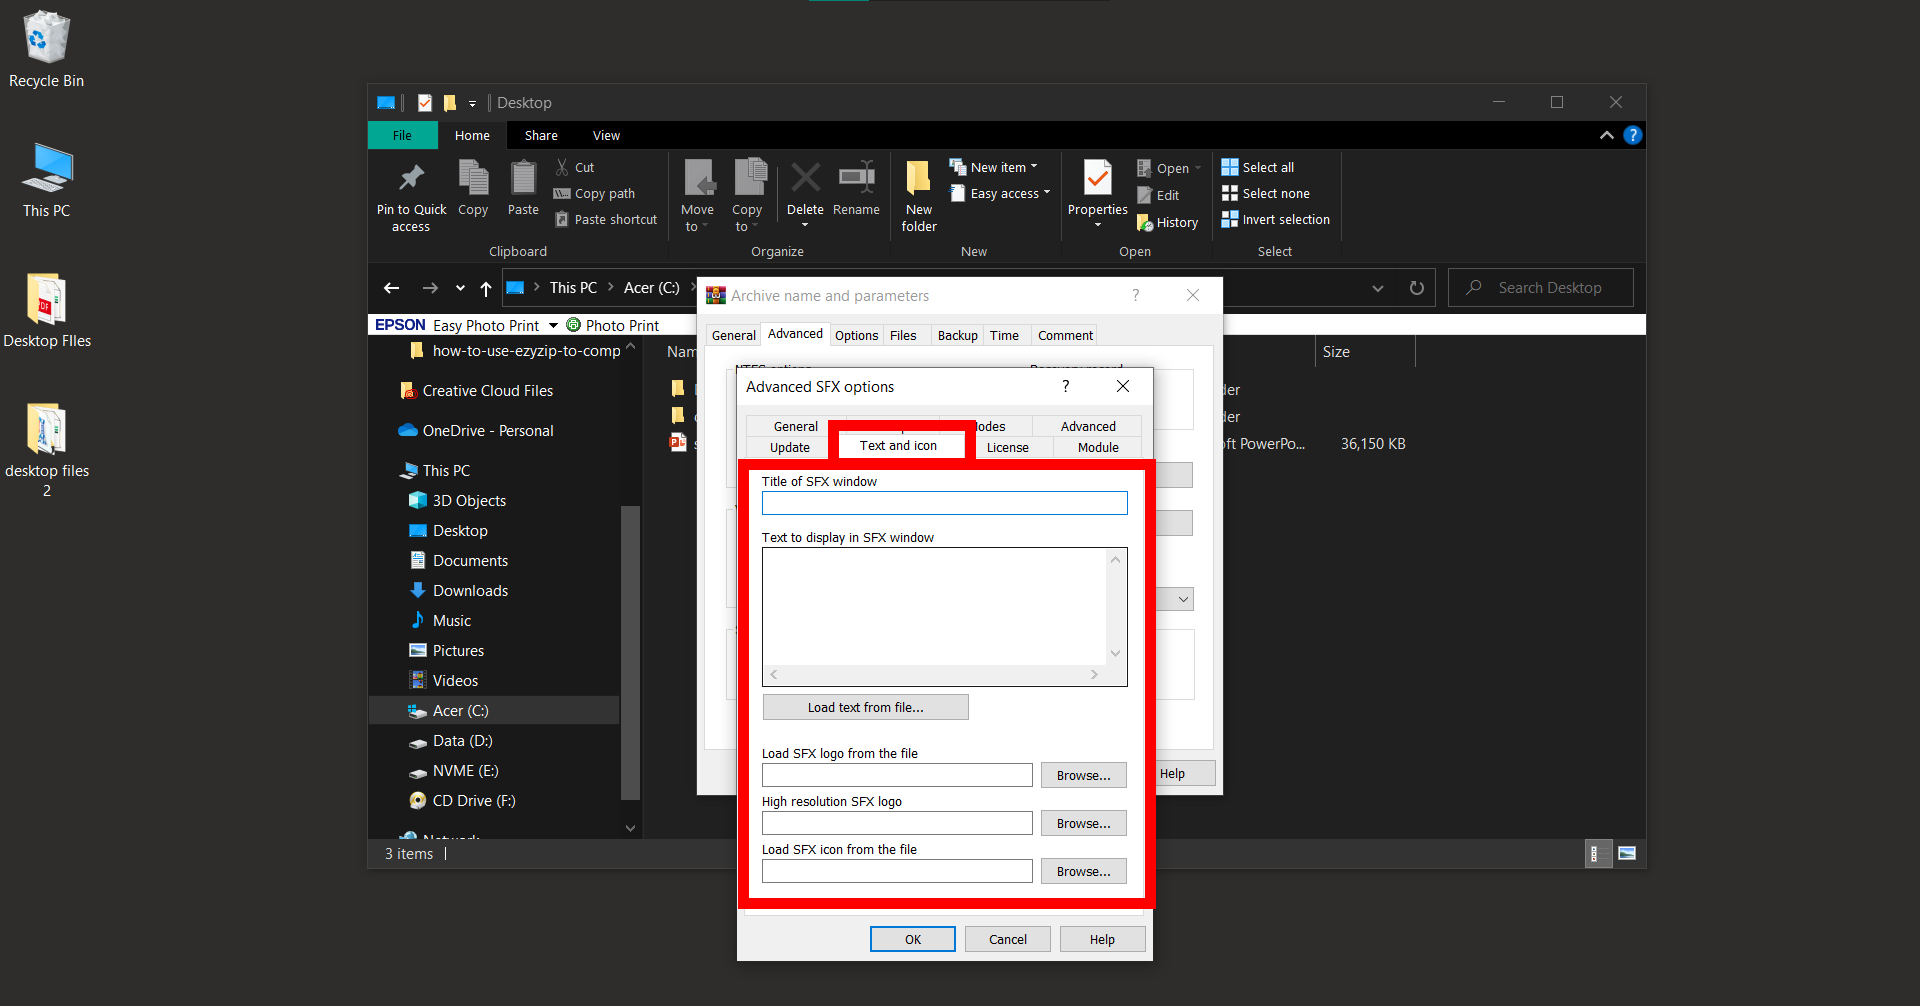
- Configure: Click on the “Advanced” tab and then “SFX options”.

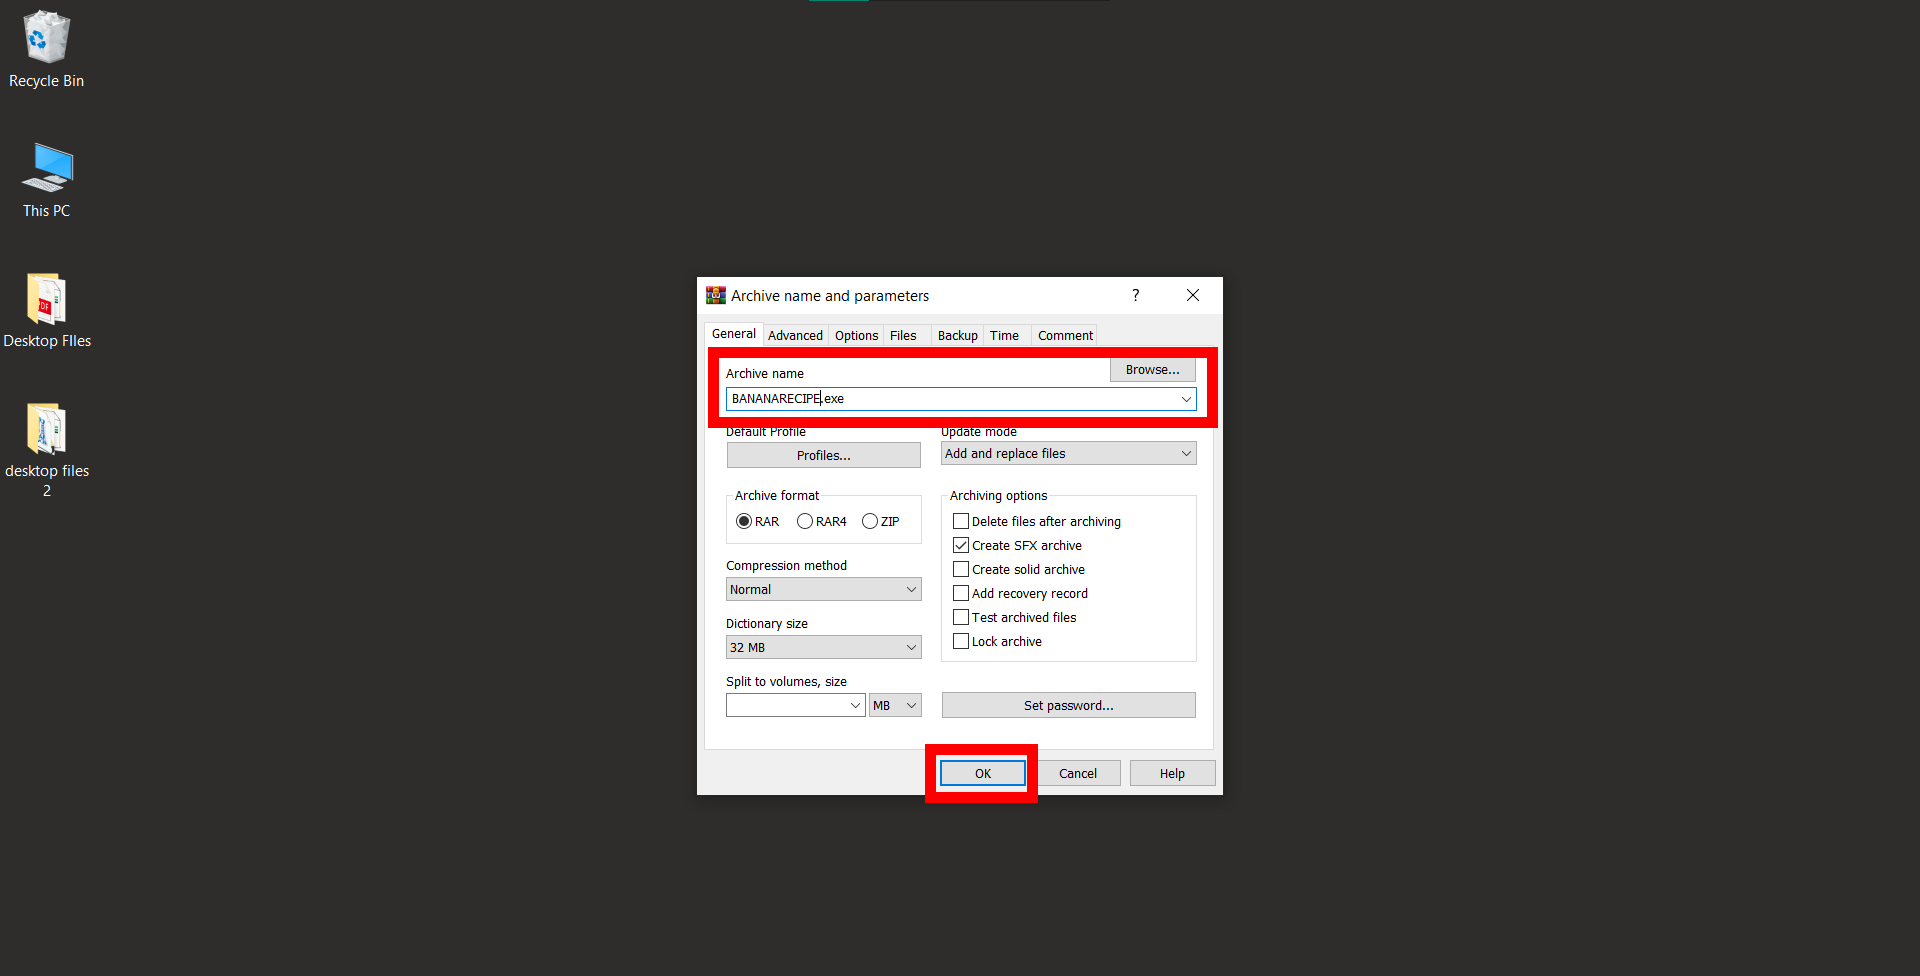
- Name and Save: Decide where the files will unpack and even add a lovely note for the recipient. Give your archive a name, like “BananaRecipes”. After you’re done, click “OK”. Watch WinRAR zip everything up into a neat, self-extracting package.
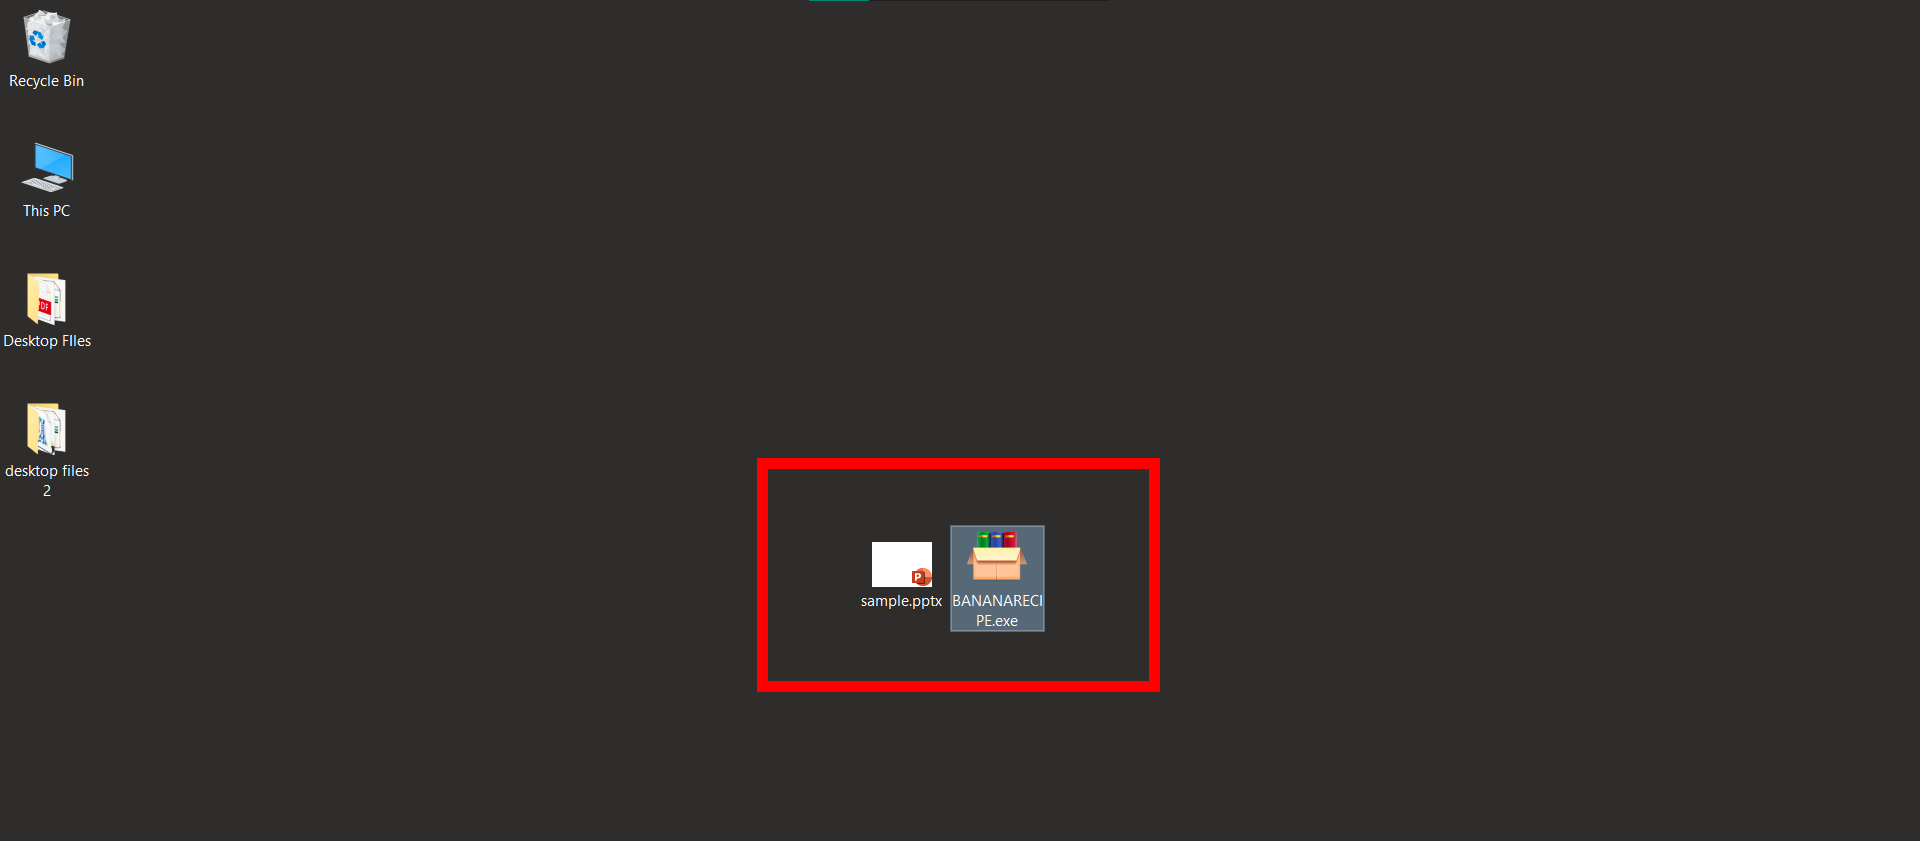
- Send Your Package: Now, just send your SFX file through the vines of the internet to your friends. They’ll be able to open it even if they don’t have WinRAR installed!
How To Create Multipart RAR Files Using WinRAR
Multipart RAR files are like a bunch of puzzle pieces; when put together, they form the complete picture (or in this case, file). They’re especially handy when you need to split large files into smaller chunks for easier sharing or storage. Let’s learn how to create them:
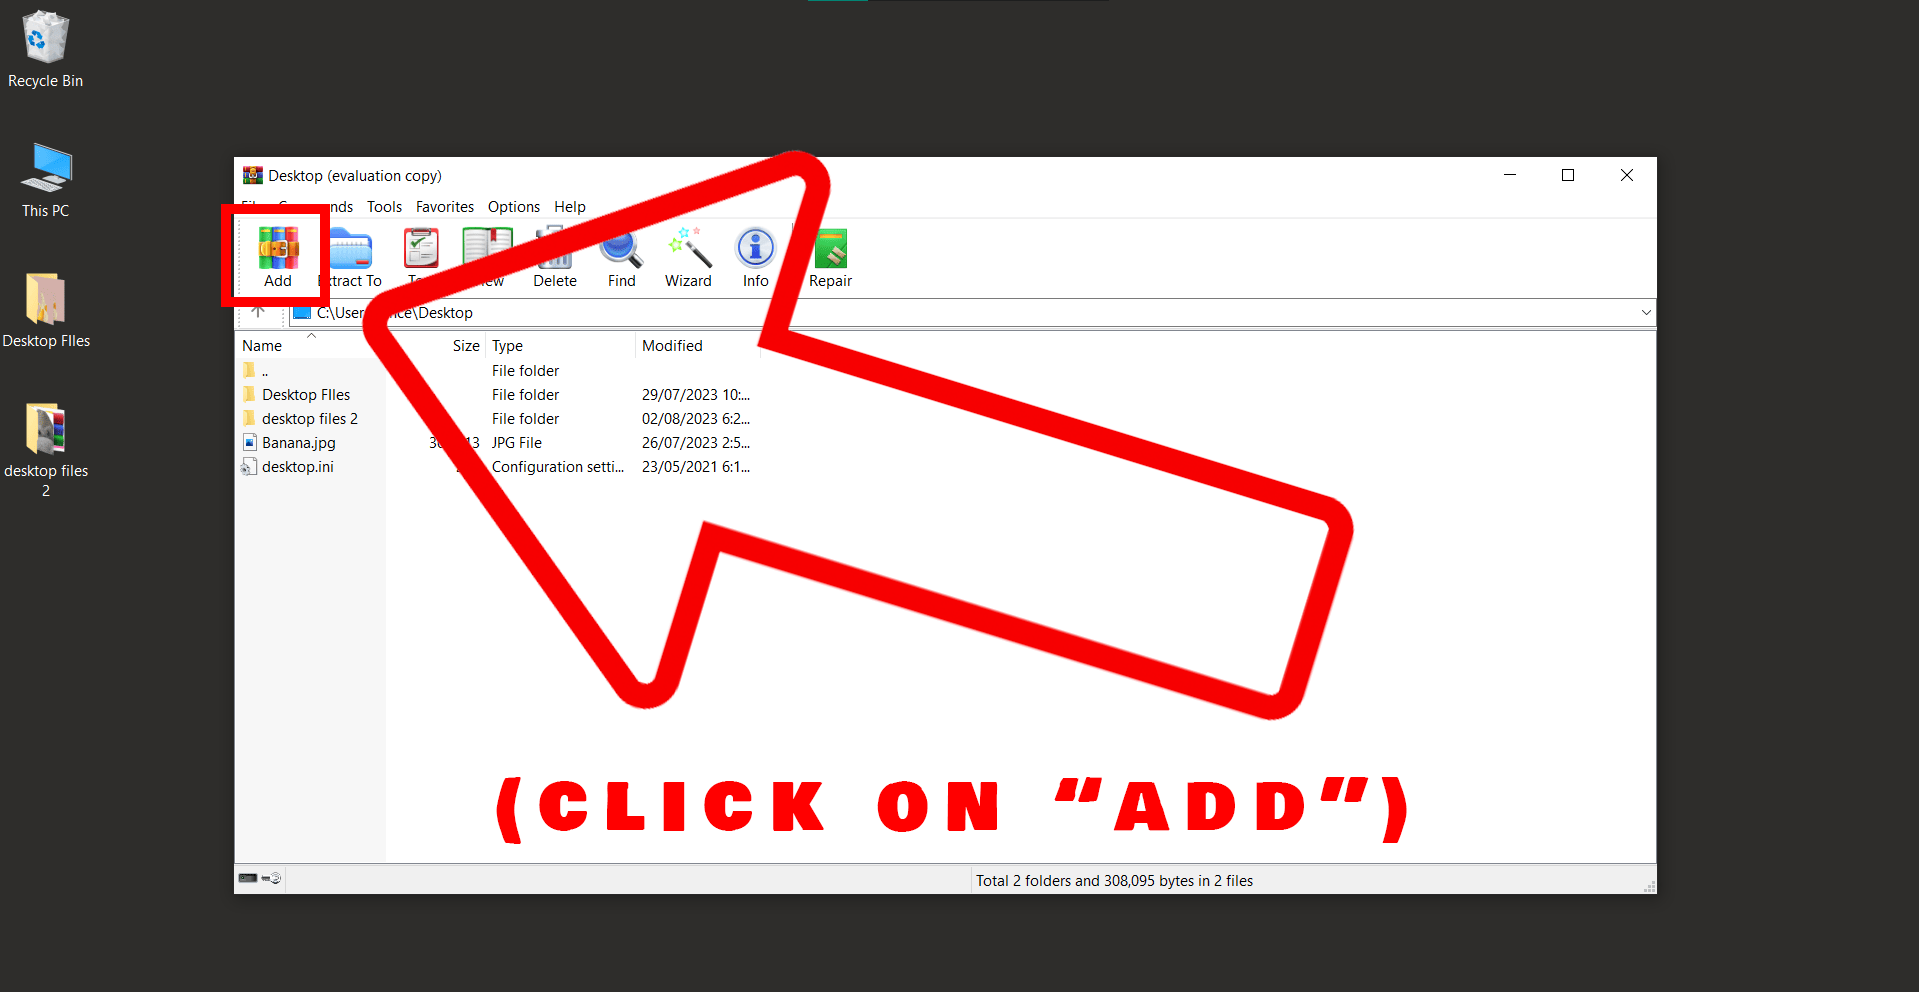
- Open WinRAR: Once installed, open WinRAR. Navigate to the file you want to split. It’s like seeking out that tasty banana in the treetops!

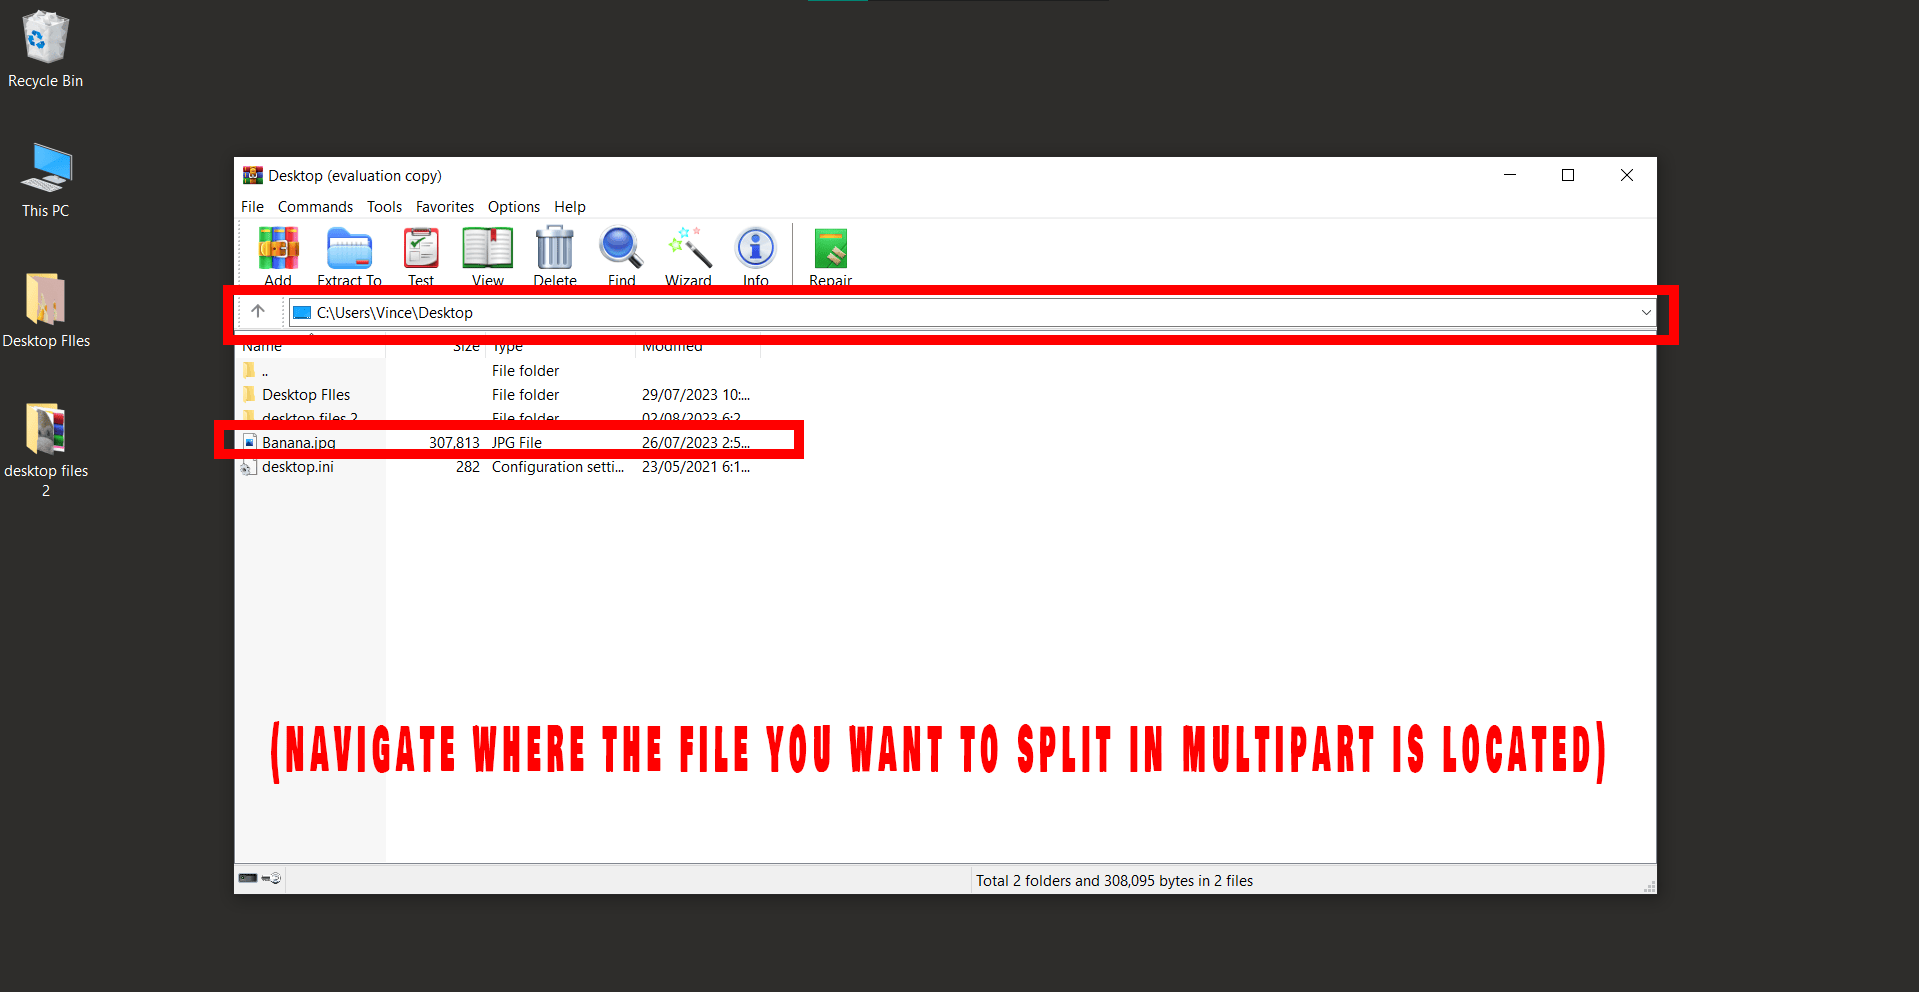
- Select your File: Right-click on the file and select Add. Here’s where the fun begins!
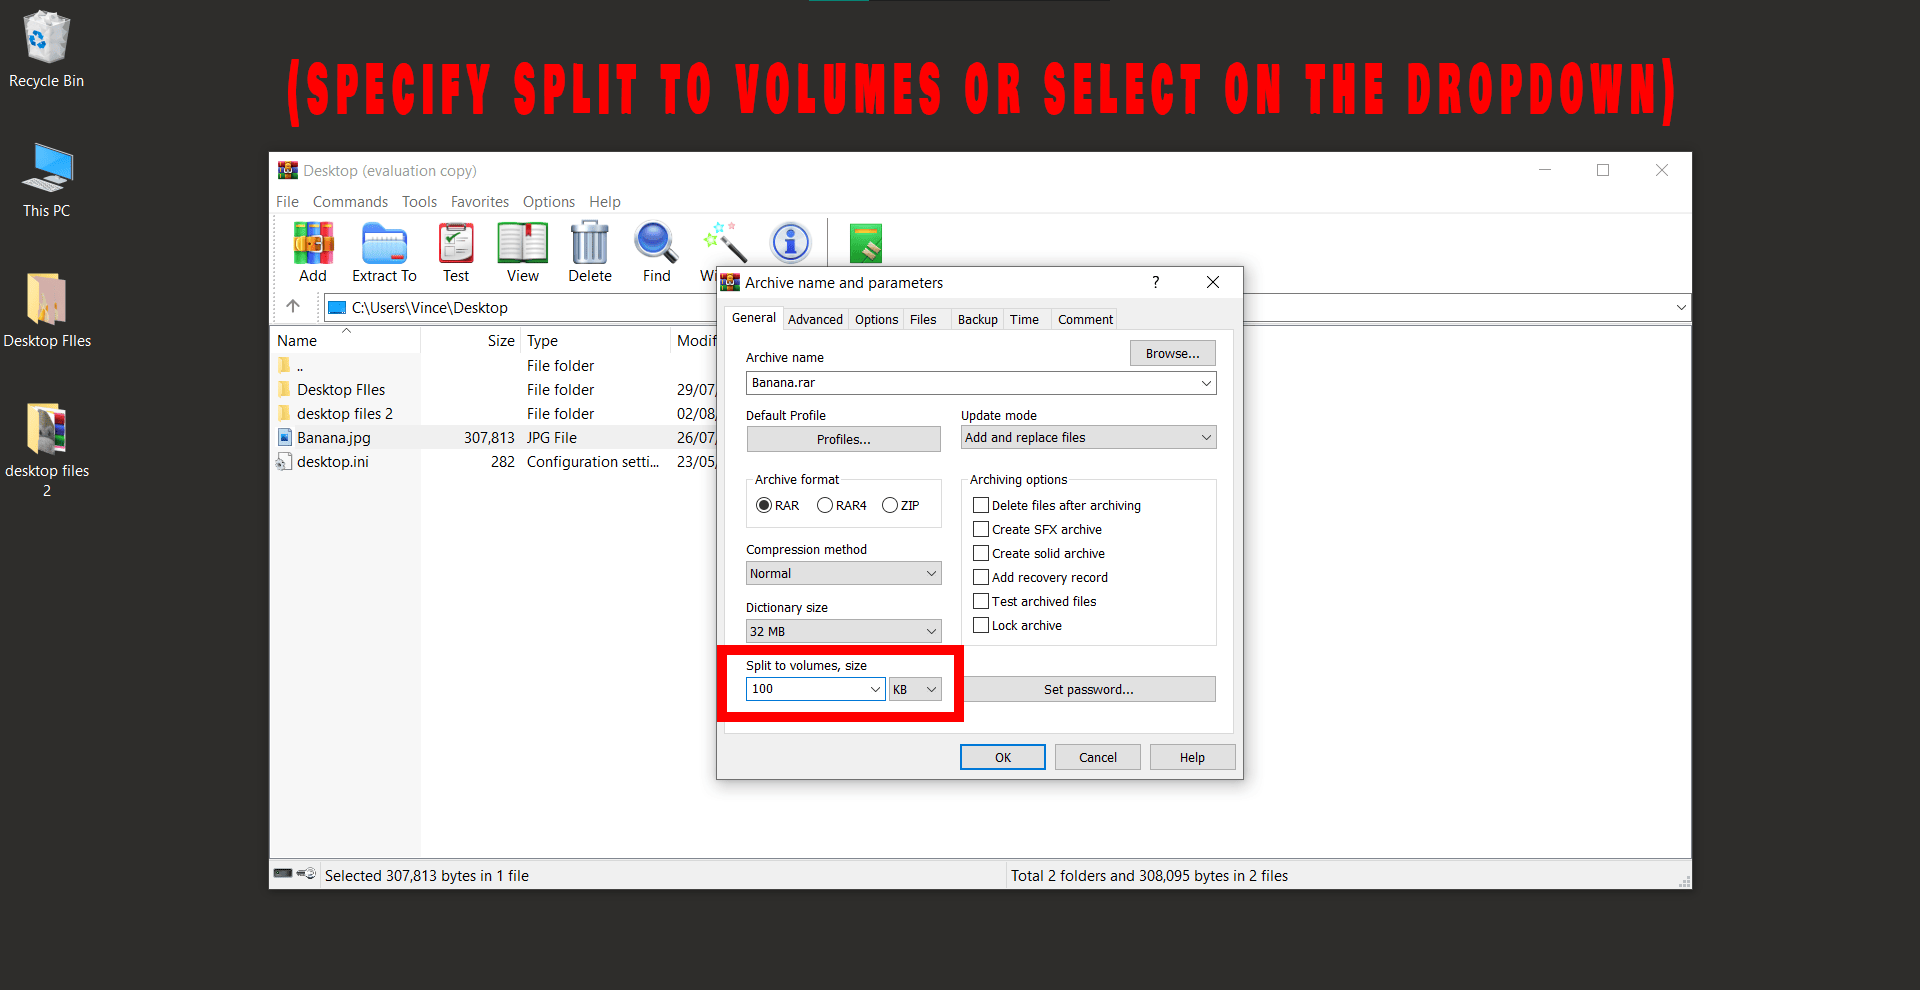
- Split to volumes: In the new window, look for the Split to volumes option. Input the size you want each part to be (like 10M for 10MB parts). It’s like slicing up a banana for your little monkey friends!
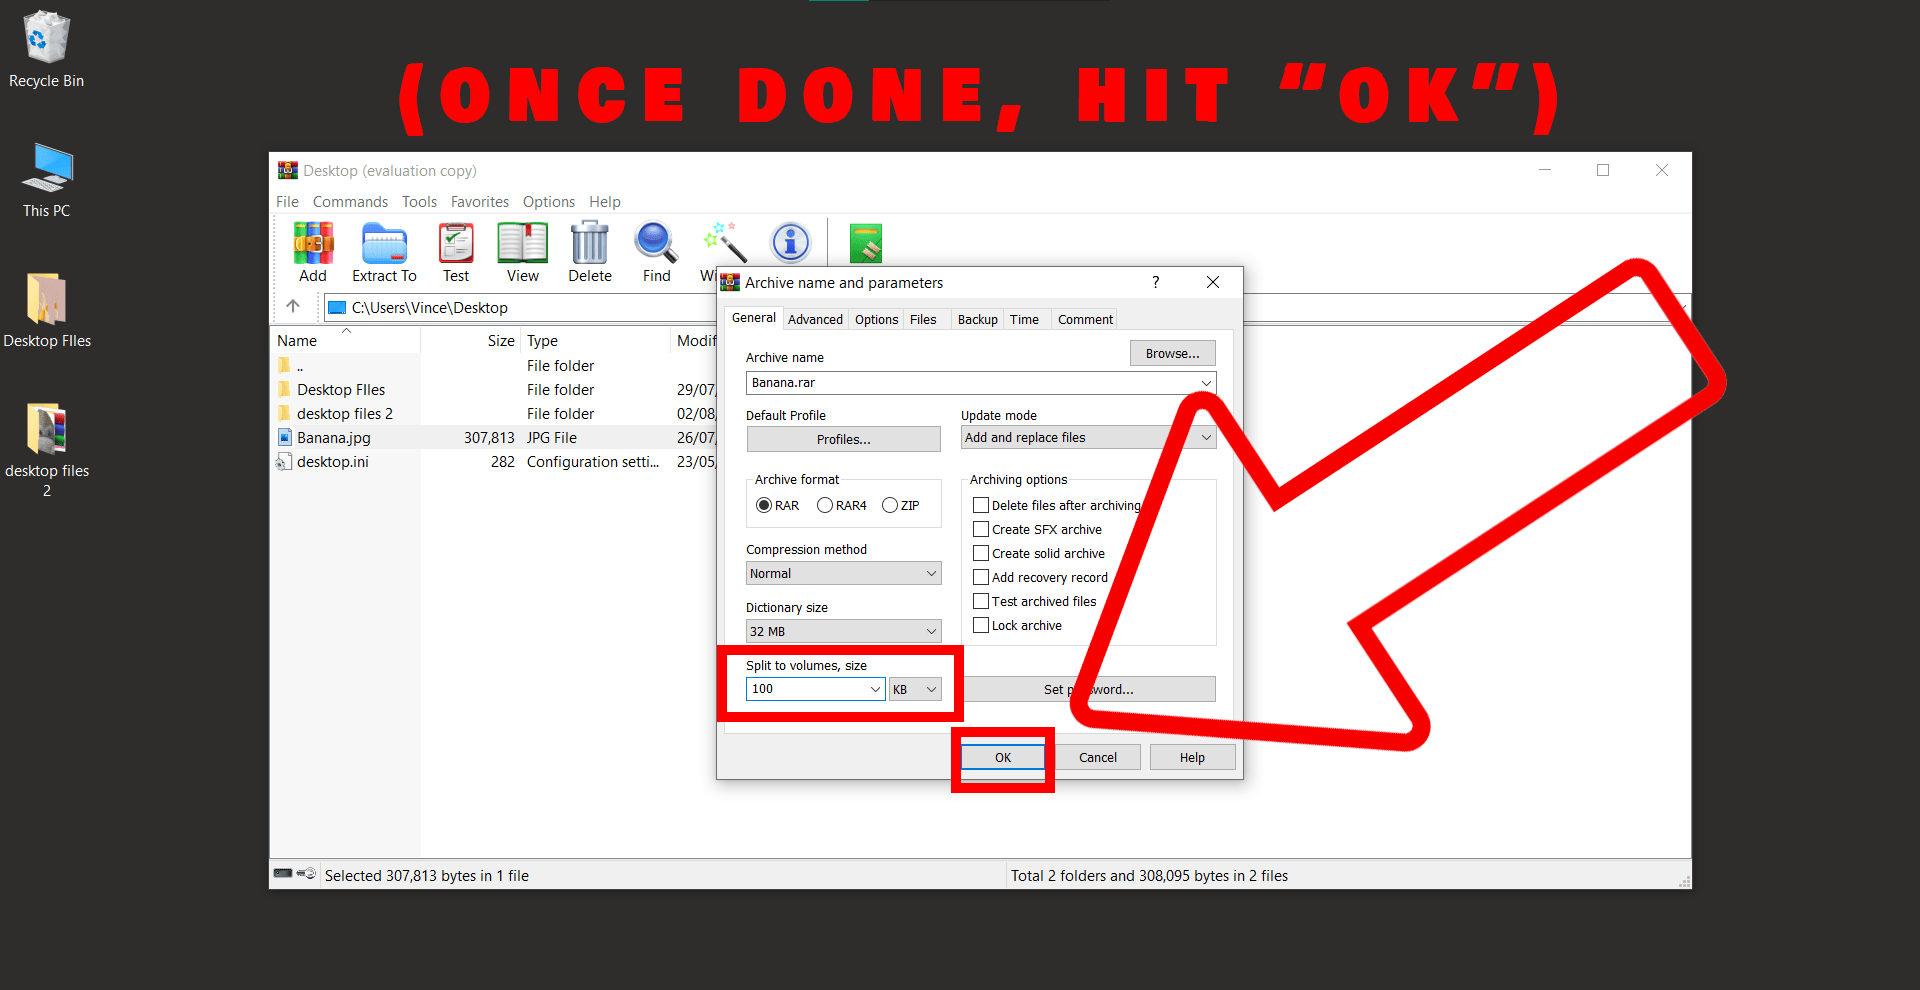
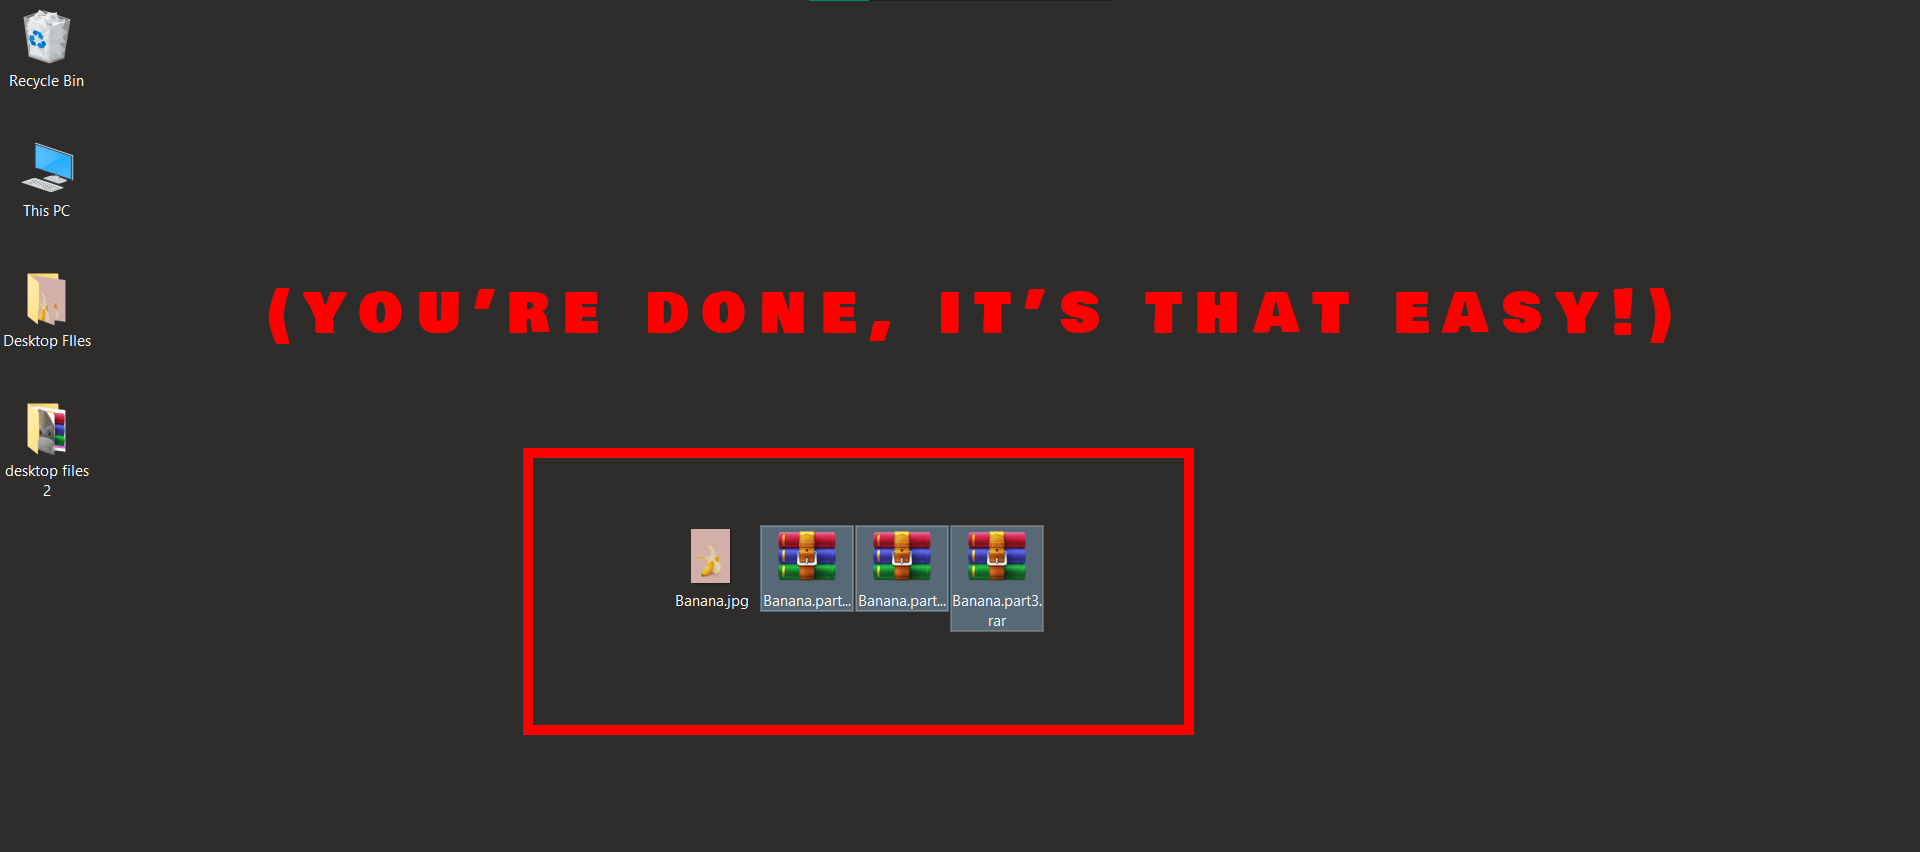
- Click OK: Once you’ve input your desired size, click OK. WinRAR will start working its magic, splitting your files faster than a monkey scooping up bananas!
How To Extract Files Using WinRAR
Peeling open an archive? Easier than a ripe banana!
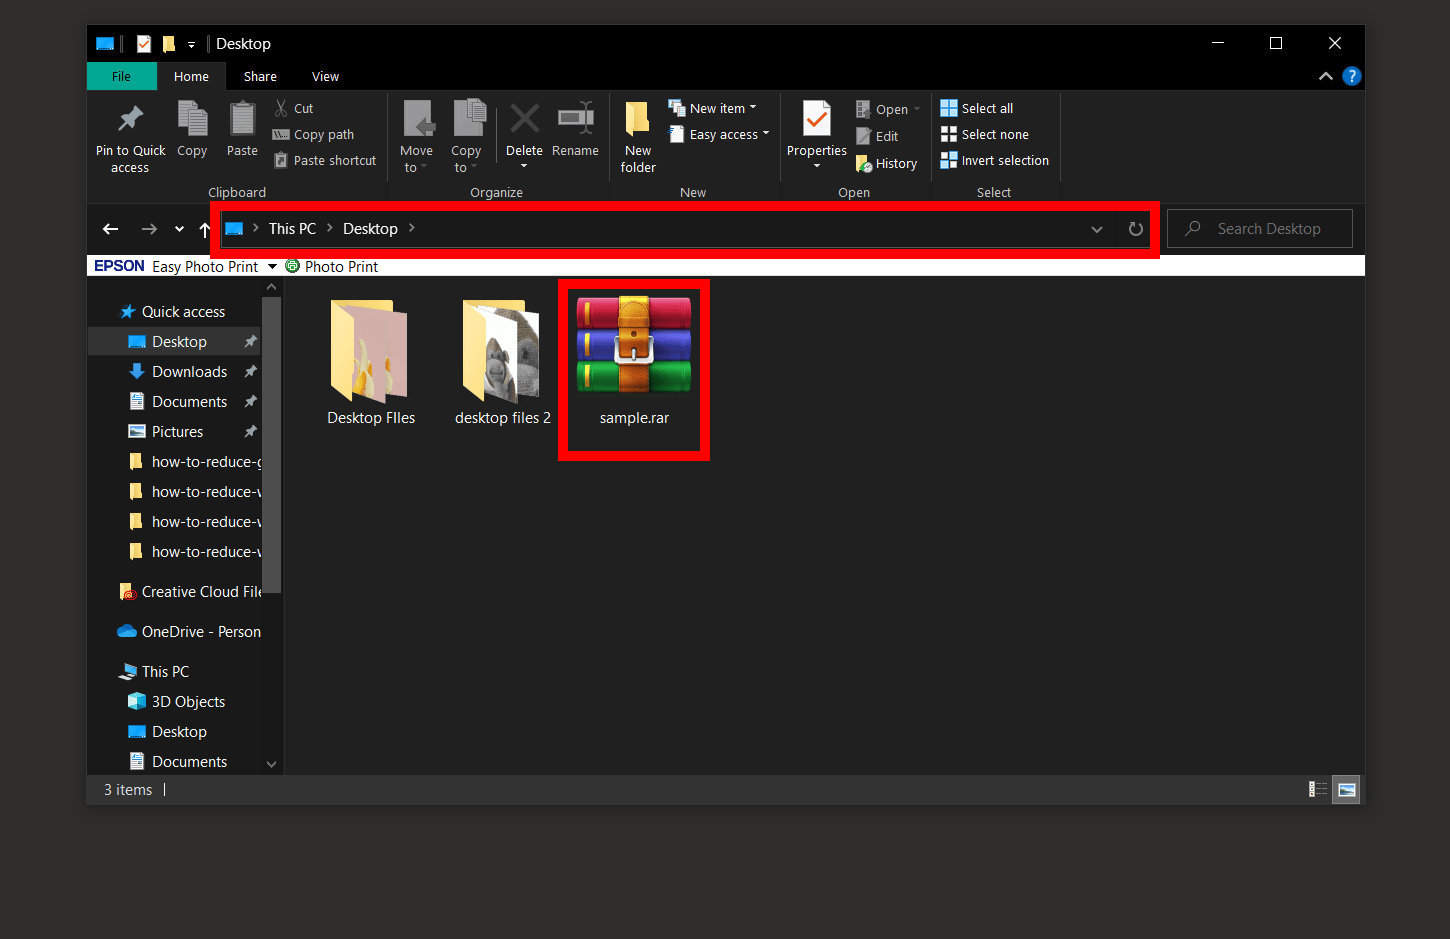
- Locate your RAR file: Navigate your way to the location of your RAR file in Windows File Explorer. Think of it as a digital treasure hunt.
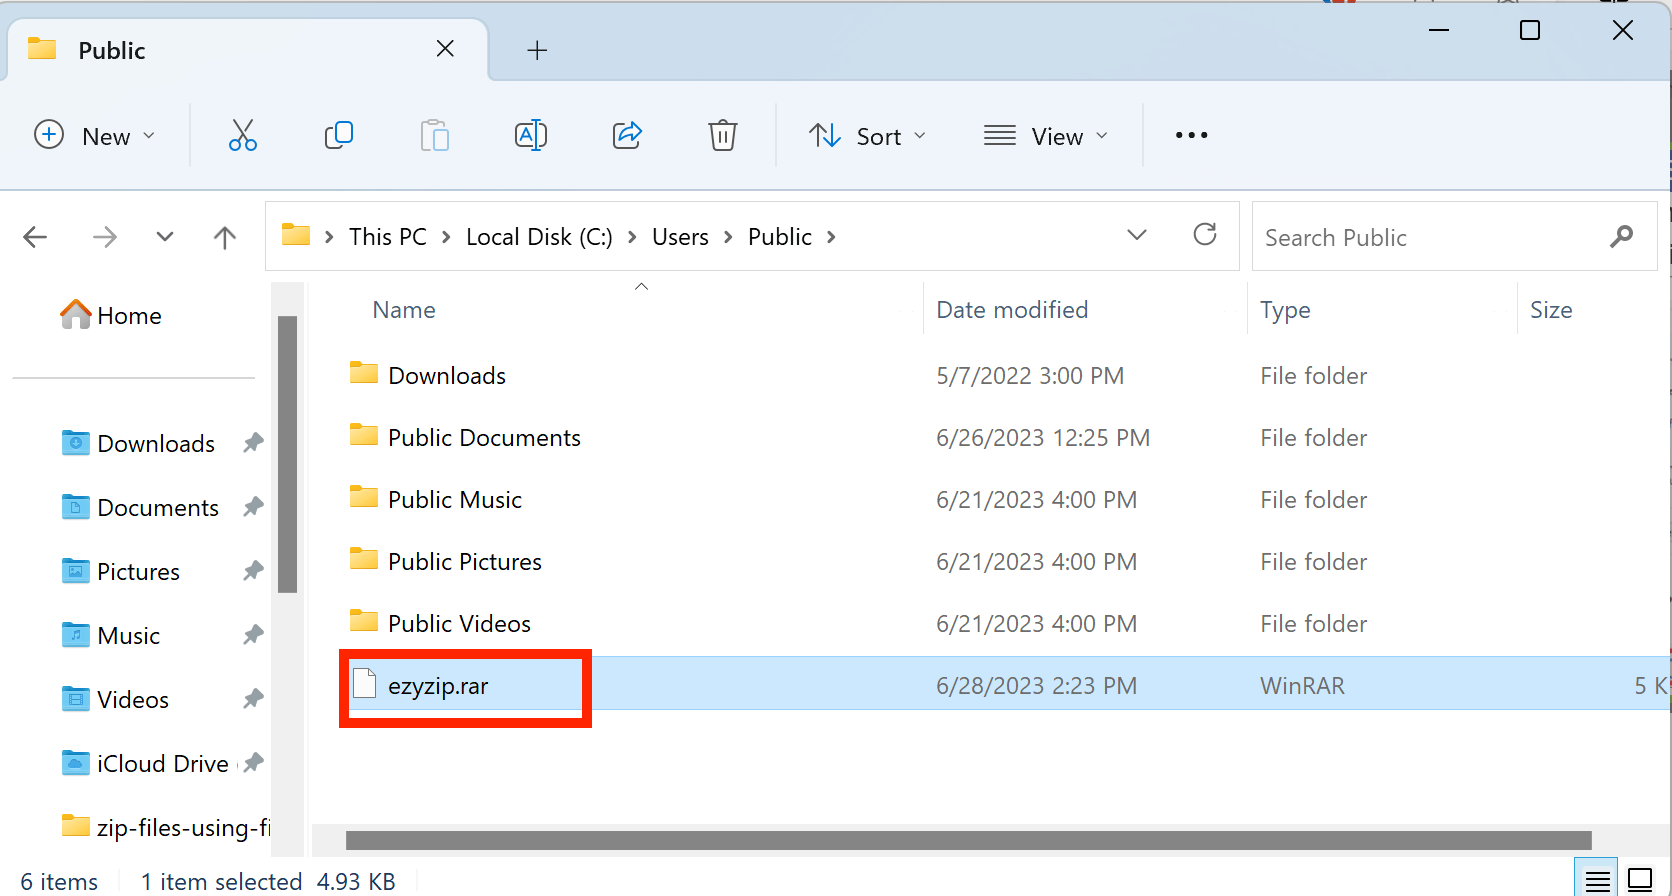
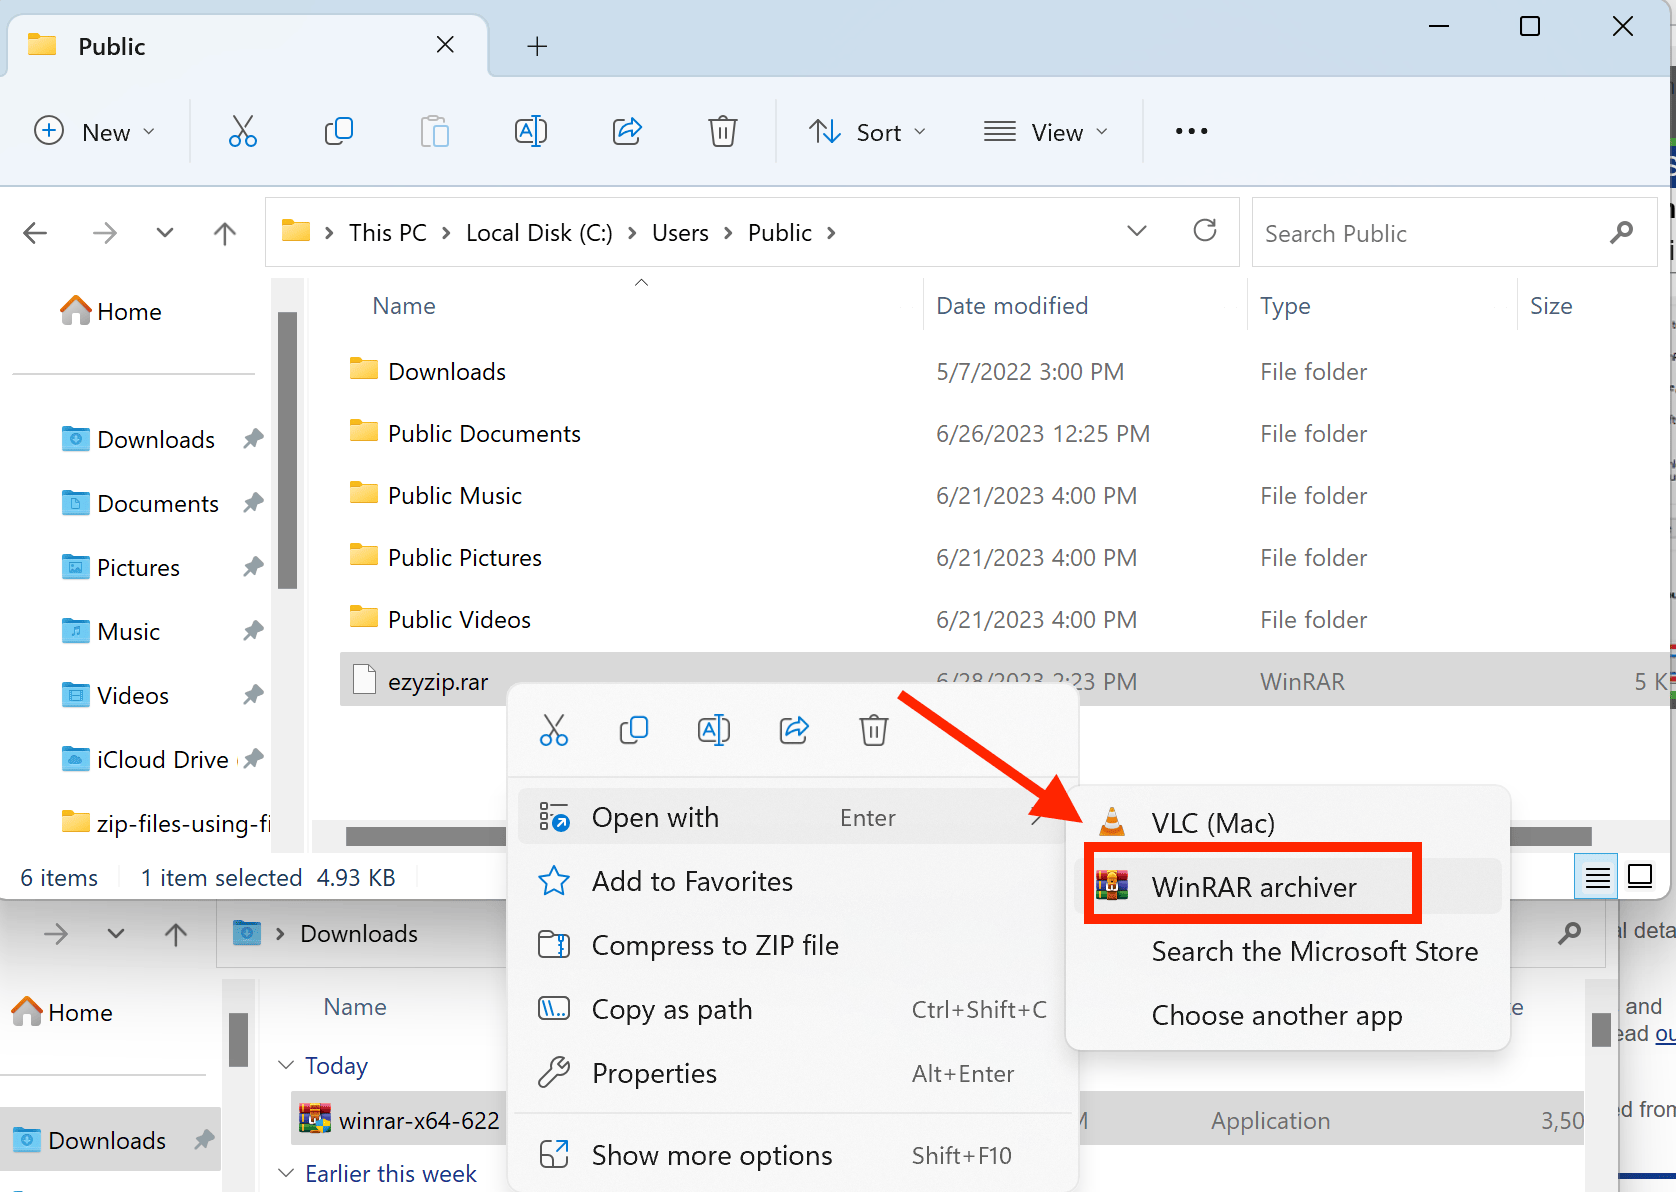
- Open with WinRAR: Right-click your RAR file and select Open with > WinRAR archiver. Just the right key for our digital treasure chest!
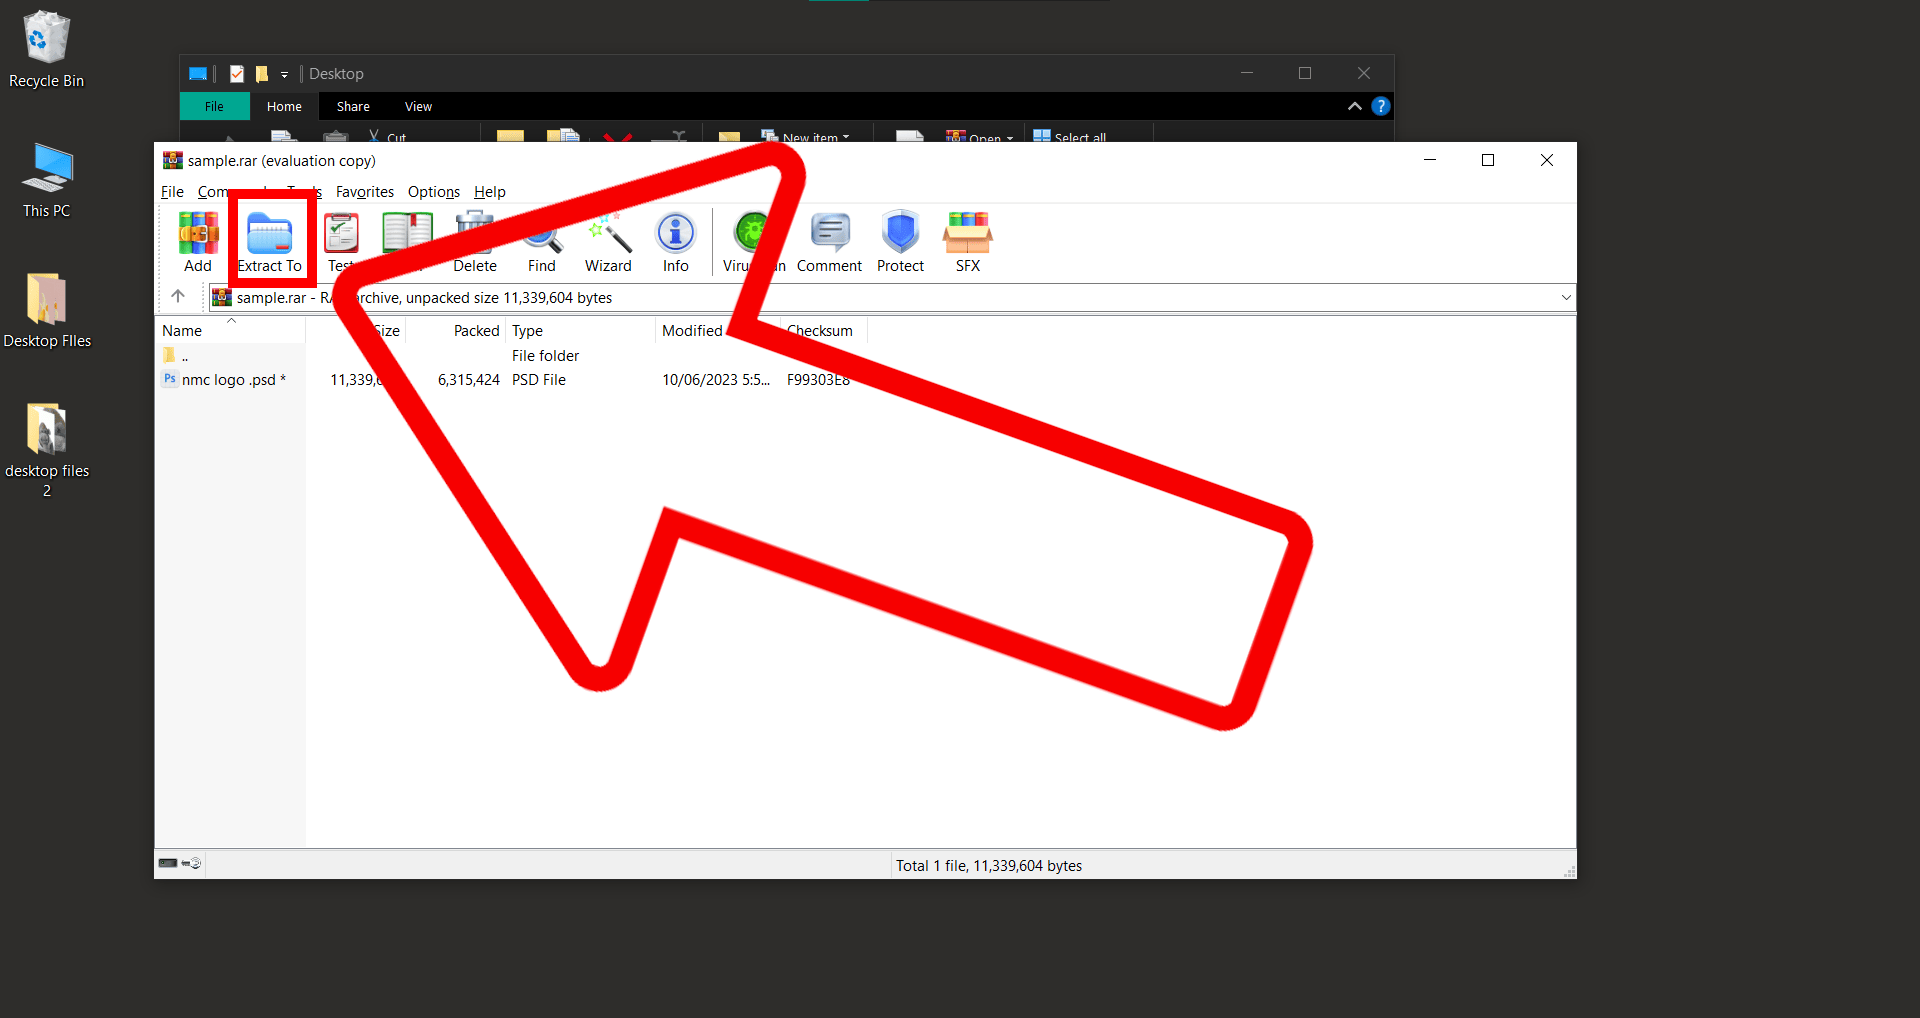
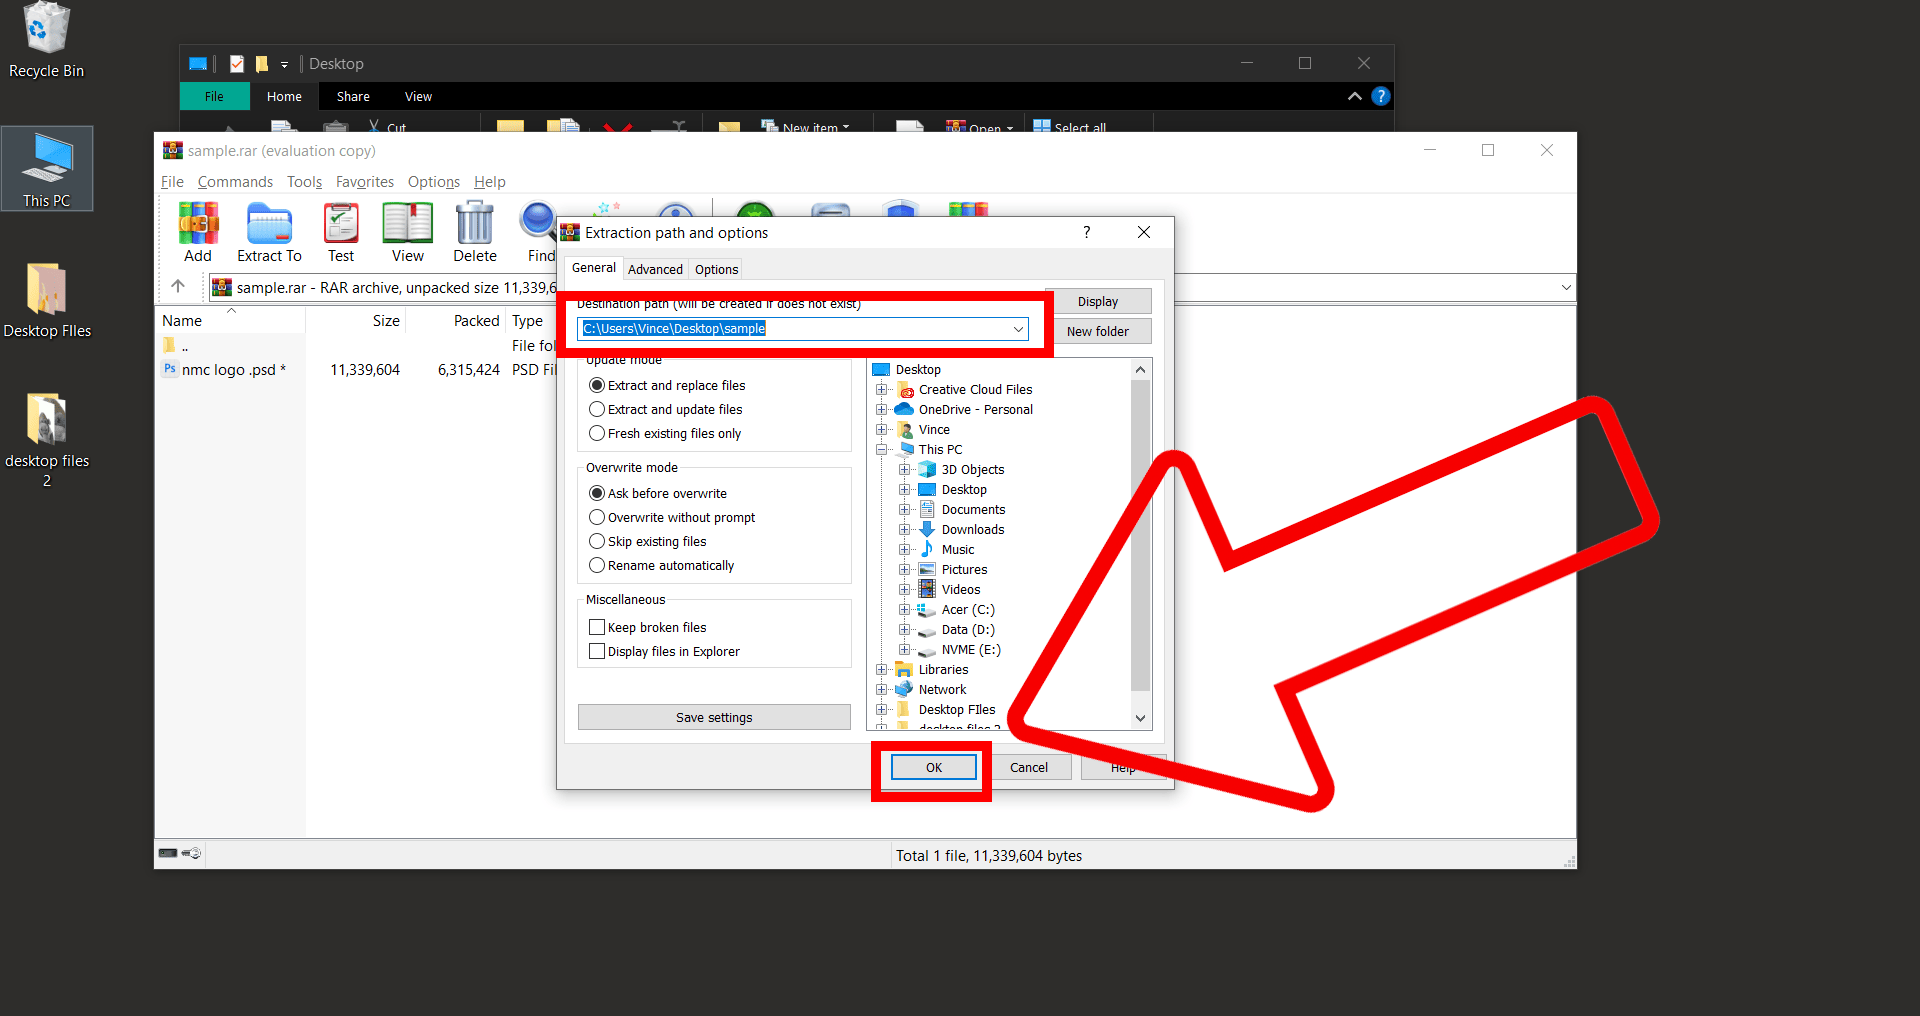
- Extract the files: Click on “Extract To”, choose your desired location, and click “OK”. You’ve just struck gold, matey!

How To Open Password Protected RAR Files Using WinRAR
Encountered a password-protected RAR file? It’s like a treasure chest waiting to be unlocked! Follow these steps to access its contents:
- Install WinRAR: First things first. If you don’t have WinRAR, head on over to the WinRAR official website to download it. Now, follow the on-screen instructions to install. Remember, installing software is like climbing a tree - take it one branch at a time.
- Locate the File: Now that you’re all set with WinRAR, it’s time to locate your file. Search for it in the Explorer window, just like you would look for a ripe banana in the jungle.
- Open with WinRAR: Right click on the file, and select ‘Open with” > “WinRAR archiver”. It’s like giving your file a friendly monkey handshake.

- Extract the File: Once you enter the correct password, you’ll see a button that says “Extract To”. Click it and choose where you’d like to extract the file. It’s like choosing the perfect branch to enjoy your banana.
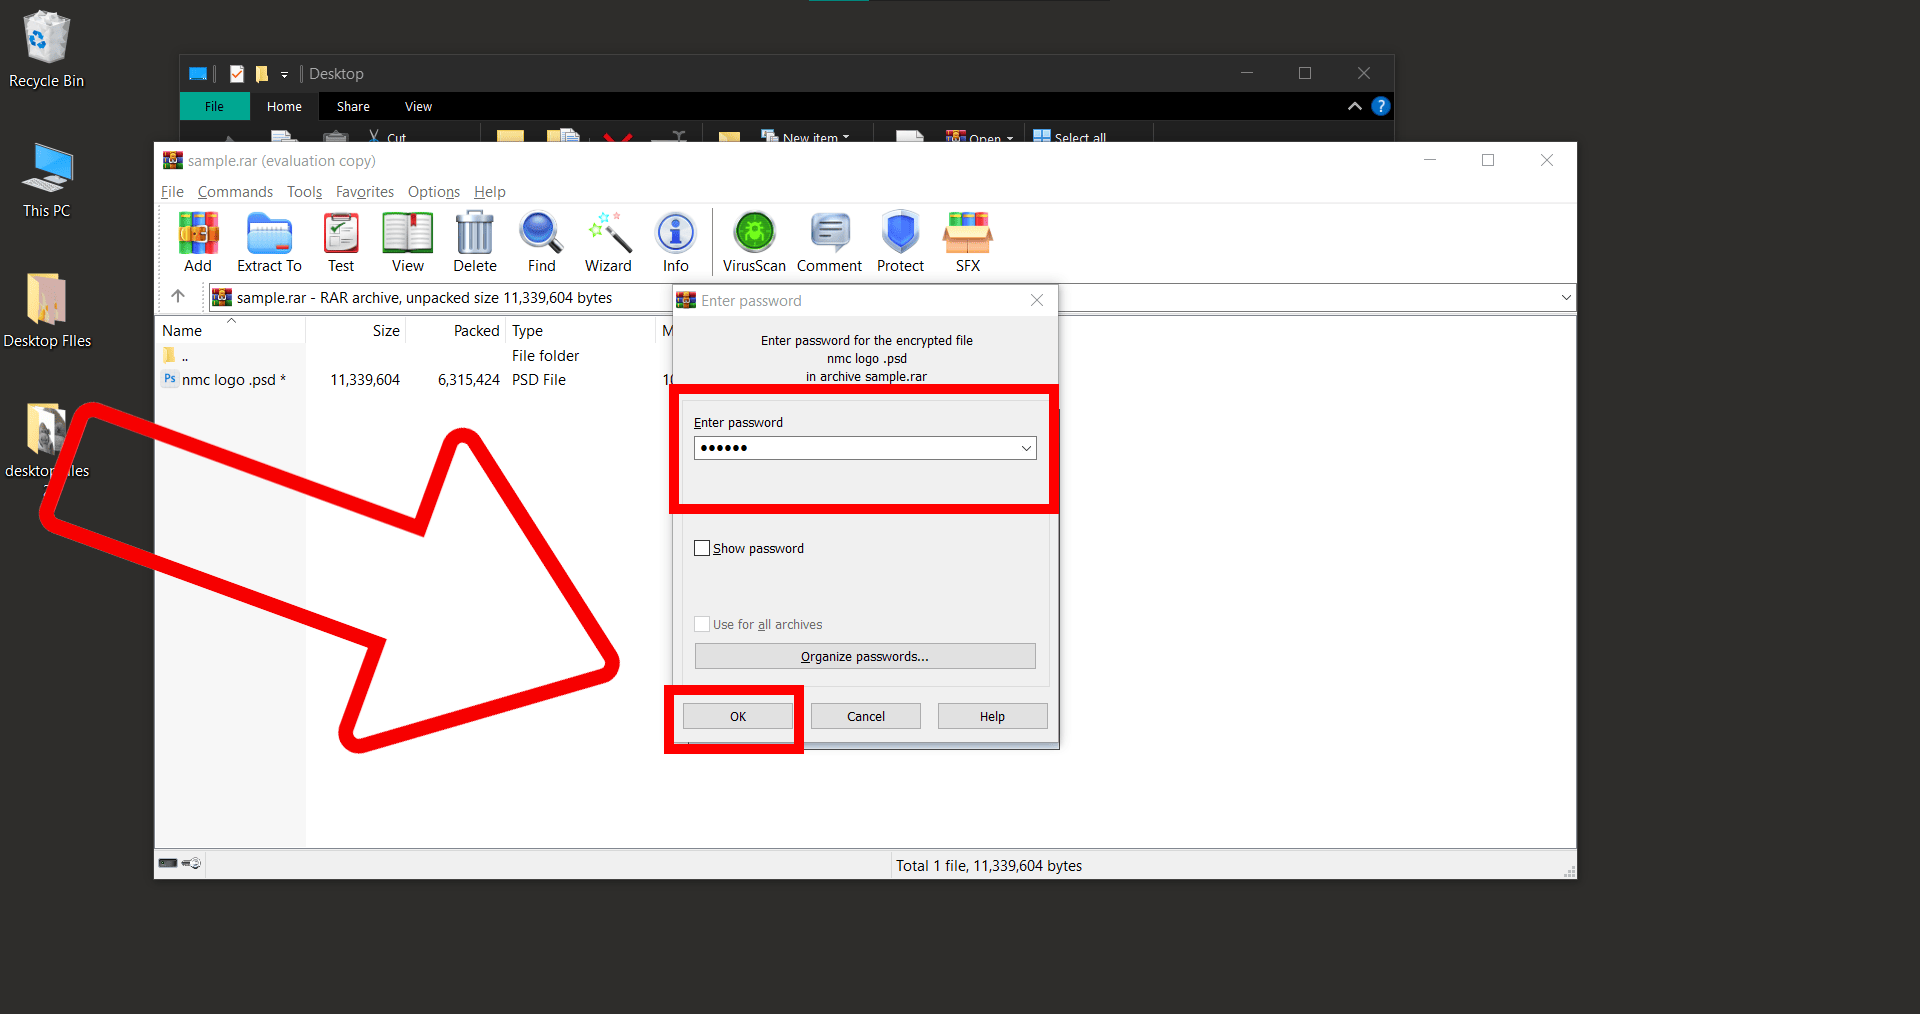
- Enter the Password: You’ll be prompted for a password. Enter it in the box. After entering, hit OK. Remember, no monkey business here! You’ll need the exact password.
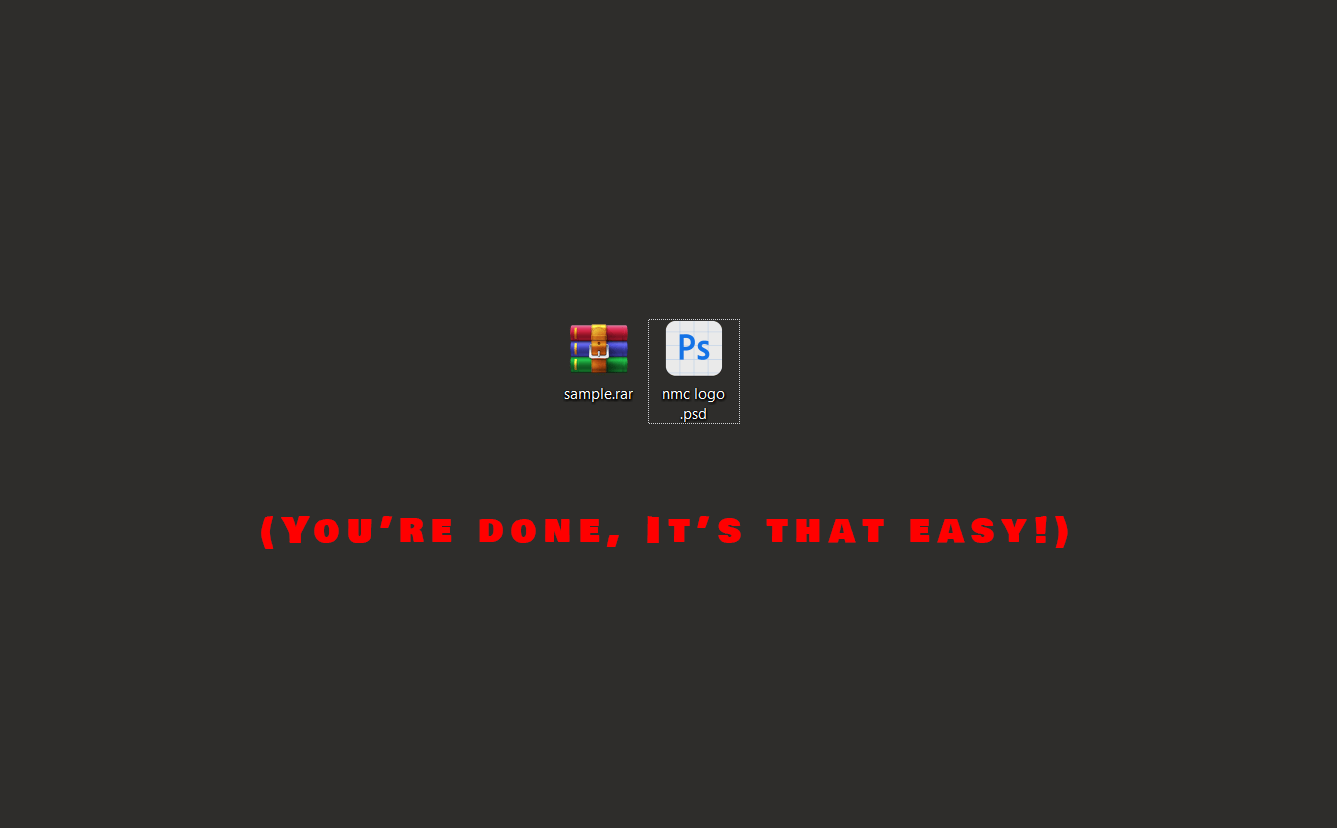 And there you go! You’ve tamed the RAR file, you brilliant tech-savvy simian.
How To Add Password To RAR Files on Windows
Yearning to put a lock on that RAR treasure chest like a pirate monkey guarding its bananas? In this canopy of knowledge, we’re diving into the easy-peasy steps to password-protect your RAR files using good ol’ WinRAR for Windows.
- Open WinRAR: Unleash the power of WinRAR.
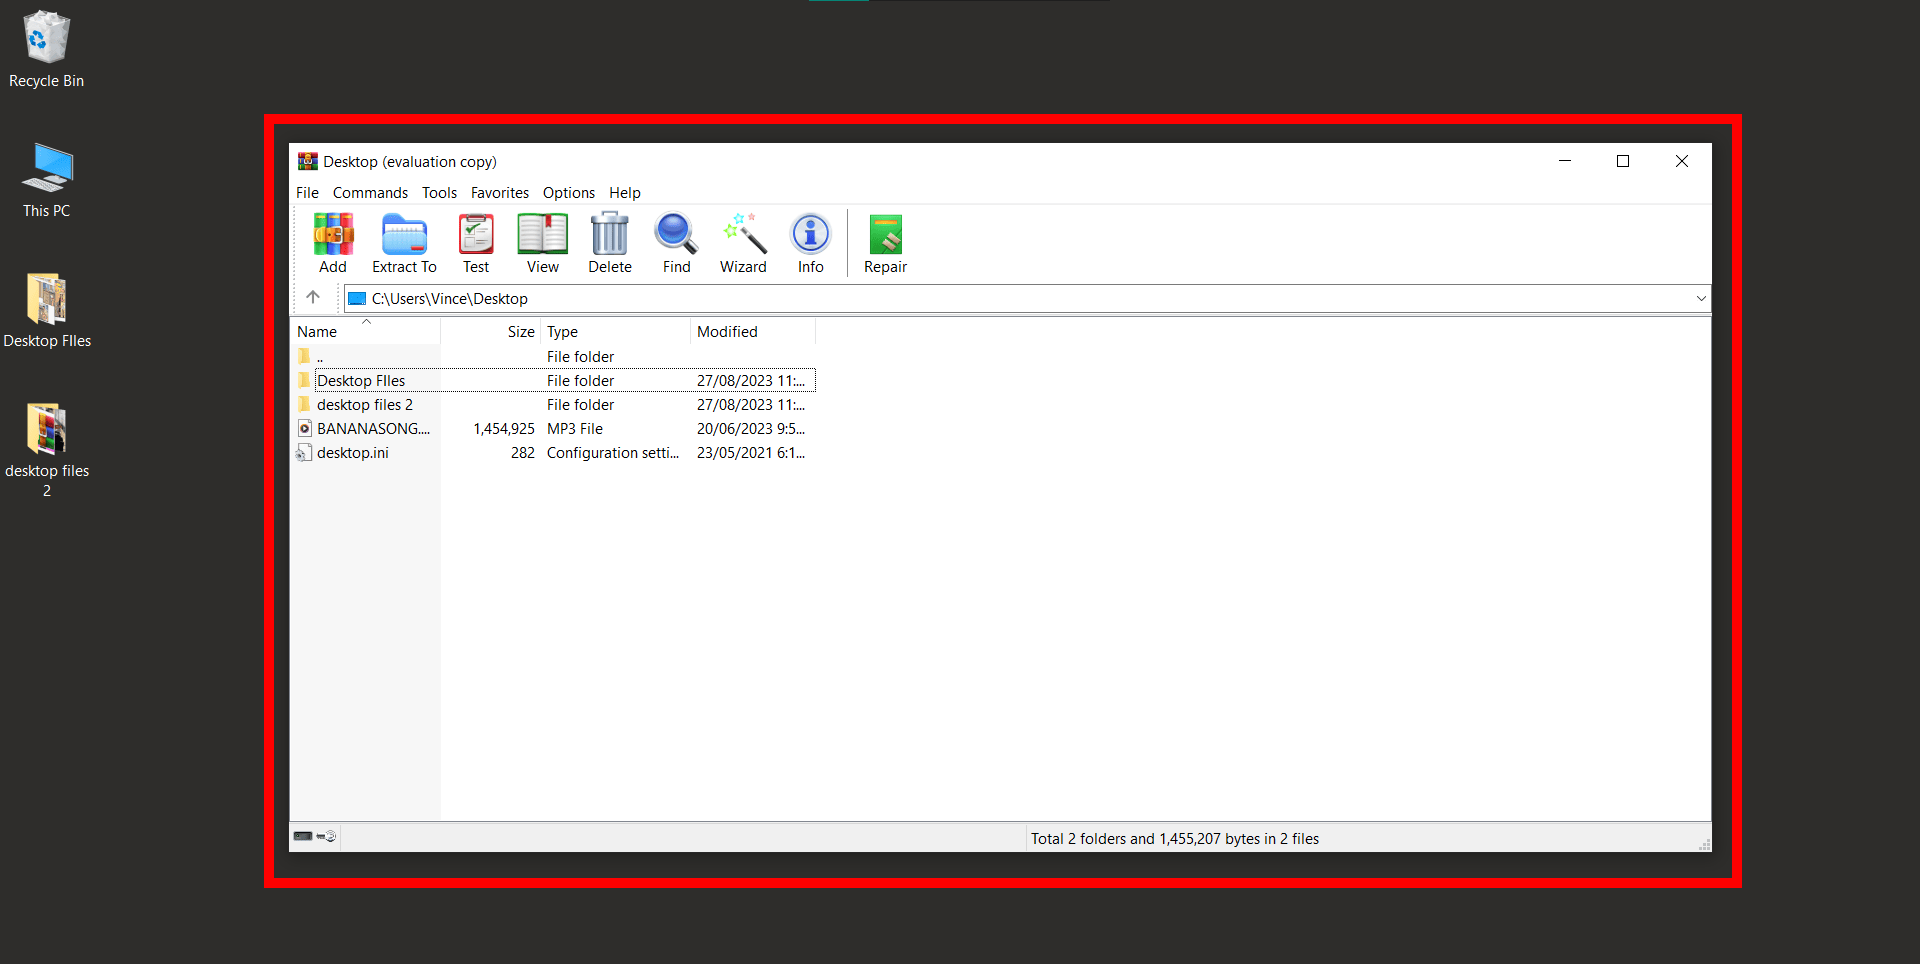
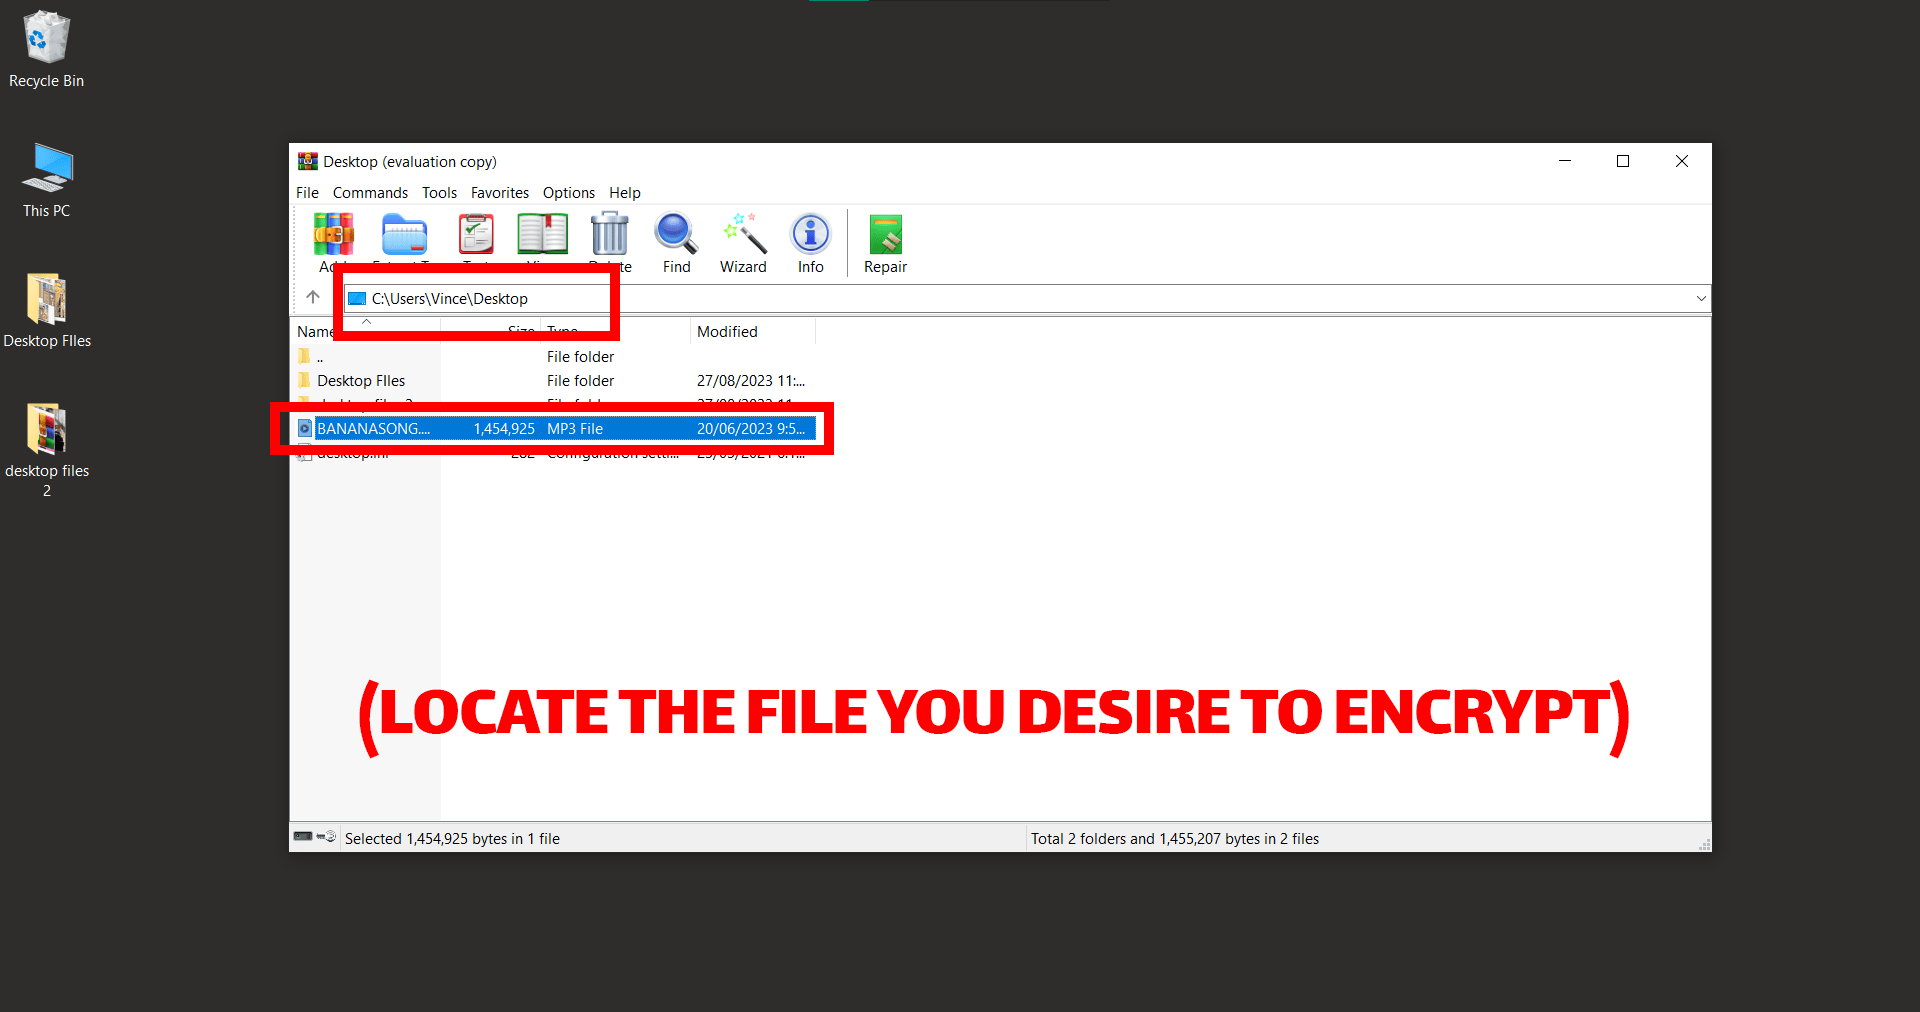
- Select Your Prize: Highlight the file or folder you wish to safeguard.
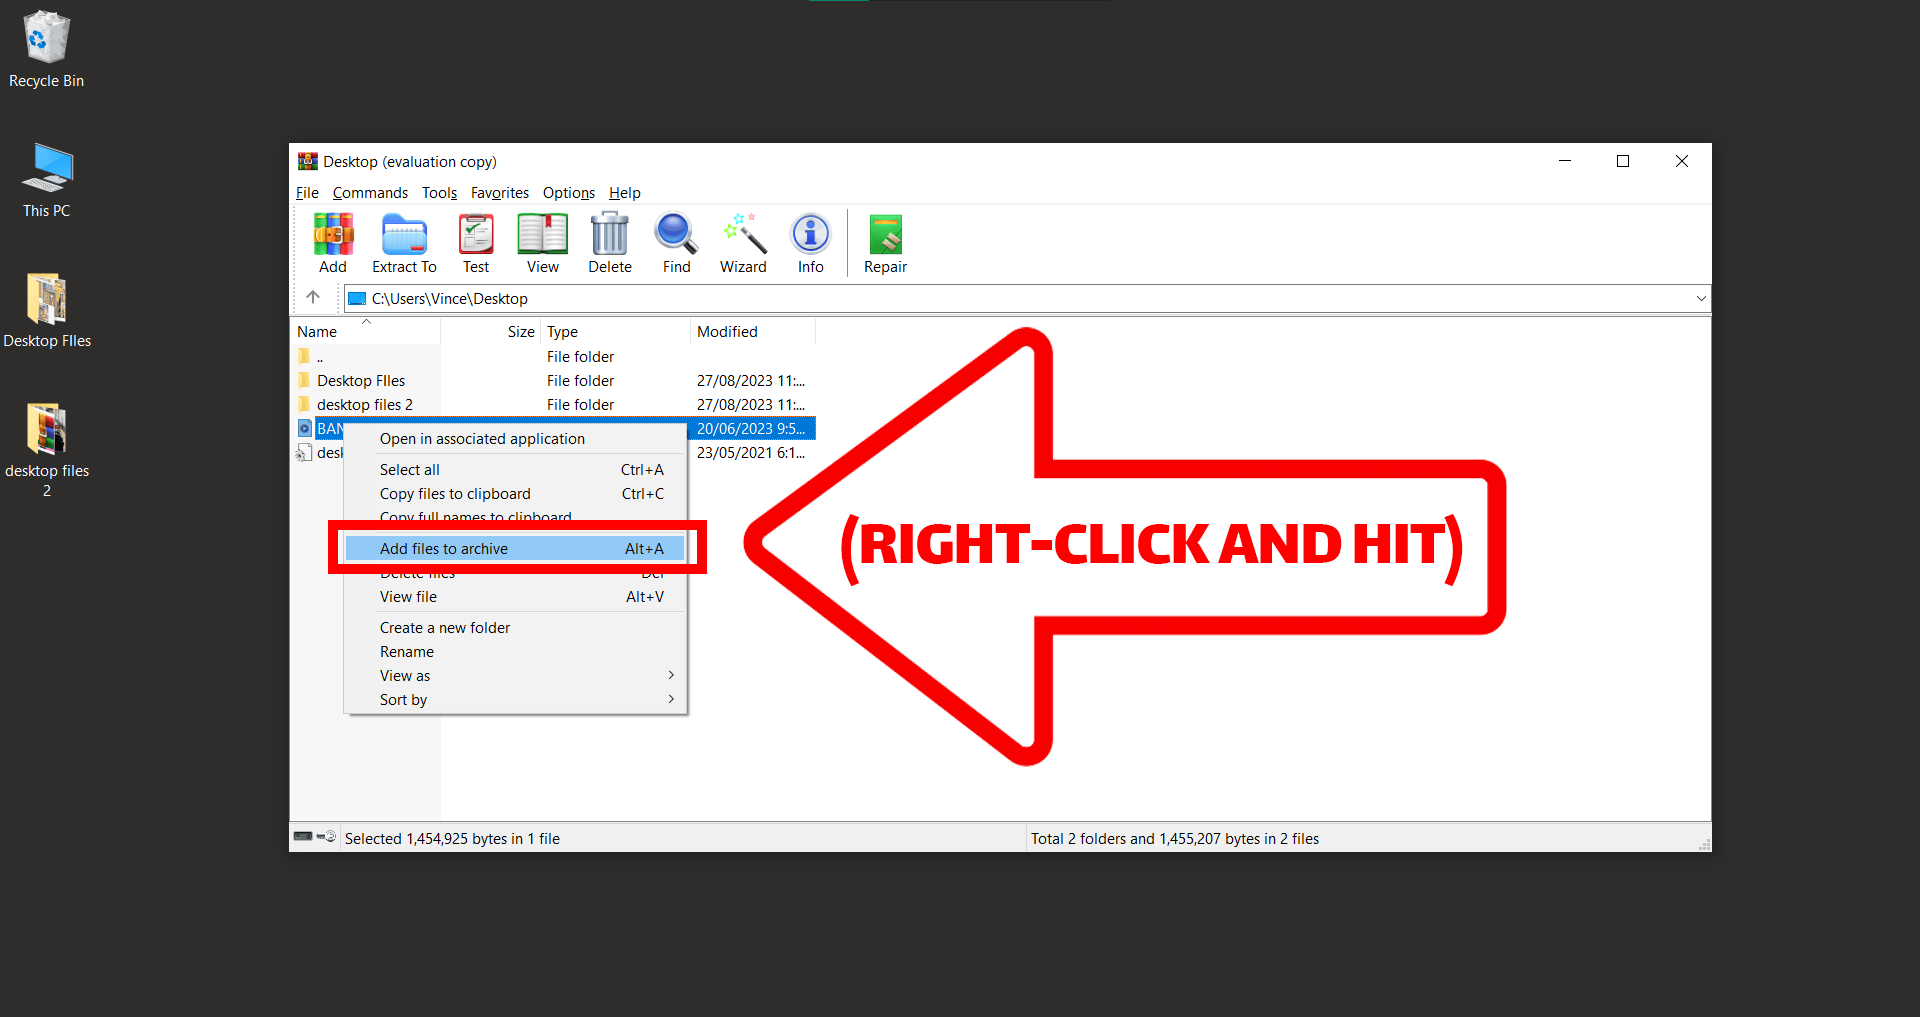
- Archive Time: Right-click and opt for ‘Add files to archive’.
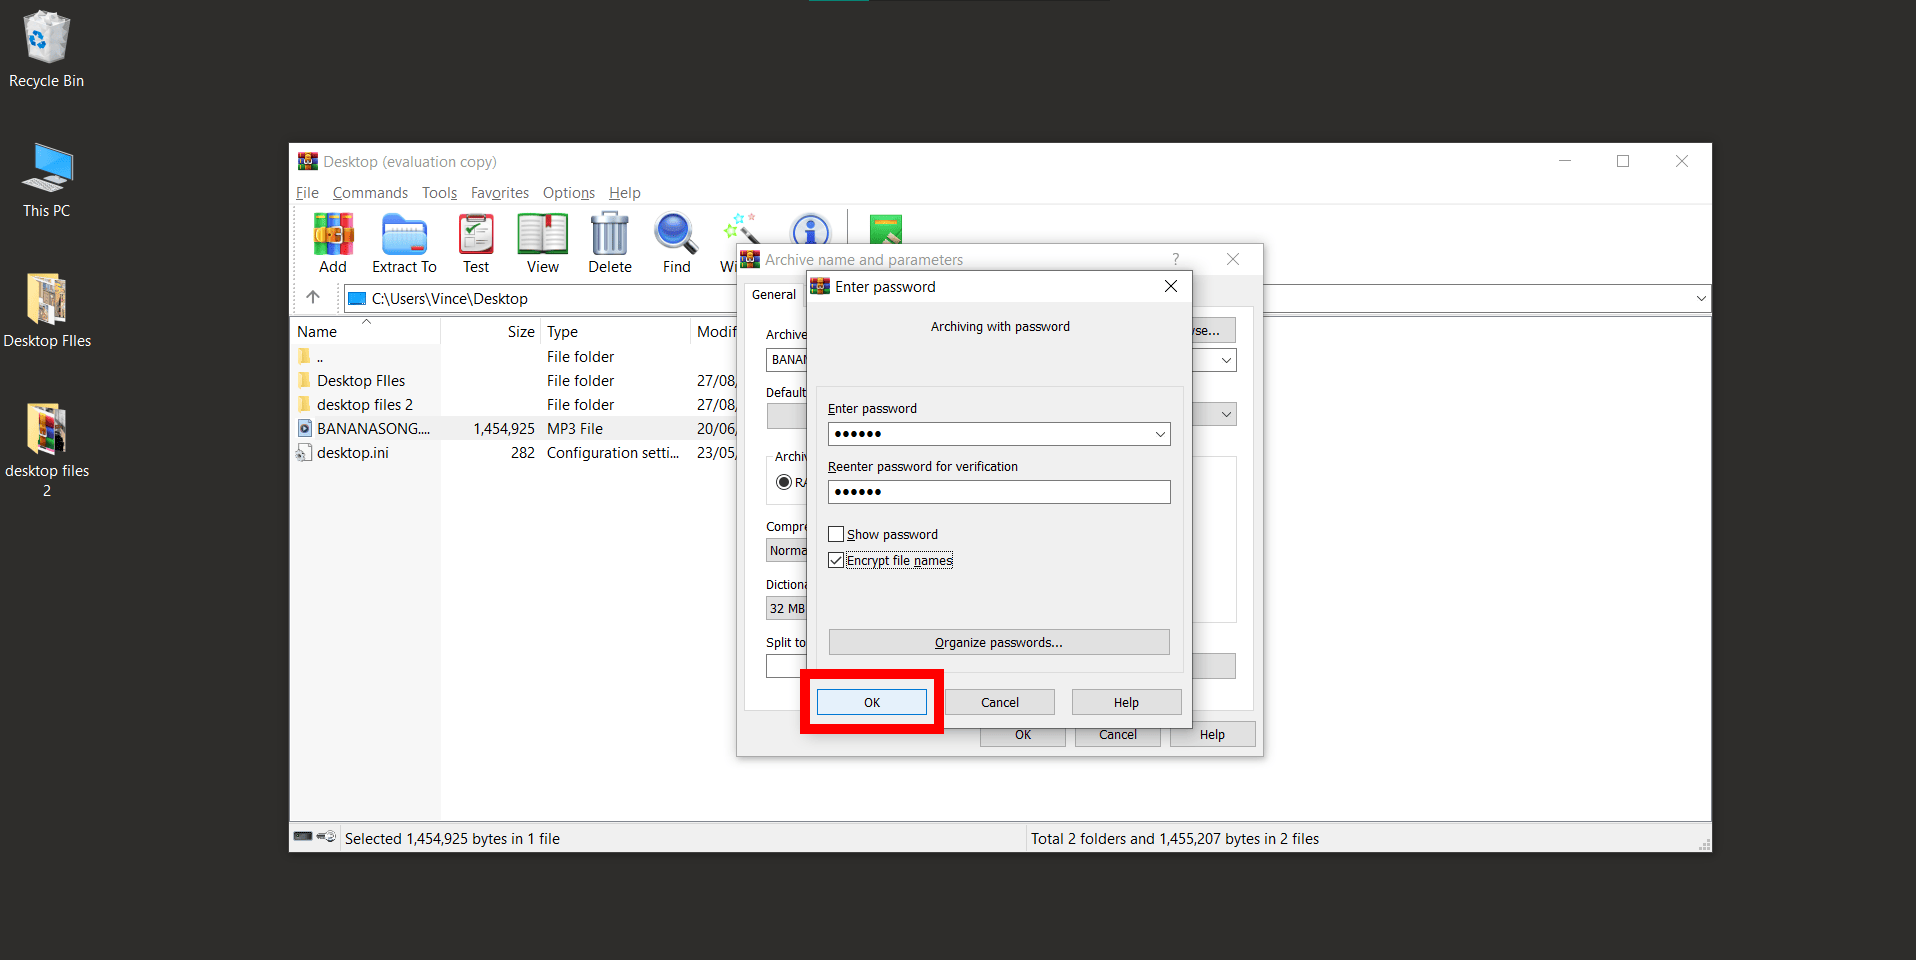
- Encryption Moves: Inside the General tab, hit Set password. Punch in your password twice. For added secrecy, ensure Encrypt file names is ticked.
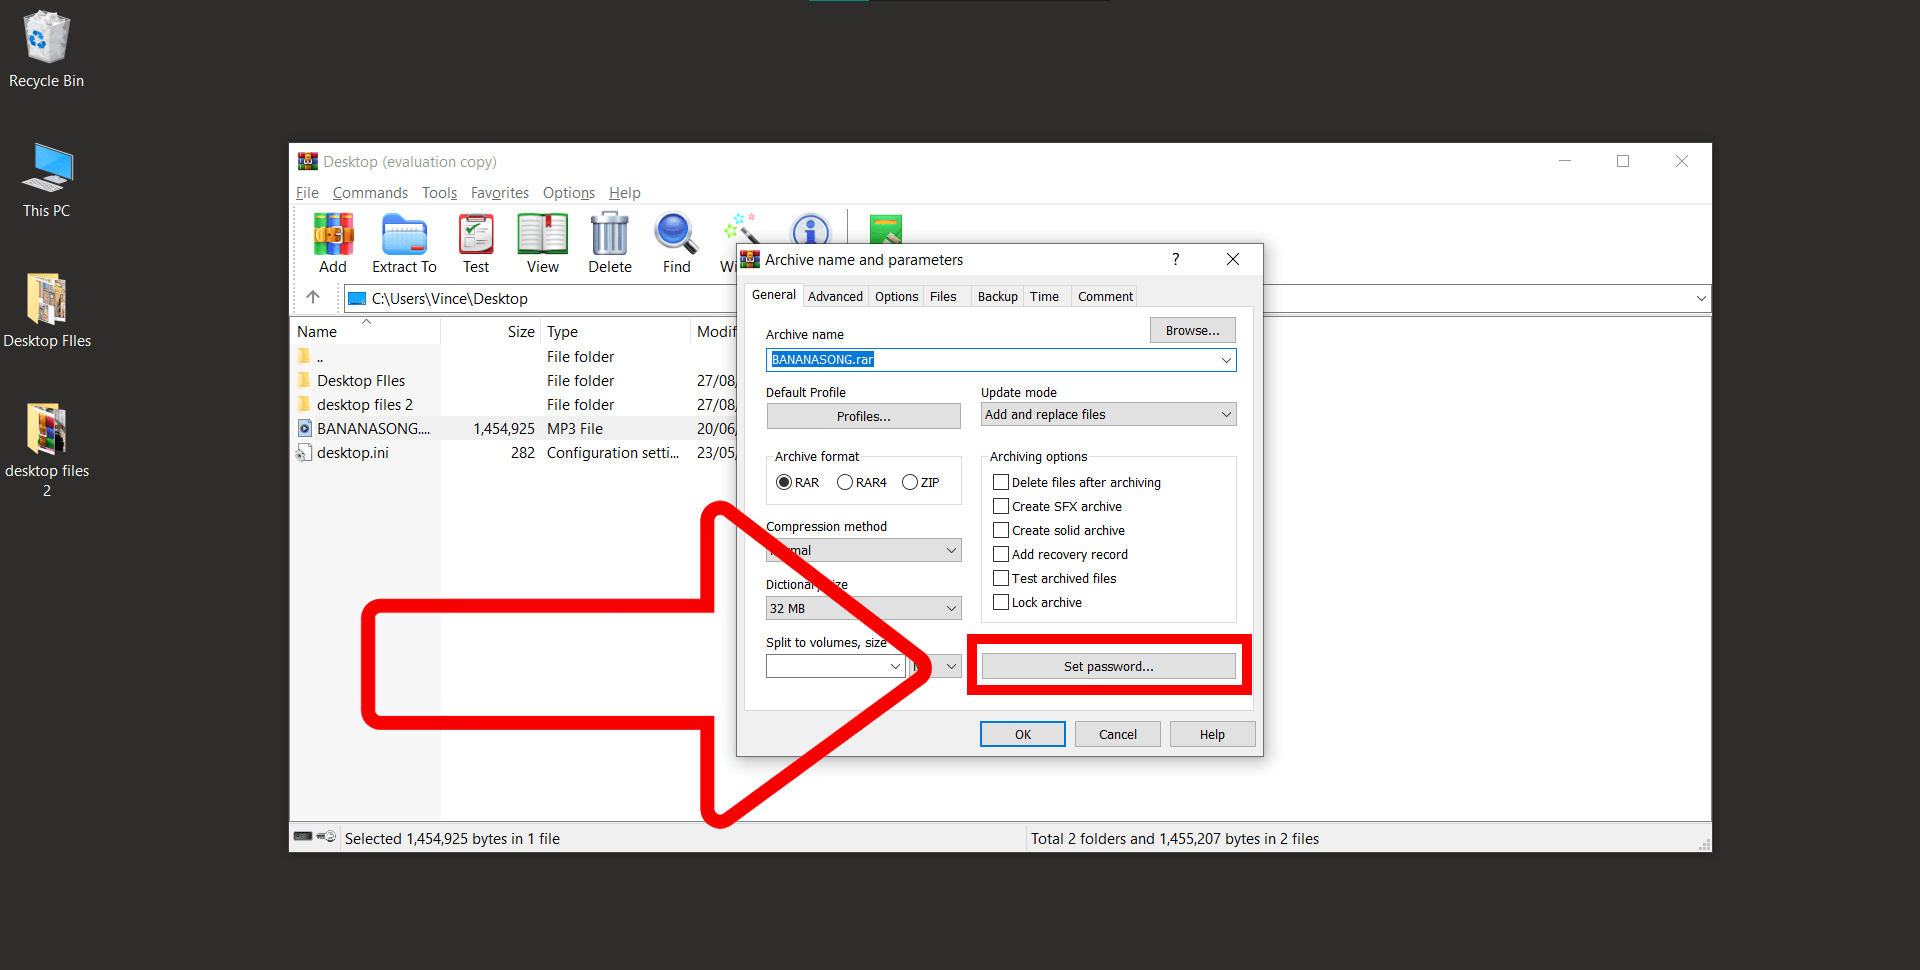
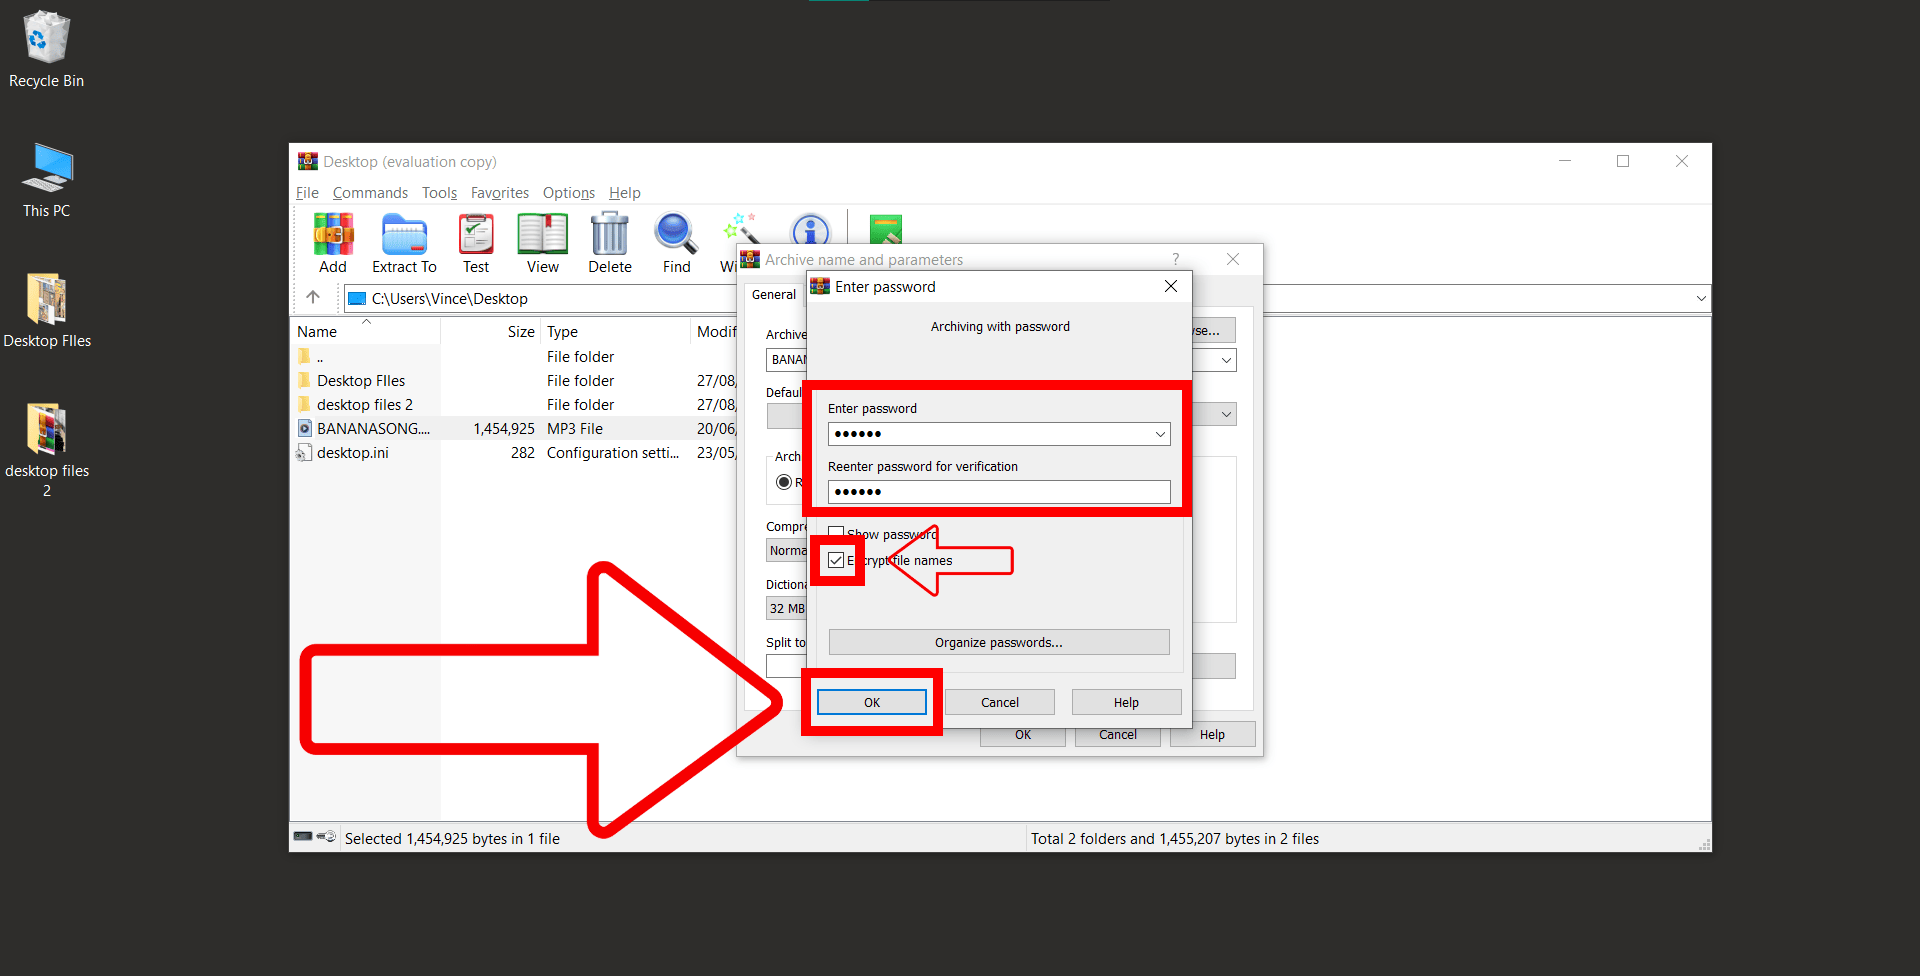
- Wrap It Up: Click ‘OK’ on both prompts. Your treasure is now encrypted and ready for safekeeping.
How To Add Password To RAR Files on Linux or MacOS
Need to stash your digital bananas—aka your files—in a RAR file with a password? Well, you’ve swung to the right branch! Whether you’re a Mac-monkey or a Linux-lemur, the following steps will help you out.
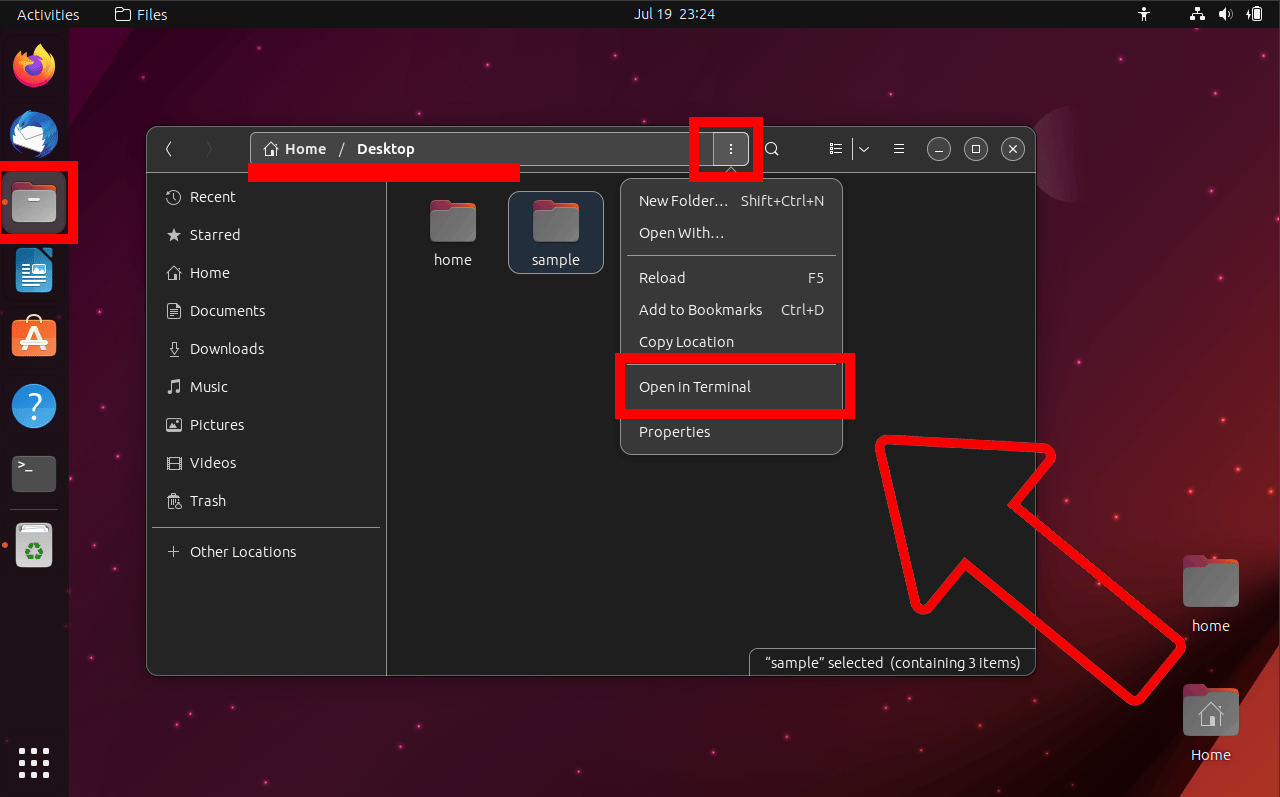
- Open Terminal on Directory: Open up your file manager and find the directory where your rar archive is located. Click the three dots and click on (Open in terminal). It’s like the tree where all the magic happens.
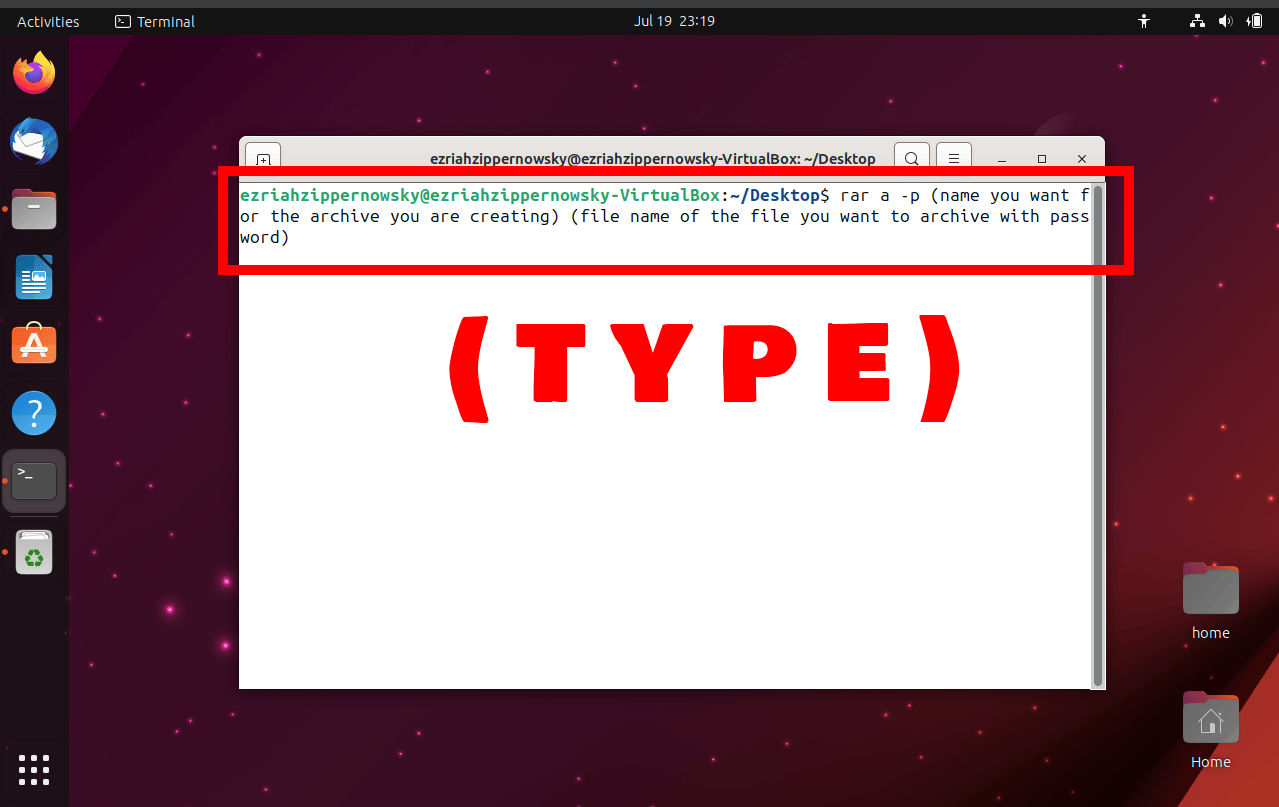
- Compress Command: Type
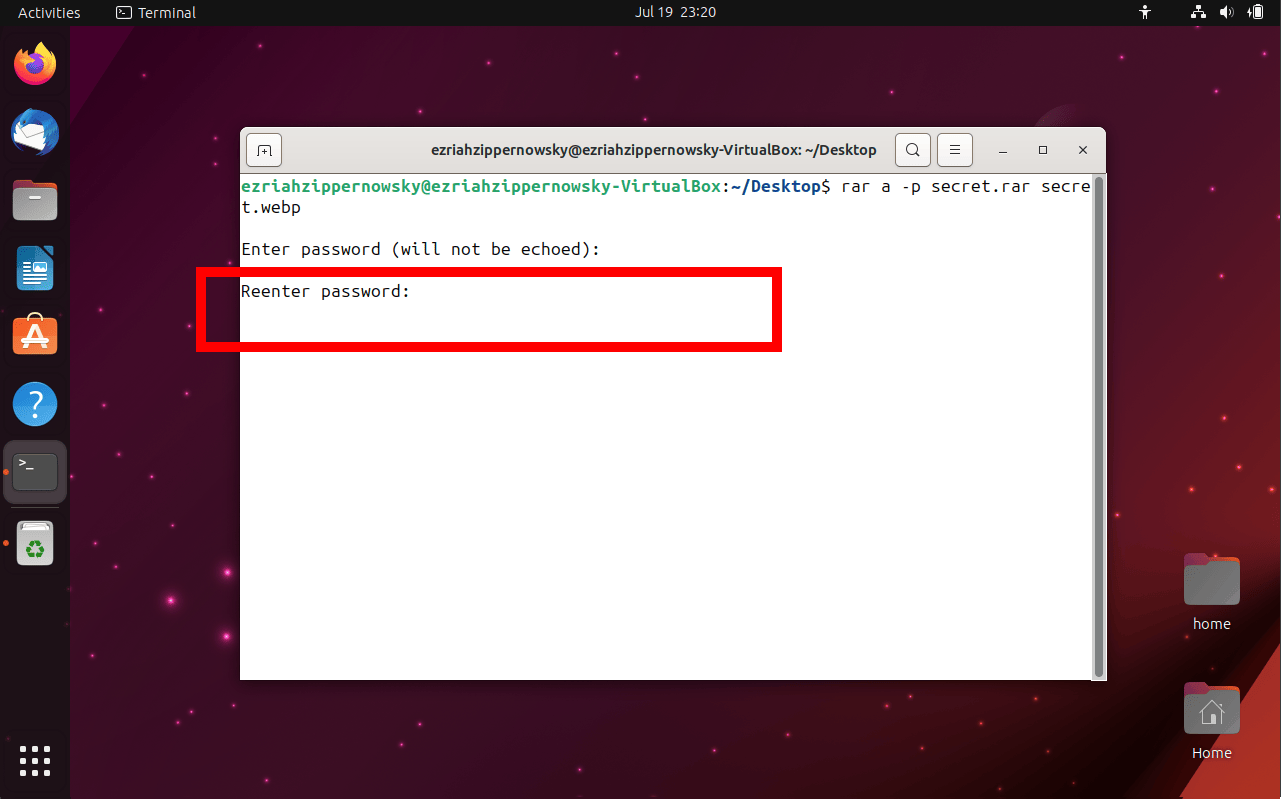
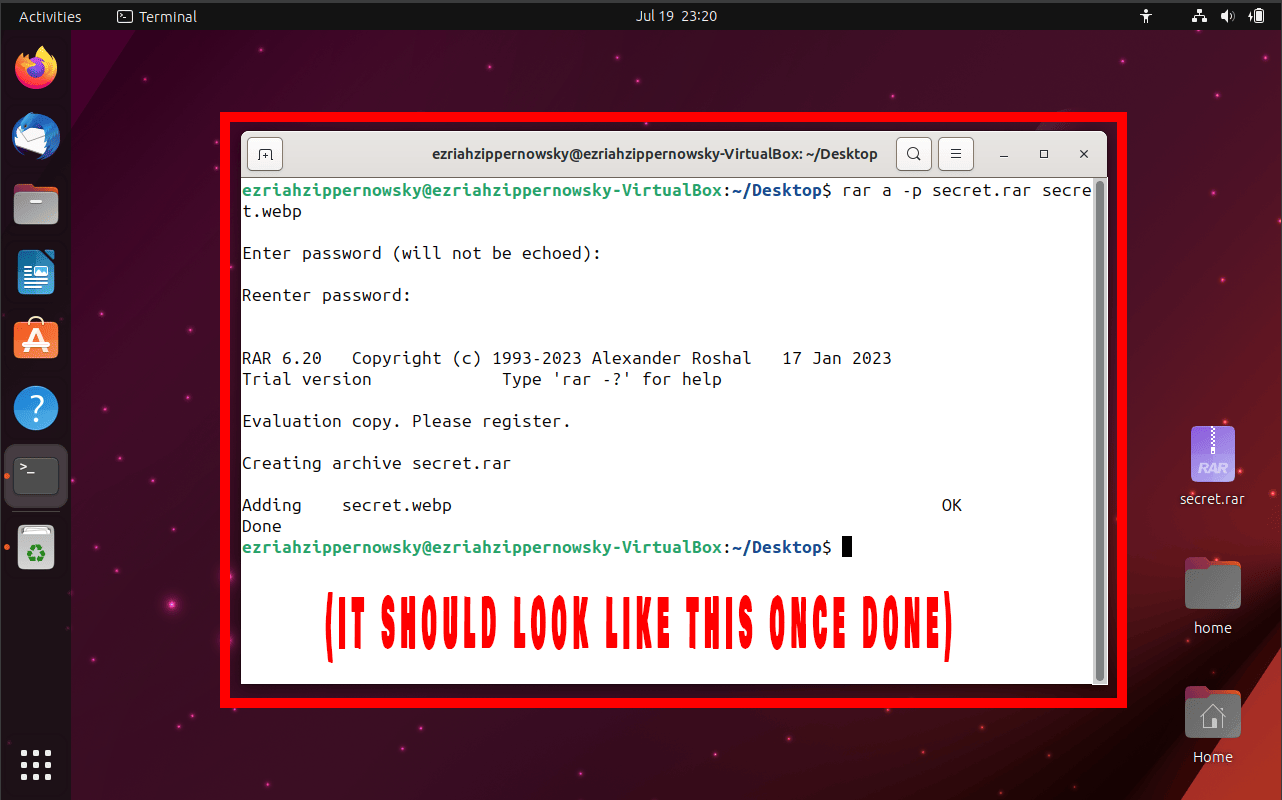
rar a -p yourfile.rar yourfileThe -p switch is the magic spell that protects your bananas with a password. You’ll be prompted to enter a password after you type the command.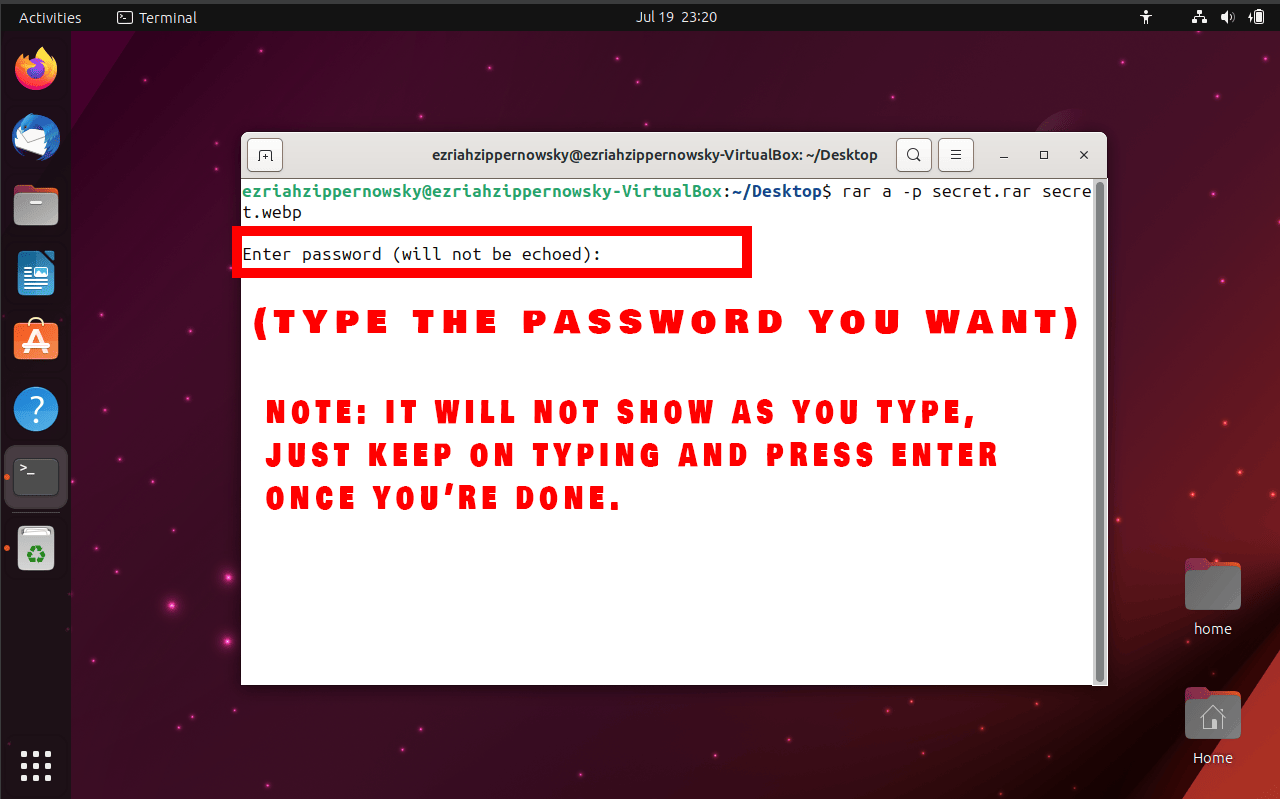 It will ask you to re-enter your password.
Conclusion
Remember, intrepid explorers, with WinRAR by your side, the tech jungle becomes your playground. Keep swinging, stay curious, and enjoy every bit of the adventure! 🐒🌴